
Windows 11 Unlocked: Effective TPM Deactivation
Windows 11 Unlocked: Effective TPM Deactivation
The Trusted Platform Module (TPM) is a security chip that safeguards your computer against malware and other attacks. It plays a crucial role in the installation of Windows 11 and is also an integral part of several security features like Windows Hello and BitLocker.
If you need to clear the TPM for any reason, you’ve come to the right place. This guide features four ways to clear TPM on Windows 11.
When Should You Clear TPM, and Is It Safe to Do So?
While TPM safeguards sensitive data and thwarts hacking attempts generated through a computer’s hardware, below are a few instances when you should clear TPM on your computer.
- If you checked your computer for malware and suspect it has been infected, resetting the TPM will eradicate any malware that burrowed into it.
- The TPM stores crucial information about drivers and applications installed on your computer. Therefore, you must reset the TPM before selling your computer to protect your privacy.
- Clearing the TPM can also help you troubleshoot problems related to security, encryption, and authentication.
- You should clear the TPM before clean installing a new operating system. This way, the OS can fully deploy its TPM-based functionalities like attestation.
It’s completely safe to clear TPM on your computer. However, remember that this action will erase all encrypted keys generated by the TPM and the associated protected data. This data contains information related to virtual smart cards or sign-in PINs.
As such, it’s crucial to back up your Windows data that’s protected by the TPM to prevent any data loss.
1. How to Clear the TPM Using the TPM Management Console
The TPM management console allows you to manage the TPM installed on your computer. You can use it to enable or disable TPM , clear TPM, and manage TPM keys.
To use it to clear or reset TPM, follow these steps:
- Press Win + R keys together to open the Run dialog box.
- Type tpm.msc in the search bar and press Enter.
- Click the Clear TPM option in the Actions section.

- Click Restart.

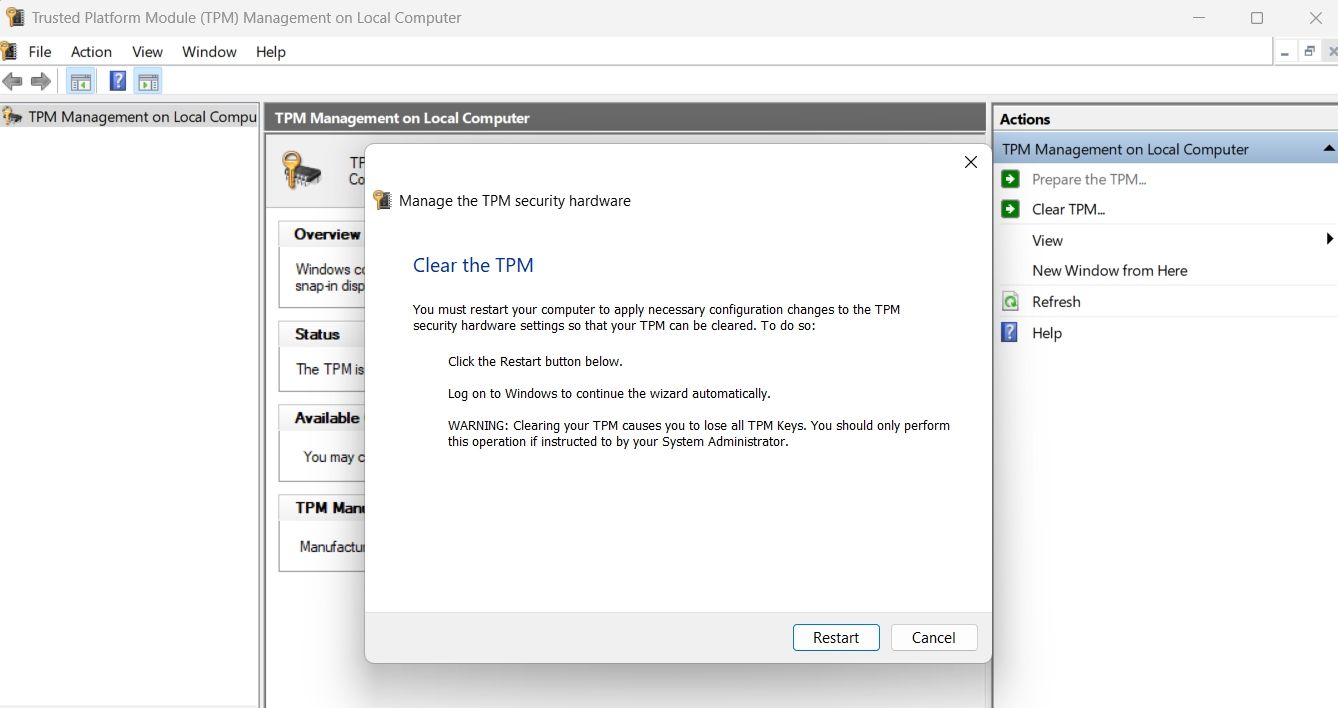

Your computer will now restart to finish the TPM reset process.
2. How to Clear the TPM Using the Windows Security App
To clear the TPM using the Windows Security app, follow these steps:
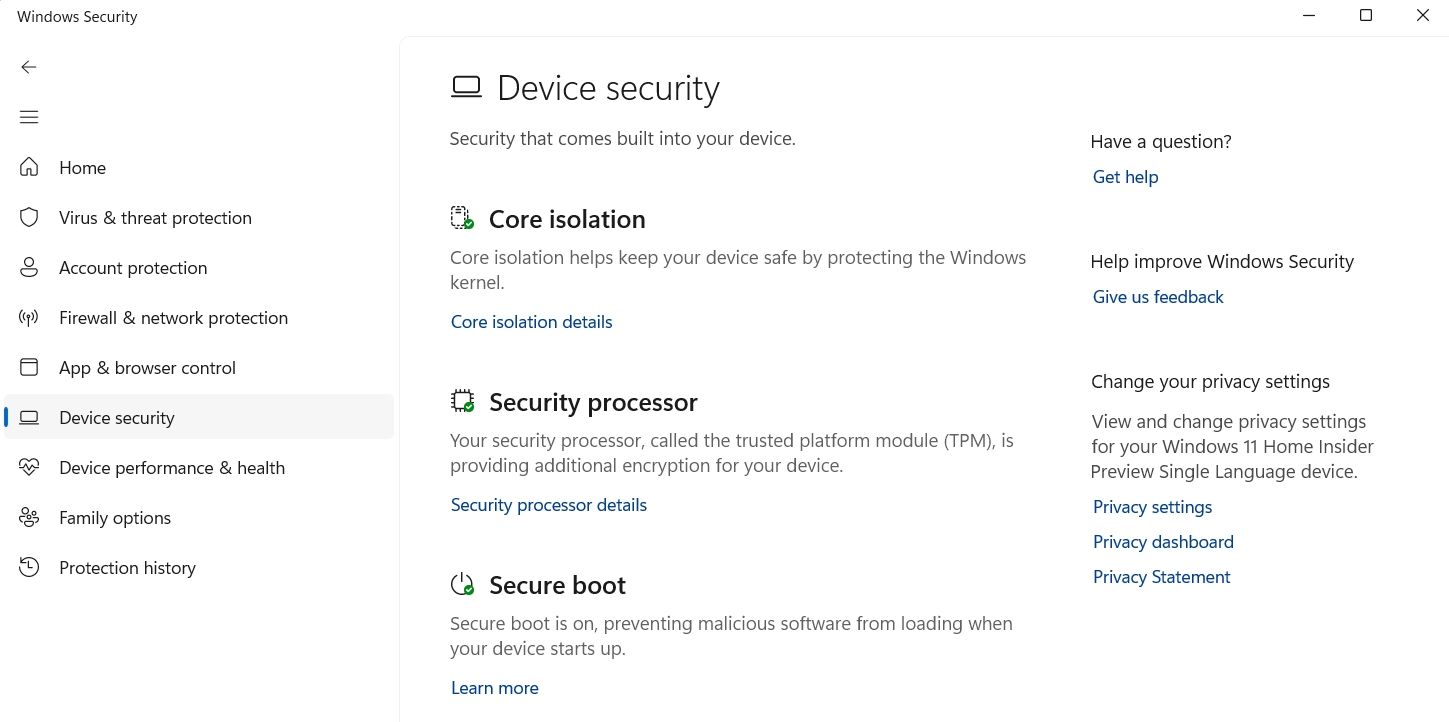
- Open the Start Menu, type Windows Security in the search bar, and press Enter.
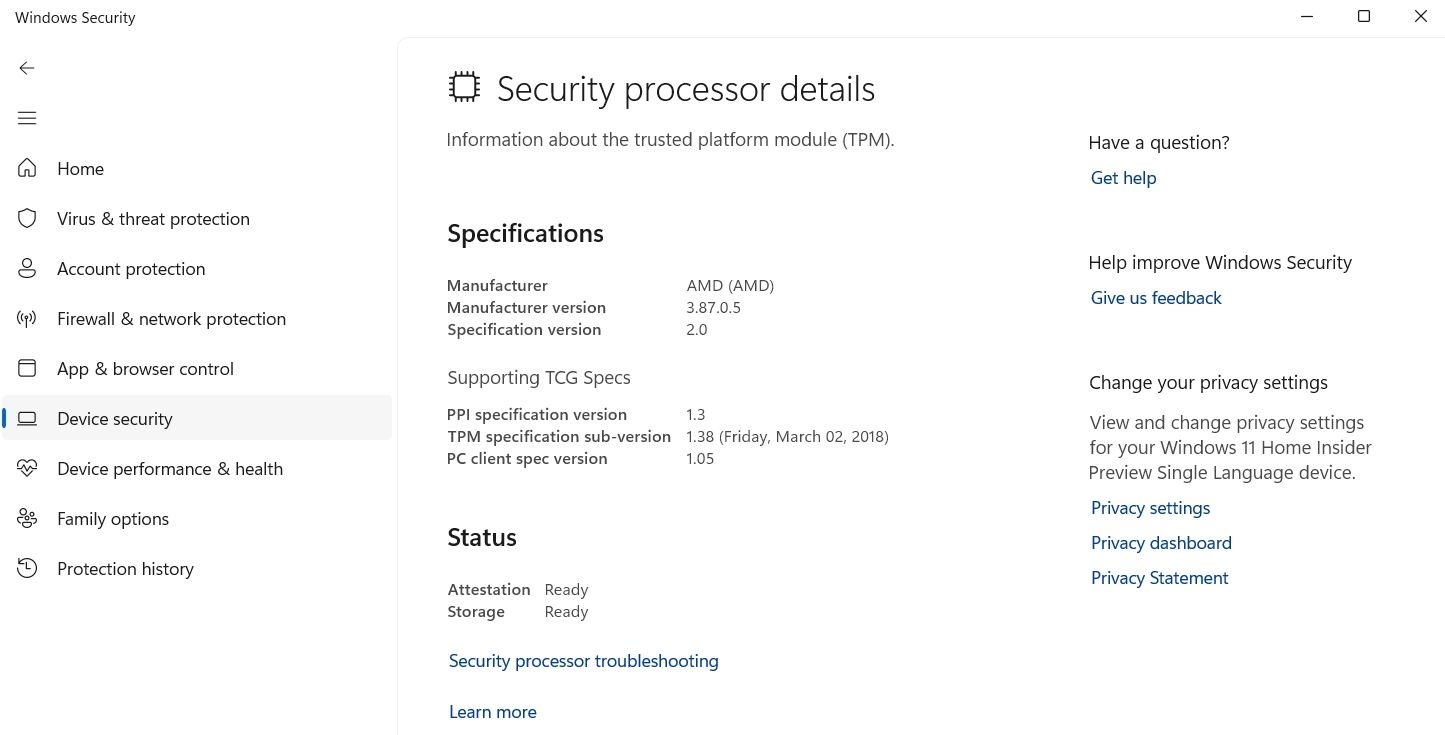
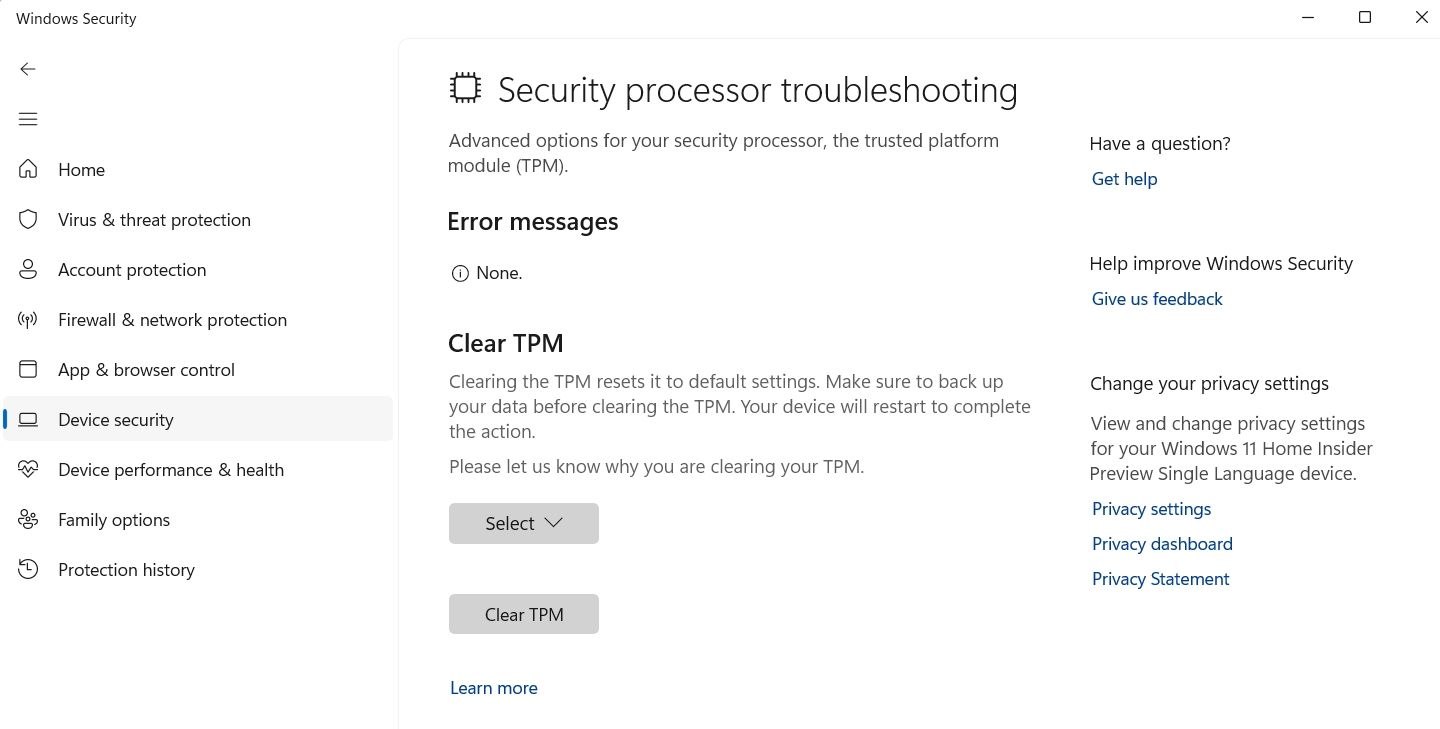
- Choose Device security from the left sidebar and click on Security processor details.
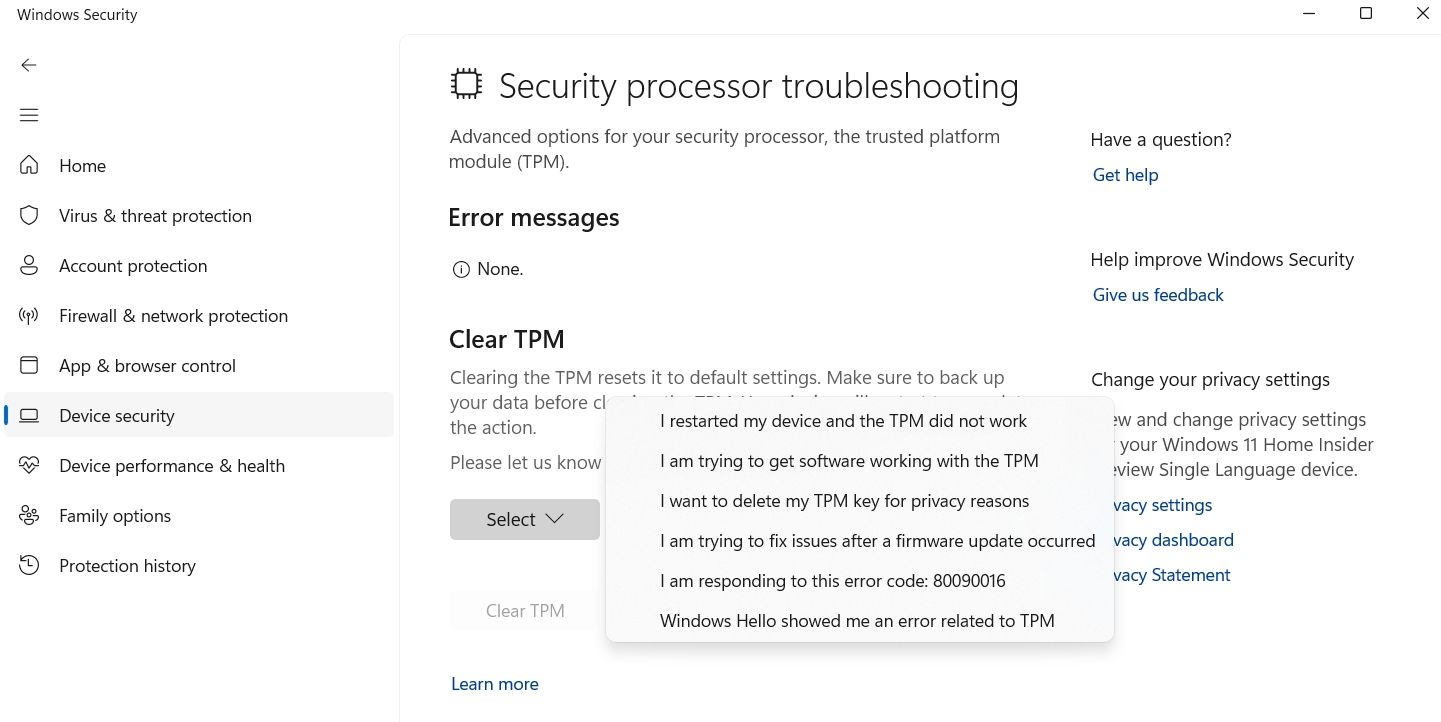
- Click on Security processor troubleshooting.
- Choose a reason to delete TPM from the Select drop-down menu.
- Click on Clear TPM.
- Click on Clear and restart.

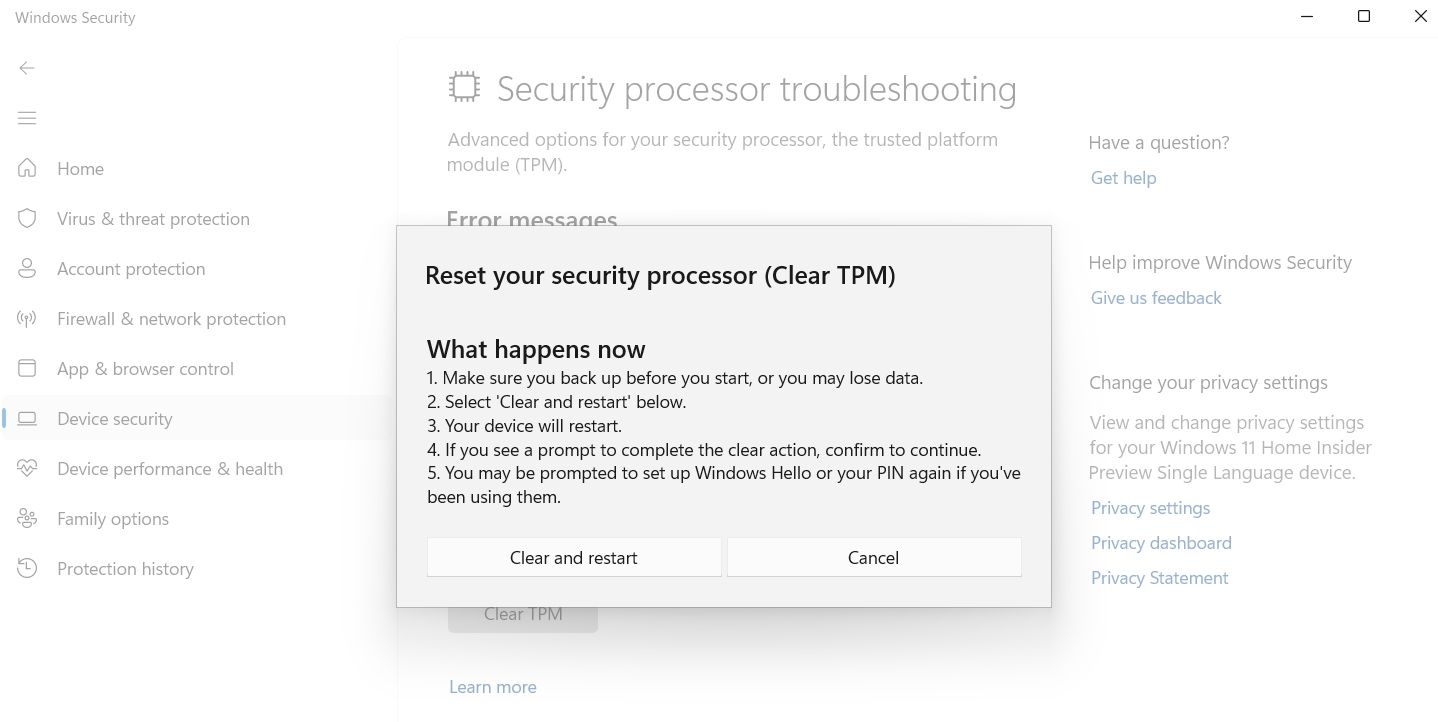
Your computer will now restart. After that, you will have to set up Windows Hello if you have been using it before.

3. How to Clear TPM Using Windows PowerShell
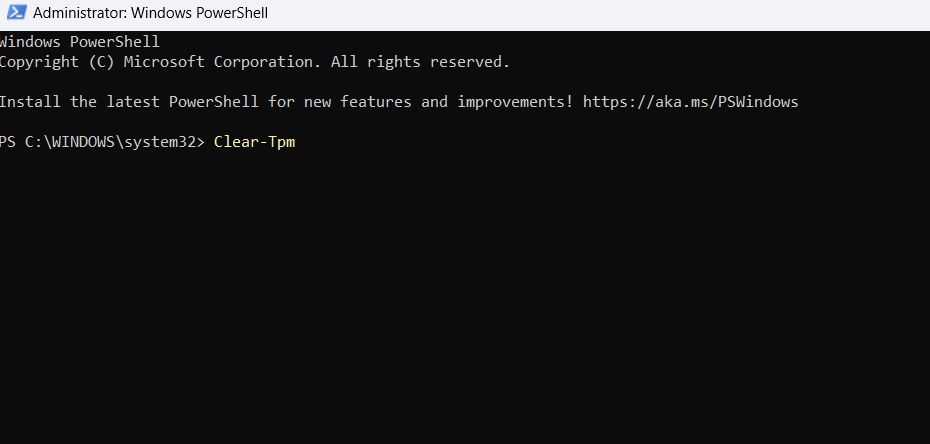
Windows PowerShell is a command-line tool that lets you perform advanced operations on your computer.
To use it to delete TPM, open Windows PowerShell with administrative rights (see how to launch Windows PowerShell as an administrator ), type Clear-Tpm, and press Enter.

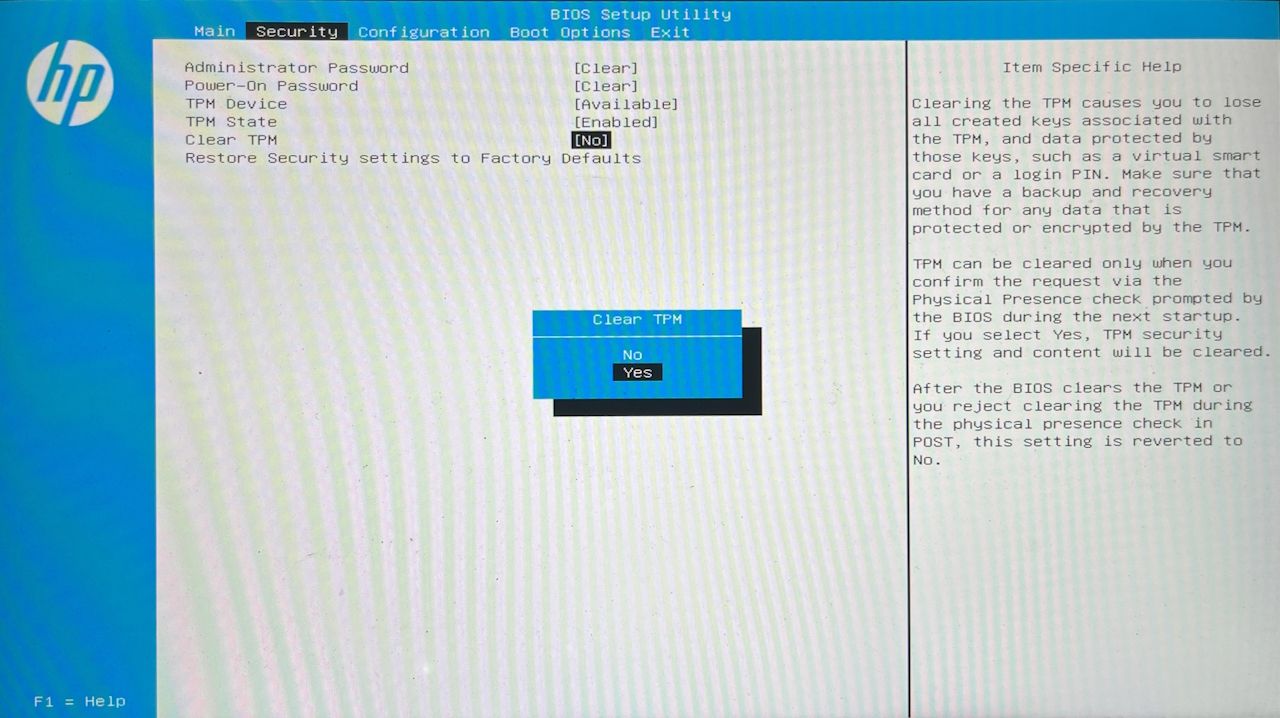
4. How to Clear the TPM Through the BIOS
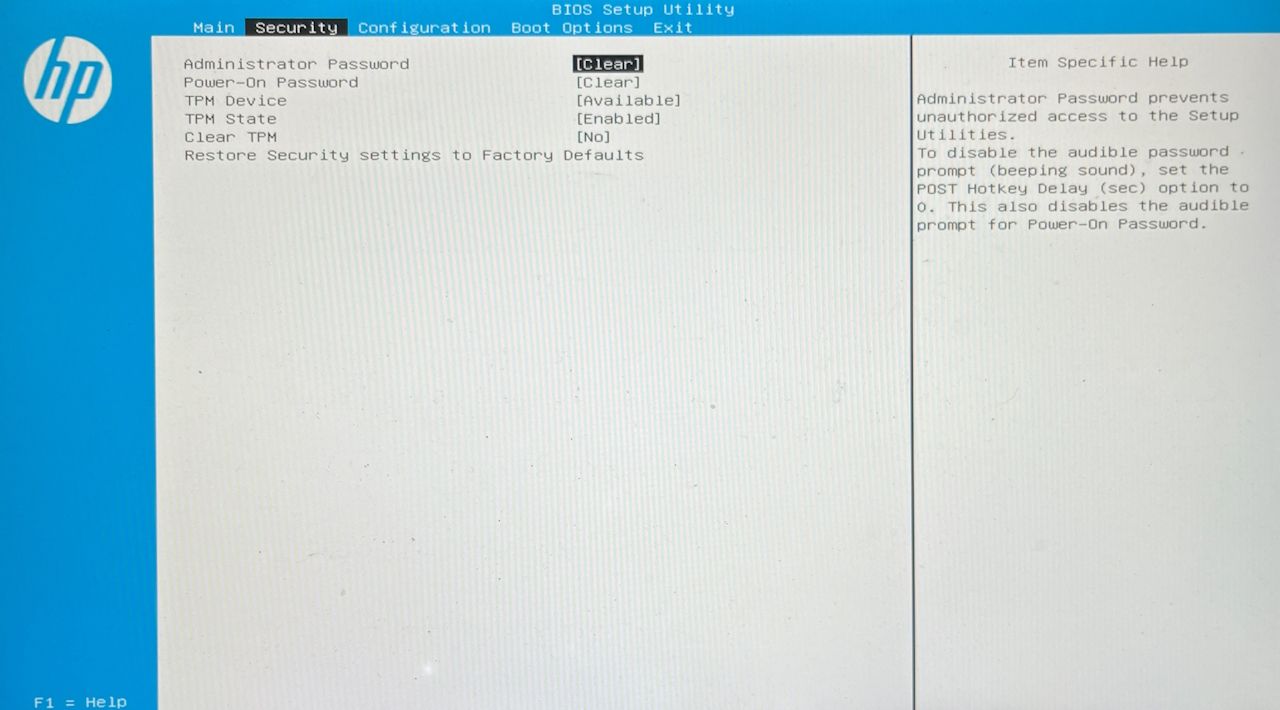
You can configure your computer’s security layers, including the TPM from the BIOS. Below are the steps to reset TPM from the BIOS:
- Restart your computer and press the BIOS key (usually F2 or Del key) to access the BIOS menu.
- Switch to the Security tab.
- Click the Clear TPM option and choose Yes from the prompt.
- Switch to the Exit tab and choose Save Changes and Exit. Then, select Yes.
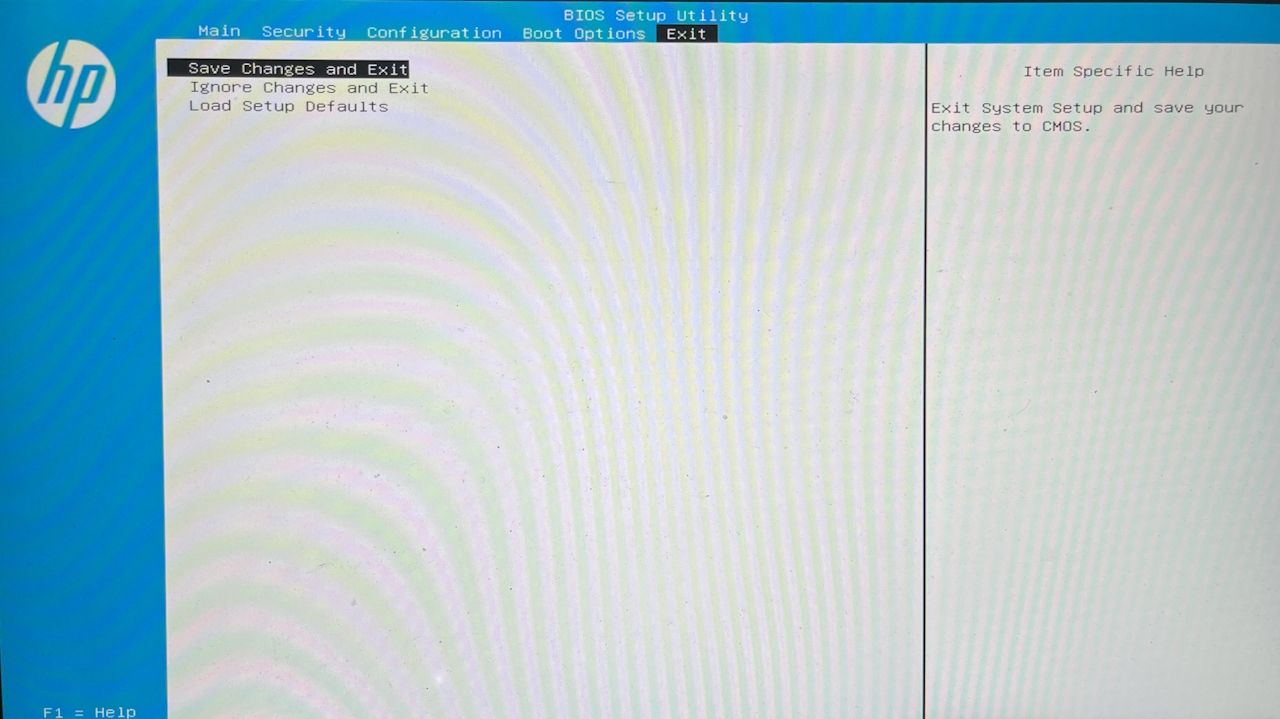
That’s it. Your computer will restart, and you’ll get the option to set up your pin on the login screen, indicating that you have successfully cleared the TPM.

Keeping Your Data Safe From Malware on Windows
The TPM stores important security-related data, including encryption keys. However, when the TPM gets affected by malware, you must clear it to protect your information. Fortunately, you can quickly reset TPM using the above methods.
If you need to clear the TPM for any reason, you’ve come to the right place. This guide features four ways to clear TPM on Windows 11.
- Title: Windows 11 Unlocked: Effective TPM Deactivation
- Author: David
- Created at : 2024-08-16 00:30:00
- Updated at : 2024-08-17 00:30:00
- Link: https://win11.techidaily.com/windows-11-unlocked-effective-tpm-deactivation/
- License: This work is licensed under CC BY-NC-SA 4.0.