
Windows 11 Trick: Show/Hide User-Defined Directories

Windows 11 Trick: Show/Hide User-Defined Directories
If you’re running the latest version of Windows 11, the folders in This PC will be hidden by default. That’s by design so you can pay more attention to your drives. However, there’s a way you can unhide them so you can access them.
In this guide, we are going to show you how to add or remove the 3D Objects, Documents, Music, Video, Pictures, and Downloads in This PC by making a few Windows Registry tweaks.
Before You Start Adding or Removing Folders in This PC…
We are going to make changes to the Windows Registry by adding keys and values to it using the Registry Editor. To fire it up, press Win + R to bring up the Windows Run dialog box, enter regedit in the text box, and then click OK.
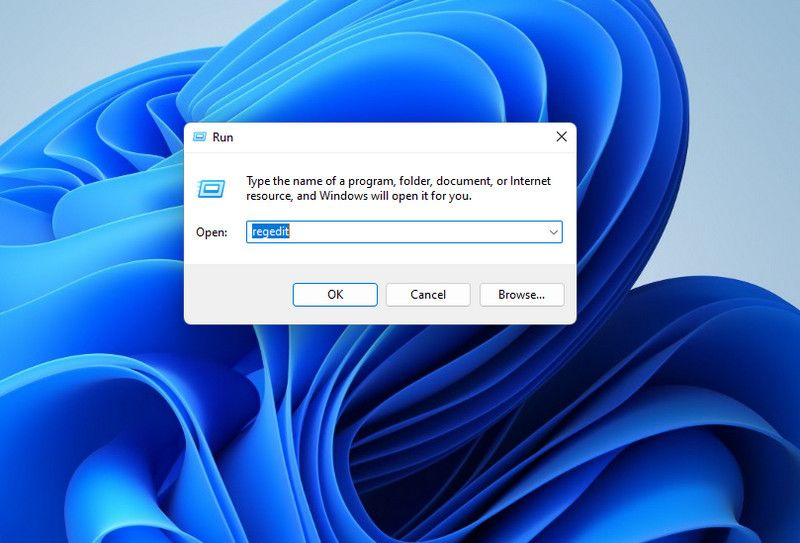
Before you proceed, we highly recommend reading our guide on what the Windows Registry is and how to edit it to familiarize yourself with what we will be doing next. Also important is knowing how to back up the Windows Registry . Considering this is the database that Windows stores the data it needs to operate properly, you will need this backup in case you make an error.
For showing and hiding folders in This PC to work, make sure you’re running the latest version of Windows 11. You’ll know you have it if File Explorer has tabs.
With the Registry Editor open, let’s get to it.
How to Show or Hide the 3D Objects Folder in This PC
For the 3D Objects folder, you need to add a key to the registry and the folder will pop up in This PC. So, in the address bar of the Registry Editor, enter the below path and then hit the Enter key:
HKEY_LOCAL_MACHINE\SOFTWARE\Microsoft\Windows\CurrentVersion\Explorer\MyComputer\NameSpace
Next, right-click the NameSpace key in the left panel and select New > Key. Then, name that key {0DB7E03F-FC29-4DC6-9020-FF41B59E513A}. If the name is a bit too hard to type out, just copy and paste it.
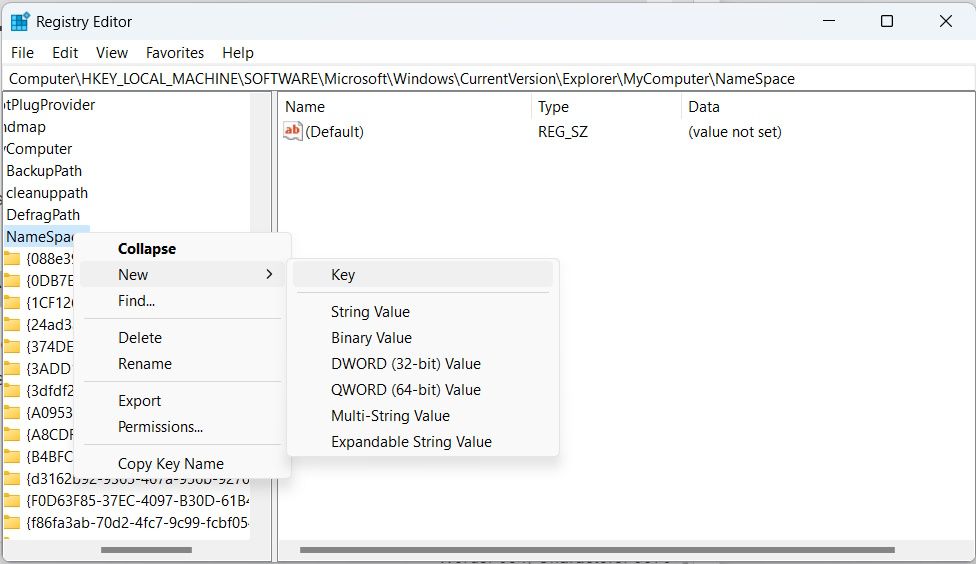
Once done, refresh File Explorer by hitting F5. Now you will see that the 3D Objects folder has appeared in This PC.
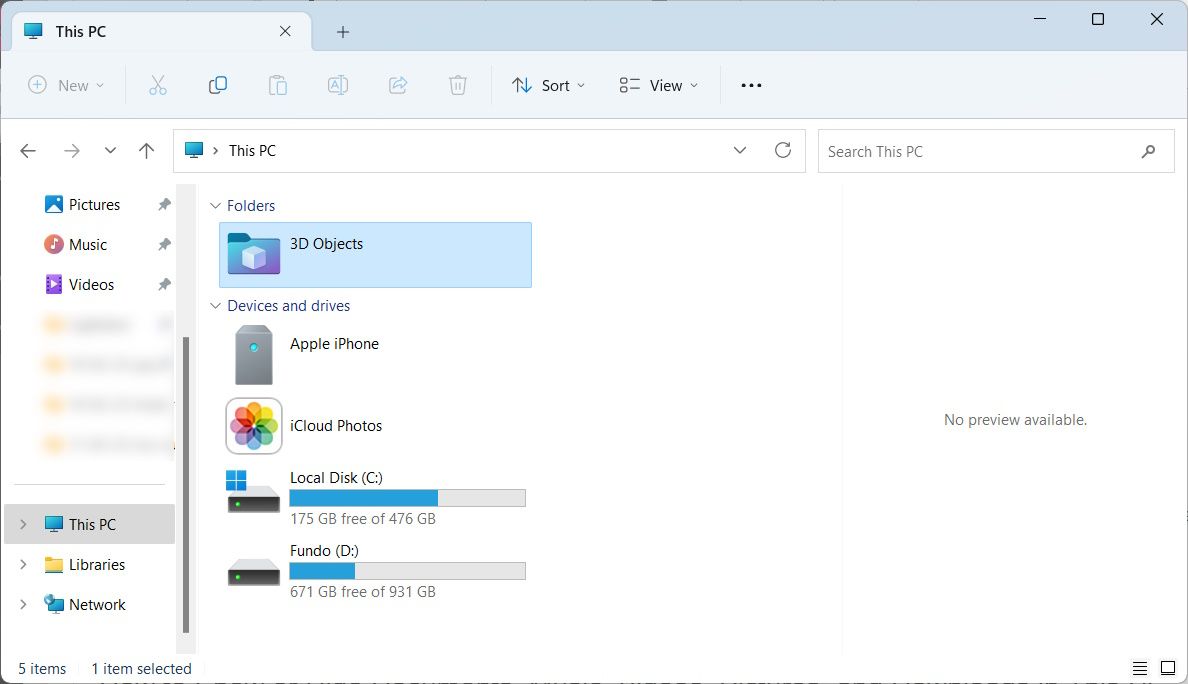
To remove the folder again, just go back to the Registry Editor, right-click the {0DB7E03F-FC29-4DC6-9020-FF41B59E513A} key, and select Delete. After you refresh File Explorer, the folder will be gone.
How to Show or Hide the Documents, Music, Videos, Pictures, and/or Downloads Folders in This PC
To add the Documents folder to This PC, enter the below path in the address bar of the Registry Editor and then hit Enter on your keyboard to go where its key is located:
HKEY_LOCAL_MACHINE\SOFTWARE\Microsoft\Windows\CurrentVersion\Explorer\MyComputer\NameSpace{d3162b92-9365-467a-956b-92703aca08af}
Right-click the HideIfEnabled value in the right panel and select Delete.
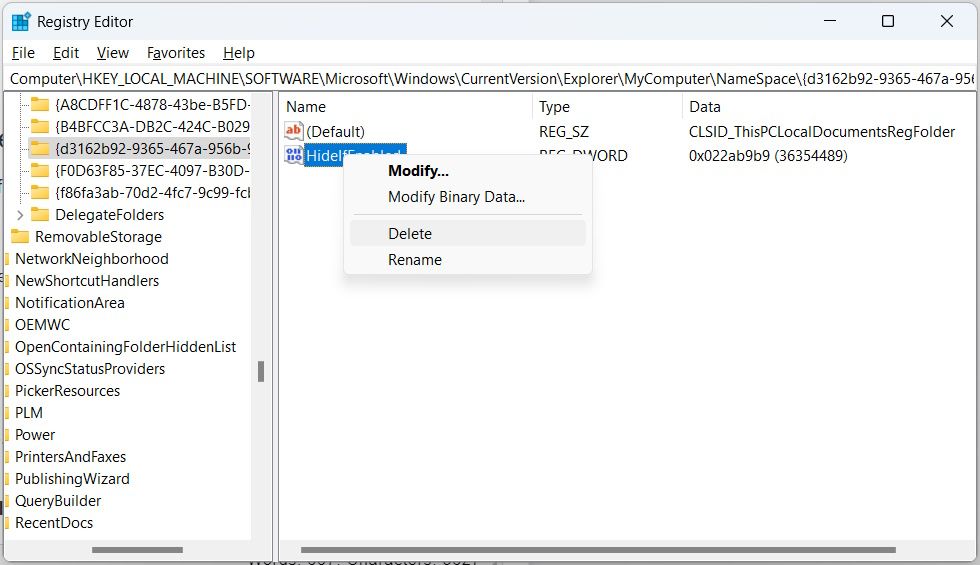
Now, refresh File Explorer with F5 and the Documents folder will appear in This PC.
To hide it, right-click the key on the left panel and select New > DWORD (32-bit) Value and name it HideIfEnabled. Double-click the newly-created value in the right panel, set Value data to 22ab9b9, and then click OK.
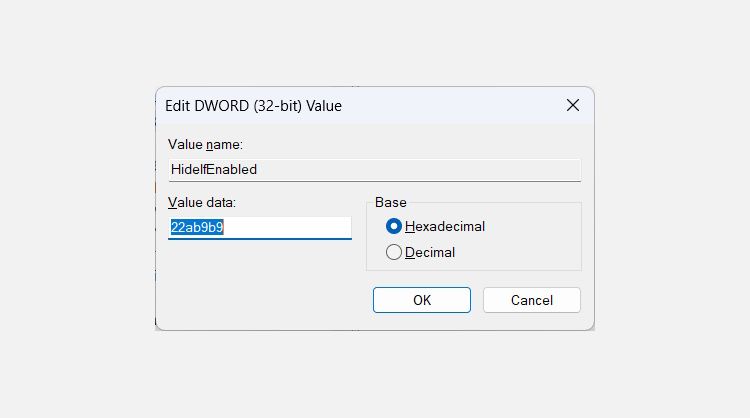
Now when you refresh This PC in File Explorer, you will see that the Documents folder is gone.
The steps to show or hide the other folders from this point on are the same. Just go to the respective key in the Registry Editor and either delete the HideIfEnabled value to show the folder in this PC or create the value and set it to 22ab9b9 to hide the folder.
Here’s the path to the Music folder:
HKEY_LOCAL_MACHINE\SOFTWARE\Microsoft\Windows\CurrentVersion\Explorer\MyComputer\NameSpace{3dfdf296-dbec-4fb4-81d1-6a3438bcf4de}
Here’s the path to the Video folder:
HKEY_LOCAL_MACHINE\SOFTWARE\Microsoft\Windows\CurrentVersion\Explorer\MyComputer\NameSpace{f86fa3ab-70d2-4fc7-9c99-fcbf05467f3a}
Here’s the path to the Pictures folder:
HKEY_LOCAL_MACHINE\SOFTWARE\Microsoft\Windows\CurrentVersion\Explorer\MyComputer\NameSpace{24ad3ad4-a569-4530-98e1-ab02f9417aa8}
Here’s the path to the Downloads folder:
HKEY_LOCAL_MACHINE\SOFTWARE\Microsoft\Windows\CurrentVersion\Explorer\MyComputer\NameSpace{088e3905-0323-4b02-9826-5d99428e115f}
Choose the Folders You Want to Appear on This PC in Windows 11
If you want to see folders on This PC, you can do so by making a couple of edits to the Windows Registry. While we do recommend that you know what you’re doing if you proceed, we have made the instructions relatively simple to follow so there’s minimal chance of messing up the registry.
As long as you take the necessary steps not to mess up the Windows Registry, you should be able to hide and show the folders you want easily.
Also read:
- [New] 2024 Approved Direct Capture Tool for Chrome Systems
- [New] 2024 Approved Sony BDP-S6500 Review
- [New] Exclusive, Overlooked The Crème De La Crème Mac Transcribers
- [New] Leveraging YouTube's Features to Improve Visuals
- [Updated] 2024 Approved Master Viral Wonders Secrets to Exceptional TikTok Photo Tricks
- Drive Performance Gains with Optimized Android Studio on Windows
- Easing the Burden of Faulty Windows Character Map
- Easy Steps to Bluetooth-Link AirPods on Windows
- Enabling File Transfers: Remedy for uTorrent on Windows
- High Fidelity Gaming Hacked: Top Strategies for Classic Adventures with ScummVM
- How to Exit Android Factory Mode On Vivo Y17s? | Dr.fone
- In 2024, How To Use Special Features - Virtual Location On Sony Xperia 1 V? | Dr.fone
- Quiet Down Windows' Update Reminders and Alerts
- Rediscover Lost Features Within Windows 11'S Control Panel
- Set Your Preferred Job Location on LinkedIn App of your Gionee F3 Pro | Dr.fone
- Title: Windows 11 Trick: Show/Hide User-Defined Directories
- Author: David
- Created at : 2025-01-05 18:40:28
- Updated at : 2025-01-06 20:50:41
- Link: https://win11.techidaily.com/windows-11-trick-showhide-user-defined-directories/
- License: This work is licensed under CC BY-NC-SA 4.0.