
Win-Friendly Methods to Resolve Error 1 in Games
Win-Friendly Methods to Resolve Error 1 in Games
When Minecraft fails to launch correctly, it will sometimes crash with the “exit code: 1” error. While the error message indicates issues with Java runtime configuration, there can also be other reasons. An outdated graphics driver, incorrect in-game settings, incompatible mods, buggy game files, and an invalid launcher file path can also trigger the “exit code:1” error on Windows.
Here we show you a few quick troubleshooting steps to fix the “exit code: 1” and get back to playing Minecraft on your Windows computer.
1. Delete or Disable Outdated Mods
The “exit code: 1” error can occur due to outdated mods. To resolve the error, check the Minecraft mods folder and delete it. Removing mods can break your worlds. So make sure to create a backup before attempting to remove any mods. Here’s how to do it.
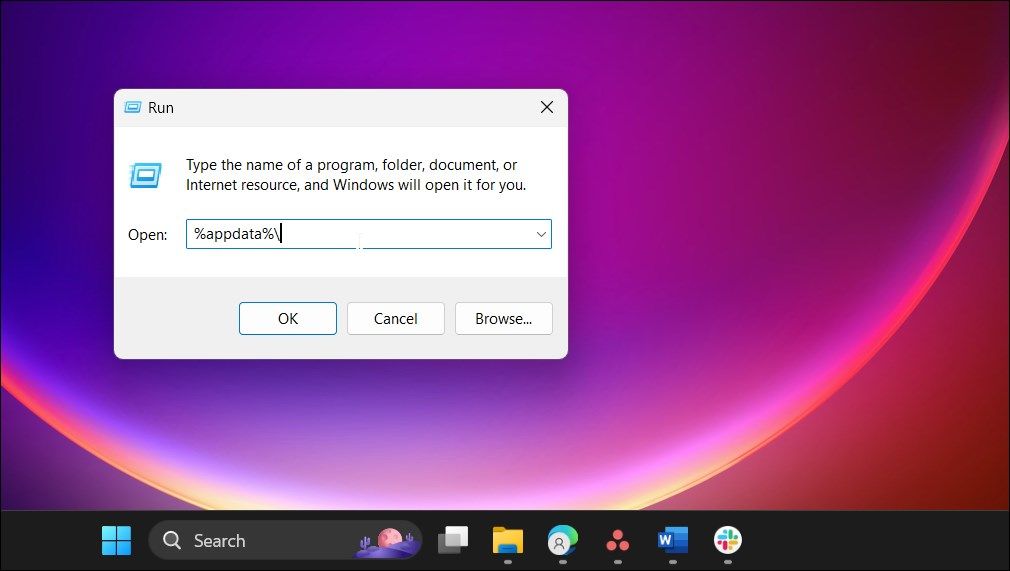
- PressWin + R and type the following in theRun dialog:
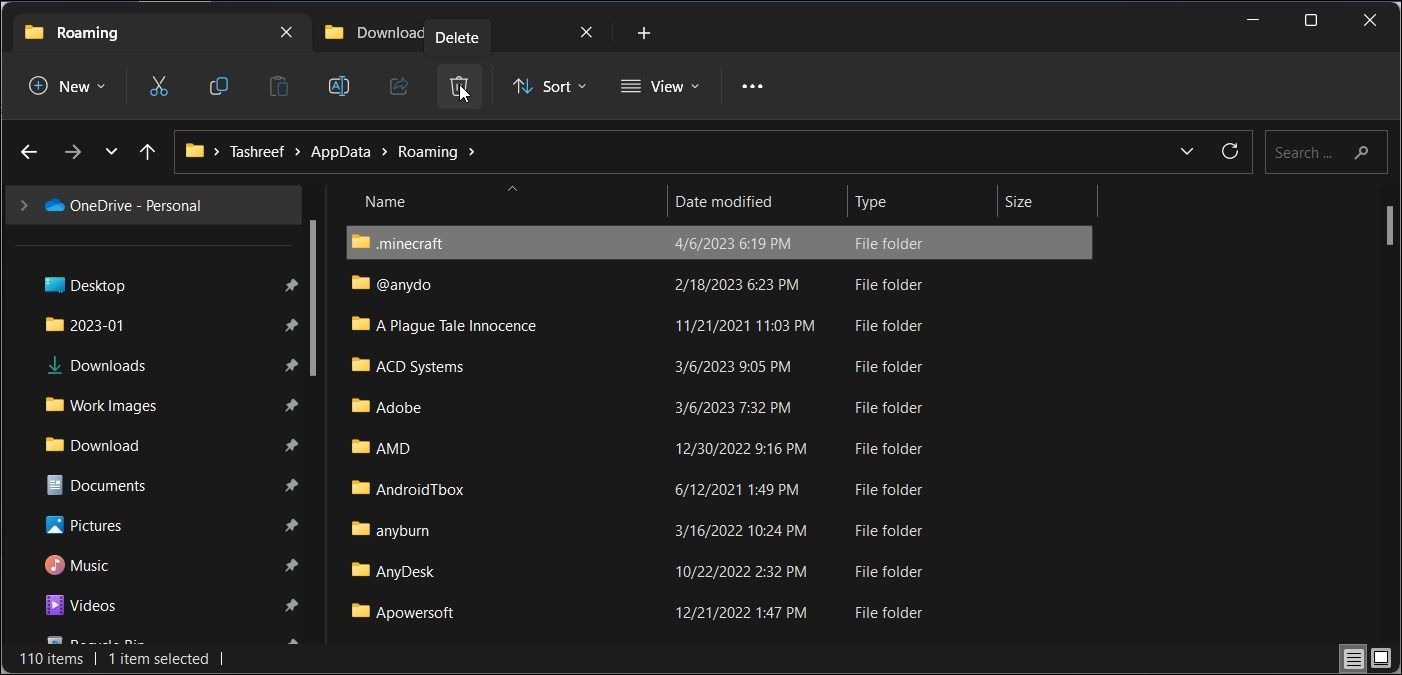
%appdata%\ - ClickOK to open theAppData\Roaming folder inFile Explorer .

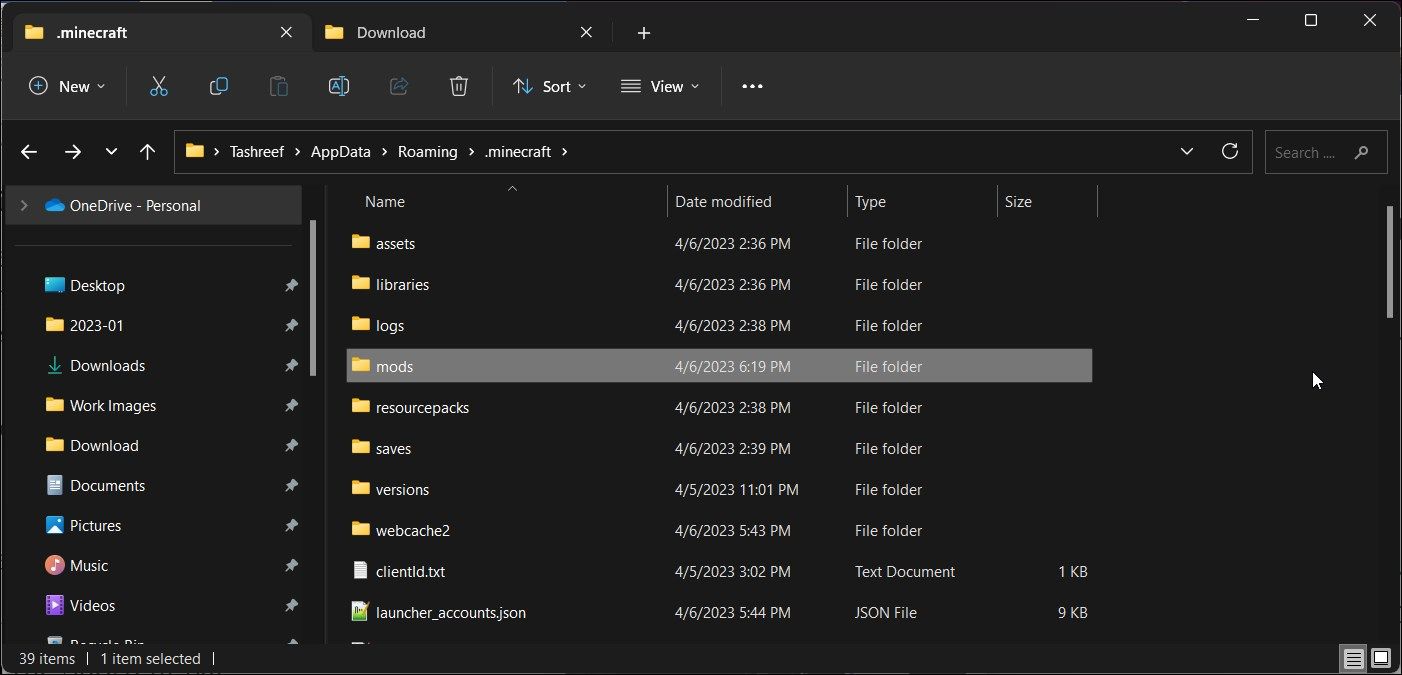
- Next, open the**.minecraft** folder.
- Open themods folder inside the**.minecraft** folder.
- Select and right-click on all themods one by one and selectDelete .
Once all the mods are removed, close File Explorer and relaunch Minecraft to see if the error is resolved. On the flip side, you may find some Minecraft levels (worlds) broken upon launch. You may also want to re-download mods to make further modifications.
2. Repair Minecraft Launcher
You can fix common problems with the Minecraft Launcher using the built-in repair option on Windows . During repair, Windows will look for common issues and try to fix them automatically. It will also delete the app’s data.
To repair Minecraft Launcher:
- PressWin + I to openWindows .
- Open theApps tab in the left pane.
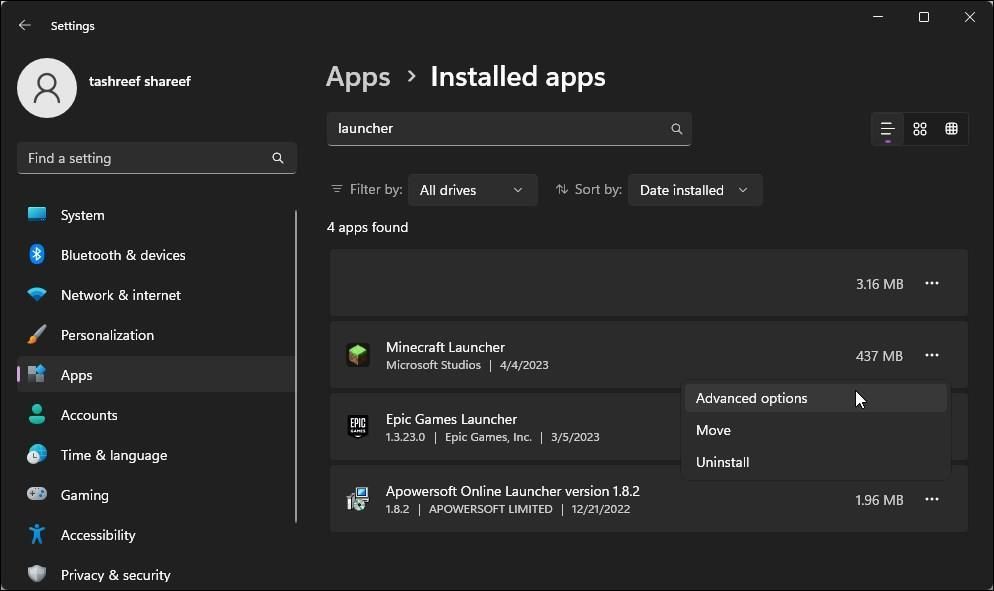
- Click onInstalled Apps and searchMinecraft Launcher .
- Next, click thethree-dots menu beside the app name and selectAdvanced Options .
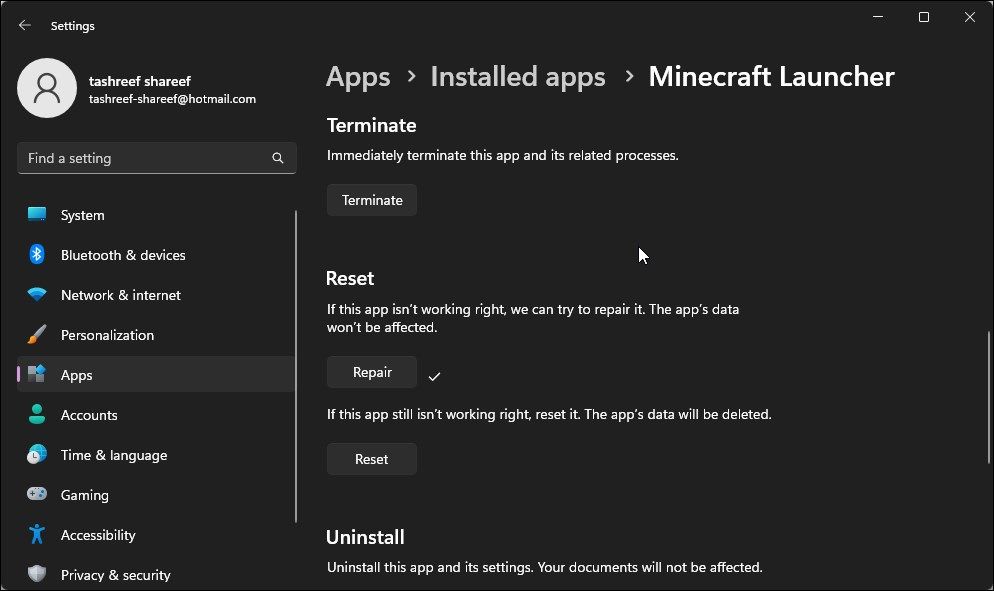
- Scroll down to theReset section and clickRepair . Windows will perform a quick repair and show a checkmark once the repair is complete.
- Relaunch Minecraft Launcher and check for any improvements.
Similarly, you can also repair your Minecraft game. Open Minecraft’sAdvanced Options and perform a repair in theSettings app.
3. Modify the Minecraft Launcher File Path

Issues with the Minecraft Launcher file path can cause the “exit code: 1” on Windows. If your user name has a special character, the Minecraft Launcher file path may not respond to a user account with a special character.
To fix the issue, you’ll need to modify the Minecraft Launcher file path to allow the launcher to access the launcher without special characters.
To change the Minecraft Launcher file path:
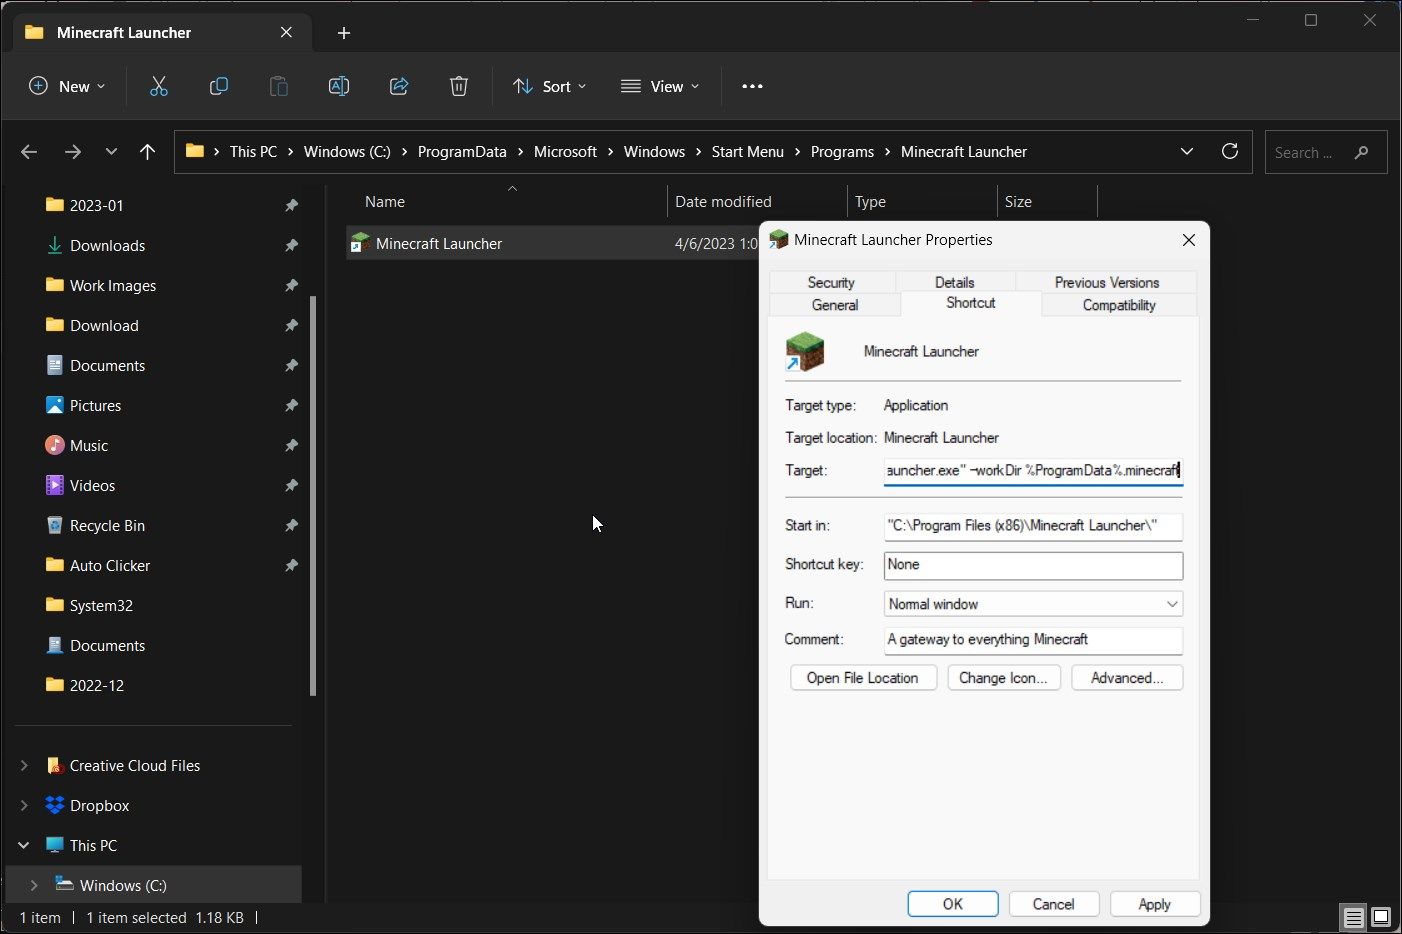
- Right-click on theMinecraft Launcher shortcut and selectProperties .
- In theProperties dialog, open the Shortcut pat.
- In theTarget field, add the following line to change the working directory for Minecraft Launcher. You need to add the below lines after the existing file path:
–workDir %ProgramData%.minecraft - After modifications, the target field will look something like this:
"C:\Program Files (x86)\Minecraft Launcher\MinecraftLauncher.exe" –workDir %ProgramData%.minecraft - ClickApply andOK to save the changes.
- Relaunch Minecraft and check for any improvements.
4. Change the Java Executable Path
Your Minecraft installation can run into issues if the launcher fails to detect the correct Java file. While Minecraft Launcher automatically installs the required JRE version, at times, you may need to manually change the executable to run the modified version of the game.
To change the Java executable for Minecraft:
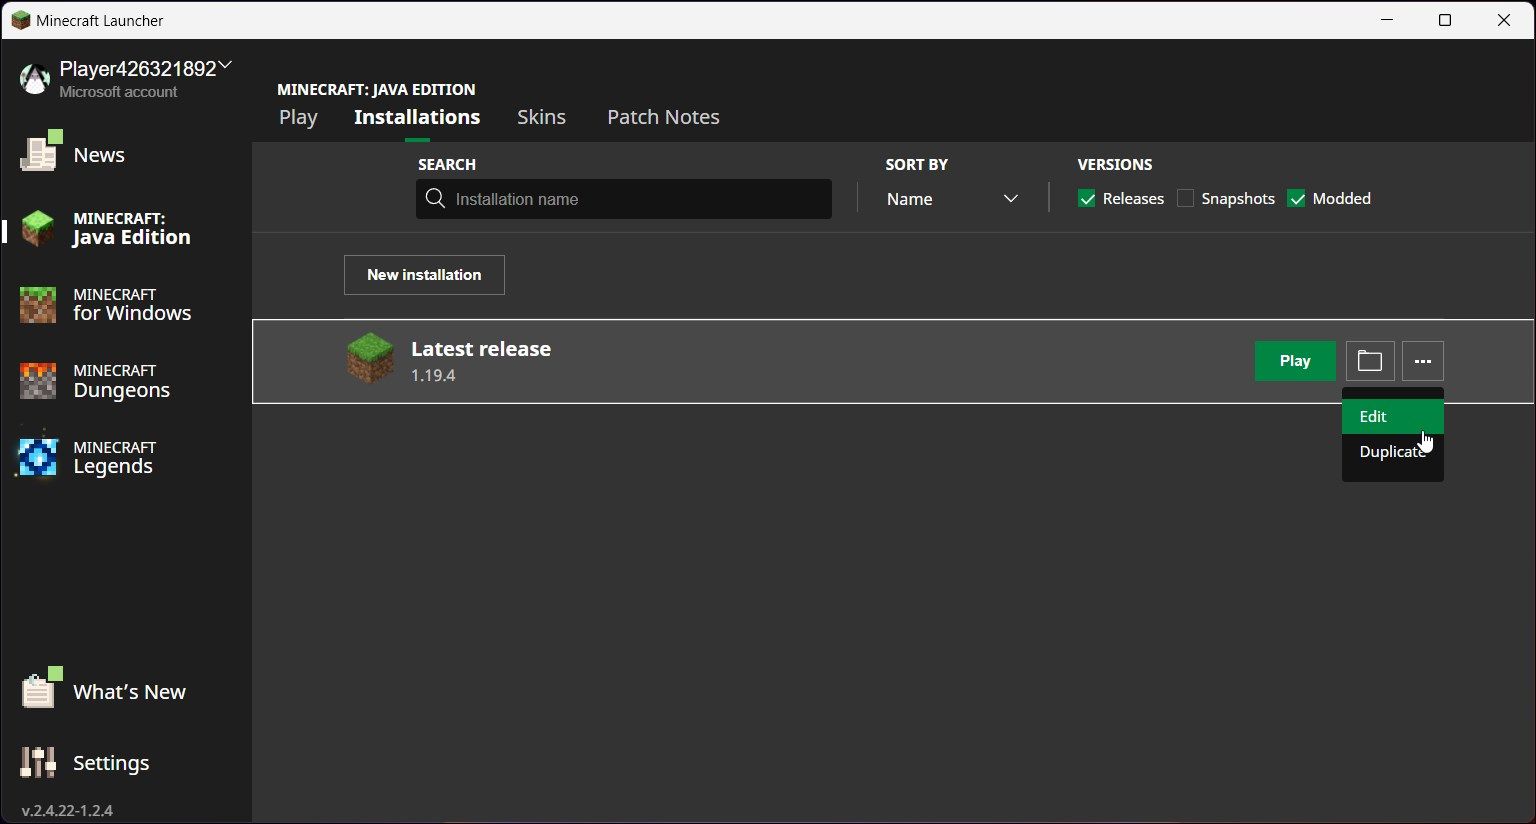
Open theMinecraft Launcher .
Next, select theMinecraft Java Edition tab in the left pane.
Open theInstallations tab in the toolbar.
Hover your mouse overLatest Release and click thethree-dots menu.
SelectEdit from the menu.
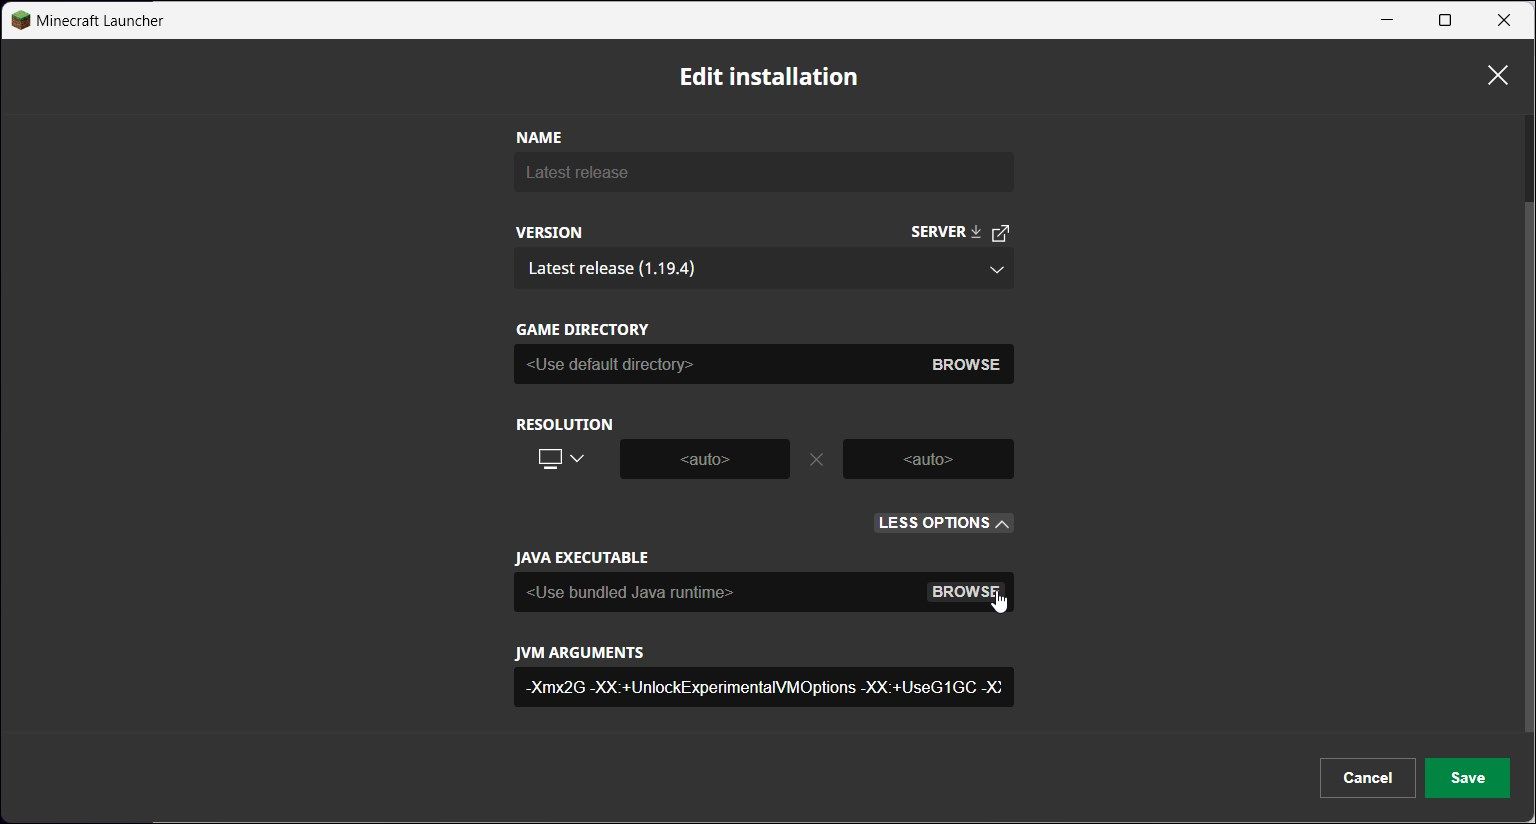
ClickMore Options to view additional options.
ClickBrowse to add aJava Executable .
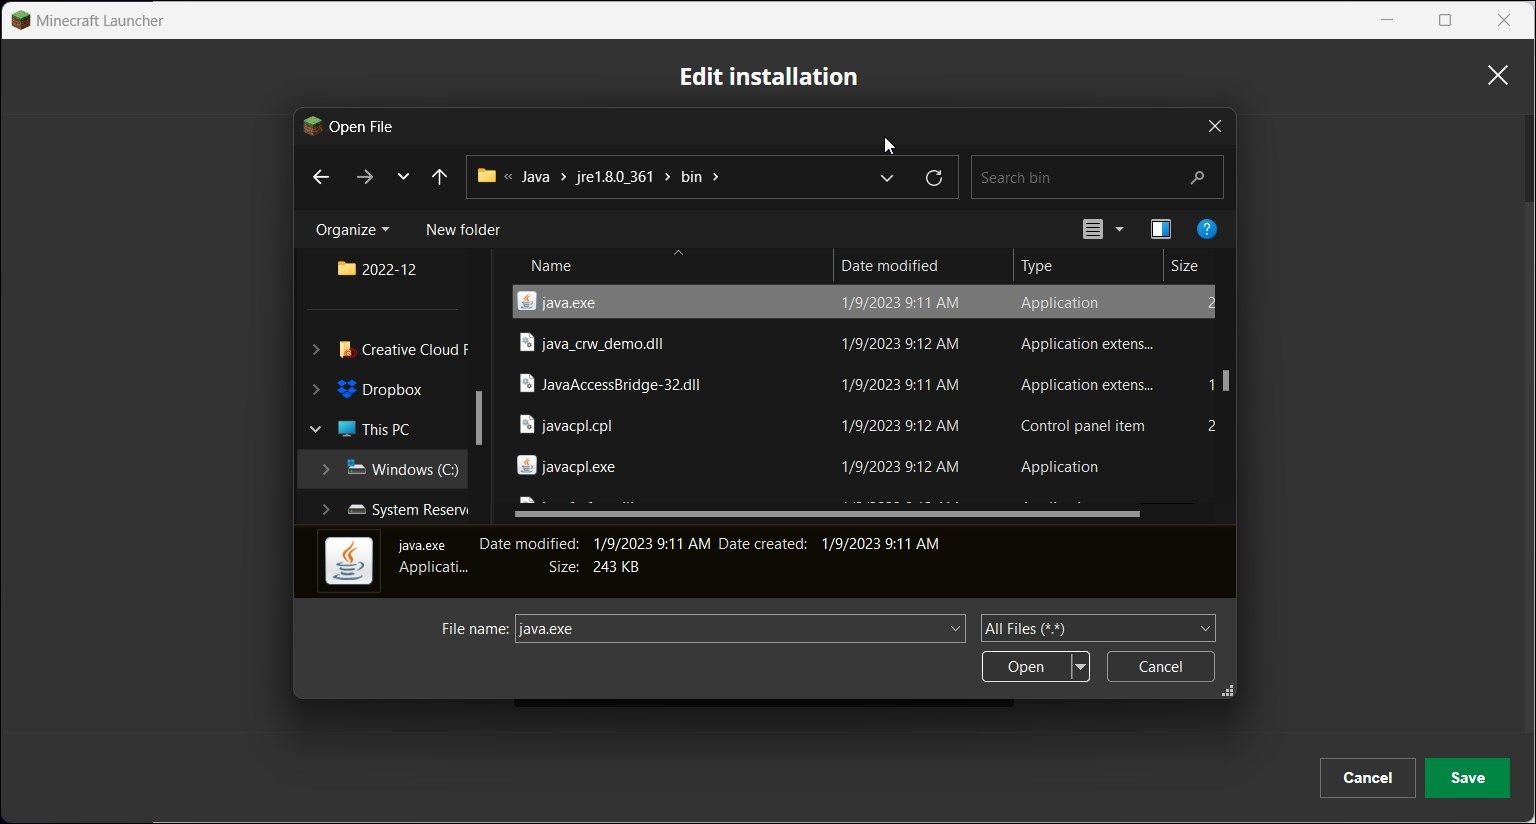
Navigate to your Java installation. By default, the JRE file path is:
C:\Program Files (x86)\Java\jre1.8.0_361\binSelect theJava.exe file and clickOpen .
ClickSave to apply the changes and relaunch Minecraft Launcher.
The caveat here is you’ll need to update the Java version number or re-add the Java executable every time you update Java.

5. Reinstall Minecraft Without Deleting Saves
You can reinstall Minecraft to fix issues with the game. Depending on how you installed the game, you can uninstall Minecraft from the Settings app or delete the .minecraft Appdata folder. If you prefer, you can also choose to keep your Minecraft saves.
To backup Minecraft saves and uninstall the game:
- PressWin + R to open theRun dialog.
- Paste the following in theRun field and clickOK :
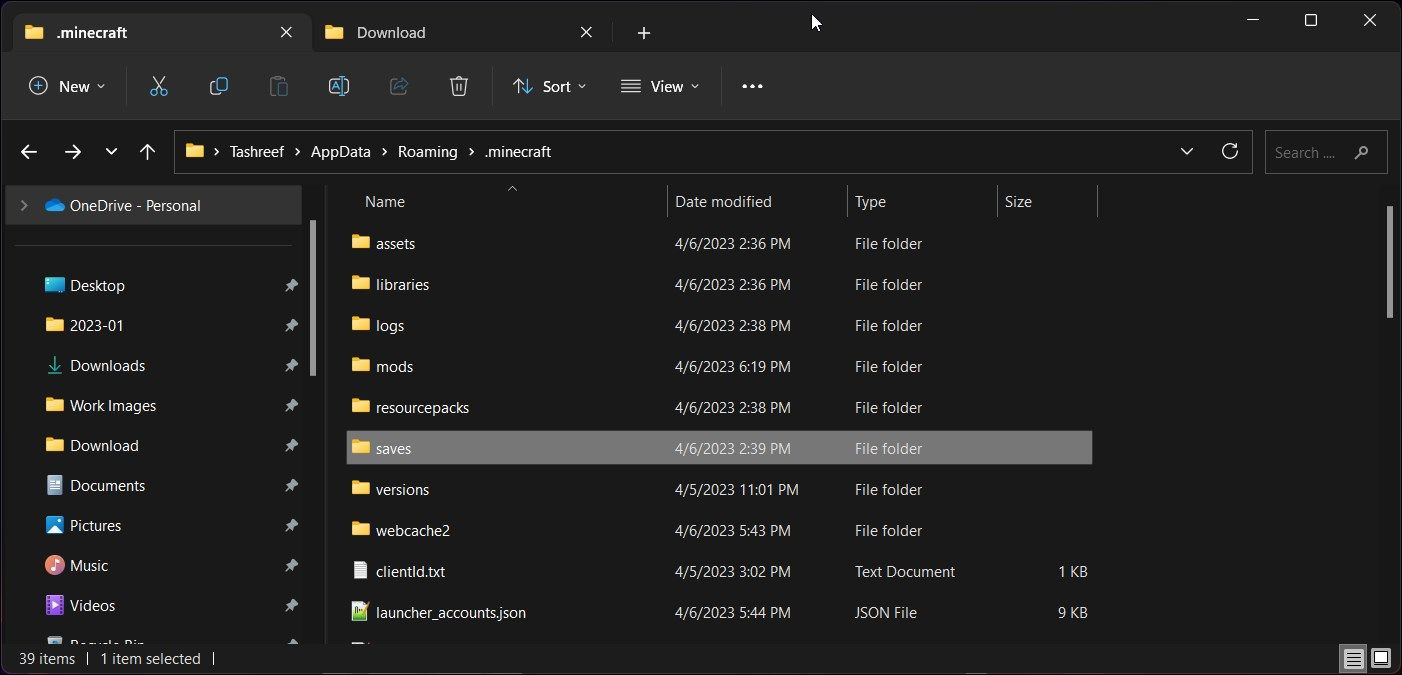
%appdata%\ - Open the**.minecraft** folder.
- Right-click on the saves folder and selectCopy (Ctrl +C) .
- Paste thesaves folder outside the**.minecraft** folder.
- Next, return to theRoaming folder and delete the**.minecraft** folder to uninstall the game.
- Restart your computer.
- To reinstall Minecraft, openMinecraft Launcher . It will start the installation process.
- Follow the on-screen instructions to complete the process and sign in with your Minecraft account.
- Next, move thesaves folder back to the following location:
C:\Users[Username]\AppData\Roaming.minecraft - Relaunch Minecraft to check if the error is resolved.
6. Perform Generic Windows and Java Fixes
If Minecraft is still plagued by the “exit code: 1” error, here are some more general fixes you can try.

Update the Graphics Drivers
Incompatible or outdated graphics drivers can cause games on Windows computers to malfunction. For a dedicated GPU, you can use AMD Radeon Software or Nvidia GeForce Experience to install the latest graphics drivers updates on Windows .
Intel users can download newer updates from the Windows update page. To do this, press Win + I to open Settings. Open Windows Updates and install any update available for your Intel graphics. Alternatively, check Intel’s website for newer display drivers for Windows.
Reinstall Java
 Glarysoft File Recovery Pro - Helps to recover your lost file/data, even permanently deleted data.
The “exit code: 1” error often hints at invalid Java runtime configuration issues. You can reinstall Java to fix configuration issues fixed in the latest release.
To reinstall Java Runtime Environment:
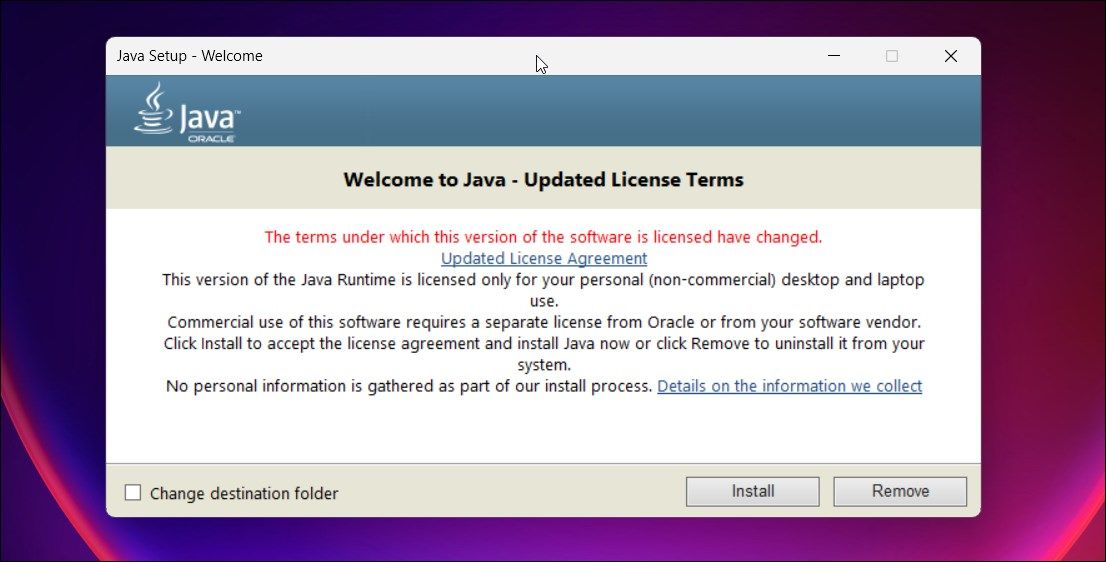
- Go to the Java download page .
- Select the correct version for your Windows computer. You can opt for the Windows Online or Offline version. Also, download the 64-bit version if applicable.
- Run the installer and follow the on-screen instructions to complete installations.
- Once installed, restart your computer and check for any improvements.
Fixing the Minecraft Exit Code: 1 Error
Many things can go wrong and trigger the “exit Code: 1 error” in Minecraft. To resolve the issue, try to disable mods and change the Minecraft Launcher path. If the issue persists, check your graphics driver for the problem.
If all else fails, perform a reinstall. You can reinstall Minecraft while keeping saves. If you are using the latest Microsoft Store version of the game, you can also uninstall it from the settings app.
- Title: Win-Friendly Methods to Resolve Error 1 in Games
- Author: David
- Created at : 2024-08-16 00:02:20
- Updated at : 2024-08-17 00:02:20
- Link: https://win11.techidaily.com/win-friendly-methods-to-resolve-error-1-in-games/
- License: This work is licensed under CC BY-NC-SA 4.0.