Unlocking Power Management Tools for Windows Devices

Unlocking Power Management Tools for Windows Devices
Your Windows laptop features a handy battery saver mode that allows you to stretch your device’s battery life. Windows archives this by lowering the screen brightness, limiting background processes, and disabling certain visual effects and animations.
Here we show you how to enable or disable battery saver mode on your Windows 10 or 11 laptop.
1. How to Enable or Disable Battery Saver Mode Using Quick Settings
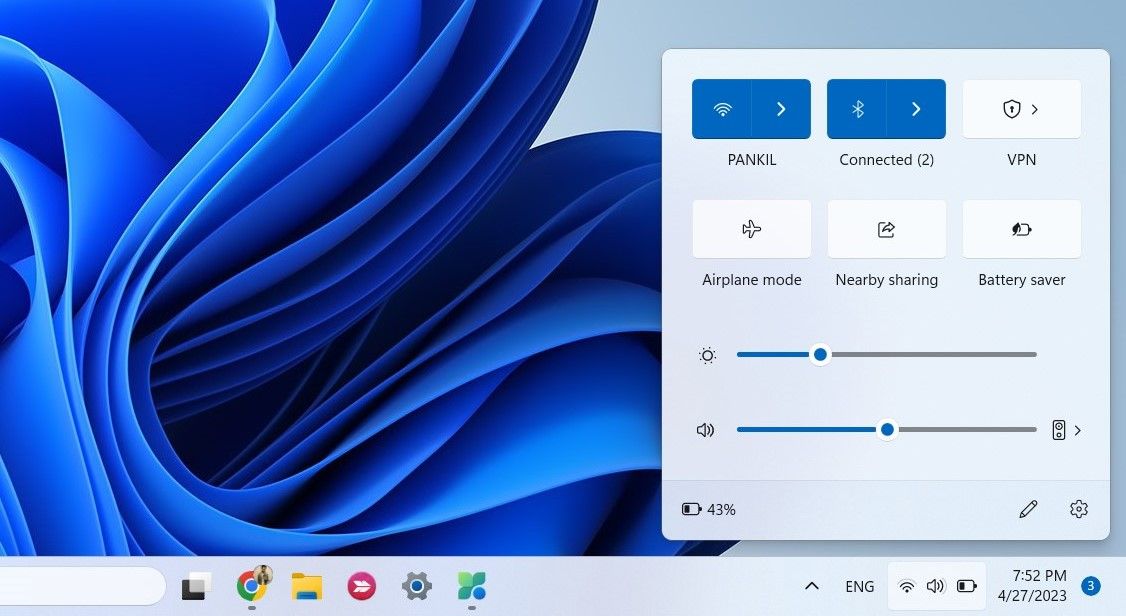
The Quick Settings panel in Windows provides access to frequently used features such as Wi-Fi, Bluetooth, Airplane Mode, and others. You can also access this panel to turn the battery saver mode on or off quickly.
Simply pressWin + A to open the Quick Settings panel, and then click theBattery saver icon to enable or disable it.

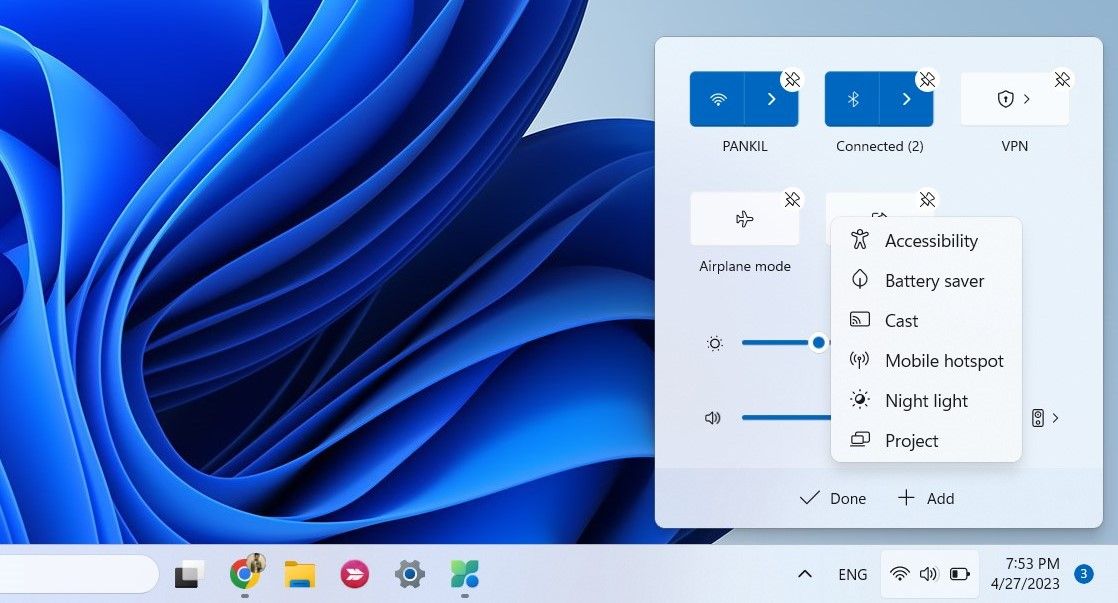
In case the Battery saver icon is missing, you can add it manually. Click thepencil icon at the bottom, and then selectAdd > Battery saver .

2. How to Enable or Disable Battery Saver Mode Using the Settings App
Another way to turn the battery saver mode on or off in Windows is via the Settings app. To do so, use these steps:
- Right-click on theStart icon and selectSettings from the list.
- In theSystem tab, click onPower & battery .
- UnderBattery , click onBattery saver to expand it.
- Click theTurn on now button to enable battery saver mode.

If the battery saver mode is on, you will see theTurn off now button instead. Further, plugging your laptop into a power outlet will also disable the battery saver mode.
3. How to Configure the Battery Saver Mode to Turn On Automatically on Windows
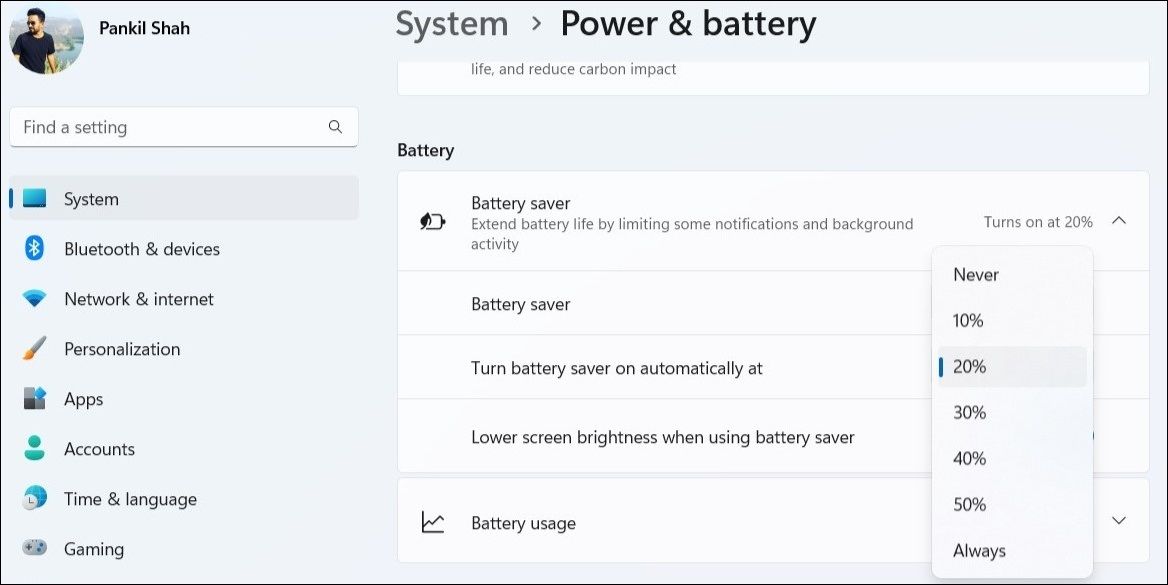
Don’t want to enable the battery saver mode manually all the time? No problem. You can configure Windows to activate battery saver mode automatically whenever the battery level drops below a specific percentage. To do so, you can use the Windows Settings app. Here are the steps you can follow.
- PressWin + I to open the Settings app.
- Navigate toSystem > Power & battery .
- Click onBattery saver to expand it.
- Click the drop-down menu next toTurn battery saver on automatically at and select your preferred battery level.

You can also prevent Windows from enabling battery saver mode on its own by selectingNever . Alternatively, if you want the battery saver mode to be enabled at all times, chooseAlways instead.
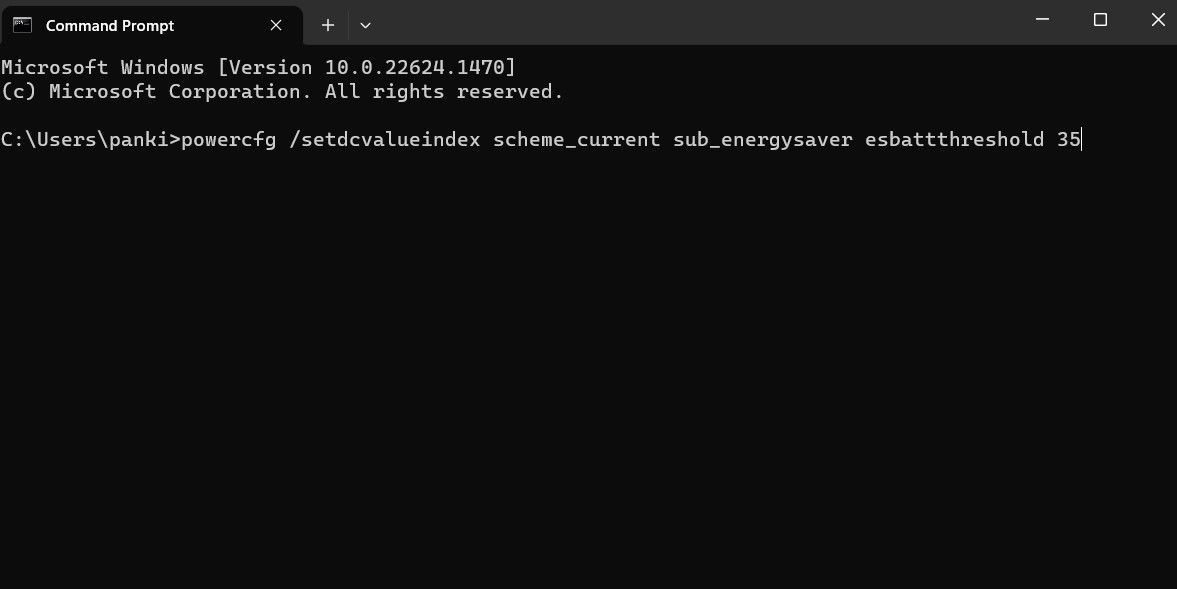
Although the Settings app is the most commonly used method for configuring the battery saver mode in Windows, it’s not the only option available. You can also use a command-line tool like Command Prompt or Windows PowerShell to configure the battery saver mode to turn on automatically. Here are the steps for the same.
- Use one of the many ways to open Command Prompt or PowerShell on your PC.
- Type the following command in the console and pressEnter .
powercfg /setdcvalueindex scheme_current sub_energysaver esbattthreshold <BatteryPercentage>
Replace**

While PowerShell and Windows Terminal may look similar, they act very differently. Check our detailed guide to learn the differences between PowerShell and Windows Terminal .
Easily Enable or Disable Battery Saver Mode on Windows
Battery saver mode in Windows can come in handy when you’re away from a power source. However, it’s important to note that leaving battery saver mode on all the time can impact certain features, such as notifications and background app sync. Hence, it’s best to enable battery saver mode only when necessary.
- Title: Unlocking Power Management Tools for Windows Devices
- Author: David
- Created at : 2024-08-16 00:25:48
- Updated at : 2024-08-17 00:25:48
- Link: https://win11.techidaily.com/unlocking-power-management-tools-for-windows-devices/
- License: This work is licensed under CC BY-NC-SA 4.0.
 PearlMountain Image Converter
