Understanding 'Unrecognized Disk' Issue: A Comprehensive Guide for Windows 11 Users
Understanding ‘Unrecognized Disk’ Issue: A Comprehensive Guide for Windows 11 Users
Are you unable to use your computer because of the “Hard drive not installed” issue? If so, don’t worry, you’re not alone.
Windows PCs can fail to boot and display the “Hard drive not installed” message for a variety of reasons, including hardware failure, a damaged CMOS battery, or an incorrect boot priority order.
Fortunately, you can quickly fix this problem and continue using your device using the solutions below.
1. Check the Hard Drive for Any Loose Connections or Physical Damage
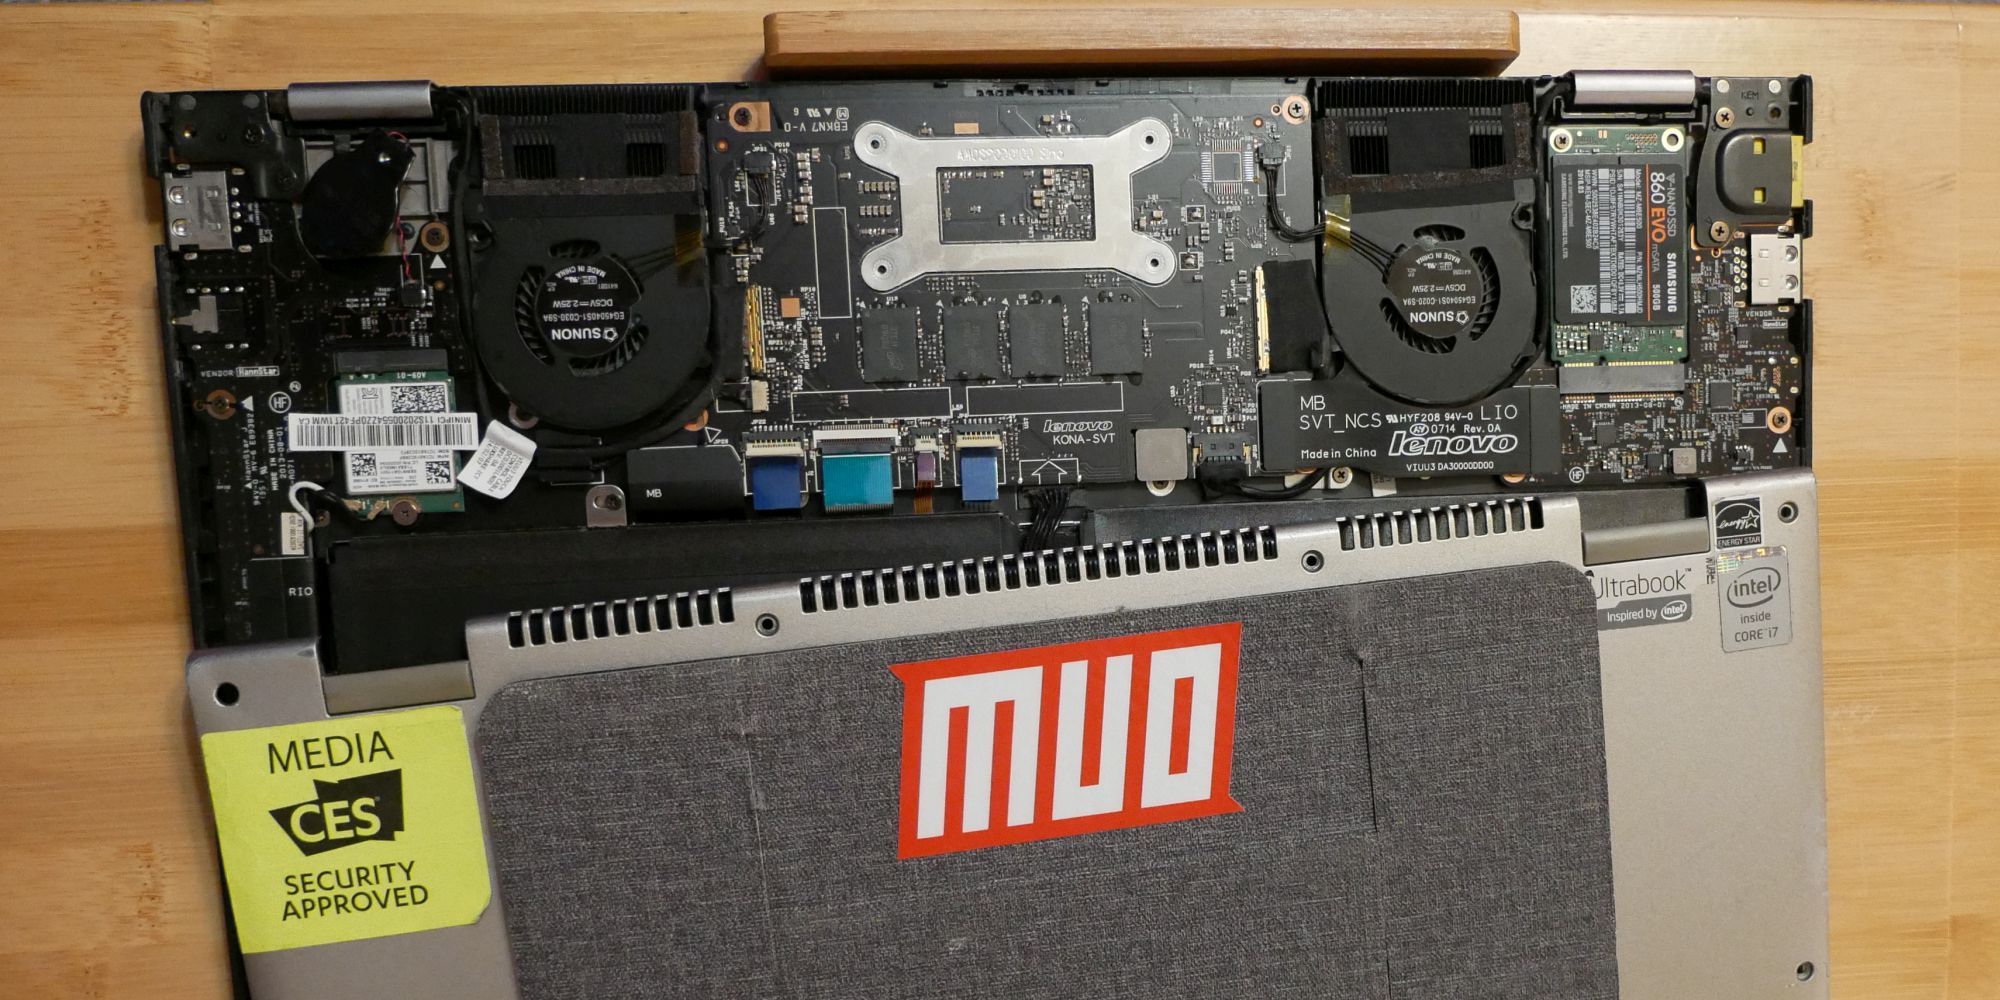
The first course of action whenever you encounter the “Hard drive not installed” issue is to ensure that the hard drive is properly connected to your computer. To do this, shut down your computer (check out different ways to shut down a Windows PC ) and unplug it from the power outlet.
Next, open your computer’s back case and ensure that all the cables connecting the hard drive to the motherboard and the power supply are securely connected. You can also reseat the cables by disconnecting them from the hard drive and the power supply and then reconnecting them after a few seconds.
After that, carefully inspect the hard drive for any physical damage. Check for cracks, dents, or any other signs of wear. Additionally, check for any indications of liquid damage or unusual noises emanating from the hard drive. If you detect any of these issues, unfortunately, the only option is to replace your hard drive.
 EmEditor Professional (Lifetime License, non-store app)
2. Perform a Hard PC Reset
 Epubor Audible Converter for Win: Download and convert Audible AAXC/AA/AAX to MP3 with 100% original quality preserved.
Image Credit: Tina Sieber
Performing a hard reset on your PC is an important troubleshooting step that can help you resolve various Windows issues and restore your computer to a working state. You can use this method when Windows becomes unresponsive or throws different errors on boot.
To perform a hard reset on your PC, follow these steps:
- Shut down your computer and unplug all power cords.
- Remove all external devices, such as external displays and printers.
- Unplug the battery from your device.
- Hold down the power button for 15 seconds.
- Plug in the battery and power cords, but do not plug in any external devices.
- Turn on your computer and check if the issue persists.
If the issue persists, you can try the next solution.

3. Change the Boot Priority Order
You might face the “hard drive not installed” issue if your computer is trying to boot from a connected external device. To confirm this, unplug all external devices from your computer, including your USB mouse, keyboard, and external backup hard drive.
Then, restart your computer and see if the problem persists. If it doesn’t, then your computer was probably trying to boot from one of the external devices you unplugged.
To configure your computer to boot correctly even when those external devices are connected, you must set your internal hard drive as the first boot device. Here’s how to do it.
The following steps are for Dell computers. The steps may vary depending on your computer manufacturer. Therefore, make sure to check your computer manufacturer’s website to learn about the exact process of changing the boot priority.
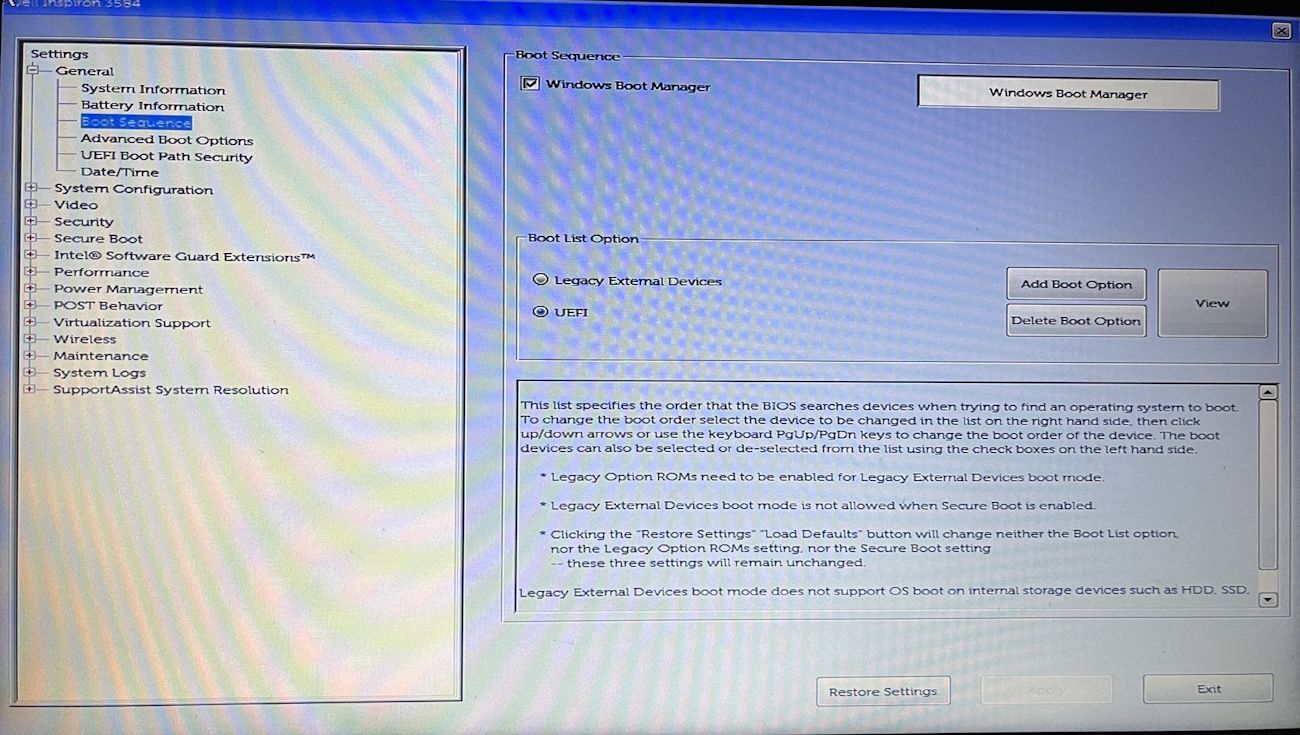
- Restart your computer and press the BIOS key (usually Delete, F2, or ESC) repeatedly as soon as you see the manufacturer’s logo.
- Click Boot Sequence in the left sidebar.
- If UEFI is selected and then select Legacy External Devices. Or, if Legacy External Devices is selected and then select UEFI.
- Click Apply.
Then, restart your computer and check for the issue.
4. Change Your System Date and Time
An incorrect date and time can impact how your computer boots up or prevent it from booting at all. So, make sure your computer is showing the current date and time. You can change the date and time by following the instructions below.
- Open the BIOS menu and choose Date /Time from the left sidebar.
- Set the correct Date and Time. Then, click Apply.
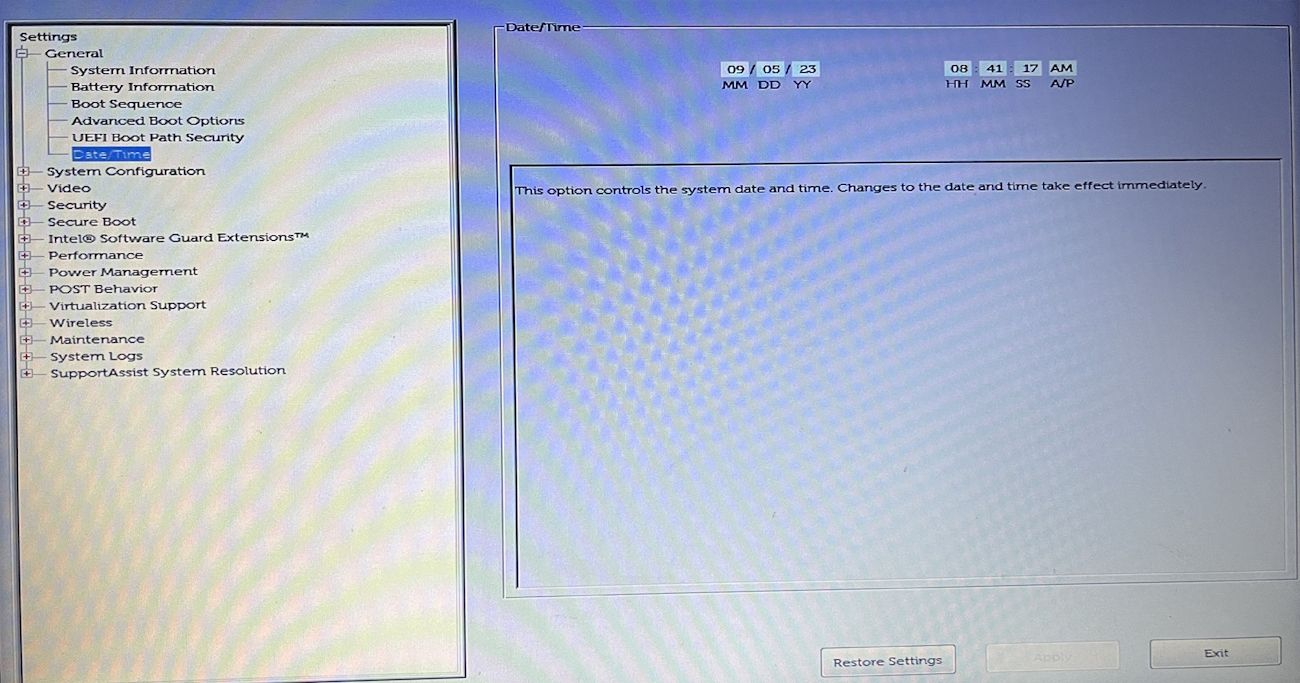
After that, restart your computer and check if the issue is resolved. If the problem is gone, but you need to set the date and time every time you boot your computer, it is likely that your computer’s CMOS battery is failing. The only way to fix this is to replace the CMOS battery .
Fixing the Hard Drive Not Installed Issue on Windows 11
It’s frustrating when you can’t use your computer because of a hardware problem. Most of the time, you can fix these problems by restarting your device. But if restarting doesn’t help and you see the “Hard drive not installed” error, then try the above solutions to troubleshoot the issue.
Windows PCs can fail to boot and display the “Hard drive not installed” message for a variety of reasons, including hardware failure, a damaged CMOS battery, or an incorrect boot priority order.
Fortunately, you can quickly fix this problem and continue using your device using the solutions below.
- Title: Understanding 'Unrecognized Disk' Issue: A Comprehensive Guide for Windows 11 Users
- Author: David
- Created at : 2024-08-16 00:21:41
- Updated at : 2024-08-17 00:21:41
- Link: https://win11.techidaily.com/understanding-unrecognized-disk-issue-a-comprehensive-guide-for-windows-11-users/
- License: This work is licensed under CC BY-NC-SA 4.0.