
Ultimate Guide: Converting and Importing PDF Files Into Excel Spreadsheets

Ultimate Guide: Converting and Importing PDF Files Into Excel Spreadsheets
Quick Links
Excel provides a plethora of features for organizing, manipulating, and handling your data. One of these unique features is inserting a PDF directly into Excel. The good news is it only involves a few simple steps to do it. Here’s how.
Inserting a PDF Into Excel
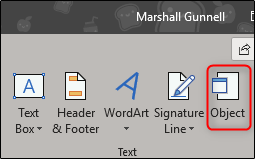
In the Excel file, head over to the “Insert” tab and then click the “Object” button.
In the Object window that appears, switch to the “Create from File” tab and then click “Browse.”

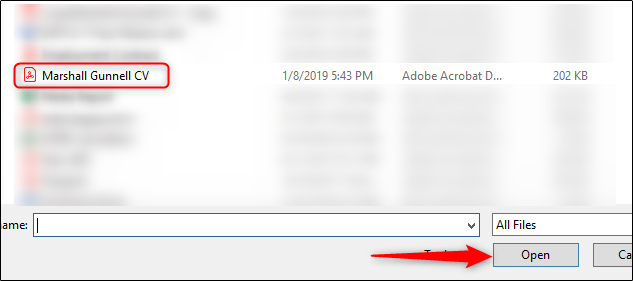
Browse to the location of your file, select the file, and then click “Open.”
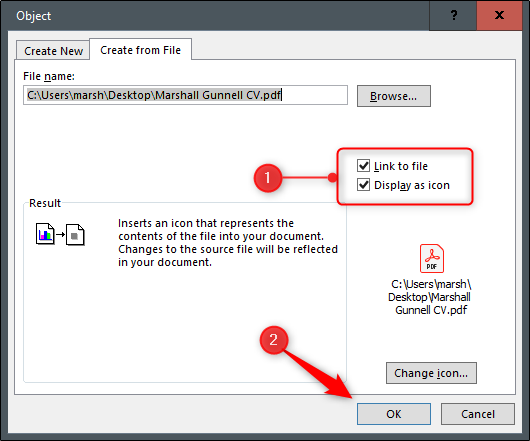
Back at the “Object” window, you’ll see the file path of your PDF. Now, you need to tell Excel how you want the file to appear in the spreadsheet. There are a few different options here. If you select “OK” without taking any further action in the “Object” window, the PDF file appears in Excel showing the contents of the PDF in its entirety.

Alternatively, you can check the box next to “Display as icon” for a less intrusive option. This method, as the name suggests, inserts an icon that represents the contents of your file. Double-clicking the icon opens the file in your computer’s default PDF viewer.
![]()
Another solution would be to check the “Link to file” option. This option, as with the others, places the content of your PDF into Excel. The difference here is that it creates a link to the source file, making it a live document. Any changes to the source file would be reflected in your document.
Also keep in mind that you can select both the “Link to file” and “Display as icon” options, creating a less intrusive method of accessing a live document.
Once you’ve selected the option that works best for you, click “OK.”
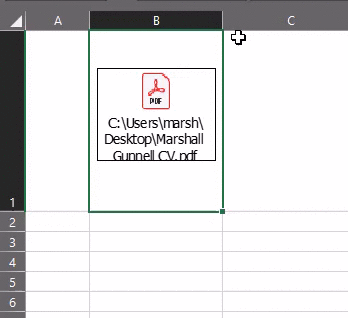
Your PDF will now be inserted into Excel as an icon.
![]()
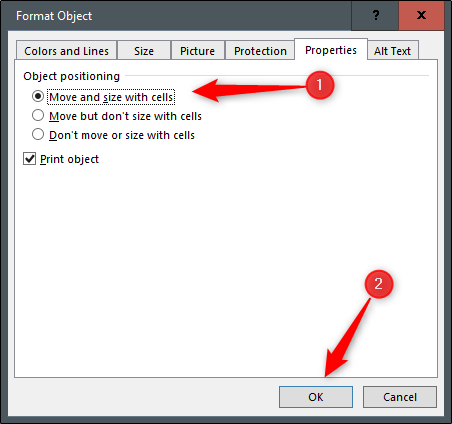
You’ll notice that once inserted, the PDF takes on an “In front of text” layout style and hovers above the cells. If you want to anchor the PDF to (and format with) a specific cell, then right-click the icon and select “Format Object” from the drop-down menu.
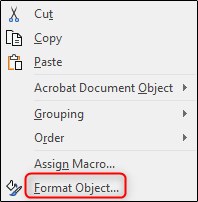
The “Format Object” window will now appear. There are several different things you can do here, including changing the size and color, cropping, and even adding alt text to the object . What we’re particularly interested in here, though, is object positioning.
First, select the “Properties” tab. You’ll find a few options concerning the positioning of the object. Here, select “Move and size with cells” and then click “OK.”
Note: If you don’t want the icon to appear in the printed version of the sheet, untick the “Print object” checkbox.
Now any changes made to the cell, including hiding or resizing, will also apply to the icon.
Repeat these steps to insert multiple PDF files in your Excel sheet.
Also read:
- [New] 2024 Approved Superior Non-Zoom Virtual Collaboration Options
- [Updated] 2024 Approved Peacock Party Patter
- [Updated] In 2024, Video Luster The Top 5 Brilliant Enhancers
- [Updated] Step-by-Step Unlocking the Joys of iFunny's Meme App
- In 2024, Tips and Tricks for Setting Up your Infinix Hot 40 Phone Pattern Lock
- In 2024, Unleashing Clarity with EIZO's ColorEdge CG318-4K
- In 2024, YouTube Rights Vs. CC Licensing
- Instagram Videos - How Long Can They Be, In 2024
- Top 4 Remedies to Resolve the '0xC00D36C4' Error During Video/Audio Playback
- Ultimate Fixes for When Plex Fails to Acknowledge or Stream Your MP4 Files
- Unraveling Windows 11'S Credentials Manager: Essential 11 Methods
- Windows, Mac, iPhone & Android: How to Create Audio Files Effortlessly
- Title: Ultimate Guide: Converting and Importing PDF Files Into Excel Spreadsheets
- Author: David
- Created at : 2025-01-02 16:59:45
- Updated at : 2025-01-06 20:08:46
- Link: https://win11.techidaily.com/ultimate-guide-converting-and-importing-pdf-files-into-excel-spreadsheets/
- License: This work is licensed under CC BY-NC-SA 4.0.