
Troubleshooting WinUpdate Error X8019
Troubleshooting WinUpdate Error X8019
BriWindows Update is a critical component of the Windows operating system that keeps your system up to date with the latest security patches and bug fixes. Although these updates are generally helpful, they can result in Windows malfunctioning or displaying error messages.
Windows Update Error Code 0x80190001 is one such error that appears when you try to install a system update. In this article, we’ll look at what causes Windows Update Error 0x80190001 and how to fix it.
What Causes Windows Update Error 0x80190001?
Windows Update Error 0x80190001 occurs most often when trying to download and install Windows Updates. It can make your computer feel outdated, slow, and unresponsive since it won’t receive important security updates.
Common causes of this error may include incorrect time and date settings, corrupted or faulty system files, and incompatible third-party security software. In this article, we’ll discuss each of these issues in more detail so that you can get your Windows Updates running again.
Here are a few things you can try if you encounter this error.
1. Restart Your Computer
A corrupted system file is often the cause of the Windows Update Error. To fix the issue and get your system running again, restarting your computer is always a good start.
It’s important to note that simply clicking “Restart” in Windows will not reset all the memory caches and processes. Instead, you may need to perform a hard reboot. For this, you will need to hold down the power button on your device for 3-4 seconds until it completely shuts off.
After that, you should wait for 30 seconds and then hit the power button again to turn on the computer. Upon restarting, check to see if Windows Update has now started working correctly.
2. Run Windows Update Troubleshooter
The Windows Update Troubleshooter is an important tool to have. This program works to detect, diagnose and resolve any potential system update issues, ensuring that your computer runs smoothly and securely.
To try it, follow these steps:
- PressWin + I on your keyboard to open System Settings .
- SelectSystem from the left side of the screen.
- Then go toTroubleshoot > Other troubleshooters .

- Click theRun option next to Windows Update.
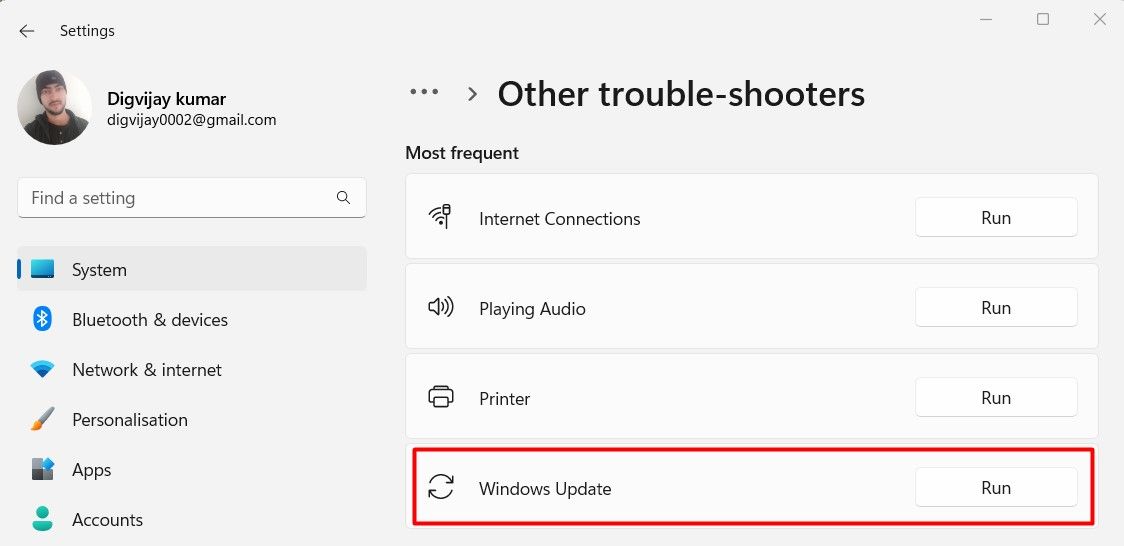
It may take some time for troubleshooting to be completed, so don’t worry if it takes longer than expected. After completing the above steps, try installing updates on Windows.

3. Check Your Date & Time
Incorrect dates and times can interfere with Windows Update, so make sure your system’s time and date are accurate. Here’s how to do this:
- Right-click onStart and selectSettings from the menu list.
- From the left pane, select theTime & language option.
- ClickDate & time on the right.
- Turn on the toggle next to “Set the time automatically”.
You should also double-check your time zone so that Windows knows when the updates should be installed - otherwise, it may ignore them.
 OtsAV TV Webcaster
4. Run an SFC and DISM Scan
If you’re still having trouble installing a Windows update, chances are you have corrupted or missing system files. To resolve this, you must first run SFC and DISM.
An SFC (System File Checker) scan will detect any corrupted system files and attempt to repair them, while a DISM (Deployment Image Servicing and Management) scan will check for any broken Windows components that need repairing.
Both scans are relatively quick and straightforward processes that don’t require any advanced technical knowledge. All you need to do is open Command Prompt as an administrator and follow these steps:
- Run Command Prompt as an administrator (see [how to run Command Prompt as an administrator](http://How to Run the Command Prompt as an Administrator in Windows) ).
- If UAC appears, clickYes to grant privileges.
- Type the command in the Command Prompt window:sfc /scannow .
- Then pressEnter on your keyboard.
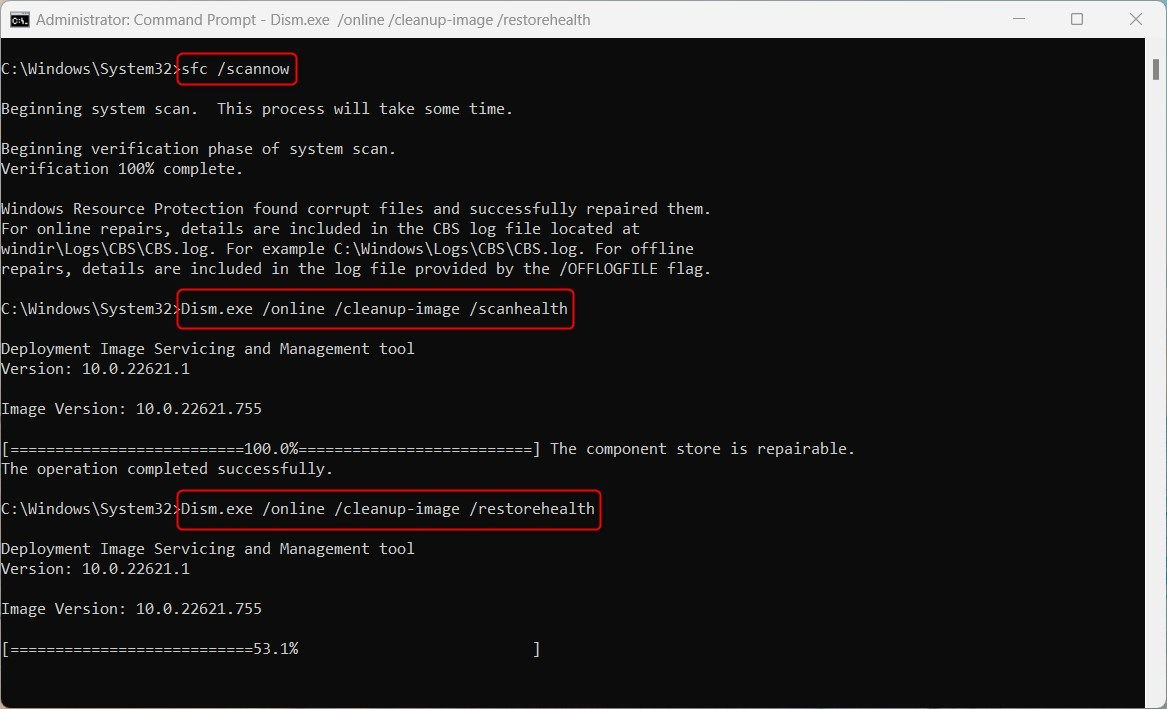
The process will take a few minutes to complete. If you wish, you can do other things while the system scans the data. Once the process is completed, try updating Windows again.
If the problem persists, you should run the Deployment Image Servicing and Management command line tool to restore system files and repair any corrupted system images. Here are the steps to follow:
- Open Command Prompt with admin access as above.
- Type the following command and pressEnter to execute:
DISM /Online /Cleanup-Image /ScanHealthDism.exe /online /cleanup-image /restorehealth
You may have to wait for a while for the process to complete. After you run the DISM command, restart your computer to see if the issue has been resolved.
5. Clear the SoftwareDistribution Folder
Clearing the SoftwareDistribution folder will delete all temporary files created when Windows updates are downloaded and installed. This will free up space on your computer and potentially resolve any errors you are experiencing. Here’s how to do this:
- PressWin + R to open the Run dialog box.
- Type “cmd” in the text box and pressCtrl + Shift + Enter on your keyboard.
- When UAC appears on the screen, clickYes to continue. This will open Command Prompt with admin access
- In the Command Prompt, type these commands then pressEnter each time:
net stop wuauserv net stop bits net stop cryptSvc net stop msiserver - After executing those commands, open Windows File Explorer.
- Browse to the following path:C:\Windows\SoftwareDistribution .
- Delete all content inside the SoftwareDistribution folder. Now you need to restart any services that were previously stopped.
- In order to do this, run the following commands from an elevated Command Prompt.
net start wuauserv net start bits net start cryptSvc net start msiserver
Restart your computer after you have completed the above steps. You should now be able to update Windows.
6. Perform a Clean Boot
Performing a clean boot helps eliminate software conflicts and can be an effective way of resolving Windows Update errors like 0x80190001. So, try this out if none of the above solutions work.
Click on Start and search forSystem Configuration .
Select theBest match from the search results.
In the System Configuration window, go to theGeneral tab.
Check forSelective startup .
Remove the check mark fromLoad startup items .
On the Services tab, selectHide all Microsoft services .
Then clickDisable all .
ClickApply to save your changes.
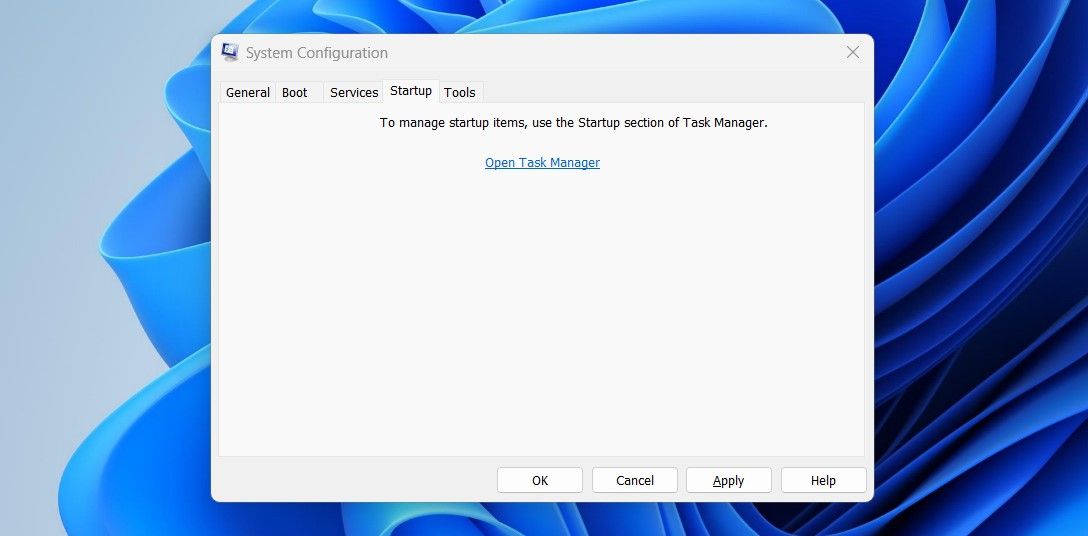
Now switch to the Startup tab and click theOpen Task Manager link.
On theStartup tab, right-click each service and disable it.
To save your changes, clickOK in the System Configuration window,

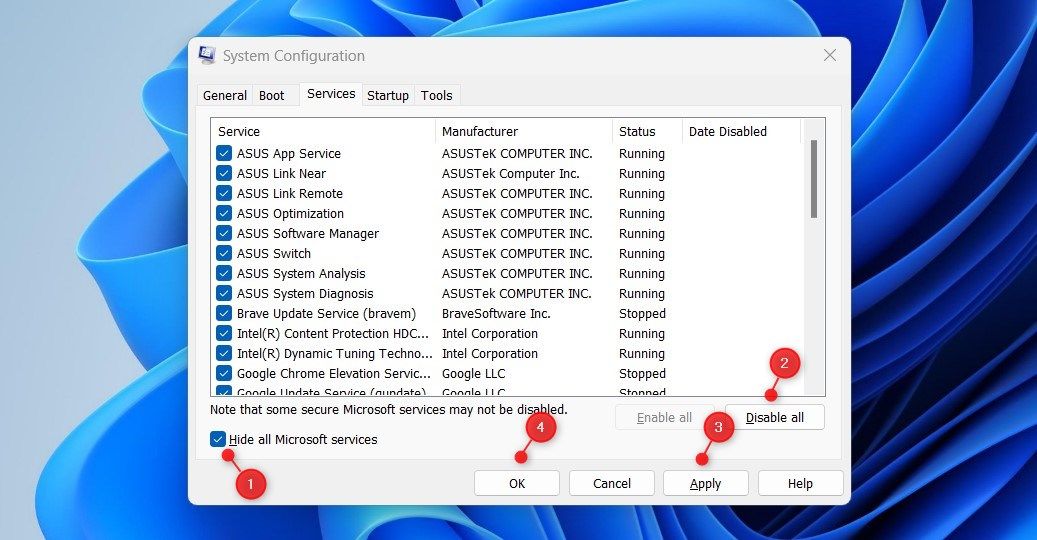
Once you have finished the steps above, restart your computer and try updating Windows again. If you find this method helpful, it means the problem lies with one of the services you disabled. As such, enable each service one by one and identify the one causing the problem.

Fixing Windows Update Error 0x80190001
Windows Update Error 0x80190001 can be a frustrating issue to deal with, causing your system to become insecure and out of date. Fortunately, this article contains several strategies to help you identify and resolve this issue.
- Title: Troubleshooting WinUpdate Error X8019
- Author: David
- Created at : 2024-08-15 23:29:50
- Updated at : 2024-08-16 23:29:50
- Link: https://win11.techidaily.com/troubleshooting-winupdate-error-x8019/
- License: This work is licensed under CC BY-NC-SA 4.0.