Troubleshooting Windows 11: Unresponsive Voice Commands
Troubleshooting Windows 11: Unresponsive Voice Commands
Voice access on your computer is like having a personal assistant. You just have to speak a specific command, and then Windows will obey the command. But when this feature stops working, Windows stop following your instructions.
So, let’s see how to troubleshoot and fix issues with Voice access on Windows 11.
Why Isn’t Voice Access Working for You?
Usually, turning on Voice access takes only a few seconds. You have to switch on a toggle from Settings > Accessibility > Speech. But, in some situations, you may receive no response at all.
Here are some major reasons why Voice access might not be opening on your system:
- The traditional Windows Speech Recognition is causing interference.
- The necessary services for Voice access might not be running as they should.
- If your microphone settings are incorrect, or you don’t have the necessary permissions, Voice access might not function properly.
- The required language pack might be missing from your computer.
These are just a few reasons why Voice access might not be running correctly. Now, let’s move on to the solutions to get your Voice access back up and running.
 PCDJ DEX 3 for Windows & MAC is the total entertainment DJ software solution, offering audio, video, and karaoke mixing ability. Automatic beat-sync, smart looping, 4 decks, DJ MIDI controller support, Karaoke Streaming and much more.
1. Try These Quick Fixes First
Voice access might not be working due to some minor Windows issues. In such a case, you should double-check:
- Your Wi-Fi or Ethernet connection: First, check whether your internet connection provides enough speed. If you need help fixing dropped connections, refer to our guide on how to fix unstable Wi-Fi connections .
- Proper microphone setup: Confirm that your connected microphone is working correctly. Sometimes, loose cables prevent your computer from hearing your commands.
- Correct sound settings: If your microphone’s sensitivity setting is too low, your computer might not pick up your voice commands. Please read our article to fix the low microphone sensitivity issue in this case.
- Availability of required language pack: You must download the required language pack to use Voice access. If you don’t know how to do this, keep reading for the steps.
- Other apps controlling Voice access: Check if any other voice-controlled applications are running in the background. These can interfere with Voice access. If you find any, try closing them and see if Voice access starts working.
If these basic fixes don’t restore Voice access, don’t worry—we have more targeted solutions coming up that should identify and resolve the problem.
2. Ensure Your Microphone is Working Correctly
A non-functioning microphone is a common reason why Voice access fails. Before moving on to other fixes, test your microphone setup .
If your microphone setup is causing you trouble, here are the steps for troubleshooting it:
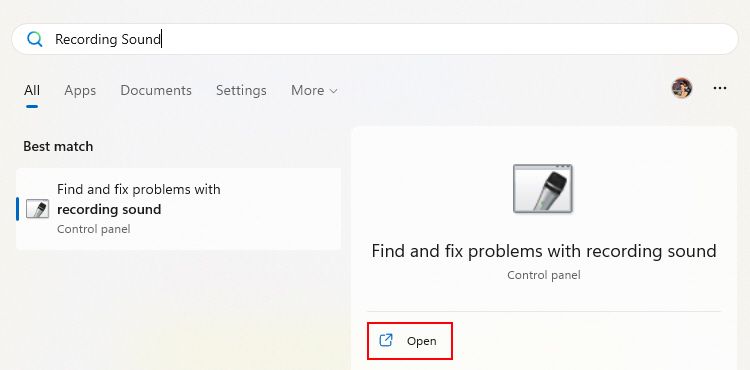
- Press Win + Q and type Recording sound.
- Click Open next to Find and fix problems with recording sound. This will open the Recording Audio troubleshooter.

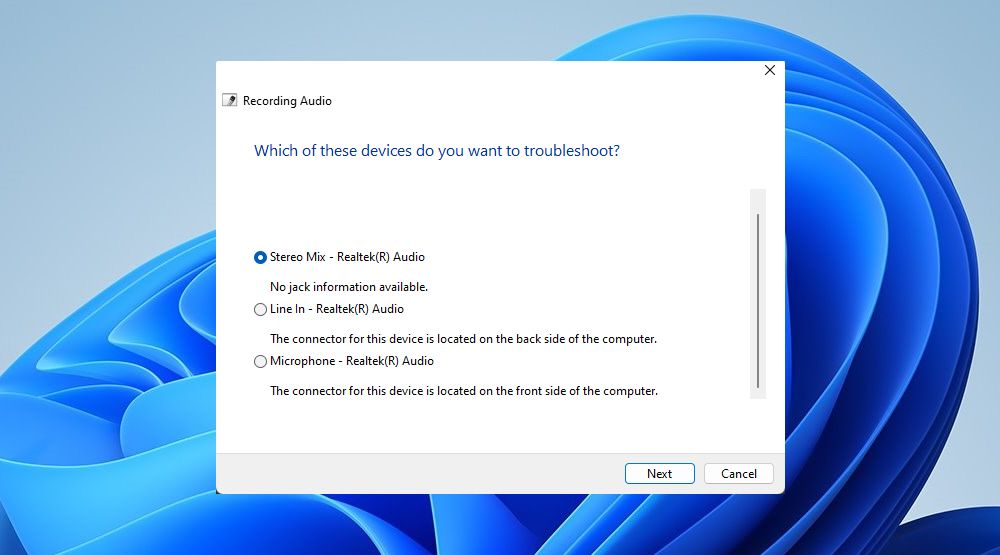
- Choose your connected microphone on the Recording Audio troubleshooter window. If you’re unable to find your microphone in the list, you’ve got your first hint. Please check the microphone cable connection and ensure they are properly connected to the correct port.
- Click on Next to proceed with troubleshooting. Follow the on-screen instructions to check for any issues with your microphone.
Once you’ve followed the instructions, return to Voice access settings and try toggling it on or off. If it’s still unresponsive, don’t worry, our remaining solutions will help fix the issue.
Also, if you have more than one microphone connected, switch between them to see which works.

3. Download Supported Languages for Voice Access
The Voice access feature can understand and respond to various languages. However, it can only do so if the correct language pack is installed on your system. If Voice access isn’t responding to your commands, it might be because the matching language pack isn’t installed.
Here’s how you can install the necessary language pack for Voice access on Windows:
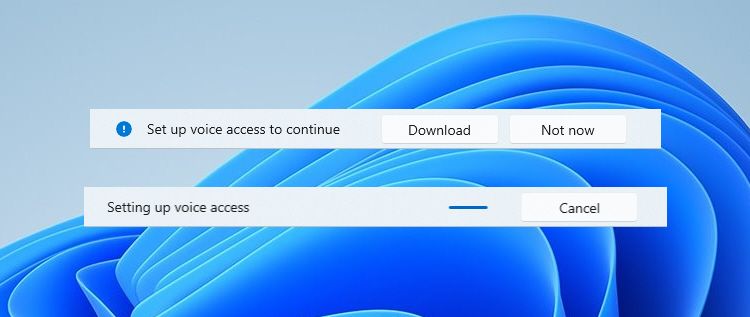
- Ensure that Voice access is set up by clicking Download.
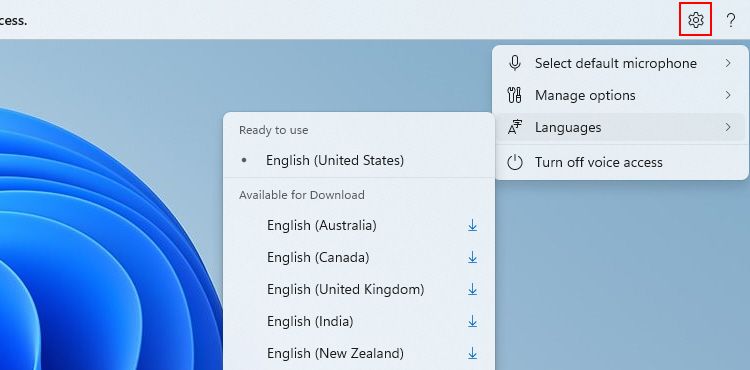
- Once the setup is complete, click the settings or gear icon on the Voice access bar.
- Click Languages and the download icon next to your preferred language.
- Click on Download again to install the chosen language.
- Once the language pack is ready, say “Voice access wake up“ to check whether it’s working.
If you cannot install the required language, you can do it from Time & Language > Language & Region settings.
Some languages have multiple dialects. For example, English has US, UK, Australian, and other dialects. Install the dialect that matches your speech pattern for a smoother Voice access experience.

4. Restart Some Windows Services
Some services directly affect Voice access or any speech or microphone-based feature. Here’s how to restart them:
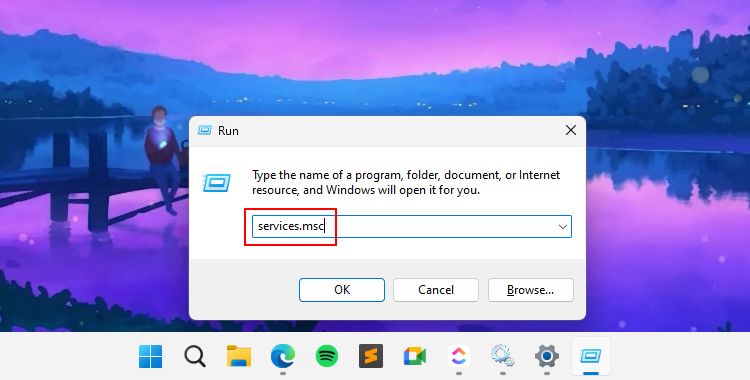
- Open the Windows Run app by pressing the Win + R keys.
- Type “services.msc” in the Run text box and press Enter.
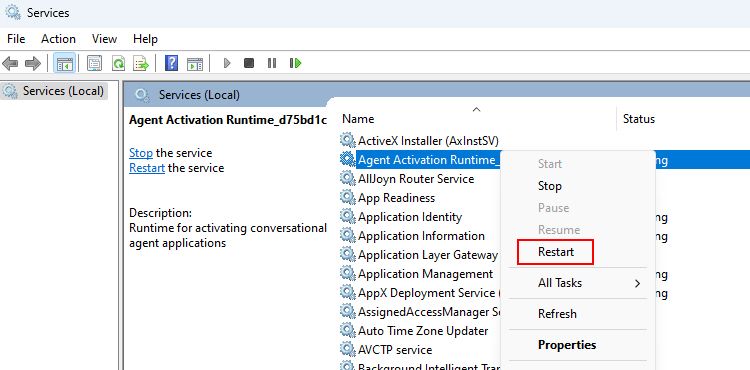
- Look for the Agent Activation Runtime, Human Interface Device Service, and Windows Audio Endpoint Builder services in the list.
- Right-click on each mentioned service. Now a context menu will appear where you’ve to click on Restart. Don’t worry; restarting these services is safe and won’t affect your work.
After performing these steps, check if Voice access has returned to normal.
There are so many presets of commands that you can use to improve your all-voice-control experience. Check the Microsoft Support article to know more about some of the useful commands.
5. Disable Windows Speech Recognition
Voice access is an upgraded version of the traditional Windows Speech Recognition feature. The issue is, sometimes, the older feature may interfere with Voice access.
Here’s how to disable Windows Speech Recognition on Windows:
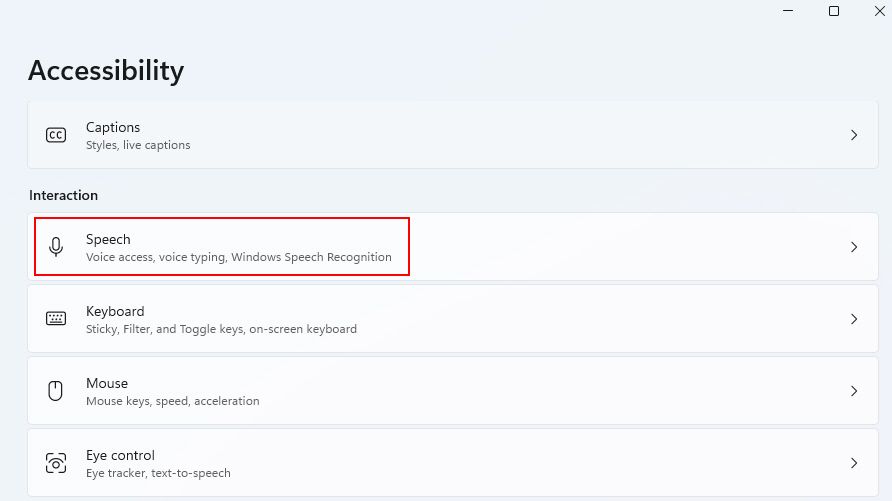
- Open Windows Settings (Win + I) and go to Accessibility > Speech.
- In this section, look for Windows Speech Recognition and switch the toggle to turn it off.
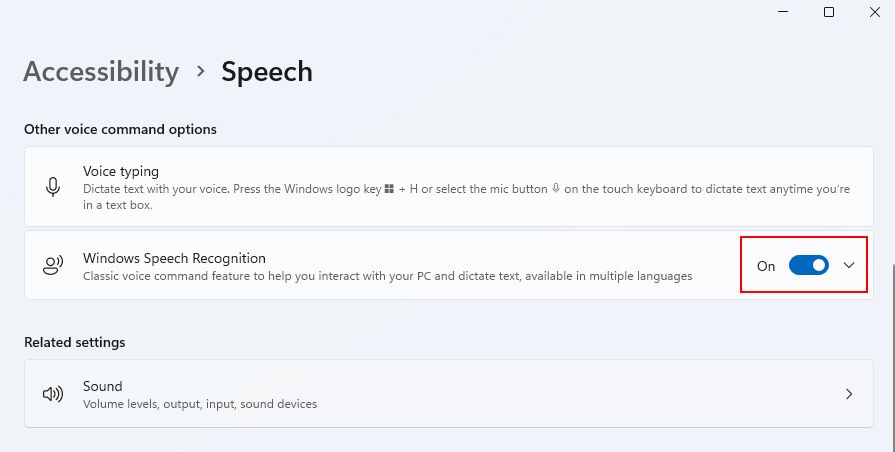
Note that Voice Access is superior to the traditional Windows Speech Recognition feature. So, there’s no reason to use the older feature. Additionally, Microsoft may phase out the older feature soon.
 NeoDownloader - Fast and fully automatic image/video/music downloader.
You’re All Set to Command Windows With Your Voice Again
Now that you can use Voice Access without issues, we recommend going through the Voice Access commands to utilize this feature entirely.
Besides Voice Access, many other accessibility features in Windows 11 can improve your whole system experience. For example, features like Magnifier, Narrator, and live captions make computing easier for everyone. Browse them in Settings > Accessibility to enhance your Windows experience.
So, let’s see how to troubleshoot and fix issues with Voice access on Windows 11.
- Title: Troubleshooting Windows 11: Unresponsive Voice Commands
- Author: David
- Created at : 2024-08-15 23:45:17
- Updated at : 2024-08-16 23:45:17
- Link: https://win11.techidaily.com/troubleshooting-windows-11-unresponsive-voice-commands/
- License: This work is licensed under CC BY-NC-SA 4.0.