Transitioning Mobile Titles: Android in Windows 11 and Google Play

Transitioning Mobile Titles: Android in Windows 11 and Google Play
While unofficial Android app emulators can give you a decent experience, they also require a lot of system resources. Eventually, Google took notice of this and now offers its own solution to play Android games on a Windows 11 PC.
The Google Play Games beta is available in multiple regions now (100 at the time of writing) and lets you install and play games on your Windows 11 PC. If you’d like to learn more, here’s how to install the Google Play Games app, find your favorite games, install them, and tweak their controls for the best experience.
Disclaimer: This post includes affiliate links
If you click on a link and make a purchase, I may receive a commission at no extra cost to you.
What Is Google Play Games?
The name “Google Play Games” actually describes several apps. For the sake of this article, we will be covering the app you can download on Windows PCs. Don’t confuse it with the Android app that’s also called “Google Play Games,” which handles downloading apps on your mobile devices.
You can use the Windows app to download and play games on your PC. It uses hardware virtualization to emulate Android games on Windows.
Before you continue, you need a medium-grade Windows PC to run the Google Play Games app. Check out the Google Play Games system requirements page and make sure your hardware matches or exceeds them.
How to Download and Install Google Play Games on Windows 11
Perform the following steps to download and install Google Play Games on your Windows PC:
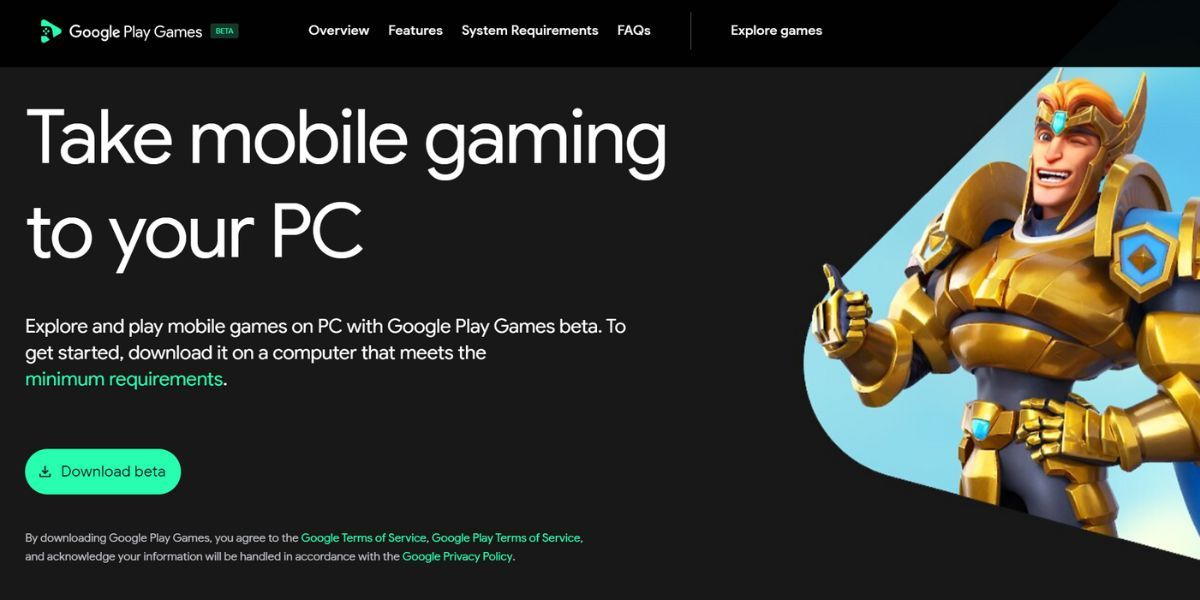
- Visit the Google Play Games official website .
- Click on the Download beta button.

- Wait for the file to download. Visit your downloads folder and run the setup file.
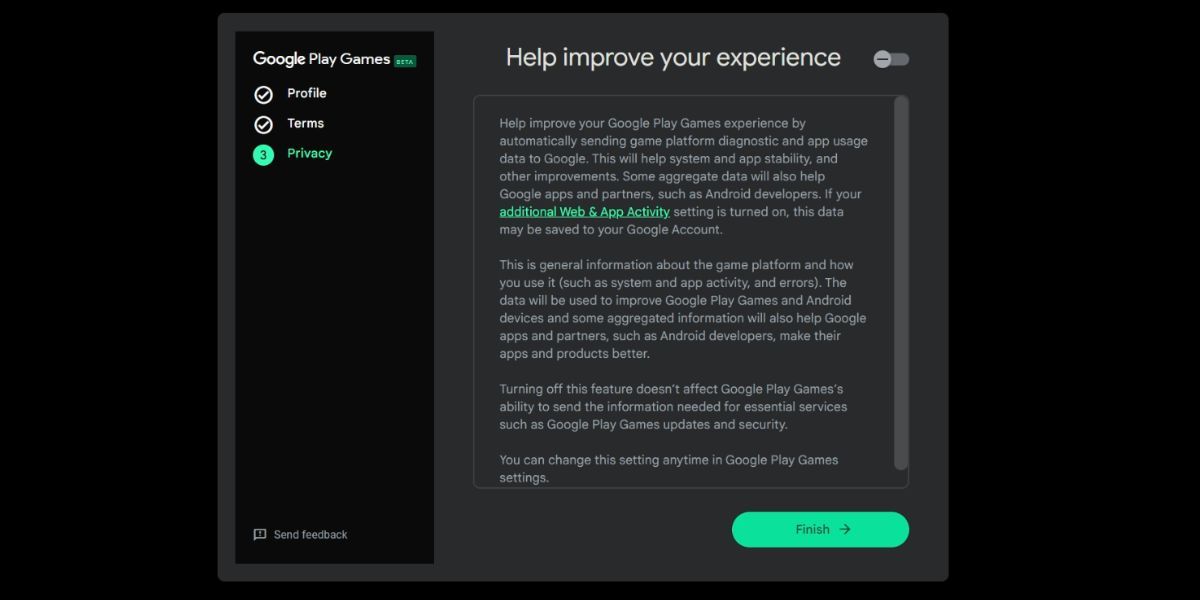
- Click on the Accept button to agree to the Terms and Conditions.
- Turn off the Help Improve Your Experience toggle and click on the Finish button.

Now you should be ready to play Android games on your PC.
How to Install and Play Games Using Google Play Games
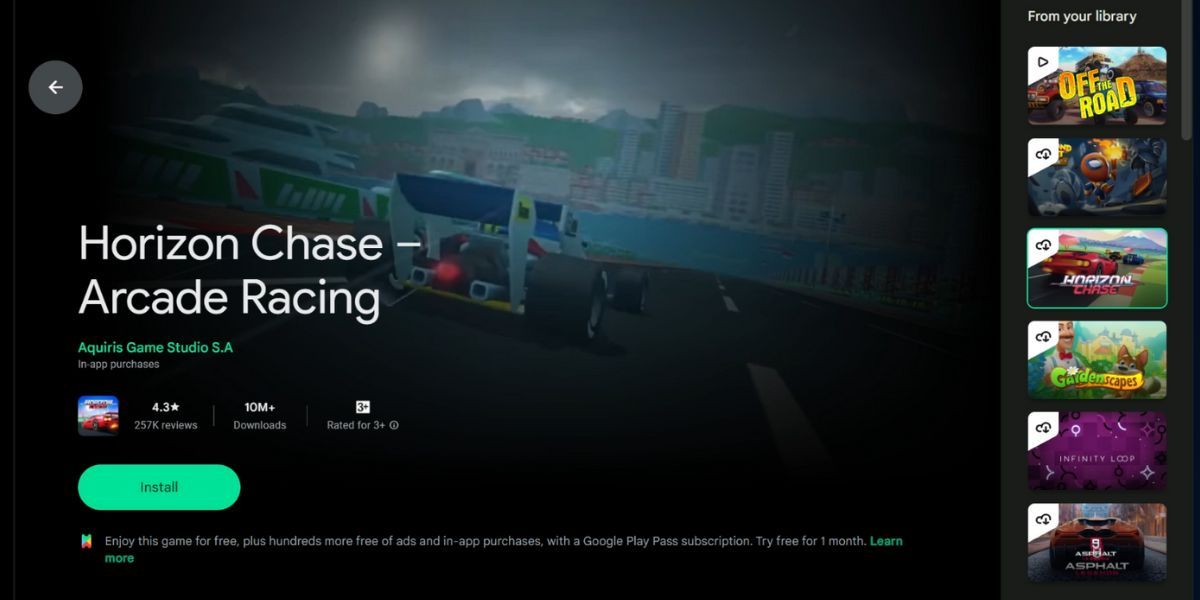
Now you can browse the game library and install any game supported in the beta program. The current game library consists of over a hundred popular titles, and more are being added.
When you first install a game, you will notice that it will also install the Windows Hypervisor Platform on your Windows 11 PC. This is normal and is required for you to play games using Google Play Games. You only need to install this once.
Repeat the following steps to install a game using Google Play Games:
- Launch the Google Play Games app.
- The app will show a recommendation list on the right side, displaying all the games you played or installed on your phone earlier. Scroll down and click on the View button below the “Check out all our games” banner.
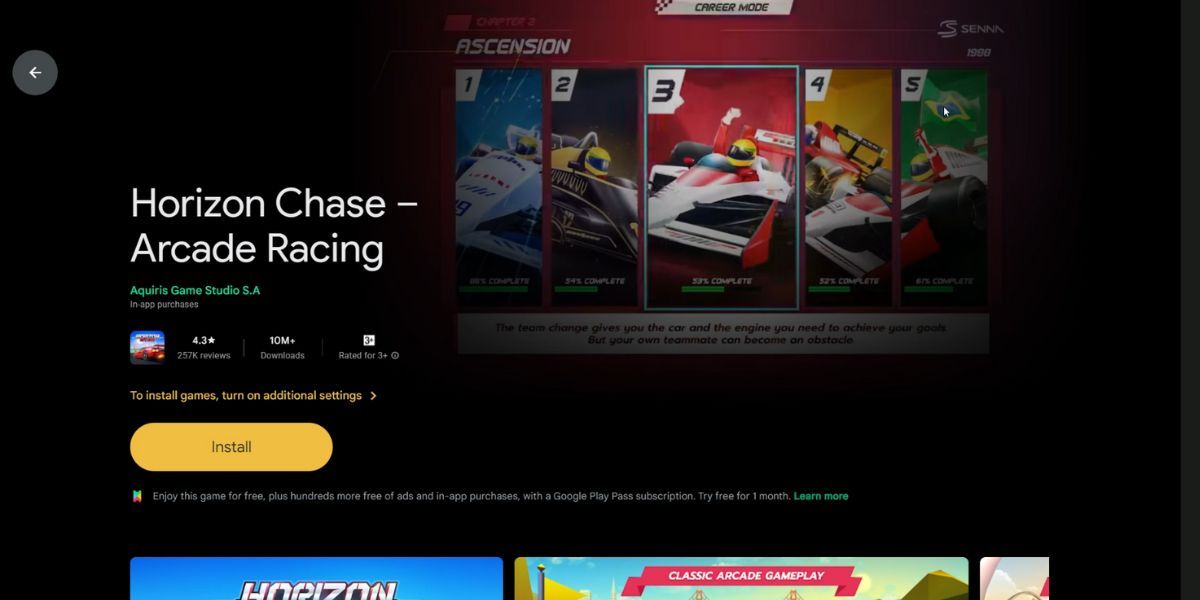
- Click on a game tile to open its page. Then click on the Install button.

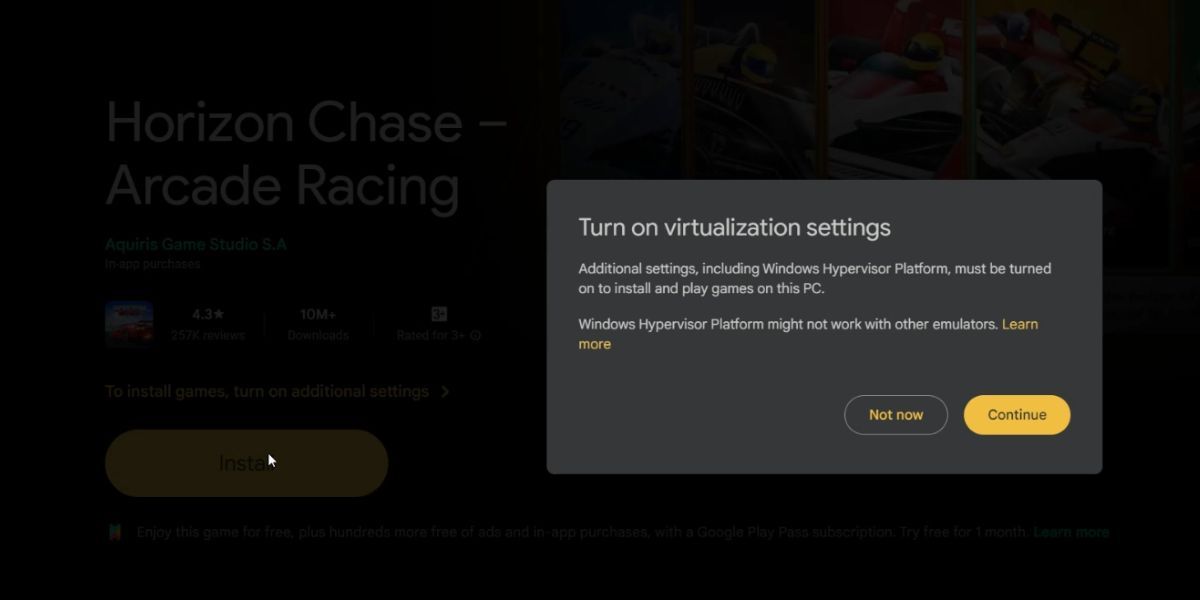
- The app will prompt you to “Turn on Virtualization Settings”. Click on the Continue button.

- Click on the Yes button to install the Windows Hypervisor Platform.
- Lastly, click on the OK button to update your PC and apply the changes.
Wait for your PC to restart. Once it’s back:
- Launch the Google Play Games app again.
- Revisit the game’s page and click on the Install button.

- Click on the Play button to launch the Game.
- The game will launch in windowed mode. Press Alt + Enter to enter full-screen mode.

You should now have everything you need to play Android games set up on your Windows PC. However, we’re not quite done yet.
How to Customize Your Game Controls on Google Play Games
The default game controls can seem weird, given you’re playing an Android game on a computer. Fortunately, you can change the controls through Google Play Games.
Some games let you set the controls in-game, but if you don’t see any such option, repeat the following steps:
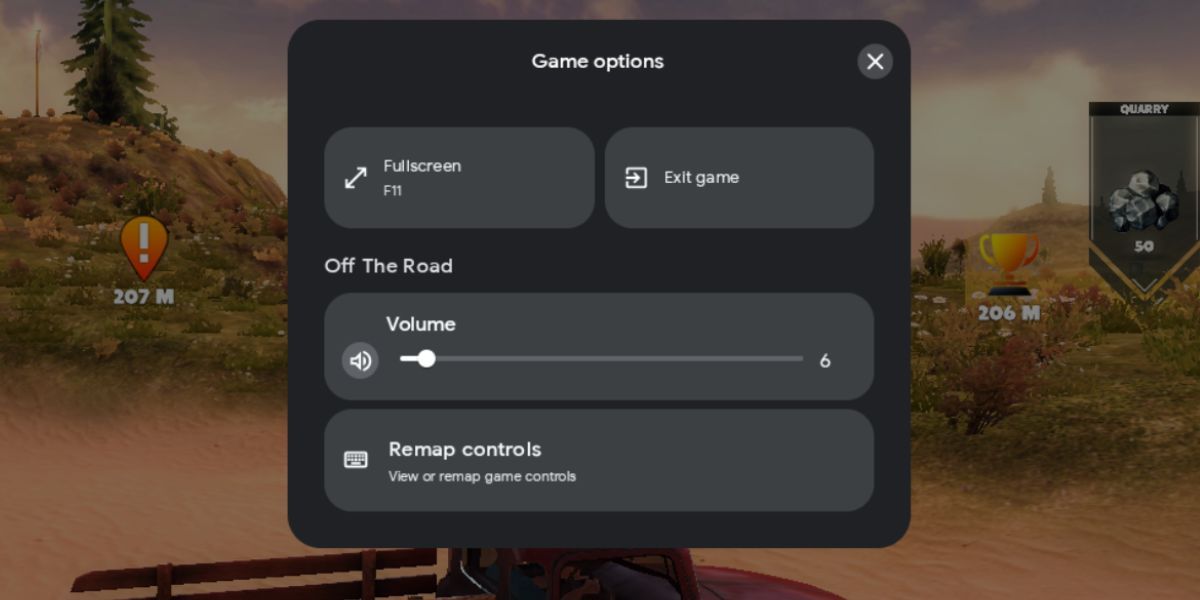
- Press Shift + Tab to open the Game Options menu.
- Click on the Remap Controls option. Now, you will see the game-related key bindings.

- Now, click on the key binding you want to change, then press the key you want to assign to it. It will save the changes automatically.
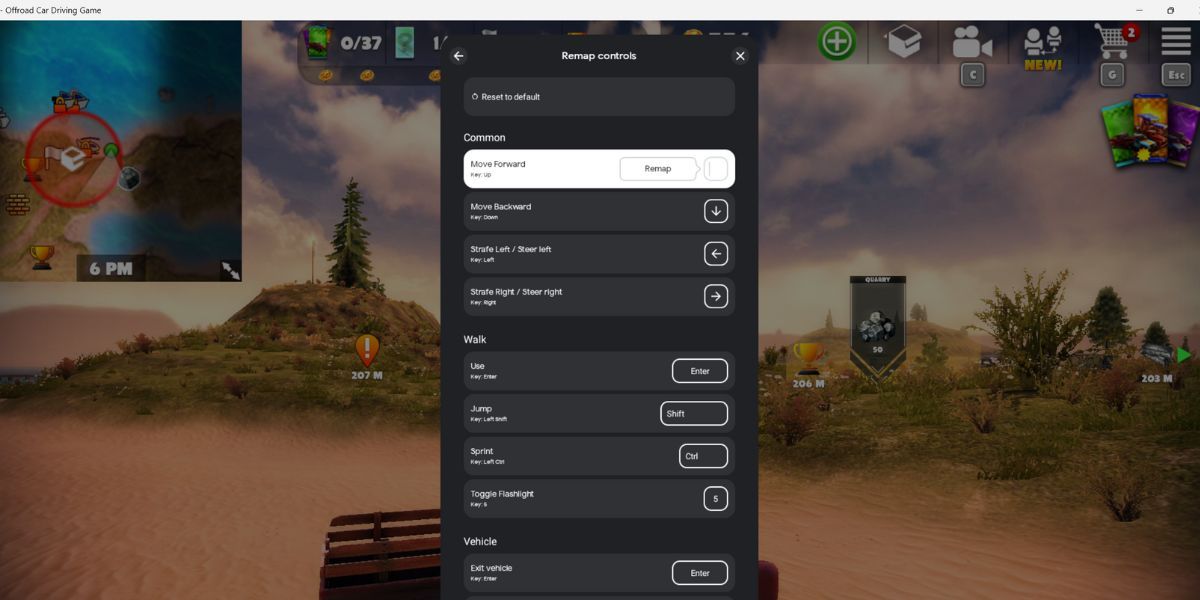
4. Lastly, click on the Xbutton to close the Remap Controls window and return to the game.
Our Experience With the Google Play Games App for Windows
When we tried out the app, the games run fine and look great in the Google Play Games app. You will notice a few jagged edges in some games due to a lack of anti-aliasing , but that is manageable. Remember that these are mobile games, after all.
One minor inconvenience with the app is that some games do not pause when you press the Shift + Tab keys to open the game options. The games keep running in the background, and you’ll have to use the in-game method to pause the game if one exists.
Fortunately, the gameplay experience is smooth, and since the app uses your Google account to log you in, the app will sync your progress automatically across all of your devices. You can earn game achievements like you do when your play games on your Android device.
Google Play Games isn’t as resource intensive as other ways to run Android apps on Windows , such as Bluestacks. The app consumes 800-900 MB while playing games, which is moderate. But you will need a PC with 8 GB RAM to run Google Play Games and other apps smoothly.
Play Your Favorite Android Games on Windows
Google Play Games makes it possible to play popular games like Asphalt 9, Jetpack Joyride, and more on your Windows 11 PC. The performance is decent, and your achievements and game progress sync perfectly. All we can ask is that the game library will feature more popular titles in the future.
The Google Play Games beta is available in multiple regions now (100 at the time of writing) and lets you install and play games on your Windows 11 PC. If you’d like to learn more, here’s how to install the Google Play Games app, find your favorite games, install them, and tweak their controls for the best experience.
Also read:
- [Updated] Enhance Your Content Filmmaking for YouTube Trailers with Filmora for 2024
- [Updated] ImmaculatePixels Prograde Background Elimination
- [Updated] In 2024, Secret Strategies Streamlining Your Stylizing Skills
- 2024 Approved The Benefits of TubeBuddy | Manage Your YouTube Channel More Easily
- A Perfect Guide To Remove or Disable Google Smart Lock On Lava Blaze 2 Pro
- Discovering Storage Patterns: How to Apply Windows' DiskUsage Proficiently
- Fixing Windows-Related Roblox Error 403
- Fixing Xbox Game Pass Failure Code on Windows 11 Computers
- Guida Passo-Passo per Creare Un Backup Di Windows Server 2022 Su Disco Fisso Nouveau
- In 2024, Best Ways to Bypass iCloud Activation Lock from Apple iPhone 14 Pro Max/iPad/iPod
- Methods for Unblocking Search Results in Win 10/11 OS
- Perfect Guide: Preserving Original Fidelity - How to Extract DVD Content Without Any Loss
- Resurrecting an Inactive Printer: A Windows Guide
- The Ultimate List of 3D Paint Keys
- Things to Consider Before Buying a DVR
- Transforming Notetaking - The Obsidian Method
- Troubleshooting Windows Update: A Reset Strategy
- Ultimate Guide: Secure File Deletion on Windows 11
- Unlock Your PC Effortlessly Without a Screen Saver
- Title: Transitioning Mobile Titles: Android in Windows 11 and Google Play
- Author: David
- Created at : 2024-10-09 18:44:57
- Updated at : 2024-10-15 22:47:18
- Link: https://win11.techidaily.com/transitioning-mobile-titles-android-in-windows-11-and-google-play/
- License: This work is licensed under CC BY-NC-SA 4.0.
