
Transforming the Way You Use Windows 11'S Search Feature
Transforming the Way You Use Windows 11’S Search Feature
In today’s fast-paced world, the convenience of quickly searching and accessing files and folders is truly a blessing. With Windows 11, you get an impressive search feature that can swiftly locate what you need, whether it’s your local files, OneDrive documents, or even Bing results.
To harness the full potential of this powerful search function and ensure optimal performance on Windows 11, try out the search tuning techniques mentioned below. These simple yet effective hacks will enhance your search experience and boost your productivity like never before.
What Is the Windows 11 Search Feature?
The Search service on Windows 11 is the built-in tool that lets users quickly find relevant files, applications, and settings on their system. It uses a sophisticated Windows Search indexing engine that rapidly cross-references tens of thousands, and potentially millions, of files to provide results for your search queries promptly.
Thanks to Search, you no longer need to browse multiple directories to find what you’re looking for. By entering a few keywords, Windows 11 will quickly return a list of results that match your search query in just a few seconds.
In Windows 11, you can access Search primarily through the Start menu or the search bar in File Explorer. Although searching on Windows 11 is usually fast, it might occasionally slow down or become buggy. If you frequently experience these issues, you’ll want to look at the steps to make your Windows Search more efficient .

1. Allow Cloud & History Search Results
Windows Search can fetch results from other Microsoft services associated with your account, such as Outlook, OneDrive, and Bing, to better serve your search queries. These integrations allow for searching that is faster and more relevant to you.
Additionally, Windows 11 can store search results on your PC to enhance the search experience. It’s understandable if you’re concerned about the privacy issues that can arise, but Microsoft ensures that data related to your history search is only stored on your device locally.
If you’ve searched for Microsoft Word recently, it will prioritize showing Microsoft Word at the top of your search results over Microsoft Excel.
To enable Cloud content and history search on Windows 11:
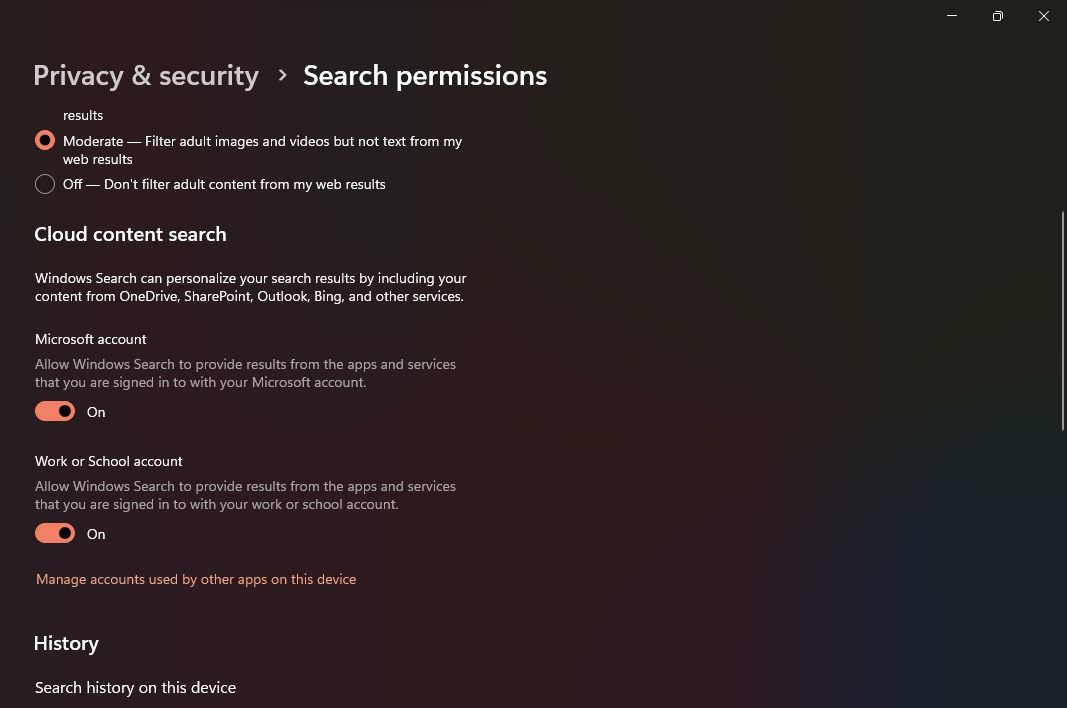
- Launch the Settings app and navigate to Privacy & security from the sidebar.
- Below the Windows permissions group, select the tab labeled Search permissions.
- Enable both toggle buttons under the Cloud content search group to allow Windows Search to personalize your search results.
- Make sure you also enable the Search history on this device toggle.
2. Use Enhance Indexing
Windows Search, by default, works on a Classic indexing service that only filters a few specific folders such as Documents, Music, and Pictures (you can add additional directories as well). While this may work for most cases, you’ll need a more comprehensive search if your files are scattered around different drives and folders.
When you enable the Enhanced index, Windows Search builds the search index from your entire file directory rather than specific folders. While this will provide you with comprehensive search results, it will likely come at the cost of battery life and CPU resource consumption.
Here’s how you can use an Enhanced index on Windows 11
- From the Settings app, navigate to Privacy & security > Searching Windows.
- Select the Find my files tab and then click on Enhanced.

3. Update Windows 11
If your Windows PC is acting up or running slowly, one of the initial steps to take is to ensure that your Windows operating system is up-to-date. If you notice that the Search feature is unusually slow, updating Windows can help resolve known issues automatically.
To update your Windows 11 PC:
- From the Start menu, search for the Settings app, and then launch the Best match.
- Select Windows Update from the side menu.
- On the top right, choose the Check for updates button. If Windows has already fetched the latest updates, you should select the Download & Install button instead.
- Once the updates get installed, you’ll have to restart your PC so that the changes can take effect.
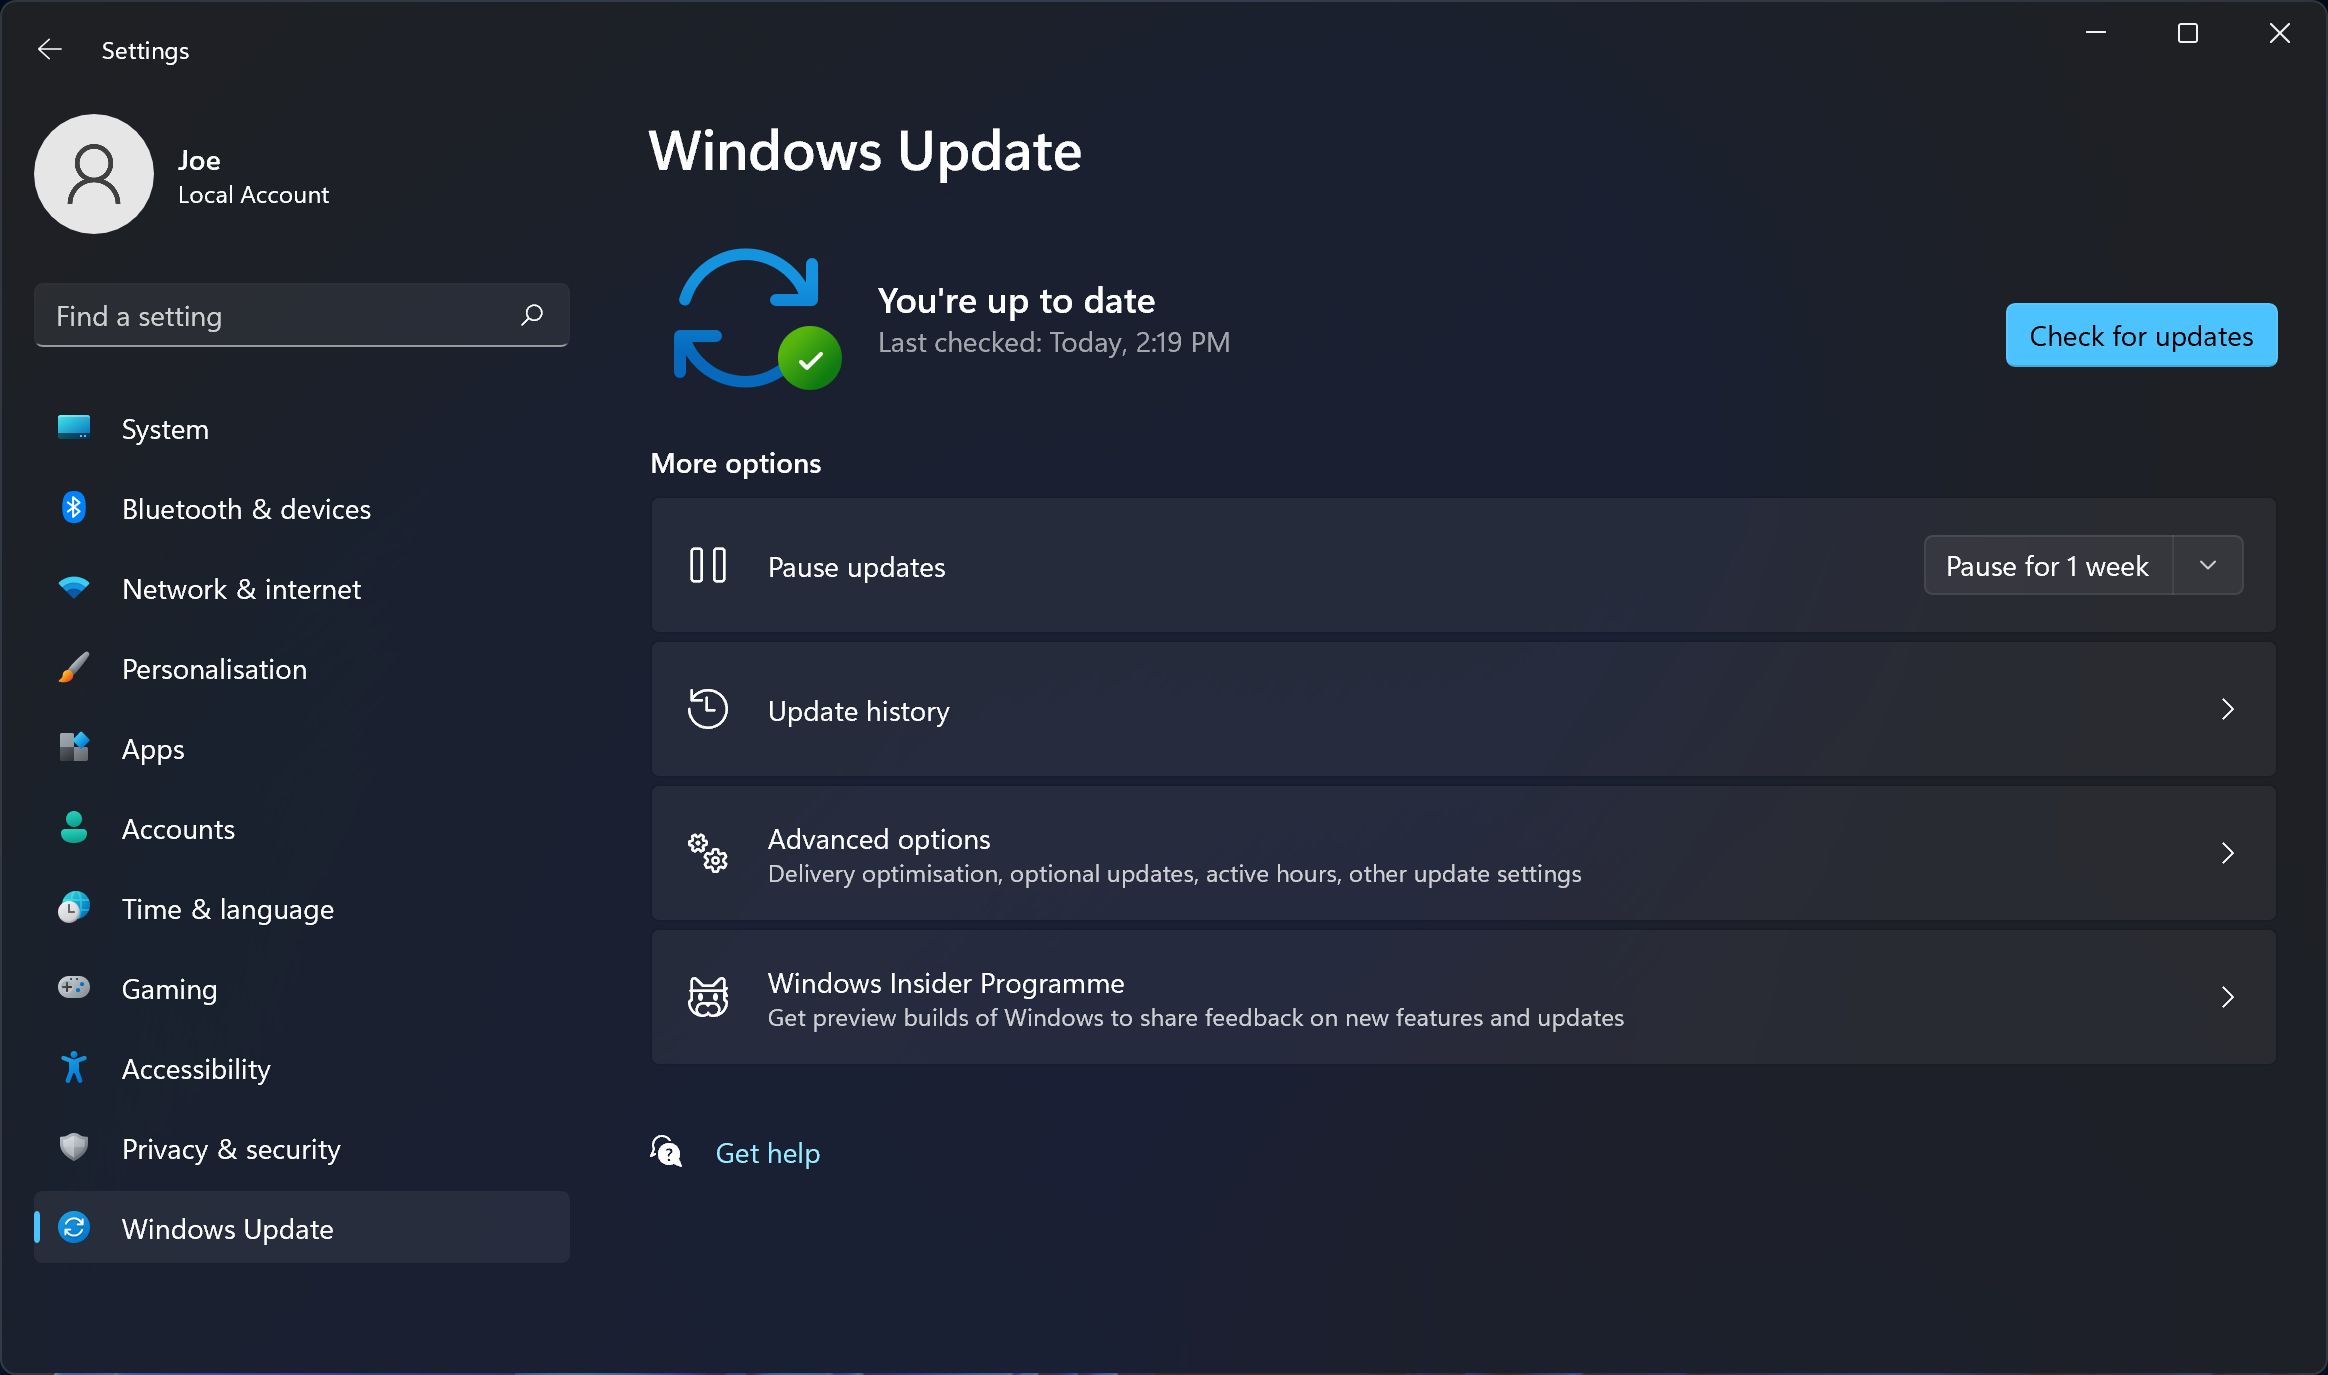
Updating Windows usually leads to improved performance, and if Windows Search was buggy on your system, you should see a significant difference after the update.
4. Run the Windows Indexing & Search Troubleshooter
Microsoft has introduced several essential troubleshooters with both Windows 10 and 11. These convenient utility wizards are highly valuable for diagnosing and automatically resolving system issues, providing quick and effective fixes.
Among the tools available, the Windows Indexing & Search troubleshooter stands out for its ability to detect potential indexing and search service issues. It offers a swift and straightforward solution to resolve problems with Windows Search by simply running the troubleshooter.
To launch the Windows Indexing & Searchtroubleshooter and fix common issues with the search index:
- Launch the Settings app through the Start menu.
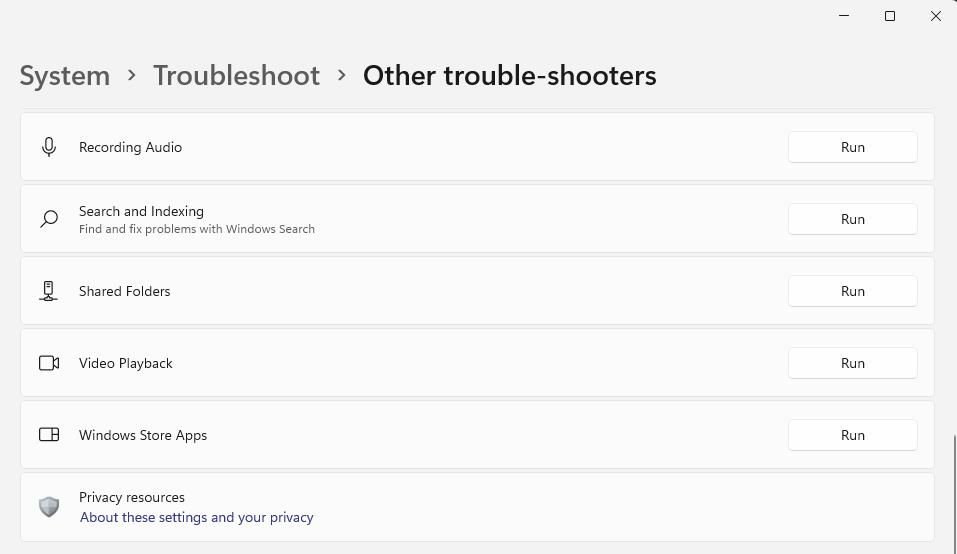
- Select System from the sidebar and then select the Troubleshoot tab.
- Under the Options group, choose Other troubleshooters, and find the Search and Indexing tab from the list.
- Click on Run to launch the Windows Indexing & Search troubleshooter.
- If the troubleshooter finds any issues related to search or indexing, it will ask for your confirmation to fix those issues.
- After restarting your laptop, you should notice a significant improvement in Windows Search speed, making it easier for the search function to quickly and efficiently resolve your queries.
5. Rebuild the Windows 11 Index
The above steps should significantly improve the search performance, but if you’re still unsatisfied, you could try rebuilding the entire search index. Since the search index is similar to a table of contents page (but massive with millions of entries), rebuilding it can help optimize the time it takes to find the specific files.
Once you decide to rebuild the search index, allowing the Indexer to run for up to 24 hours is recommended. This ensures that Windows Search functions appropriately and effectively indexes all the necessary files on your system.
If you want to rebuild the Windows 11 Search Index:
- Open the Settings app from the Start menu.
- Navigate to Privacy & security > Searching Windows.
- At the bottom, you’ll find Advanced indexing options listed under Related settings.
CalendarBudget - Monthly subscription membership to CalendarBudget via web browser or mobile app. Support included.
- Click on Advance when prompted and then choose OK.
- From the Advanced options window, click on Rebuild and finally select OK.

 CalendarBudget - Monthly subscription membership to CalendarBudget via web browser or mobile app. Support included.
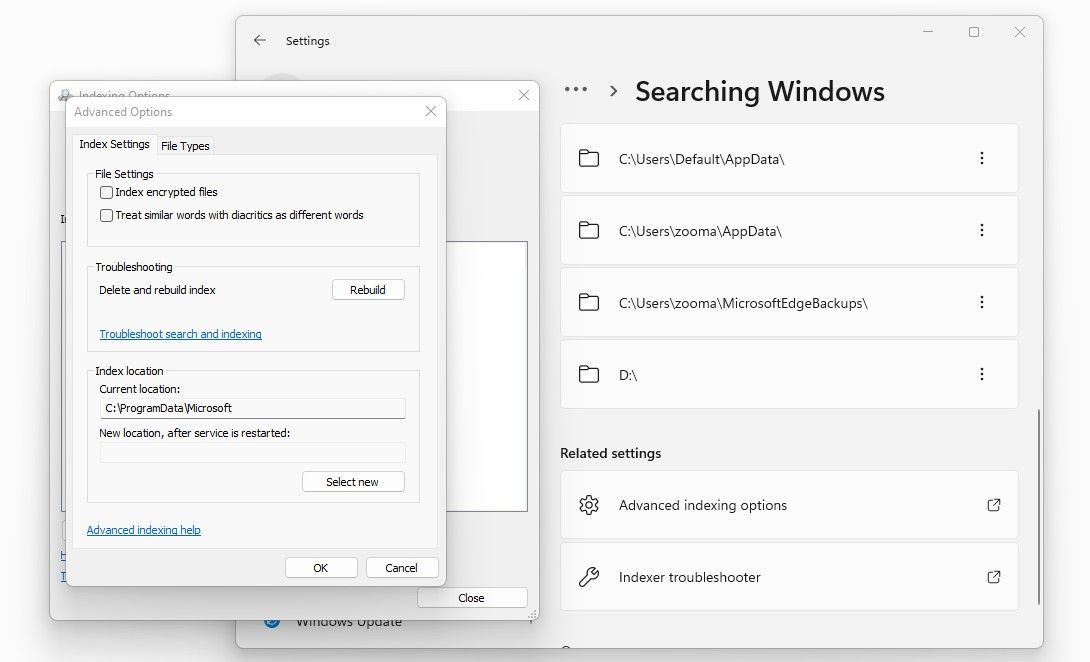
Make Windows Search Faster
Windows 11 is already fast, but by incorporating the best search practices, you can take your search experience to a whole new level of efficiency. You’ll get super productive once you learn the ins and outs of Windows Search.
To harness the full potential of this powerful search function and ensure optimal performance on Windows 11, try out the search tuning techniques mentioned below. These simple yet effective hacks will enhance your search experience and boost your productivity like never before.
- Title: Transforming the Way You Use Windows 11'S Search Feature
- Author: David
- Created at : 2024-08-15 23:31:49
- Updated at : 2024-08-16 23:31:49
- Link: https://win11.techidaily.com/transforming-the-way-you-use-windows-11s-search-feature/
- License: This work is licensed under CC BY-NC-SA 4.0.