
Top 4 Strategies for Windows PCT Success
Top 4 Strategies for Windows PCT Success
Just because developers built an app for an older version of Windows, it doesn’t mean you can’t run it on a newer version of the OS. Through compatibility mode, you can easily run old programs without any issues a majority of the time.
If you run into compatibility issues, however, don’t fret. Windows has a built-in tool that allows you to diagnose and fix them with ease. It’s called the Program Compatibility Troubleshooter, and we’re going to show you all the different ways that you can fire it up.
1. Run the Program Compatibility Troubleshooter Using the Context Menu
The easiest way to run the Program Compatibility Troubleshooter on Windows 10 is to simply right-click an app and selectTroubleshoot compatibility . If you’re on Windows 11, you’ll have to clickShow more options first after you right-click the app to bring back the classic context menu, and then selectTroubleshoot compatibility .
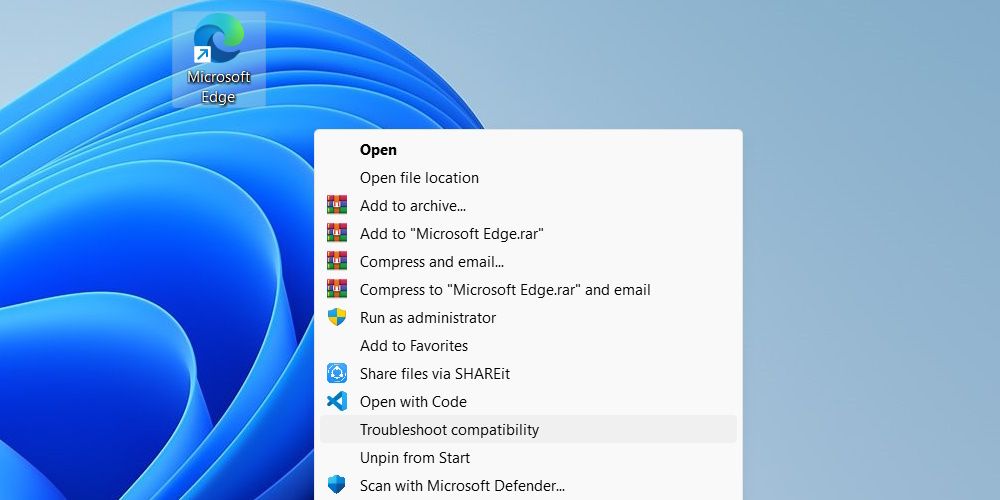
This will instantly launch the tool, and it will help you troubleshoot any compatibility issues you’re experiencing with the selected app.
2. Run the Program Compatibility Troubleshooter on the Troubleshoot Page
Both Windows 10 and 11 have a Troubleshooting page in the Settings app where you can launch the Program Compatibility Troubleshooter from. If you can’t get to the Troubleshoot page because the Settings app isn’t working, please read our guide on how to fix Windows Settings when it won’t open .
On Windows 11
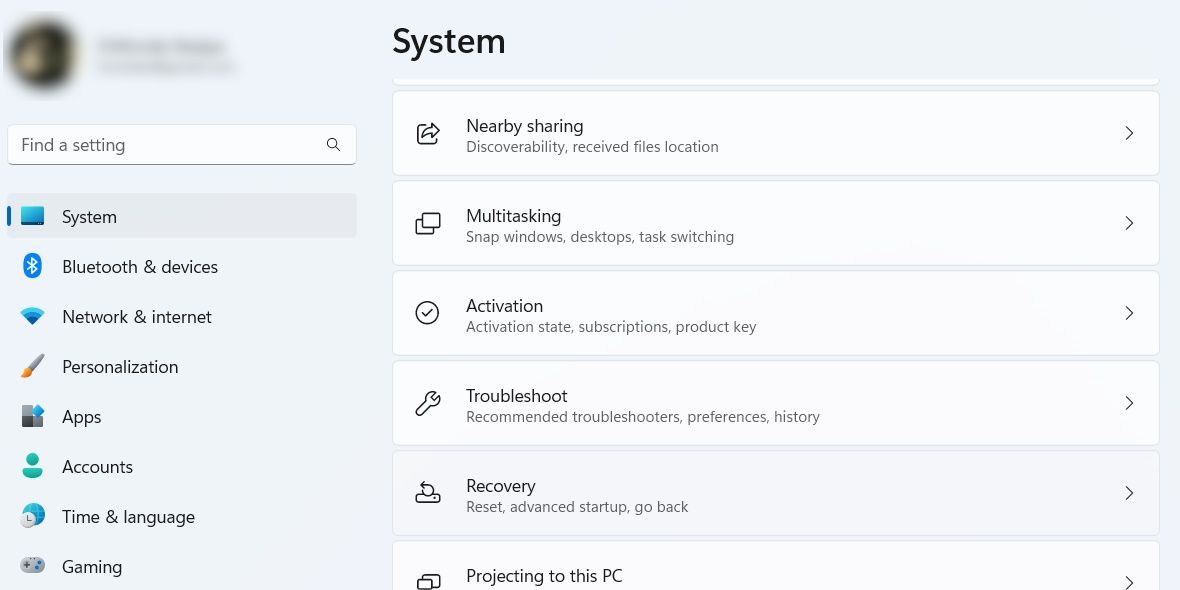
To run the Program Compatibility Troubleshooter from the settings on Windows 11, start by pressingWin + I to open the Settings app. Next, clickSystem on the left side menu, and then click onTroubleshoot on the right.

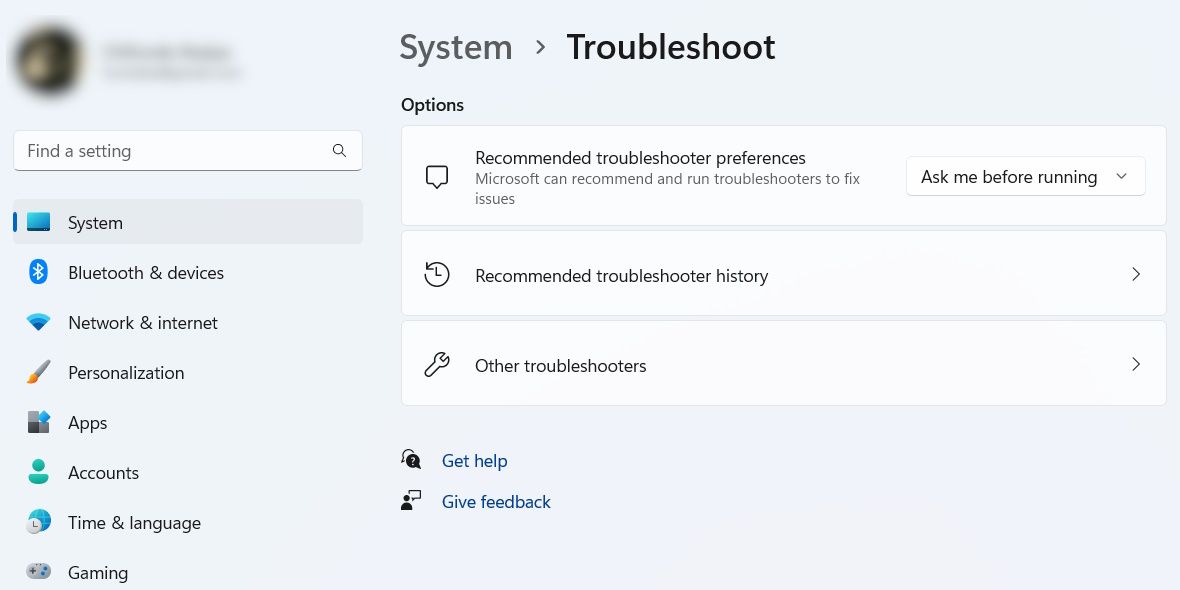
On the Troubleshoot page, scroll down and click onOther troubleshooters .

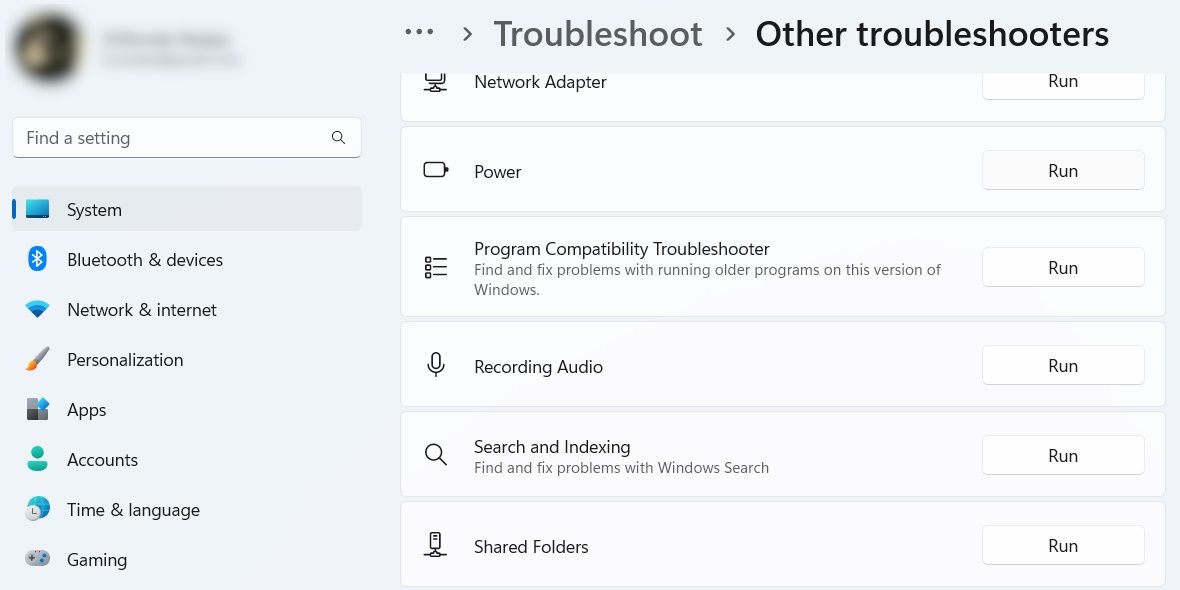
Scroll down to theOther section, findProgram Compatibility Troubleshooter from the list of troubleshooters, and then click theRun button next to it.
 DEX 3 RE is Easy-To-Use DJ Mixing Software for MAC and Windows Designed for Today’s Versatile DJ.
Mix from your own library of music, iTunes or use the Pulselocker subsciprtion service for in-app access to over 44 million songs. Use with over 85 supported DJ controllers or mix with a keyboard and mouse.
DEX 3 RE is everything you need without the clutter - the perfect 2-deck mixing software solution for mobile DJs or hard-core hobbiests.
PCDJ DEX 3 RE (DJ Software for Win & MAC - Product Activation For 3 Machines)
This will get the Program Compatibility Troubleshooter started.
On Windows 10
If you’re on Windows 10, pressWin + I to open the Settings app, and then click onUpdate & Security . Next, click onTroubleshoot on the left side menu, and then click onAdditional troubleshooters on the right.
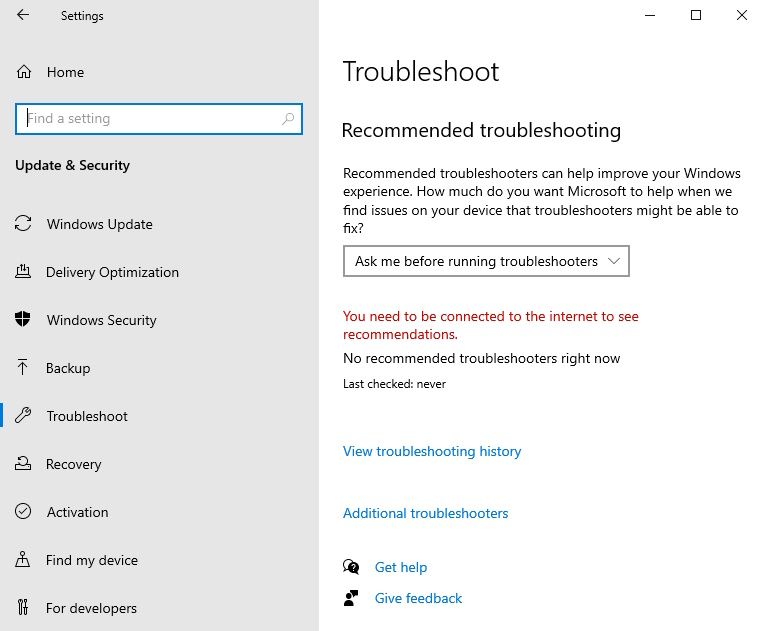
Find and click onProgram Compatibility Troubleshooter to expand it. Then, click on theRun this troubleshooter button.
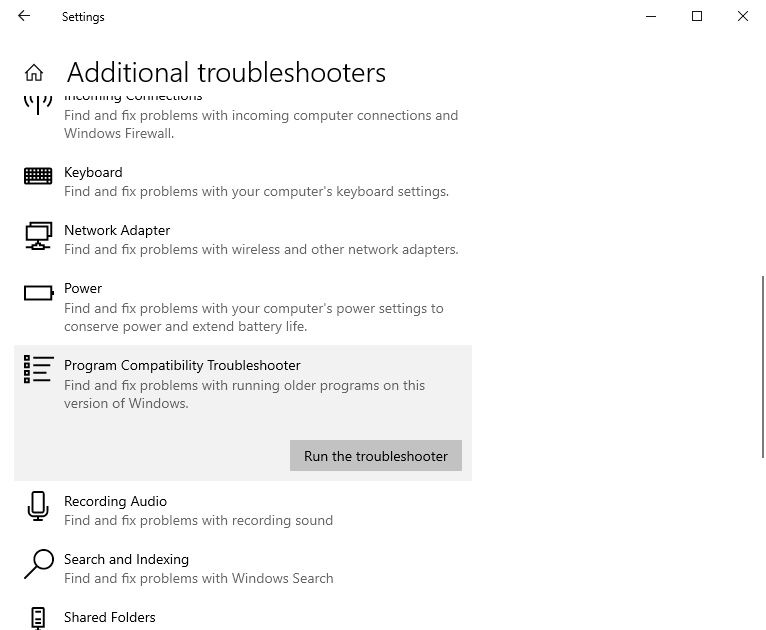

Now, you can use the tool to fix compatibility issues on Windows 10.
.png) Kanto Player Professional
Kanto Player Professional3. Run the Program Compatibility Troubleshooter Using the Control Panel
Another way to launch the Program Compatibility Troubleshooter is through the Control Panel. To do that, start by pressingWin + S to bring up Windows Search, entercontrol panel in the search box, and then click onControl Panel in the search results.
You can also read our guide on ways to open the Control Panel on Windows for more methods to launch the program.
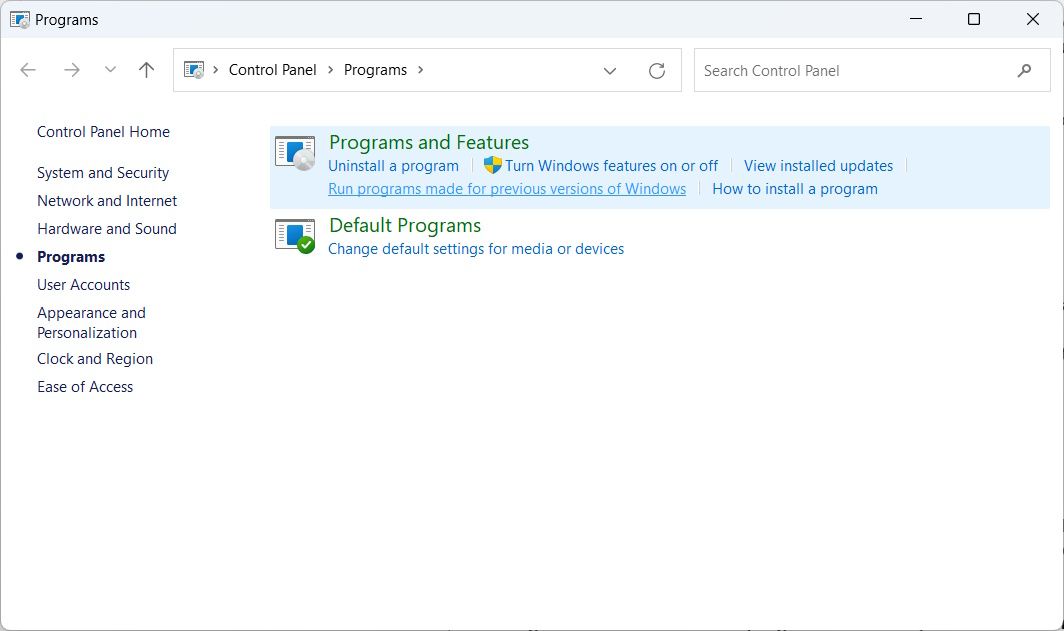
In the Control Panel, selectPrograms , and then click on theRun programs made for previous versions of Windows link.
 WinUtilities Pro
This will launch the Program Compatibility Troubleshooter.
4. Run Program Compatibility Troubleshooter Using a Desktop Shortcut
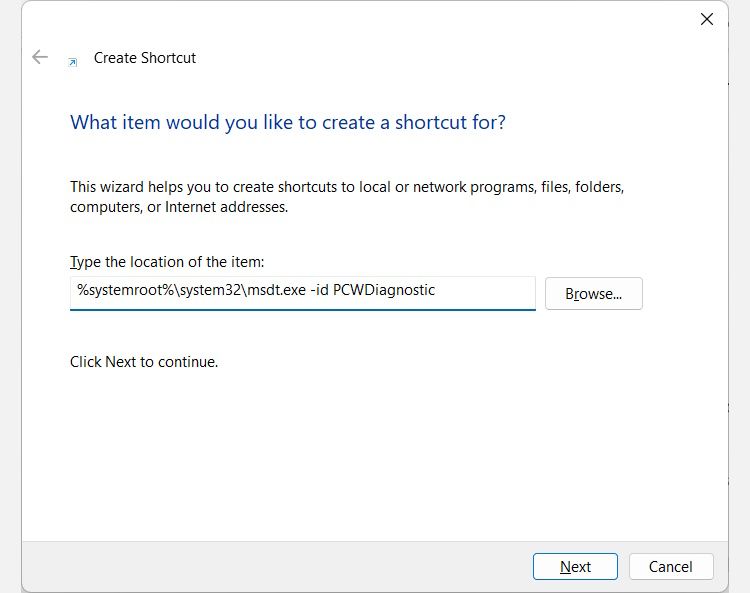
If you use the Program Compatibility Troubleshooter a lot, adding it to the Desktop is a good way to keep it within reach. To do that, right-click an empty space on the Desktop, and then clickNew > Shortcut to launch the Create Shortcut wizard.
Copy the below text:
%systemroot%\system32\msdt.exe -id PCWDiagnostic
Next, paste the text you just copied into the text box of the Create Shortcut wizard, and then clickNext .
Name the shortcut Program Compatibility Troubleshooter, and then clickFinish to add the shortcut to your Desktop.
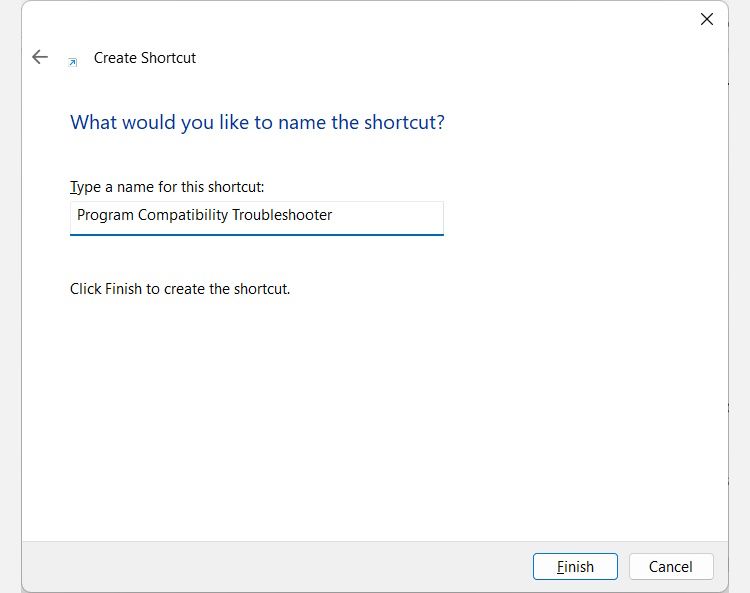
Now when you double-click the shortcut you just created, you will launch the Program Compatibility Troubleshooter.
Now You Can Run the Program Compatibility Troubleshooter in Different Ways
The Program Compatibility Troubleshooter is sometimes the last resort to get older apps running on your current version of Windows. There are various ways to fire up this handy tool, and we have just shown you all the ways in case one of them doesn’t work for you.
- Title: Top 4 Strategies for Windows PCT Success
- Author: David
- Created at : 2024-08-15 23:59:04
- Updated at : 2024-08-16 23:59:04
- Link: https://win11.techidaily.com/top-4-strategies-for-windows-pct-success/
- License: This work is licensed under CC BY-NC-SA 4.0.