Top 3 Steps for Identifying Your PC's GPU in Windows 11

Top 3 Steps for Identifying Your PC’s GPU in Windows 11
The graphics processing unit (GPU) plays an integral part in your overall Windows experience, all the way from gaming to video editing. A high-performing graphic card can be a key deciding factor in your user experience.
You may know all of the significant graphic card manufacturers, such as AMD, Nvidia, Intel, and ASUS… but what model is your GPU, exactly? Here’s how to check your graphics card model on a Windows 11 PC.
Disclaimer: This post includes affiliate links
If you click on a link and make a purchase, I may receive a commission at no extra cost to you.
1. How to Check Your Graphics Card Model via Windows 11’s Task Manager
The Task Manager was redesigned in Windows 11 and now boasts a sleek interface that complements its functionality. While users typically use the Task Manager to keep track of running applications and services, you can also use it to figure out your graphic card model name and specs.
To check the installed graphics card or GPU of your Windows 11 PC:
- Right-click theStart menu and selectTask Manager.
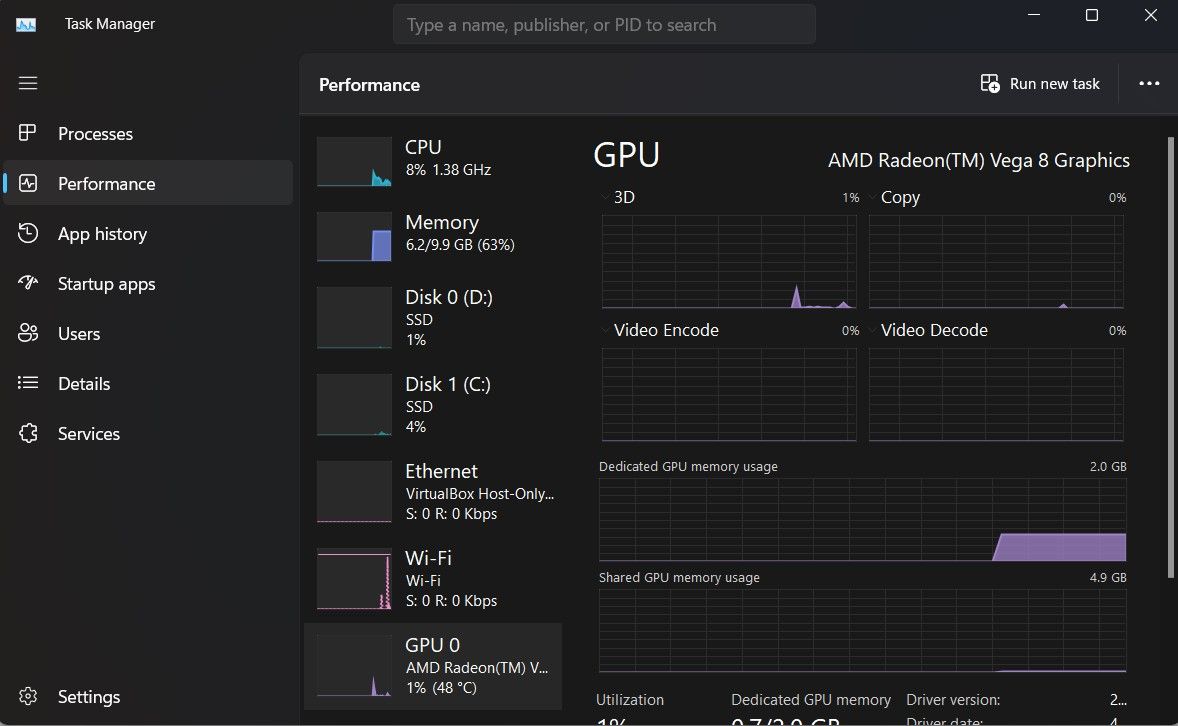
- From the side menu, choosePerformance and thenGPU 0 . If you have more than one GPU installed, you’ll see them labeledGPU 1, GPU 2 , etc. Alternatively, if you don’t know anyGPU option, it’s possible you may not have a graphics card on your system, or you may not have configured it correctly.

- The Task Manager window will list the name of your graphics card in the top right corner. You can also find theDriver andDirectX versions in the bottom right corner.
Check outhow to use the Windows Task Manager for more in-depth instructions on this tool.
2. How to Find Your GPU Model Using DirectX on Windows 11
You can use the DirectX Diagnostics Tool to get detailed specs of your PC. You can find system details such as the processor, total available RAM, BIOS version, GPU, sound, and even the details of input devices configured to your PC.
To find the details of your Windows 11 GPU using the DirectX Diagnostics Tool:
- Launch theStart menu, search fordxdiag , and select theBest match .

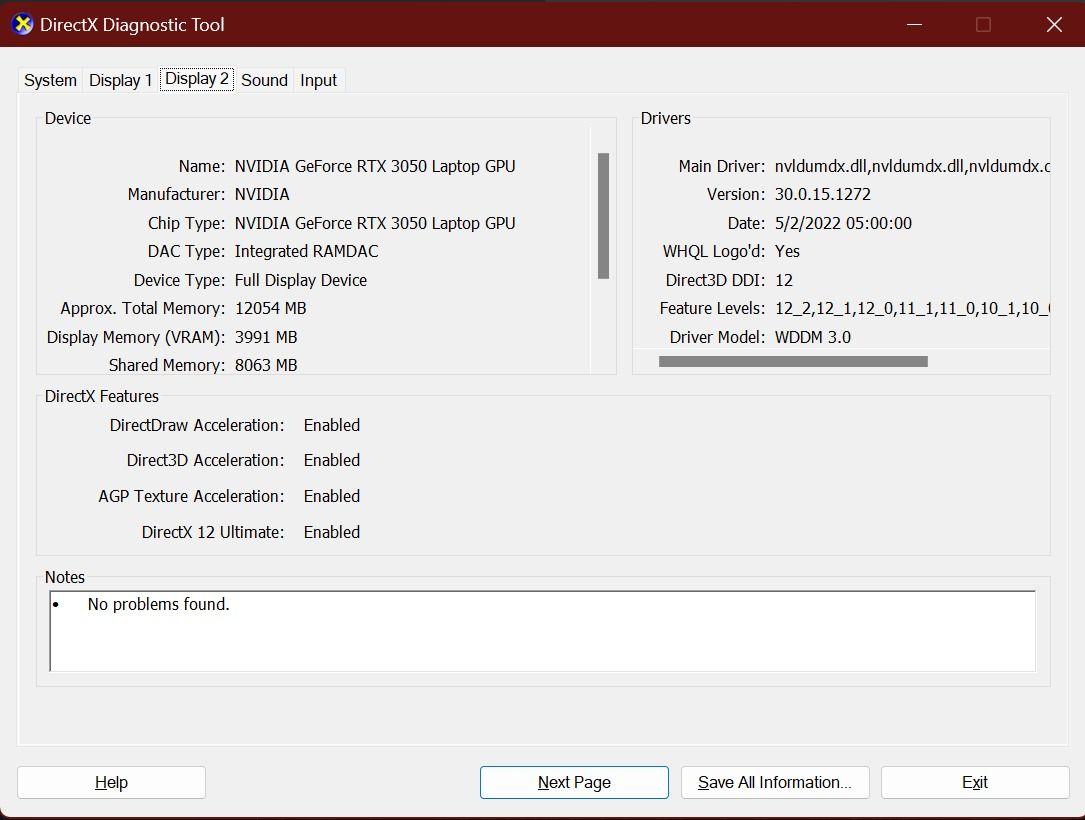
- Select theDisplay tab to view details of your GPU, including the GPU manufacturer, chip type, dedicated display memory, etc. If you have more than one GPU on your PC, you will see multipleDisplay tabs with details of each GPU.
3. How to Confirm Your Graphics Card Model via the Windows 11 Settings App
While you may have used the Settings app to configure different aspects of your PC, you can also use it to view the specs of the graphic card installed in your system. You can also view other display settings, such as the screen resolution and display type.
To check the advanced display settings of your Windows 11 PC, including GPU specs:
- Launch theSettings app through theStart menu.
- From the side menu, selectSystem and thenDisplay .
- UnderRelated settings , selectAdvanced display .

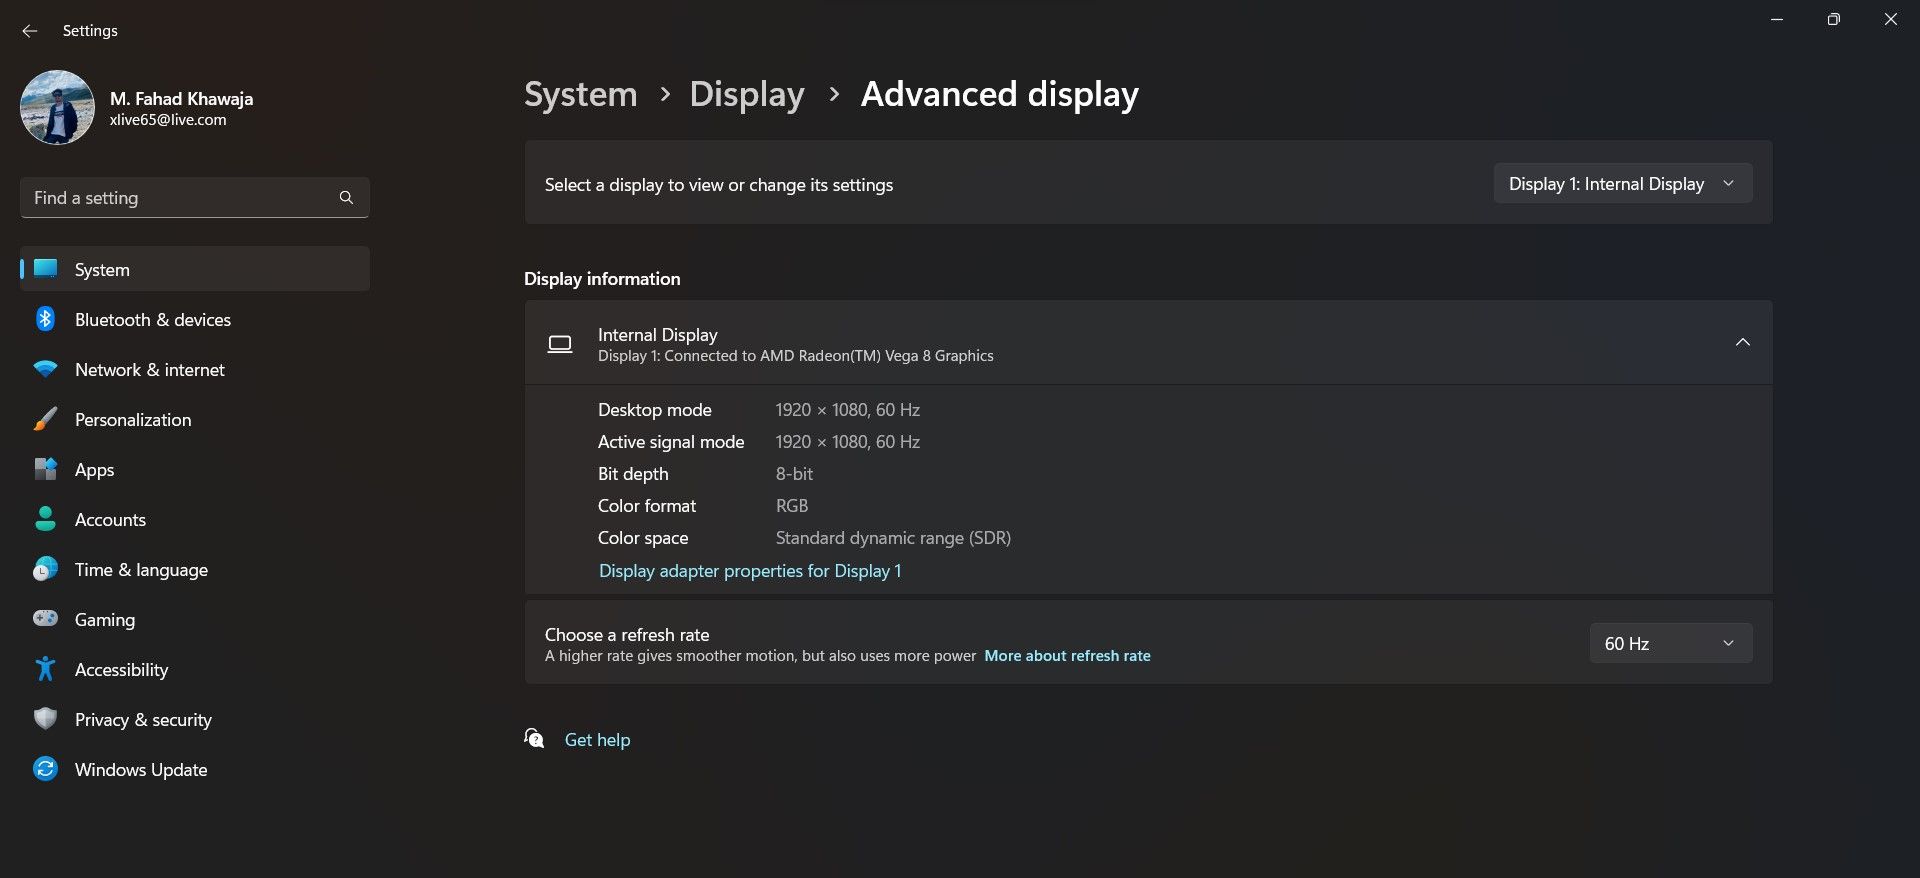
- You can see your GPU make and model under theDisplay information tab.

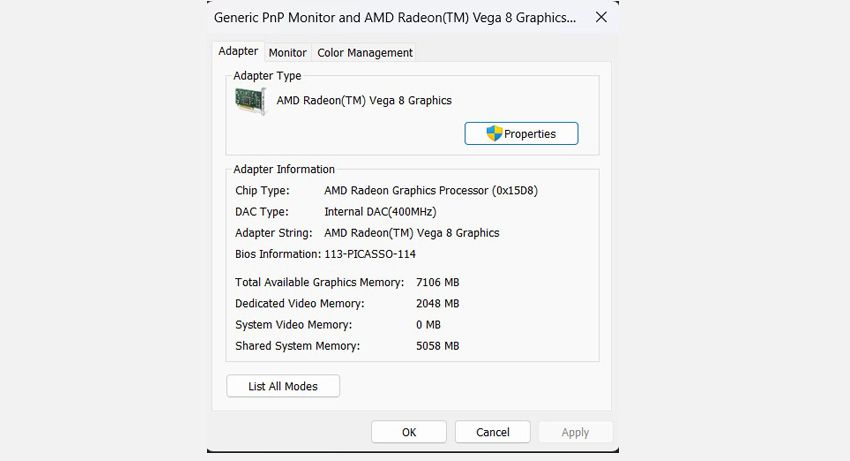
- For more details, selectDisplay adapter properties for Display .
Get to Know Your GPU Model Better on Windows 11
Whether you want to double-check your system requirements for a new game, or you want to update your GPU’s drivers properly, knowing your graphics card’s model is essential. Now you know how to quickly find out which card you have on Windows 11.
Also read:
- [New] Essential Guide to Capturing Your Screens - Stepwise Approach for 2024
- [New] In 2024, Elite 8’S Imagery Merging Digital Software
- [New] In 2024, Essential Displays for Picture Perfect Editing [Choices]
- [Updated] In 2024, Dissecting the Revenue-Sharing Mechanisms in YouTube Shorts Economy
- 2024 Approved When Worlds Collapse Premium Zombie Video Game Guide
- 7 Obstacles Hindering Windows 11 Upgrade Traction
- Combatting Windows Mail Glitches: The 0X80072746 Fix Guide
- DarkModeToggleForWin-basedTextEditor
- Data Recovery Essentials: How to Find & Access Your Backups with Guidance From YL Software Solutions
- Fixing Your Printer on Windows 11: Step by Step
- How to Change your Xiaomi Redmi K70E Location on Twitter | Dr.fone
- Ideal Ink-to-Paper Translation: Selecting Best Windows Tabs
- Learning Curve to Funimate Excellence
- Master the Fixes: Combatting Elevated CPU Drain by WUDFHost.exe on Windows 10 Systems
- Mastering Coding in Windows: A Guide to Using Microsoft Copilot
- Overcoming the Dark Screen Quandary in Window 8
- Streamline Windows 11 Start-Up with These Simple Ideas
- Title: Top 3 Steps for Identifying Your PC's GPU in Windows 11
- Author: David
- Created at : 2024-12-15 17:49:22
- Updated at : 2024-12-22 18:08:23
- Link: https://win11.techidaily.com/top-3-steps-for-identifying-your-pcs-gpu-in-windows-11/
- License: This work is licensed under CC BY-NC-SA 4.0.


