
Techniques for Ascertaining Your PC's Intel Core Gen
Techniques for Ascertaining Your PC’s Intel Core Gen
Do you know what Intel processor generation is running on your computer? Is it the latest and most advanced model? Or is it an outdated version needing an upgrade? Knowing which Intel processor generation your computer is vital when upgrading, troubleshooting, and maximizing performance.
Below are the steps to easily check which Intel processor generation you have on Windows.
1. How to Check Your Intel’s Processor Generation Using System Settings
On Windows, you can quickly check your Intel processor generation through System Settings. To do this, go to the Windows Search bar and type “Settings”. Then select Settings app from the search results. You can also use Win + I to open it directly.
In the Settings window, click on the System option to open it. Next, on the right-side panel, scroll down and click About to view your system information.
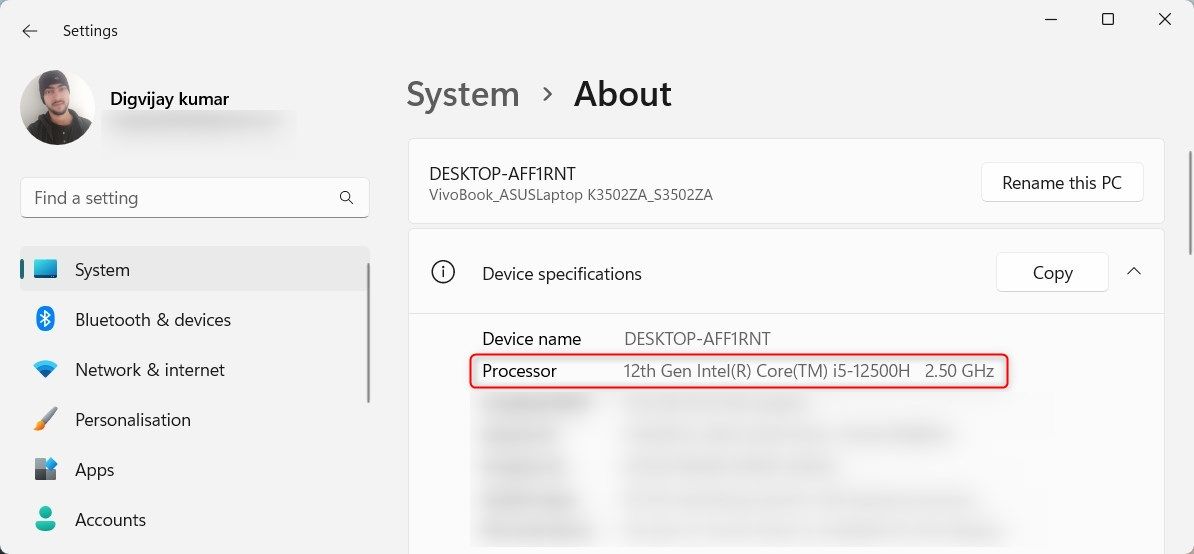
Here you will find your processor name and Intel processor generation number. You can also check additional specifications like RAM and OS version here.

2. How to Check Your Intel’s Processor Generation Using Device Manager
Another way to check your Intel processor generation is through Device Manager. To do this, right-click on Start and select Device Manager from the options list. You will find a list of different devices and hardware in the device manager window. Expand the Processors section to view your Intel processor name and generation.
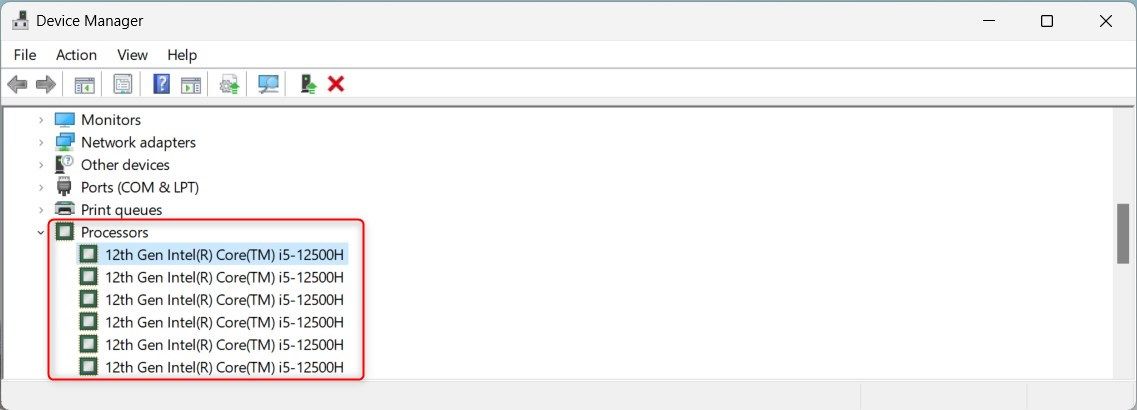
Here you can also check other details like Hardware IDs, Manufacturers, and Driver Providers. To view them, right-click on your processor and select Properties. Then switch to the Details tab and click the Property drop-down menu.
3. How to Check Your Intel’s Processor Generation Using the System Information Tool
You can use the System Information tool for a thorough system report. This tool provides more than just Intel processor generation identification. It offers detailed insights into installed drivers, system models, BIOS versions, Windows versions, memory, and more.
To open this tool, type System Information in the Windows search bar. Then select it from the search results. You can also use Win + R to open the Run command, type msinfo32, and hit Enter.
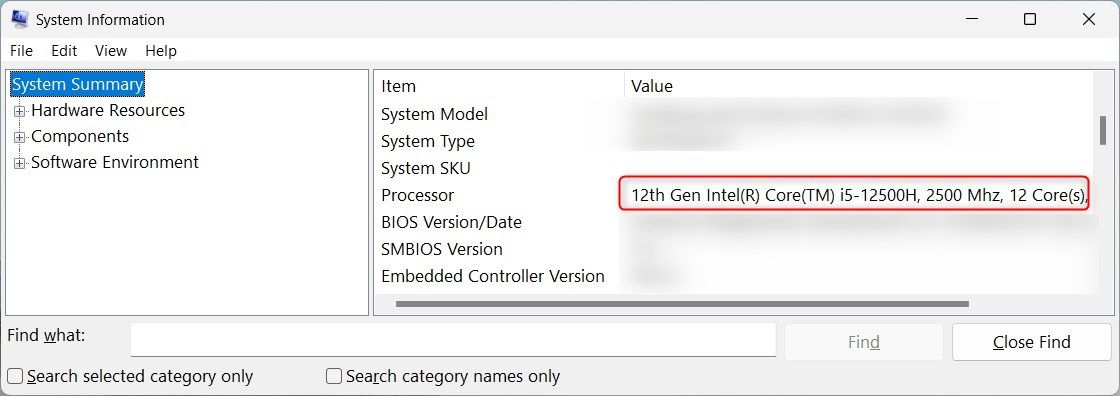
Your processor name is in the System Summary section on the right-side panel.
4. How to Check Your Intel’s Processor Generation Using File Explorer
If you’re using Windows File Explorer, you don’t even need to leave it. You can check your Intel processor generation right from the File Explorer window.
To do this, click on This PC from the left side panel, then select Properties.
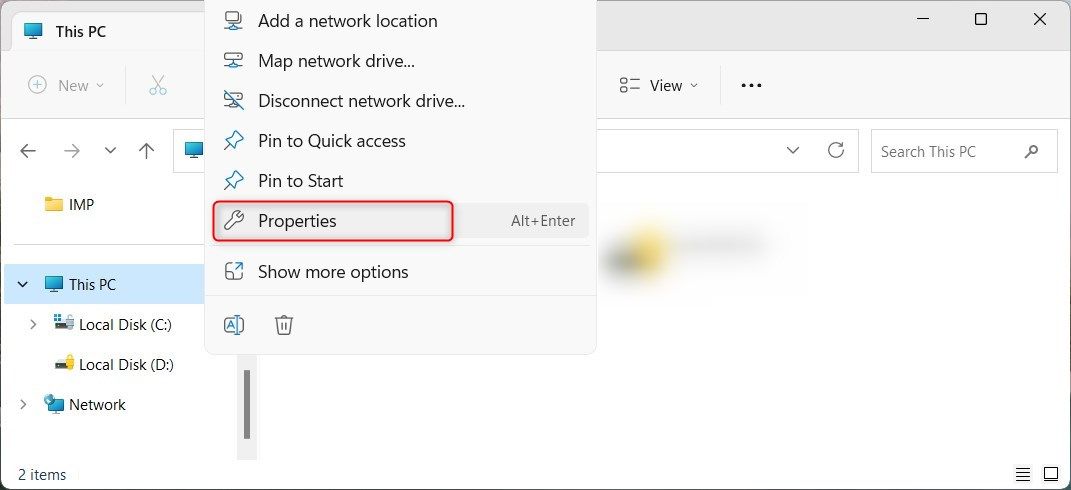
You’ll find the Intel processor generation in the Device specifications section.
This screen also shows Windows Edition, OS build, System type, and other details.
5. How to Check Your Intel’s Processor Generation Using Task Manager
Task Manager is a native Windows tool that shows what programs and services are running on your computer. To open it, right-click on an empty space on your taskbar and select Task Manager from the pop-up menu. Alternatively, press the Ctrl + Shift + Esc keys to open it directly.
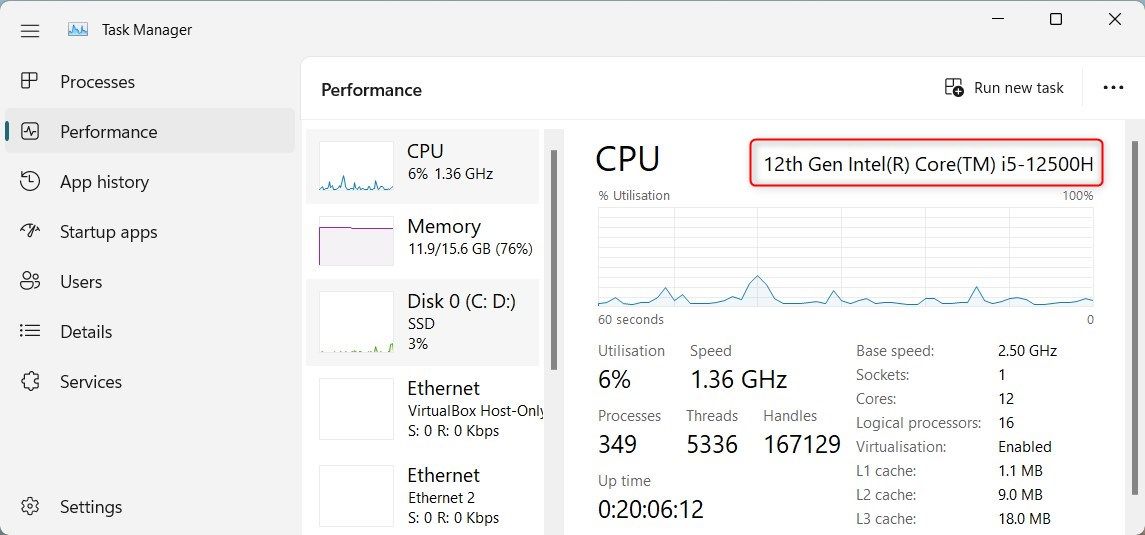
You will see multiple tabs in the Task Manager window like Processes, Performance, App history, and more. Click on the Performance tab and expand the CPU section.

WPS Office Premium ( File Recovery, Photo Scanning, Convert PDF)–Yearly
Here you will find your processor name and Intel processor generation. For example, if you see 12th Gen Intel(R) Core(TM) i5-12500H, you have a 12th generation Intel Core i5 processor.
Power Tools add-on for Google Sheets, 12-month subscription
6. How to Check Intel Processor Generation Using DirectX Diagnostic Tool
The DirectX Diagnostic Tool is another Windows utility that provides detailed information about your system hardware and configuration. This tool is designed to troubleshoot DirectX sound and video issues, but you can also check your Intel processor generation.
To open this tool, right-click on Start and select Run. Type dxdiag in the input field and click OK or press Enter. This command opens the DirectX Diagnostic Tool .
In the DirectX Diagnostic Tool window, click on the System tab. Look for the Processor line in the System Information section, you will find the name and generation of your processor.
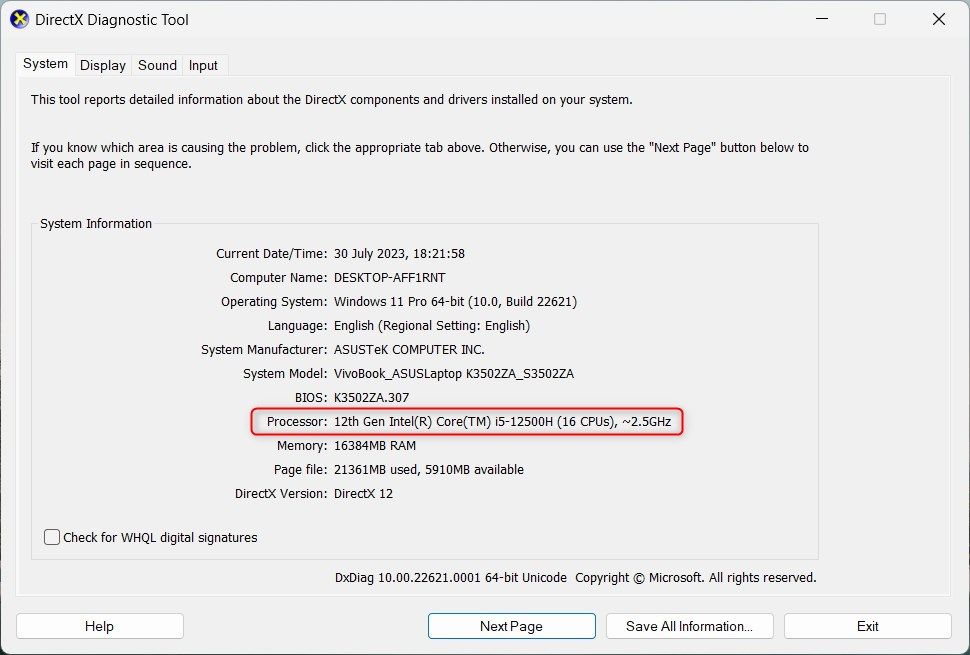
The snapshot above shows that my system has a 12th-generation Intel Core i5-12500H processor.
This information is important when troubleshooting and upgrading computer components. You can also compare performance differences between different Intel processor generations.
7. How to Check Your Intel’s Processor Generation Using Command Prompt
If you’re tech-savvy, you can also use Command Prompt to check your Intel processor generation. To do this, type CMD in the Windows search bar and select the Command Prompt app from the search results. If Command Prompt is new to you, here’s a quick tutorial on command line use .
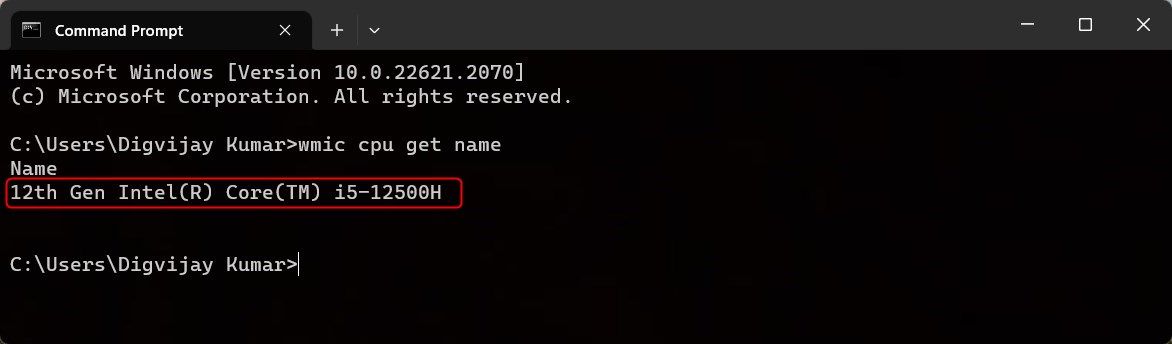
In the Command Prompt window, type wmic cpu get name, and hit Enter. You will see your processor name along with its Intel processor generation.
8. How to Check Your Intel’s Processor Generation Using Windows PowerShell
PowerShell is similar to Command Prompt but has additional features and functionality. So if you want a more advanced system report that includes your Intel processor generation, using PowerShell is the best option.
To open PowerShell, right-click on the Start button and select Terminal from the options list. If it opens the Command Prompt instead, click the down arrow and select Windows PowerShell from the list. Alternatively, you can use the Ctrl + Shift + 1 keys to open a PowerShell window directly.
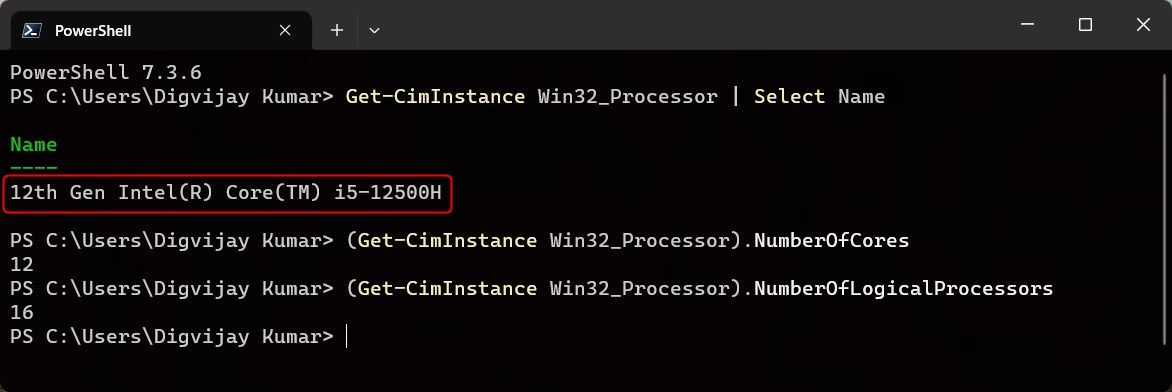

In the PowerShell window, type the following command, and hit Enter. You will get your processor name and Intel processor generation.
Get-CimInstance Win32_Processor | Select Name
To find the total number of cores and threads in your processor, type the following command in the PowerShell window and hit Enter. You’ll see the current core count for your CPU.
(Get-CimInstance Win32_Processor).NumberOfCores
Similarly, type the following commands and hit Enter to get the total thread count.
(Get-CimInstance Win32_Processor).NumberOfLogicalProcessors
These are some of the ways to check your Intel processor generation. Now you can use these tips before buying a new CPU or upgrading an old one to check Intel processor generation.
Get to Know Your Intel Processor’s Generation
Hopefully, these methods helped you verify your Intel processor generation. Now you know what version your computer runs. If it’s outdated, upgrading it can improve performance and stability. Just ensure your motherboard supports the processor.
Below are the steps to easily check which Intel processor generation you have on Windows.
- Title: Techniques for Ascertaining Your PC's Intel Core Gen
- Author: David
- Created at : 2024-08-16 00:15:33
- Updated at : 2024-08-17 00:15:33
- Link: https://win11.techidaily.com/techniques-for-ascertaining-your-pcs-intel-core-gen/
- License: This work is licensed under CC BY-NC-SA 4.0.