Streamlining Workflow with UWP App Shortcuts in Windows 11

Streamlining Workflow with UWP App Shortcuts in Windows 11
Universal Windows Platform (UWP) apps are those you download from the Microsoft Store. Unlike desktop software, you don’t need to install UWP apps with setup files. The UWP apps you download automatically get installed to a default WindowsApps restricted location.
The usual way to create shortcuts for desktop apps is to right-click their EXE files within installation directories and select Send to Desktop. So, some users may wonder how they can create desktop shortcuts for UWP apps that are in an inaccessible WindowsApps folder. You can still create shortcuts for UWP apps with the methods below.
Disclaimer: This post includes affiliate links
If you click on a link and make a purchase, I may receive a commission at no extra cost to you.
1. Drag and Drop UWP Apps From the Start Menu Onto the Desktop
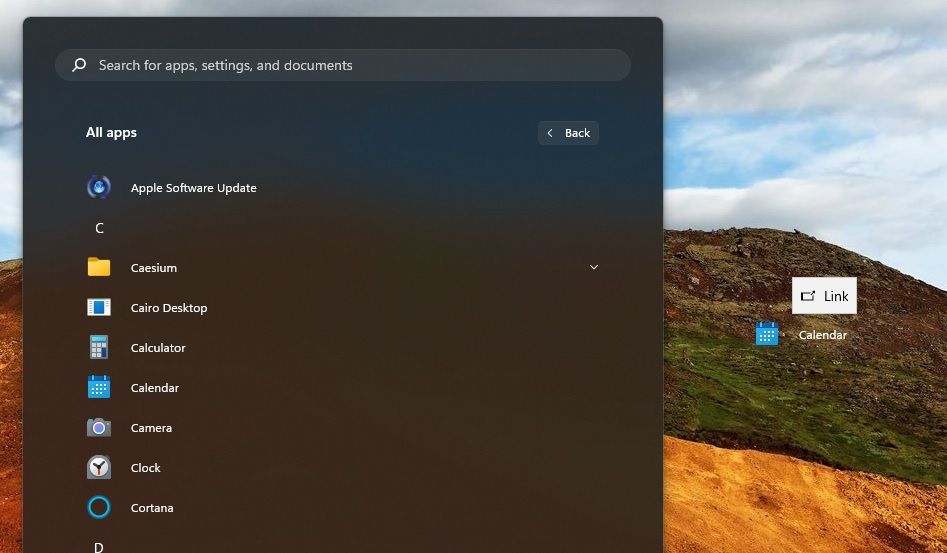
A simple way to create shortcuts for UWP apps is to drag and drop them from the Start menu onto the desktop. To do that, open the Start menu and click All apps. Then click a UWP app on the menu, hold the left mouse button, and drag its icon onto the desktop. Release the left mouse button when you see a Link box to add the desktop shortcut.
2. Create Desktop Shortcuts for UWP Apps From the Applications Folder
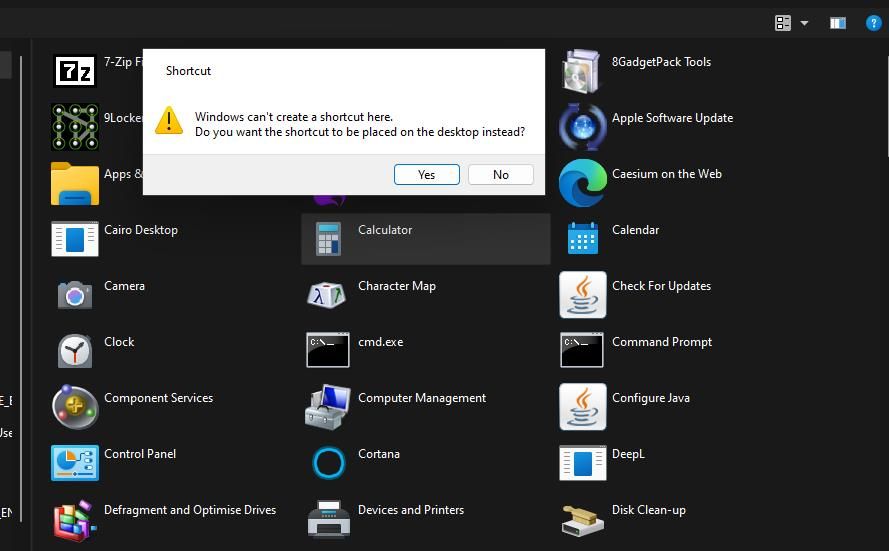
Windows 11 has an accessible Applications folder that includes your installed UWP apps. You can select to create shortcuts for MS Store apps from that folder as follows:
- First, press the Windows + R hotkey to start the Run tool .
- Type shell:AppsFolder inside Run’s Open box.
- Click OK to view the Applications folder.
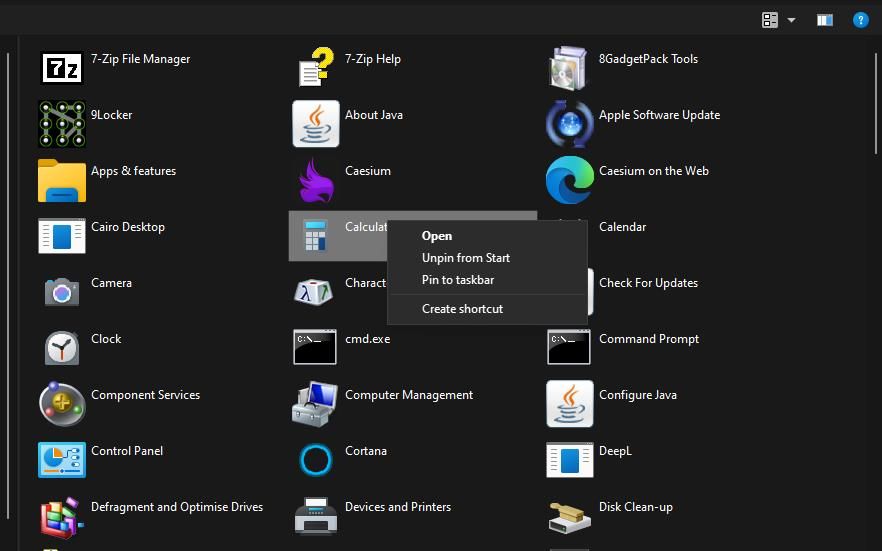
- Right-click a UWP app you want to add to the desktop and select Create shortcut.

- Select Yes when prompted to place a shortcut on the desktop.
3. Create Desktop Shortcuts for Pre-Installed UWP Apps With the Create Shortcut Wizard
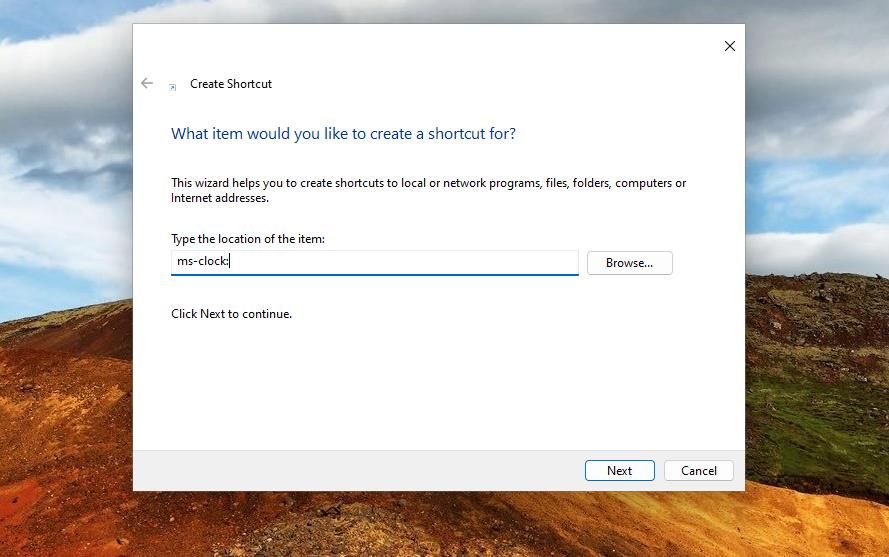
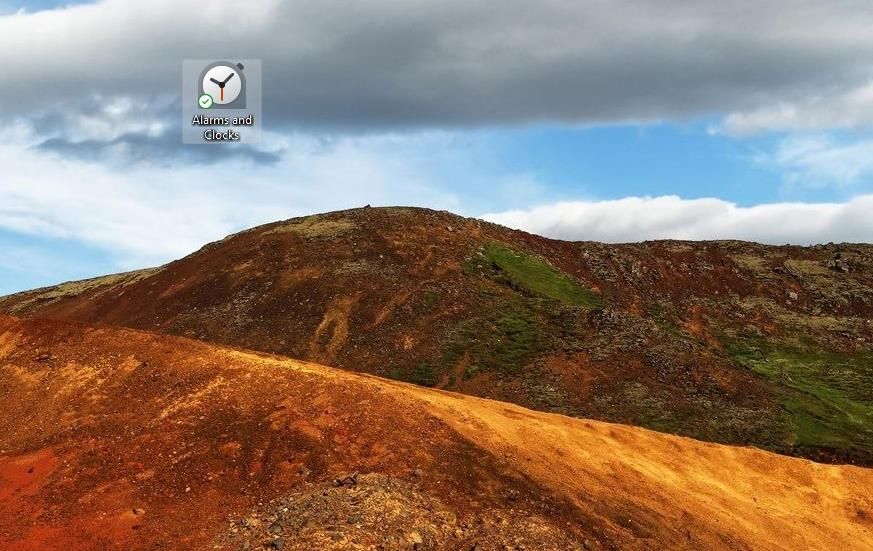
The pre-installed UWP apps have Uniform Resource Identifier (URI) addresses with which you can open them. For example, inputting ms-clock: in Run will open the Alarms and Clock app. You can add pre-installed UWPs to the desktop by creating shortcuts with their URIs as follows:
- Right-click any part of the desktop area within Windows 11 and move the cursor over the New submenu.
- Click Shortcut to view the Create Shortcut wizard.
- Input the URI for the UWP app in the location text box. For example, you would need to enter the ms-clock: URI there to create a desktop shortcut for Alarms & Clocks.

- Click Next to proceed to the final step of the wizard.
- Enter the app’s name in the text box.
- Press Finish to create your UWP app shortcut.

This method will add a URL (web document) shortcut for opening the app to the desktop. These are some of the URIs with which you can create UWP desktop shortcuts:
Microsoft Store: ms-windows-store:
Camera: microsoft.windows.camera:
Calendar: outlookcal:
Photos: ms-photos:
Weather: bingweather:
Xbox: xbox:
Windows Security: windowsdefender:
Calculator: calculator:
Microsoft News: bingnews:
Snip and Sketch: ms-screensketch:
Feedback Hub: feedback-hub:
Settings: ms-settings:
Tips: ms-get-started:
Media Player: mswindowsmusic:
Get Help: ms-contact-support:
Incidentally, you can also create shortcuts with URIs for Settings pages much the same. Check out this how to set up Settings page shortcuts guide for further details.
4. Pin UWP Desktop Shortcuts to the Taskbar
You can select to pin UWP apps to the taskbar with their desktop shortcuts. To do so, right-click the UWP app’s desktop shortcut and select Show more options > Pin to taskbar. Then you can open the app from the taskbar instead.
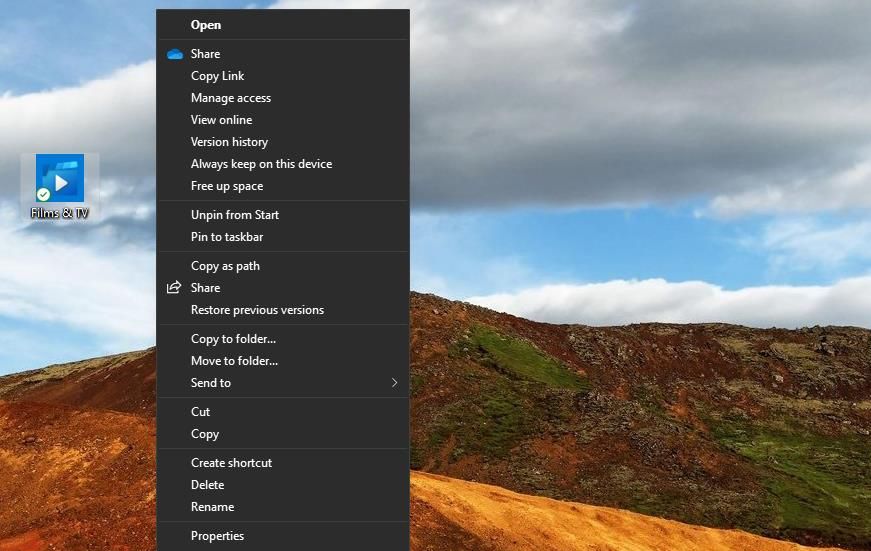
Note that you can’t pin web document desktop shortcuts to the taskbar. The context menus for desktop shortcuts created with URI commands don’t include the Pin to taskbar option.
5. Assign Hotkeys to UWP App Desktop Shortcuts
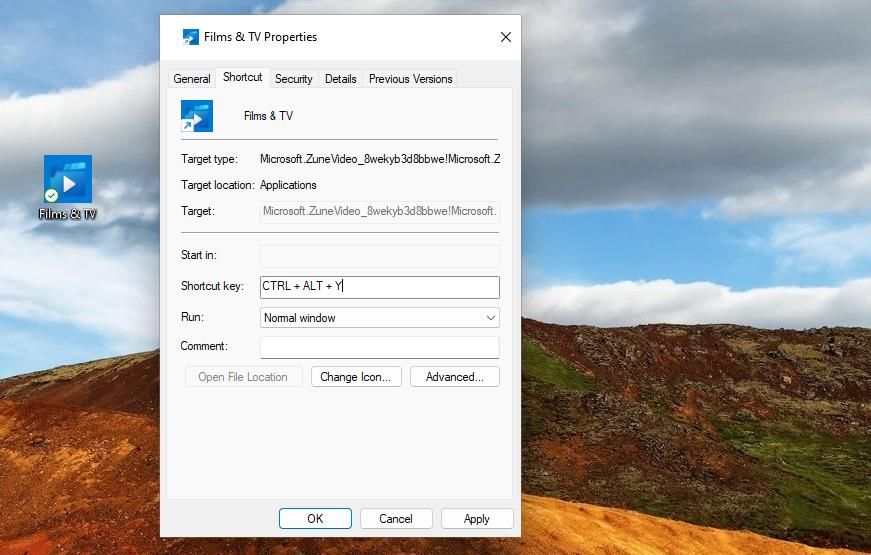
After creating a UWP app desktop shortcut, you can also assign a hotkey to it. Pressing that hotkey will activate the shortcut to launch the UWP app. You can create a hotkey for a UWP app desktop shortcut like this:
- Right-click the desktop shortcut and select Properties.
- Click inside the Shortcut key box on the Shortcut or Web Document tab.
- Press a key to set up a Ctrl + Alt keyboard shortcut.

- Select Apply > OK to save the hotkey for the desktop shortcut.
Create Shortcuts for All Your Favorite UWP Apps
It’s quick and simple to create desktop shortcuts for UWP apps with the methods above. Then you’ll be able to access all your favorite MS Store apps directly from the desktop. Or create taskbar and hotkey shortcuts with their desktop icons.
The usual way to create shortcuts for desktop apps is to right-click their EXE files within installation directories and select Send to Desktop. So, some users may wonder how they can create desktop shortcuts for UWP apps that are in an inaccessible WindowsApps folder. You can still create shortcuts for UWP apps with the methods below.
Also read:
- [New] In 2024, A Critique of Dogmatism
- [New] Revive PlayStation Classics The 5 Best Android Emulation Software for 2024
- [New] Transform Ideas Into Engaging Movies Using YouTube Editor
- [Updated] Sky's Palette Explored - Top Websites Showcasing HD Imagery
- 2024 Approved Pushing Boundaries with Yuneec's Typhoon H Drone
- Customizing Windows Menu with Portable Software Tools
- Effortless Fix for Disappearing Steam Apps
- Essential Techniques for Bypassing Lock on Windows 11
- From Zero to Hero in YouTubing Equipment Essentials
- Integrating Volume Control: Windows 11'S Mixer Setup Guide
- Mastering the Art of Windows: Adding Outlook Preview
- Mastering Windows' Autolock Settings
- Overcoming Blizzard Server Connectivity Issues for Gamers
- Shortcut Tricks: Fast Uninstall via Windows Menu
- Simple Guide: How To Conduct Seamless Data Backups on Any Windows File Servers
- Title: Streamlining Workflow with UWP App Shortcuts in Windows 11
- Author: David
- Created at : 2024-12-07 17:47:45
- Updated at : 2024-12-13 06:03:01
- Link: https://win11.techidaily.com/streamlining-workflow-with-uwp-app-shortcuts-in-windows-11/
- License: This work is licensed under CC BY-NC-SA 4.0.
