Steps to Reverse the Blackout Issue in PC Games

Steps to Reverse the Blackout Issue in PC Games
Does your device’s screen go black in the middle of your gaming session? Most of the time, the problem occurs because of outdated graphics drivers, a problem with the monitor connection, improper power-saving settings, prolonged hardware stress, excessive heat generation, or misconfigured game settings.
If your screen keeps going black while gaming and takes you back to the desktop, here are a few solutions you can try to fix the problem.
Disclaimer: This post includes affiliate links
If you click on a link and make a purchase, I may receive a commission at no extra cost to you.
1. Basic Checks to Troubleshoot the Black Screen Issue on Your PC
If you experience the black screen issue on a laptop, you can skip this step and continue with the rest of the fixes. However, if you experience the problem on a PC, you should perform a few basic checks to ensure a loose connection or temporary display issue isn’t to blame.
The first step to rule out temporary problems is to ensure that DVI, HDMI, or DisplayPort cable is seated correctly and securely connected to the port; ensure the cable isn’t damaged and the ports it is connected to are in good condition. After that, double-check that the graphics card is connected correctly. If possible, disconnect it once and reconnect it back.
An insufficient power supply can also cause the GPU to render the graphics inconsistently, which can cause a complete blackout. If the issue has started soon after installing a new GPU, check that the graphics card and power supply unit are compatible. Likewise, perform other basic checks to ensure a hardware or compatibility problem isn’t the root cause.
If none of the above fixes help resolve the problem on a PC, apply the remaining fixes.
2. Perform Preliminary Checks
Start the troubleshooting process by applying the fixes listed below:
- Restart your device once to rule out temporary issues.
- Only run one game at a time, especially if it is resource-intensive and heavily strains your hardware.
- Outdated graphics card drivers can also cause display issues. Therefore, update your graphics drivers on Windows if they are out of date.
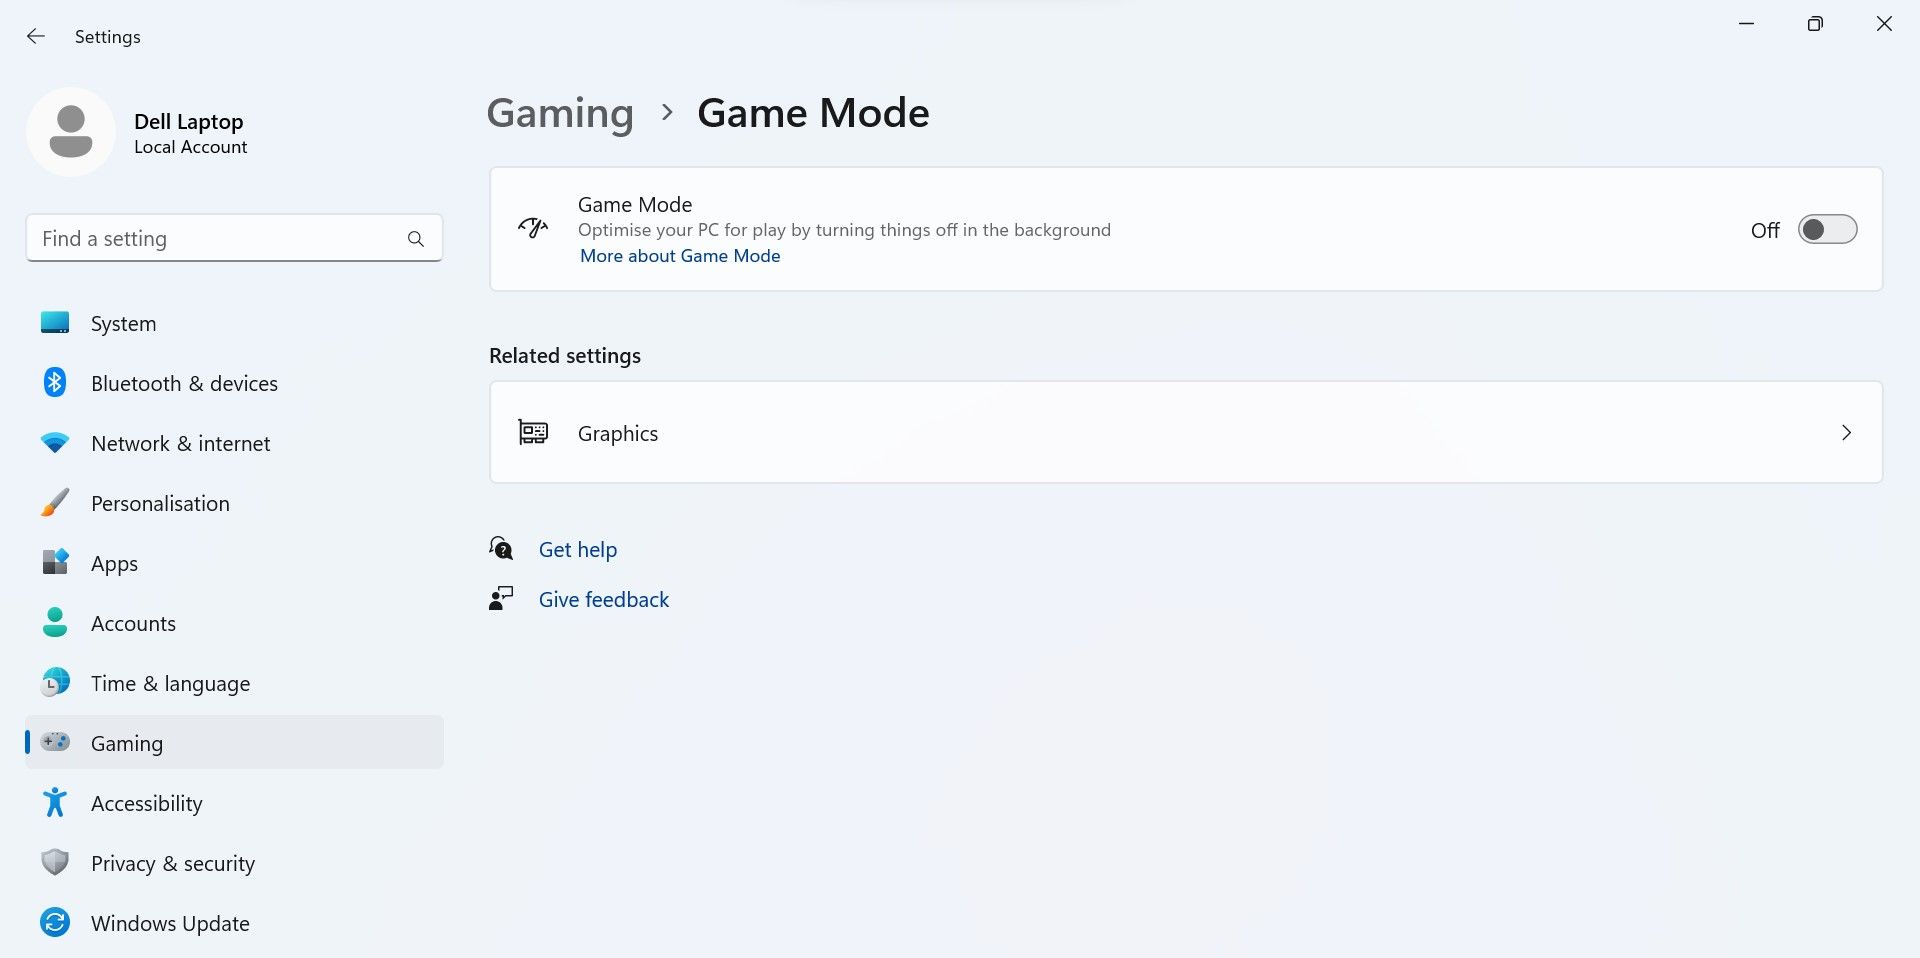
- The Windows game mode aims to improve the gaming experience, but it can also give rise to unexpected issues. Disable game mode if it is currently enabled. To do that, type “game mode” in Windows Search, open the Game Mode settings, then toggle the Game Mode switch off.

3. Check for Game-Specific Issues
Does the black screen issue only occur when playing a particular game, and other games seem to work just fine? If so, ensure the game files aren’t corrupted and the in-game settings are configured correctly. Repair the game files, update the game, lower the in-game resolution, and change other graphics settings to rule out game-specific issues.
If these changes fail to resolve the issue, or if the problem persists with more than one game, apply the remaining fixes.
4. Monitor the Resource Usage During Gameplay
Does the screen turning black issue only occur when playing resource-intensive games? If that’s the case, one of your device’s hardware components, especially the CPU or GPU, could be under high strain. To test this hypothesis, minimize the game right after launch, open Task Manager, and monitor CPU, GPU, and RAM resource consumption.
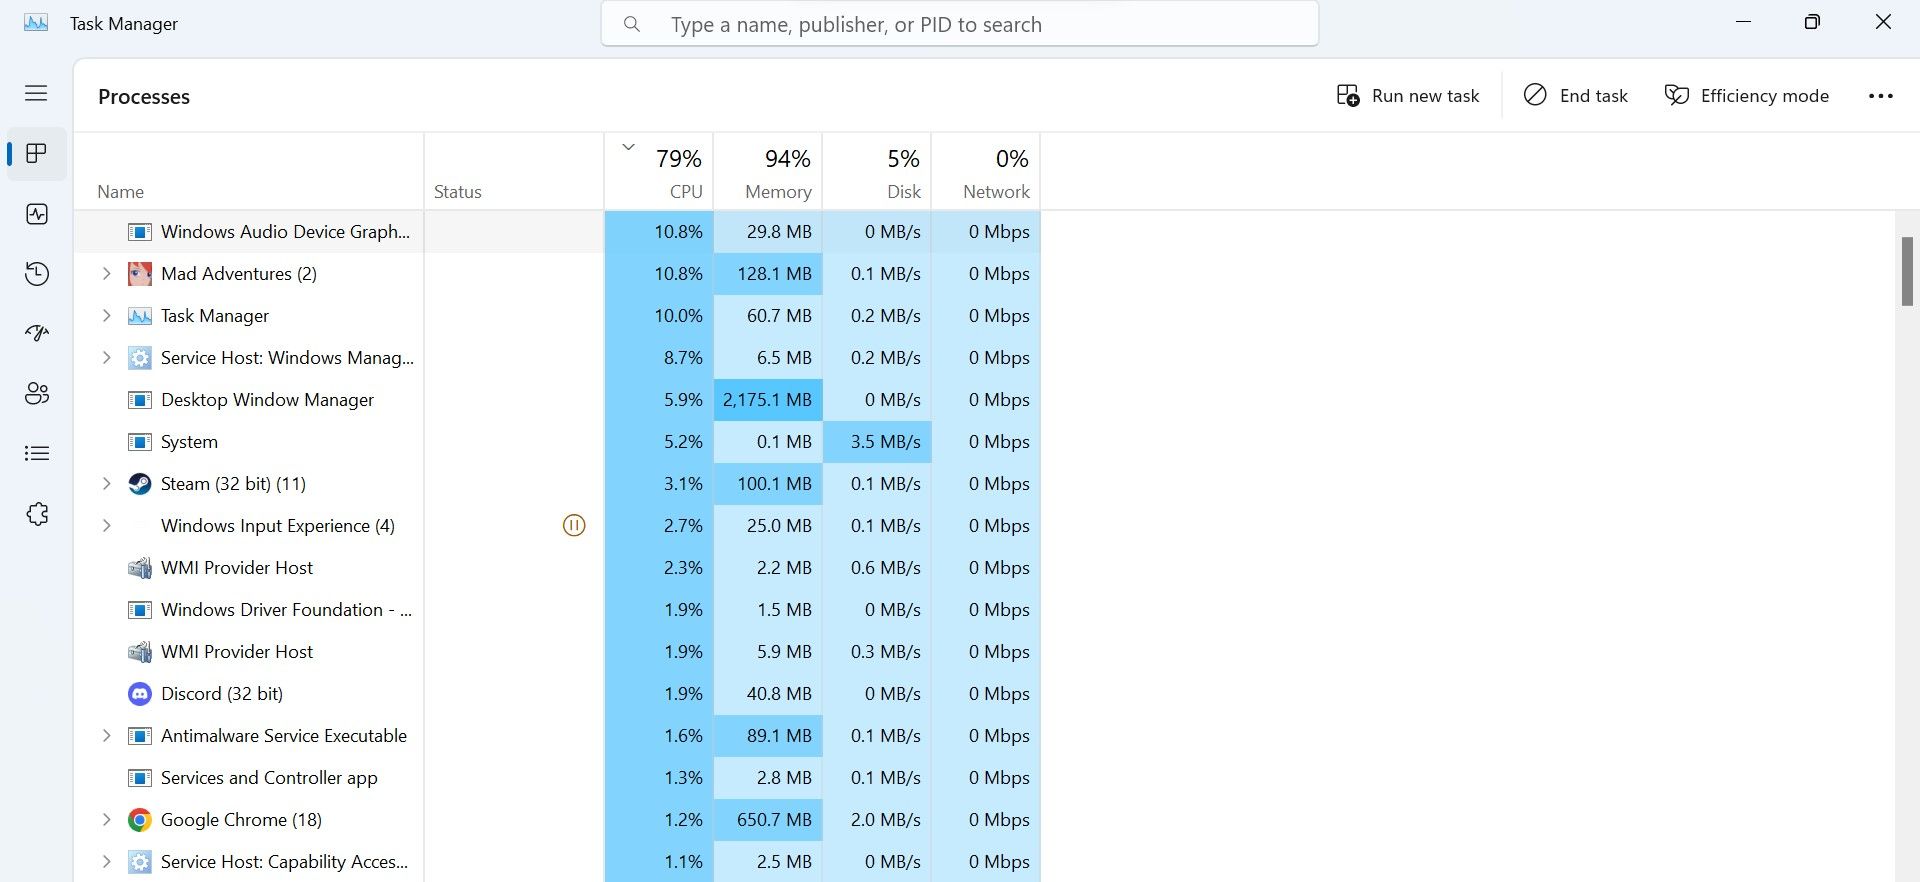
If the components’ resource usage remains within normal limits, they are not under extreme stress. However, if you see the screen go black right when one of the components’s usage spikes to 100 percent, the increase in stress is likely the cause.
For such a situation, refer to our guides on how to fix high CPU , GPU , and RAM resource usage and apply the relevant solutions.
5. Monitor the Temperature of the System Components
In extreme cases, excessive heat can prevent your device’s components from functioning correctly, leading to a complete blackout. It’s more likely to happen on laptops since they are generally more compact and feature narrow ventilation that struggles to dissipate excess heat effectively. If your laptop frequently overheats, ensure it’s not the cause of the problem.
Download any temperature monitoring app and monitor the components’ temperature while playing the game. There is nothing to worry about if the component’s temperature stays below 60 degrees Celsius during gameplay. However, if this number is higher than 70 or 80 and the screen goes black when the temperature goes up, high heat output could be the cause.
If overheating is the cause of the problem, follow the tips in our guide on fixing an overheated Windows 11 computer . If temperatures are within a normal range, proceed to the next step.
6. Turn Off the App Readiness Service
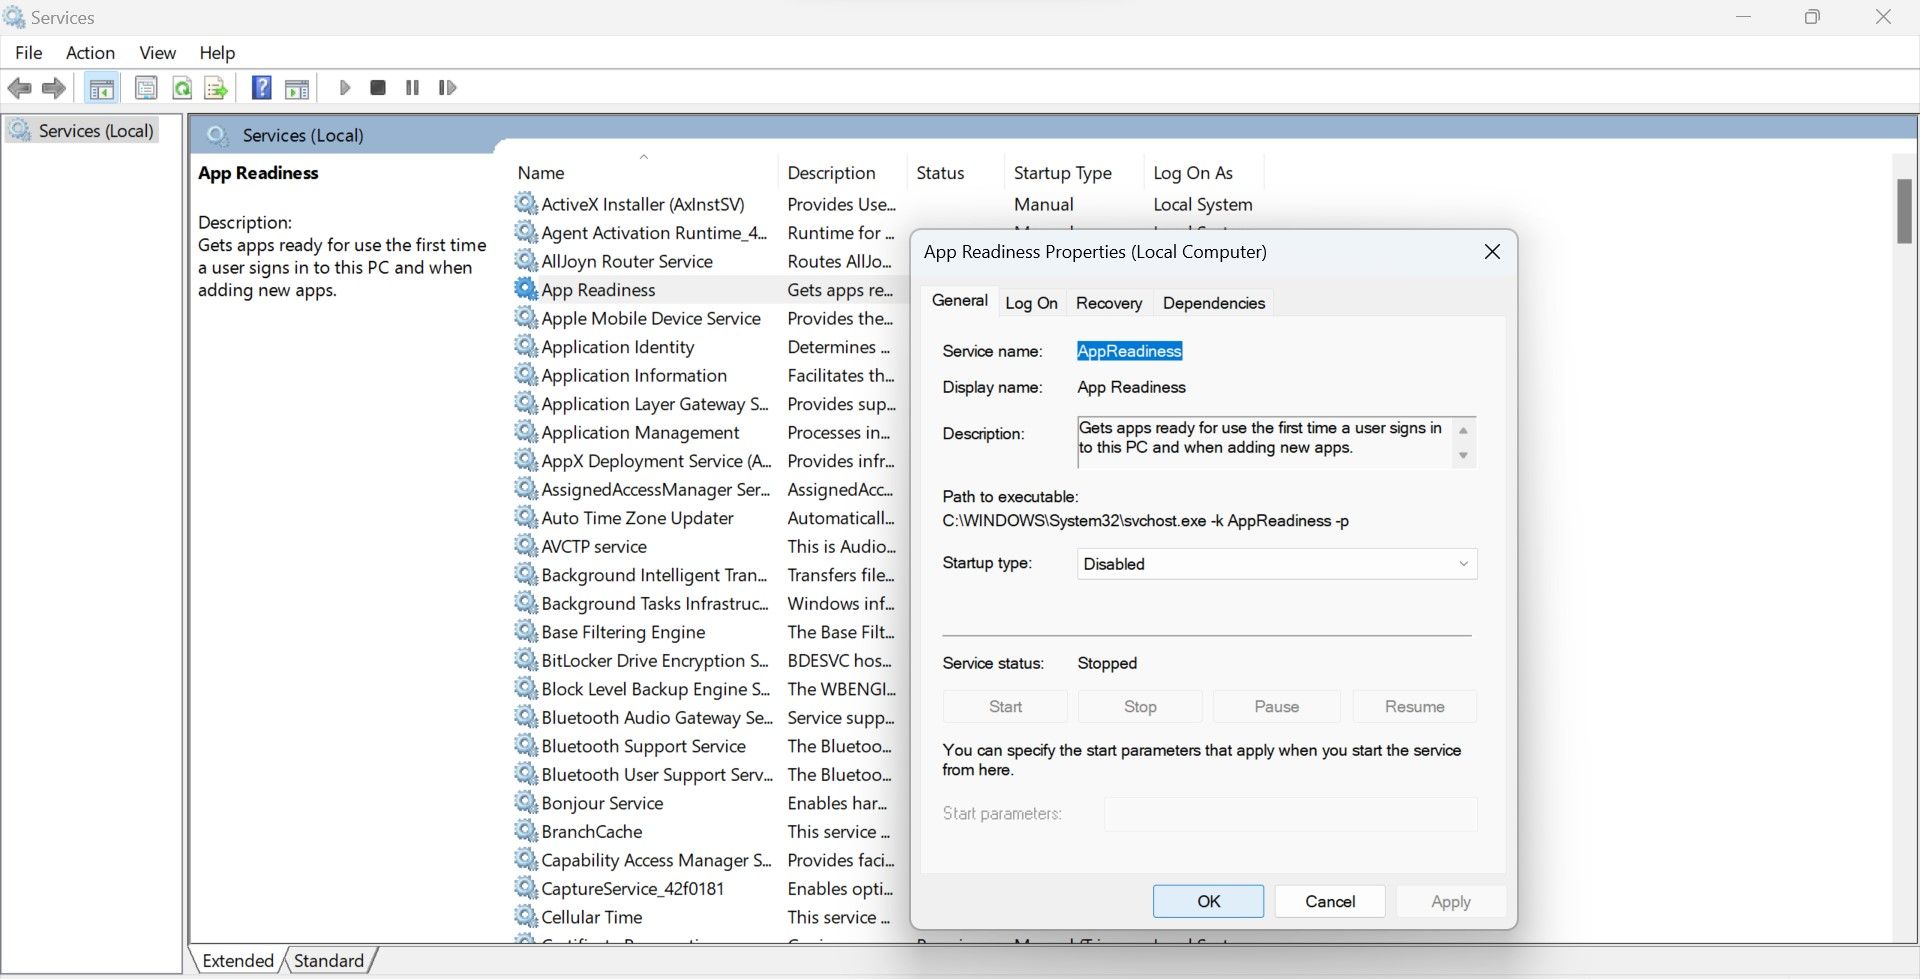
On the Lenovo discussion board , one user reported experiencing a five-minute black screen issue just seconds after booting up the system and disabling the App Readiness service resolved the issue for him. Having this service enabled has been associated with black screen issues for a long time, so disable it temporarily and see if it fixes the problem.
To turn off this service, follow these steps:
- Type “Services” in Windows Search and open the Services app.
- Double-click the App Readiness service.
- From the dropdown menu next to Startup type, select Disabled.
- Hit OK after clicking Apply.

If the issue ceases to occur after the service is disabled, it could be the culprit. While keeping the service disabled is one way to avoid facing this issue again, disabling the service permanently can have unforeseen consequences.
So, instead of permanently disabling the service, we recommend disabling it before your gaming session and enabling it when you’re finished playing.
7. Turn Off the Link State Power Management Setting
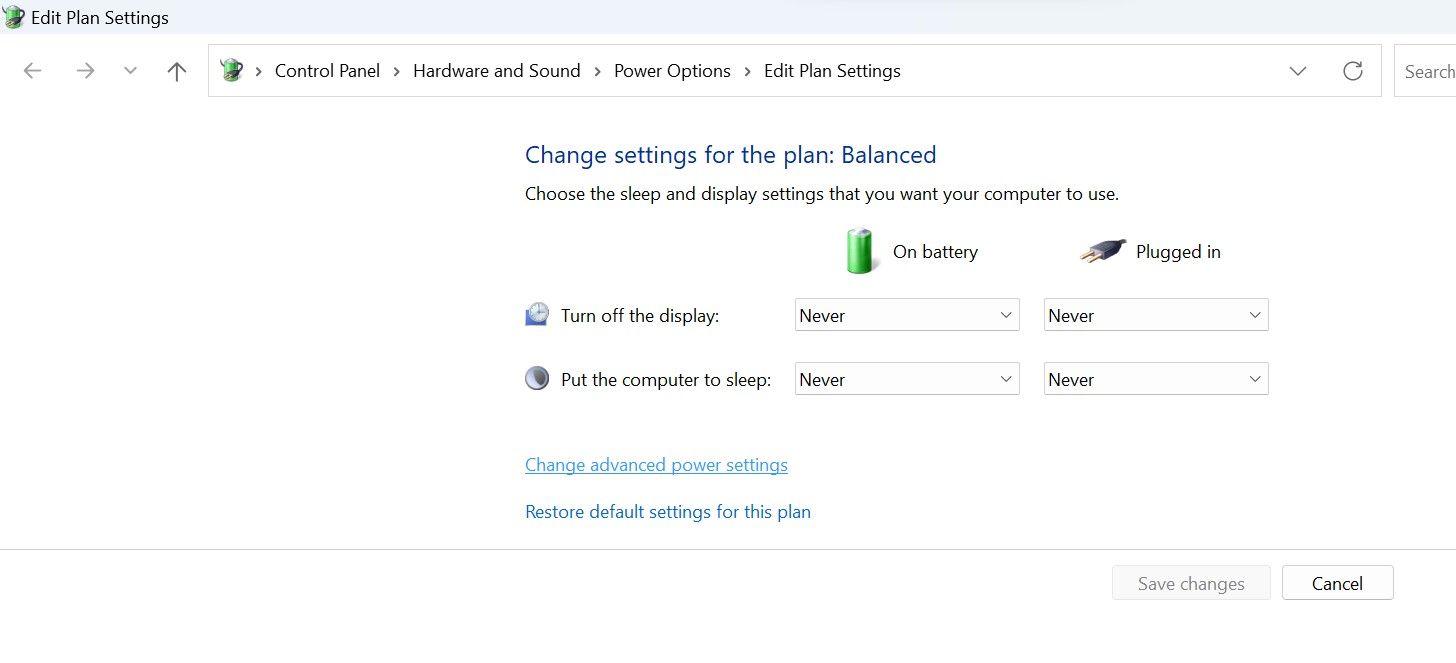
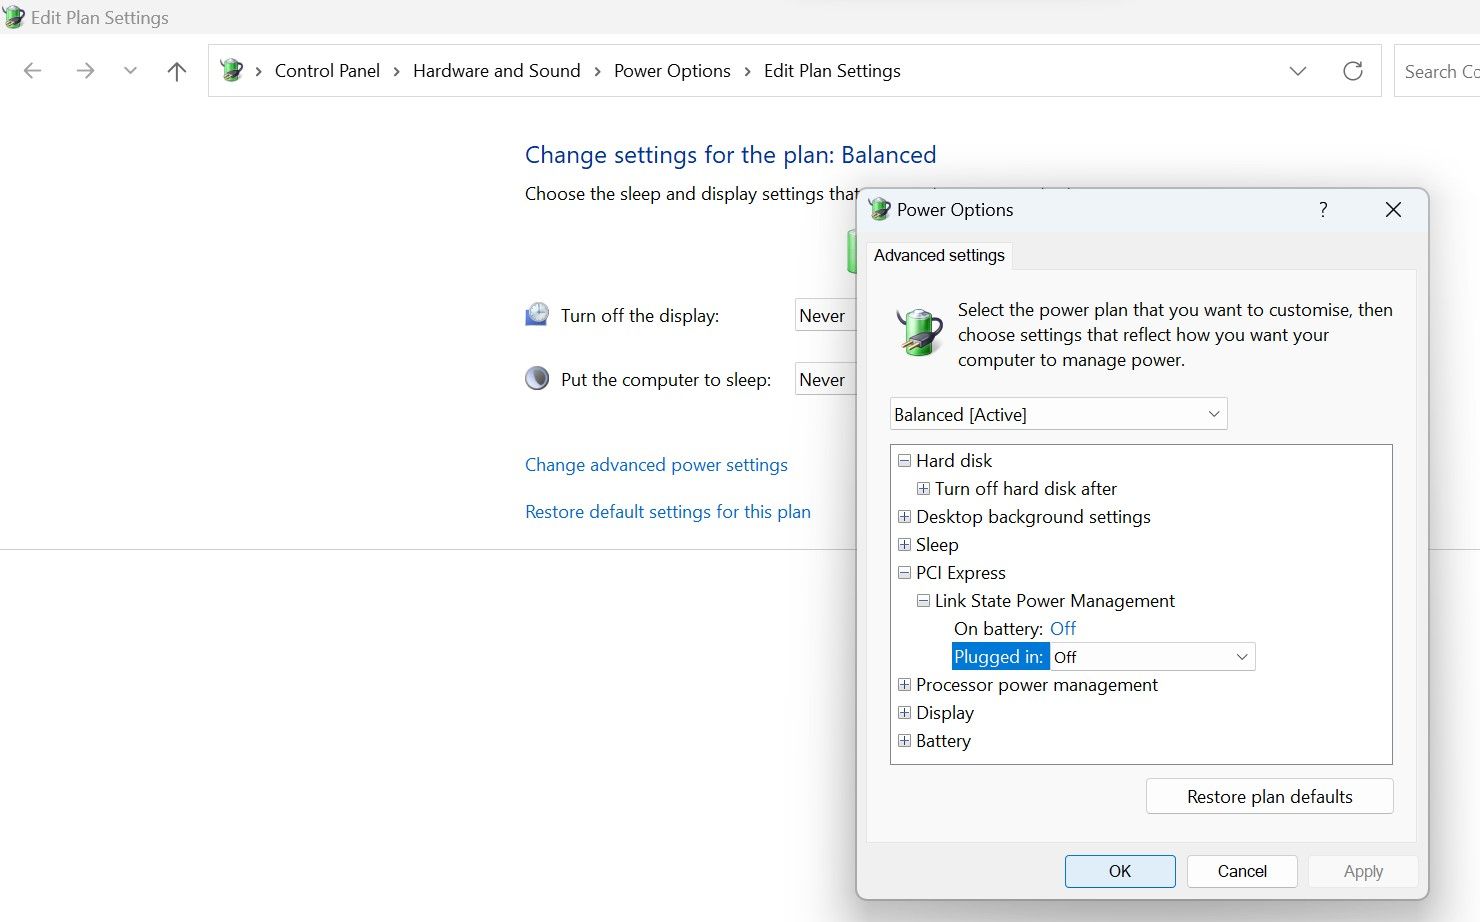
Link State Power Management enables users to save power and prolong battery life. In some cases, enabling this setting can limit your device’s power consumption, causing your screen to go black when you least expect it. To make sure that power saving is not the problem, follow the below steps:
- Type “Edit power plan” in Windows Search to open the power plan settings.
- Click on Change advanced power settings.

- Expand the PCI Express and Link State Power Management categories.
- Select Off from the dropdown menus next to On battery and Plugged in.
- Then, click Apply and hit OK.

Don’t Let a Black Screen Ruin Your Winning Streak
Seeing your screen go black while playing a game can be highly frustrating. We’ve explained the causes behind this issue and suggested solutions to fix it. Once you apply the above solutions, black screen issues will become a thing of the past.
If none of the fixes work, the problem could be hardware-related. If that is the case, have a technician look at your device to see if there are any hardware issues.
If your screen keeps going black while gaming and takes you back to the desktop, here are a few solutions you can try to fix the problem.
Also read:
- [New] Best Choices Twitter Video Conversion Software
- [New] Techniques for Immaculate VR Gaming Footage
- [Updated] Guide to Mass Extraction of TikTok Content
- Demystifying Roblox's Error Code 262
- Elevating Historical DirectX Games Through DXVK Technology
- Embracing Game-Driven Efficiency with Windows OS
- How to Overcome PC Crashes in Pathfinder: Wrath of the Righteous - Solved and Explained
- How to Rectify Non-Functional Discord Game Identifier on PC
- Optimizing Visual Quality Through Driver Restart on Win10/11
- Overcome Access Denial: Five Pivotal Strategies for Correcting Secure Keys in Windows
- Stanford's Cutting-Edge Breakthrough Blends AI with VR, Signaling the End for Heavyheadsets - ZDNET Report
- The Ultimate Guide to Bypassing iCloud Activation Lock from Apple iPhone 14
- Troubleshooting Tips for a Stable Rocket League: Overcoming Performance Lags
- Unlock Your Creative Potential with Direct Drawing in Windows 11
- Unveiling the Power of Forefront AI: How Does It Compare with ChatGPT?
- Upgrading to Apple's Newest: Key Differences Between iPhone 16 and iPhone
- Title: Steps to Reverse the Blackout Issue in PC Games
- Author: David
- Created at : 2024-12-01 06:04:24
- Updated at : 2024-12-06 23:30:17
- Link: https://win11.techidaily.com/steps-to-reverse-the-blackout-issue-in-pc-games/
- License: This work is licensed under CC BY-NC-SA 4.0.
