Solving Frequent File Explorer Freezes in Windows 11

Solving Frequent File Explorer Freezes in Windows 11
File Explorer is an essential app that allows you to access, manage, and organize files and folders on your computer. However, it’s not the most stable offering from Microsoft. There may be instances where File Explorer becomes unresponsive or, even worse, crashes on your Windows 11 computer.
Frequent File Explorer crashes can disrupt your workflow and leave you frustrated. This post will discuss some useful tips to fix File Explorer crashes in Windows 11.
1. Restart the Windows Explorer Process
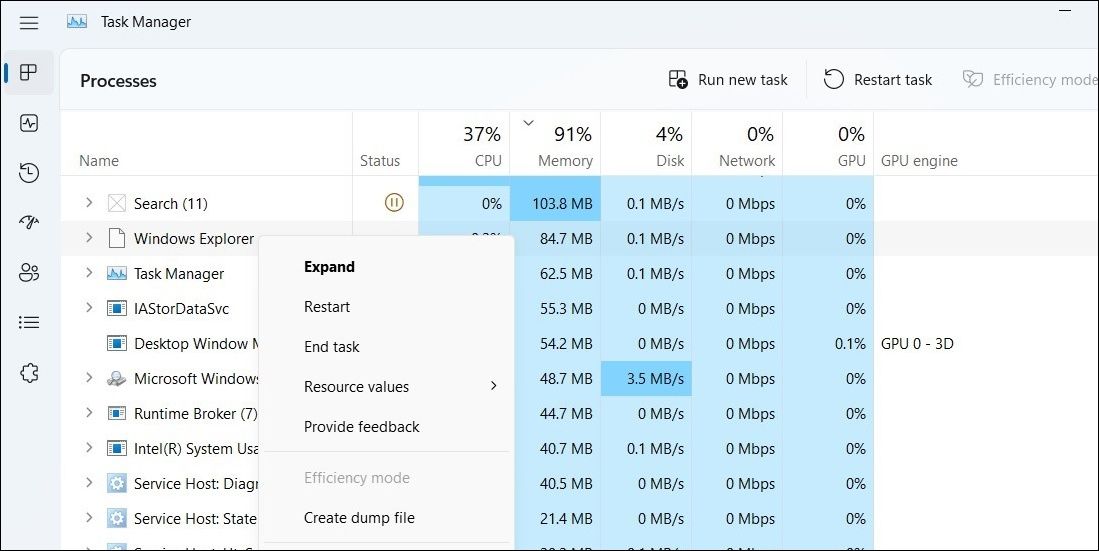
Windows Explorer is a system process that provides the graphical interface for several utilities like File Explorer, taskbar, Start menu, and more. Temporary issues with the Windows Explorer process can sometimes cause File Explorer to close unexpectedly on Windows. Instead of rebooting the system entirely, you can simply restart the Windows Explorer process to fix issues with it. Here are the steps for the same.
- Right-click on theStart icon and selectTask Manager from the list.
- In theProcesses tab, locateWindows Explorer . Right-click on it and selectRestart .

Your taskbar will disappear for a split second before reappearing, indicating the Windows Explorer process has rebooted. After that, File Explorer should work fine on Windows.
2. Clear File Explorer Cache
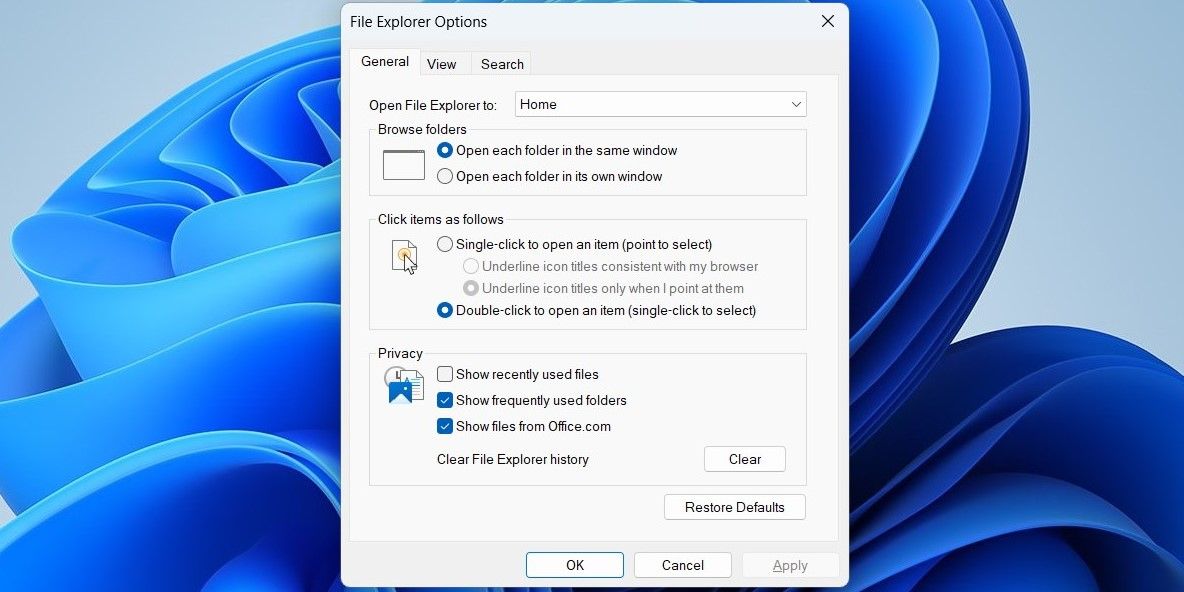
File Explorer, like any other program, accumulates cache data to improve its performance. However, when this data becomes outdated or corrupt, it can lead to a variety of issues, including the one discussed here. You can try getting rid of the existing File Explorer cache to see if that helps. To do so, use these steps:
- Open theStart menu , search forfile explorer options , and select the first result that appears.
- Under theGeneral tab, click theClear button next toClear File Explorer history .

3. Configure File Explorer Options
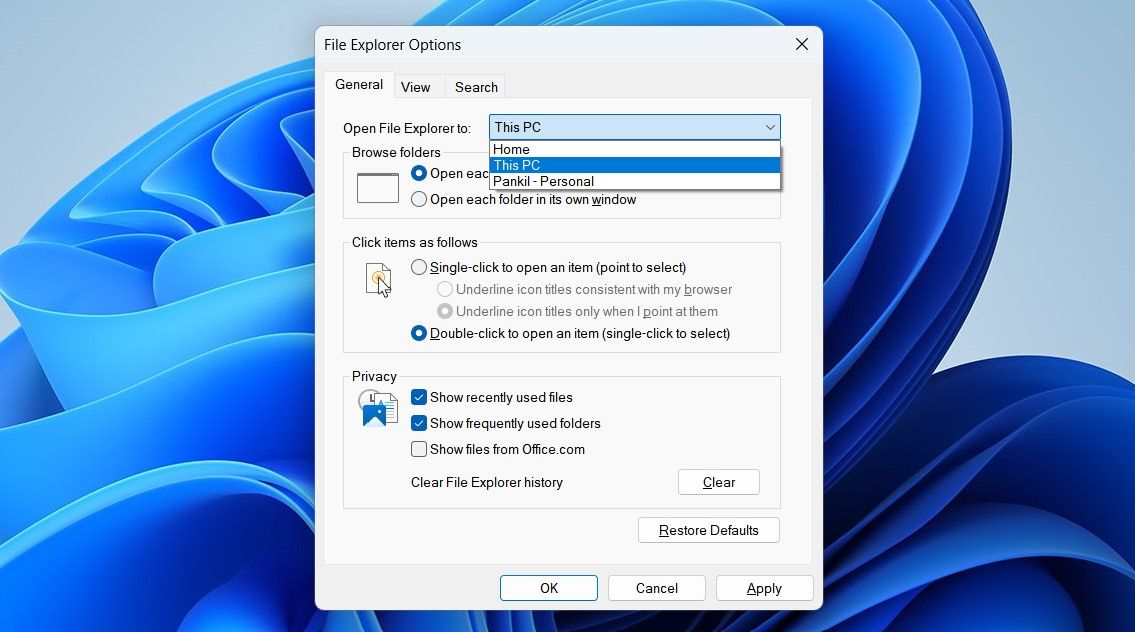
Issues with Quick Access in Windows 11 can also cause File Explorer to malfunction at times. If that’s the case, you can configure File Explorer to open on This PC page to resolve the issue. Here are the steps you can follow.
- PressWin + E to open File Explorer.
- Click thethree-dot menu icon at the top and selectOptions .
- In theFolder Options window, click the drop down menu next toOpen File Explorer to and selectThis PC .
- HitApply followed byOK .

4. Disable Your Antivirus Program
It’s always a good idea to protect your system with an antivirus program. However, not all antivirus programs are equally reliable. It’s possible that your third-party antivirus program is conflicting with File Explorer processes, resulting in abrupt crashes. To check for this possibility, you can temporarily disable your antivirus program by clicking its icon on the taskbar and selectingDisable > Disable until the next restart .
5. Launch Folder Windows in a Separate Process
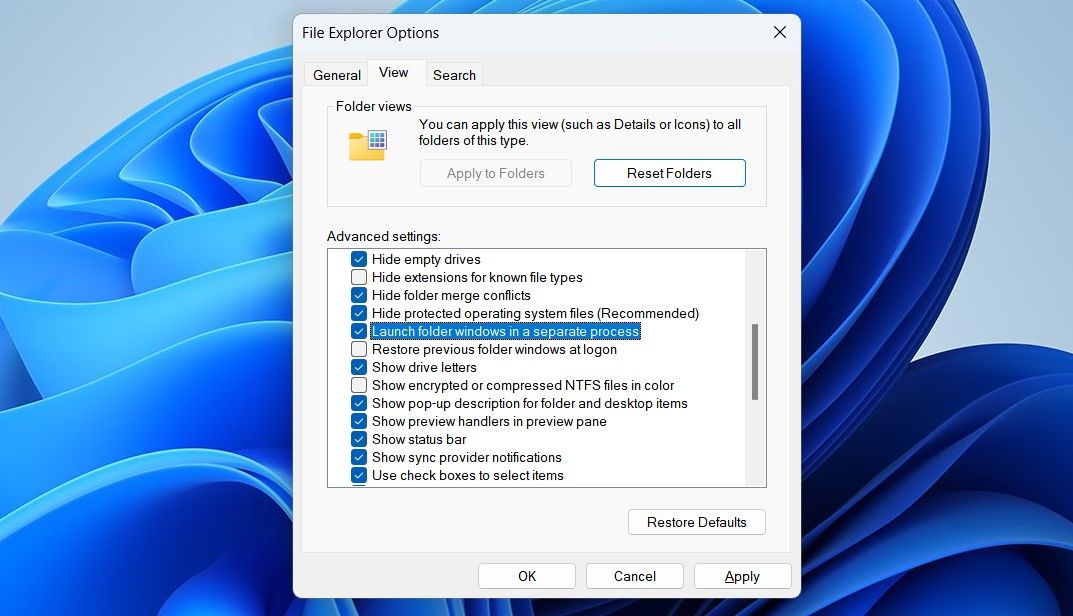
By default, all instances of File Explorer operate within a single explorer.exe process. As a result, when one of the File Explorer windows experiences issues, it affects all the active windows. To avoid this, you can configure Windows to open each File Explorer window in a separate process. Here’s how to do it.
- PressWin + R to open the Run command dialog box.
- Typecontrol.exe folders in the text field and pressEnter to open File Explore Options.
- Switch to theView tab.
- UnderAdvanced settings , tick theLaunch folder windows in a separate process checkbox.
- HitApply followed byOK .

6. Run the Windows Memory Diagnostic Tool
You are likely to experience such File Explorer crashes if there is an issue with your PC’s RAM. Fortunately, Windows includes a useful Memory Diagnostic tool that can examine your RAM for any potential errors. Running the tool requires a system restart, so be sure to save all your work beforehand.
PressWin + R to open the Run dialog box. Typemdsched in the box and pressEnter . ClickRestart now and check for problems in the Windows Memory Diagnostic window.
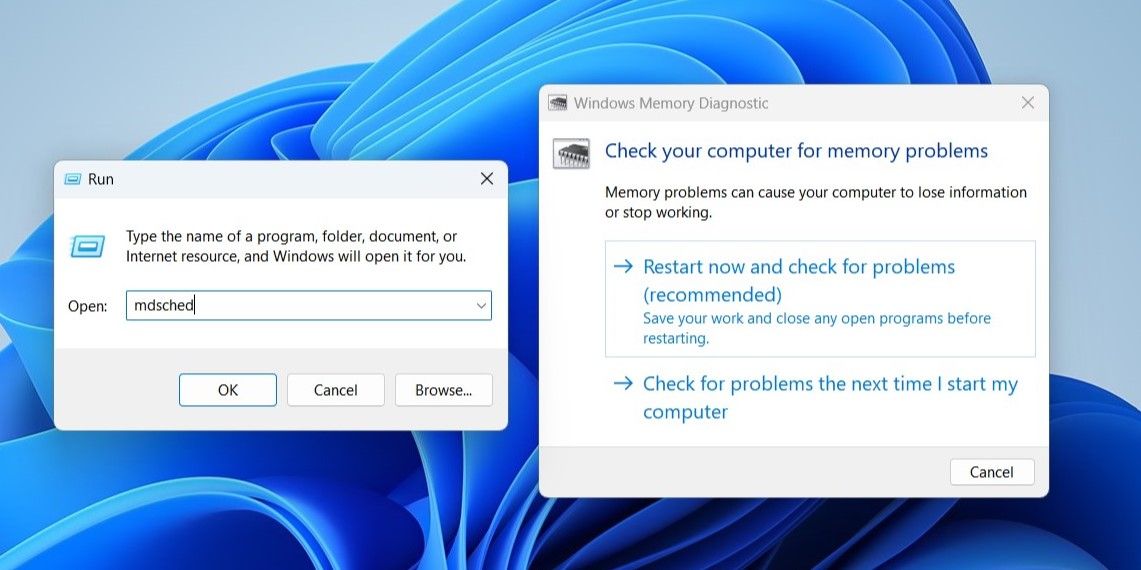
Wait for the Windows Memory Diagnostic tool to scan your PC’s RAM for errors. If it discovers any issues, take appropriate steps to troubleshoot those problems.
7. Troubleshoot in Clean Boot Mode
When you boot Windows in a clean boot state, it only runs essential programs and processes. This can help you determine if the File Explorer crashes are caused by a faulty third-party app or program.
We have a detailed guide onhow to perform a clean boot on Windows 11 . Follow the steps outlined there to enter clean boot mode. If File Explorer functions correctly while in this state, it means the background app or program causing the issue got disabled. You can consider removing any recently installed apps or programs to resolve the issue for good.
8. Apply Some Generic Fixes to Fix File Explorer Crashes
If the above fixes don’t work or if you experience similar issues with other programs, you can try out some of the generic solutions to fix issues with Windows. Let’s go over all of them one by one.
- Run an SFC Scan: Performing an SFC (or System File Checker) scan will allow Windows to examine your PC for corrupt or damaged system files and repair them.
- Scan for Malware: The presence of malware or viruses can cause File Explorer to misbehave on Windows. You canuse Microsoft Defender’s offline scan to detect and remove malware from your PC.
- Clear Temporary Files: Having an excessive number of temporary files on your PC can have a negative impact on your system’s performance. Hence, it’s a good idea todelete temporary files in Windows 11 .
- Install Windows Updates: Such issues can also occur due to a buggy or outdated Windows build. You can tryinstalling all the pending Windows updates and see if that solves your problem.
Use File Explorer Again Without Any Interruptions
So, this is how you can stop File Explorer from crashing on your Windows computer. In most cases, temporary glitches or an outdated File Explorer cache are the main culprits behind the issue. If not, you may have to resort to the other methods mentioned above to resolve the underlying issue.
Not a fan of the default File Explorer in Windows 11? There are plenty of File Explorer alternatives worth trying out.
Also read:
- [New] Echo Chamber Best Online Spots for Free Skype Music for 2024
- [Updated] 2024 Approved Next Big Thing 10 Games That Inspire GTA V
- [Updated] Image Innovation Unveiling Secrets of Photo Enhancement
- [Updated] Master the Art of Organizing Group Conversations on Skype, Irrespective of Your System's OS
- 2024 Approved Tips to Tame VR-Induced Motion Sickness
- Discover the Quiet Excitement of Apple’s Latest AI Innovations From WWDC - The Surprising Truth You Need to Know
- In 2024, 3 Methods to Mirror Oppo Reno 11 5G to Roku | Dr.fone
- Leading Edge Drawing Pads Dominating the Digital Canvas
- Network Locked SIM Card Inserted On Your Realme GT 5 Phone? Unlock It Now
- Overcoming Webcam Failure in Windows 11: Code 0xA00F4289 Fixes
- Tackling Sound Failure: Resolving Error XC00D36B4
- Troubleshooting Unlinked File Apps on Windows
- Unlocking Full Potential of Windows 11'S Taskbar
- Windows Phone Link: Why Disable YourPhoneExe?
- Title: Solving Frequent File Explorer Freezes in Windows 11
- Author: David
- Created at : 2024-12-22 18:57:12
- Updated at : 2024-12-27 22:47:56
- Link: https://win11.techidaily.com/solving-frequent-file-explorer-freezes-in-windows-11/
- License: This work is licensed under CC BY-NC-SA 4.0.
