
Solutions for Windows Update Error 0X8024800C
Solutions for Windows Update Error 0X8024800C
Windows Update is usually dependable, but errors can cause problems. Error 0x8024800C is one such issue that can make updating your Windows OS difficult. This post will guide you through troubleshooting steps to resolve it. Keep reading to find out how.
What Causes Windows Update Error 0x8024800C?
Windows Update error 0x8024800C is usually caused by corrupted or damaged system files in the Windows Update Temporary folder, located at “C:\Windows\SoftwareDistribution\Download.”
You may also experience this error if third-party software conflicts with Windows Update or if your internet connection is down. Here are some possible causes.
- An incomplete or corrupt download of a Windows Update.
- Insufficient storage space on the system drive.
- Outdated Windows Update Components.
- Issues with your internet connection, such as slow connectivity.
- Third-party software interferes with Windows Update.
Having explored the causes, let’s now see how to fix this problem.
1. Check Your Internet Connection
If you aren’t able to download Windows updates, check your internet connection first. Chances are that a slow or unstable internet connection is causing this error. To test your connection, try accessing other websites in your browser. If you have a fine internet connection, but it’s very slow, you just need to troubleshoot your network .

2. Restart Your Computer and Try Again
Sometimes, a simple restart can fix minor computer issues. It may also help if you experience system instability or frequently encounter this error. Restarting your computer will refresh the system, clearing out any corrupted data that may have caused this issue. So before proceeding, restart your computer and try updating again.
3. Run the Windows Update Troubleshooter
Windows has a built-in troubleshooter tool that identifies and resolves common Windows Update problems. Here’s how to use it:
- Press Win + R on your keyboard to open the Run box.
- Type ms-settings: in the text box and click OK.
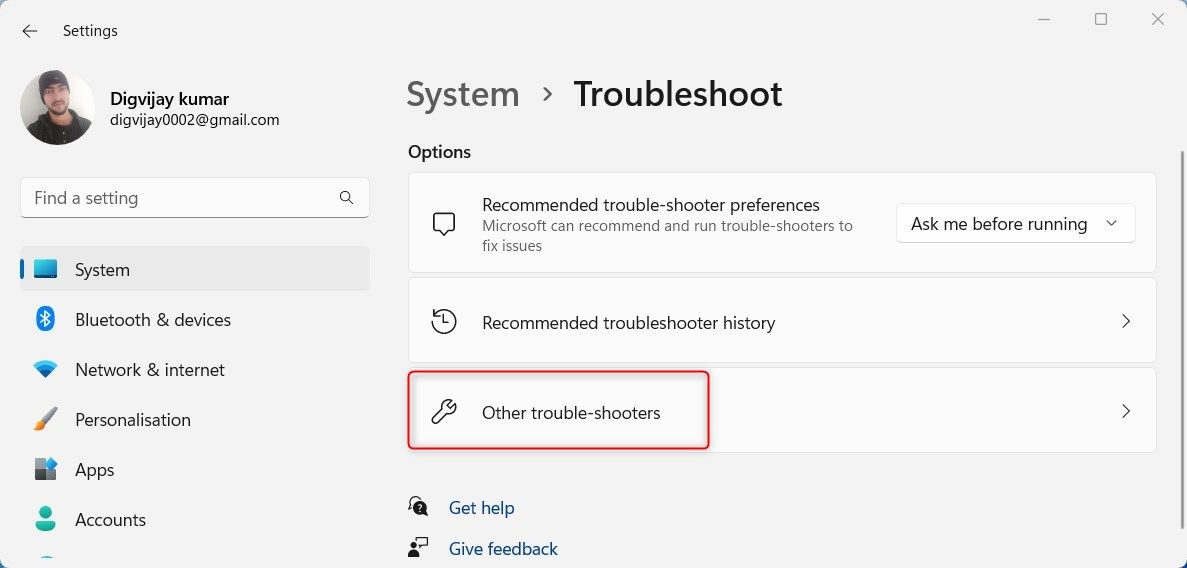
- From the left sidebar, click the System tab.
- Now move to the right pane and click Troubleshoot > Other troubleshooters.

- Click the Run button next to Windows Update.
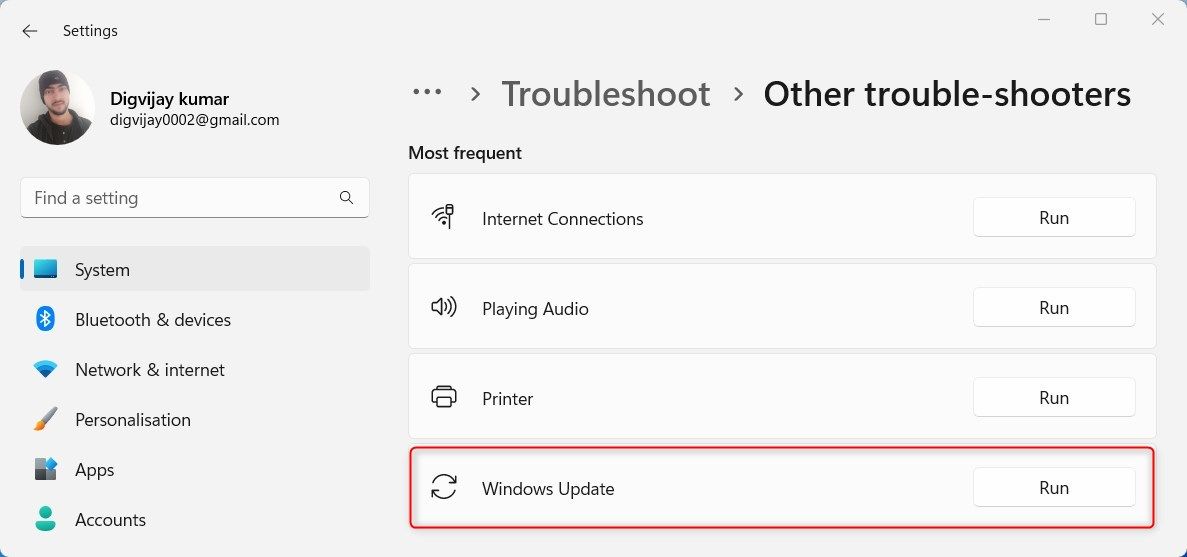
After following the above steps, the troubleshooter will scan your system for errors. When it’s done, the troubleshooter will present you with any solutions it finds. Follow the on-screen instructions and apply any recommendations to fix the problem.
 OtsAV Radio Webcaster
4. Clear the SoftwareDistribution Folder
The Software Distribution folder is where Windows stores data related to updates. It includes temporary files and download logs. Corrupted or missing system files in this folder can cause the 0x8024800C issue. To fix it, you must delete these files from your system. Here’s how:
To get started, open Command Prompt with administrative privileges . Once you’re in an elevated command prompt window, run the following command:
net stop wuauserv net stop bits
This will halt the Windows Update service and the Background Intelligent Transfer Service.
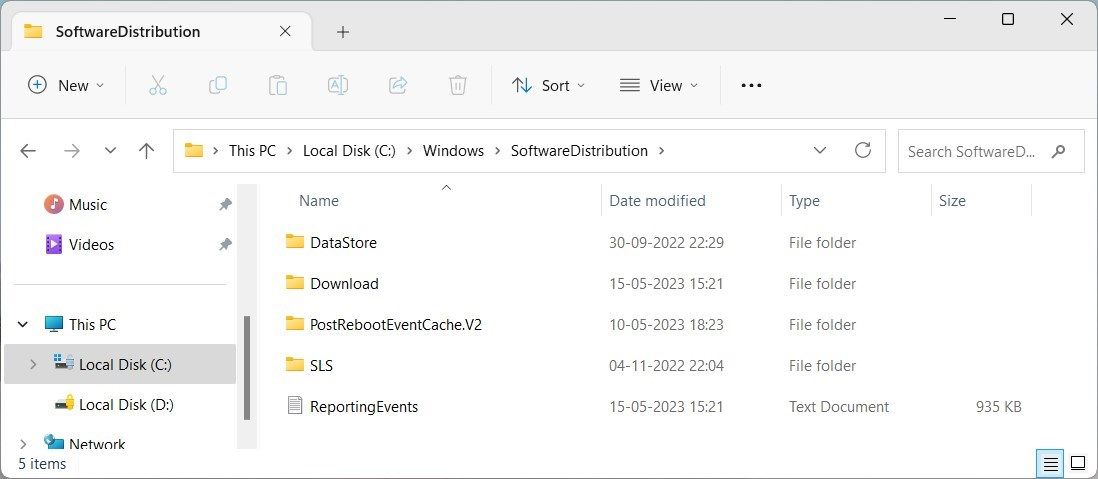
Now use the Win + E shortcut key to open File Explorer. Then navigate to the “C:\Windows\SoftwareDistribution” folder and delete all its contents. You don’t need to delete the folder itself; just the files within it.
Once you’re done, go back to the Command Prompt and type the following commands:
net start wuauserv net start bits
This will restart the Windows Update service and the Background Intelligent Transfer Service. Now try downloading updates for your computer.
5. Disable Third-Party Antivirus Software Temporarily
If you’re experiencing problems updating Windows, your antivirus might be the culprit. These programs can sometimes interfere with Windows Update components, causing errors like 0x8024800C. To be sure, we recommend disabling your antivirus temporarily and checking if this solves the issue.
6. Reset Windows Update Components
It seems that Windows Update components are corrupted or damaged, leading to this issue. To resolve it, you will have to reset them and fix any broken files.
To reset Windows Update Components, follow these steps:
- Click Start and type Notepad in the search box.
- Right-click on the Notepad icon and select Run as administrator.
- If you see a UAC prompt, click Yes to confirm.
- Now in Notepad, copy and paste the following command:
net stop bits net stop wuauserv net stop appidsvc net stop cryptsvc Del "%ALLUSERSPROFILE%\Application Data\Microsoft\Network\Downloader\*.*" rmdir %systemroot%\SoftwareDistribution /S /Q rmdir %systemroot% system32\catroot2 /S /Q sc.exe sdset bits D:(A;;CCLCSWRPWPDTLOCRRC;;;SY)(A;;CCDCLCSWRPWPDTLOCRSDRCWDWO;;;BA)(A;;CCLCSWLOCRRC;;;AU)(A;;CCLCSWRPWPDTLOCRRC;;;PU) sc.exe sdset wuauserv D:(A;;CCLCSWRPWPDTLOCRRC;;;SY)(A;;CCDCLCSWRPWPDTLOCRSDRCWDWO;;;BA)(A;;CCLCSWLOCRRC;;;AU)(A;;CCLCSWRPWPDTLOCRRC;;;PU) cd /d %windir% system32 regsvr32.exe /s atl.dll regsvr32.exe /s urlmon.dll regsvr32.exe /s mshtml.dll regsvr32.exe /s shdocvw.dll regsvr32.exe /s browseui.dll regsvr32.exe /s jscript.dll regsvr32.exe /s vbscript.dll regsvr32.exe /s scrrun.dll regsvr32.exe /s msxml.dll regsvr32.exe /s msxml3.dll regsvr32.exe /s msxml6.dll regsvr32.exe /s actxprxy.dll regsvr32.exe /s softpub.dll regsvr32.exe /s wintrust.dll regsvr32.exe /s dssenh.dll regsvr32.exe /s rsaenh.dll regsvr32.exe /s gpkcsp.dll regsvr32.exe /s sccbase.dll regsvr32.exe /s slbcsp.dll regsvr32.exe /s cryptdlg.dll regsvr32.exe /s oleaut32.dll regsvr32.exe /s ole32.dll regsvr32.exe /s shell32.dll regsvr32.exe /s initpki.dll regsvr32.exe /s wuapi.dll regsvr32.exe /s wuaueng.dll regsvr32.exe /s wuaueng1.dll regsvr32.exe /s wucltui.dll regsvr32.exe /s wups.dll regsvr32.exe /s wups2.dll regsvr32.exe /s wuweb.dll regsvr32.exe /s qmgr.dll regsvr32.exe /s qmgrprxy.dll regsvr32.exe /s wucltux.dll regsvr32.exe /s muweb.dll regsvr32.exe /s wuwebv.dll netsh winsock reset netsh winsock reset proxy net start bits net start wuauserv net start appidsvc net start cryptsvc - Click File in the menu bar and select Save As.
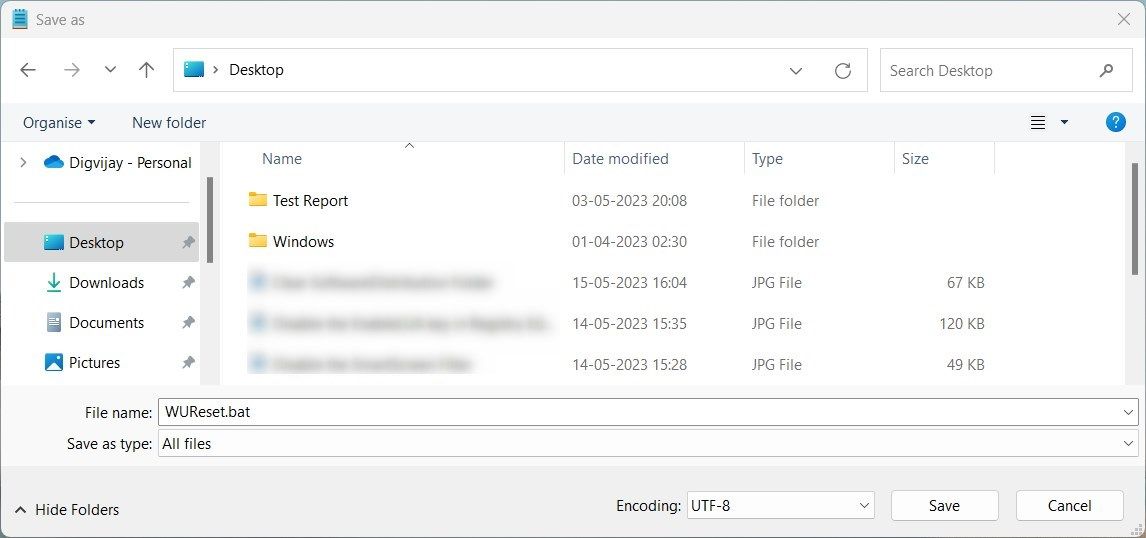
- In the dialog box that appears, set the Save as type to All Files.
- Name your file WUReset.bat and save it on your desktop.
- Once you have created the file, right-click on it and choose Run as administrator.
- If you see a UAC prompt, click Yes to confirm.
This will reset the Windows Update components and fix the 0x8024800C error. After that, you can try updating Windows again.
7. Perform Some Generic Fixes
After trying all of the above solutions, you should also try some generic fixes. This includes running System File Checker to repair corrupted system files and running Disk Cleanup to remove unnecessary junk files . You may also want to use the Deployment Image Servicing and Management tool to repair corrupt system images.
If the problem isn’t fixed, you can try either system restore or reinstalling Windows. These options will reset your computer to its original settings, which will most likely resolve any software-related problems. And remember to back up your Windows data before trying these solutions so you have something to fall back on if something goes wrong.
Fixing Windows Update Error 0x8024800C
Having trouble downloading and installing Windows updates? You might be facing Windows Update Error 0x8024800C, which prevents your PC from accessing the latest updates and security patches. Thankfully we have some easy solutions that may help you fix this error code on your Windows PC.
- Title: Solutions for Windows Update Error 0X8024800C
- Author: David
- Created at : 2024-08-16 00:20:28
- Updated at : 2024-08-17 00:20:28
- Link: https://win11.techidaily.com/solutions-for-windows-update-error-0x8024800c/
- License: This work is licensed under CC BY-NC-SA 4.0.