Security Essentials: Pre-Upgrade Activation of TPM & Secure Boot

Security Essentials: Pre-Upgrade Activation of TPM & Secure Boot
Quick Links
- What Are Secure Boot and TPM?
- How to Enable TPM and Secure Boot
- Use Microsoft’s PC Health Check App to Check If Your Hardware Is Compatible
Key Takeaways
- Windows 11 requires specific hardware, including AMD Ryzen 3000 series or Intel 7th Gen CPU or better, TPM, and Secure Boot.
- TPM is a hardware-level security solution that protects data from hacking, while Secure Boot prevents unauthorized operating systems from booting up.
- You can enable TPM and Secure Boot in your BIOS/UEFI settings, but be aware that Secure Boot may prevent dual-booting and updates on unsupported hardware.
Considering upgrading to Windows 11? There are a couple of requirements that might stop you in your tracks. We’ll explain how to know if your hardware will pass Windows 11’s checks.
First up is your physical hardware. If you’re not using an AMD Ryzen 3000 series or Intel 7th Gen CPU or better, neither a clean Windows 11 installation nor the Windows 10 upgrade path will work. Second, if your computer doesn’t support Secure Boot and TPM, you’ll also fall at the initial hurdle. However, all is not lost because you can switch on Secure Boot and TPM from your BIOS/UEFI menu.
What Are Secure Boot and TPM?
The Trusted Module Platform (TPM) is a hardware-level security solution that protects your data from hacking and other data breaches. The TPM holds unique encryption keys stored in such a way that it is nearly impossible for a hacker to access. If someone breaches your computer and your data is encrypted, it will remain secure.
Microsoft’s recommended requirements for Windows 11 list TMP 2.0. However, you can still upgrade using a previous version, TPM 1.2, which is the minimum requirement.
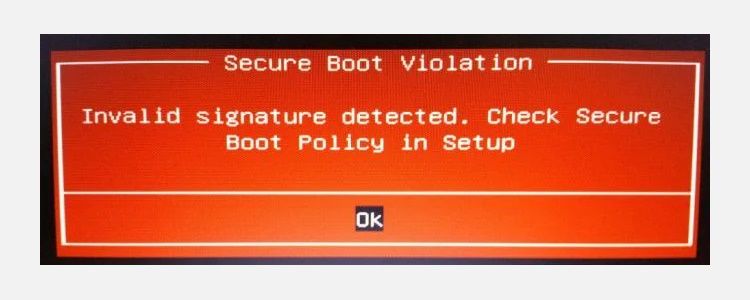
Along with TPM 2.0, Microsoft also requires you to activate Secure Boot, a UEFI-level security setting that stops any unauthorized operating system from booting up. Secure Boot is effectively a gatekeeper, stopping malicious code from booting up before your system, and its primary goal is to protect against rootkits, bootkits, and other malicious code.

But it also has some side effects. For example, Secure Boot will stop you from dual-booting Linux distributions, which has led many users to disable Secure Boot.
On top of those two vital features, Windows 11 has specific hardware requirements , with Microsoft opting to block the automatic upgrade path for millions of users. If you’re using Windows 10 on an AMD Ryzen 3000 series or later or an Intel 7th Gen CPU or later, you can upgrade to Windows 11 directly.
However, if not, you’ll have to opt for a Windows 11 clean install or to bypass Windows 11’s minimum requirements . A clean installation of Windows 11 will work on most hardware, but it does come with caveats. Notably, Microsoft has repeatedly stated that it will not provide updates to Windows 11 installations on “unsupported” hardware, so you install at your own risk.
How to Enable TPM and Secure Boot
Trusted Module Platform and Secure Boot are found in your UEFI settings. You’ll have to enter system UEFI to enable them before attempting to upgrade to Windows 11. Both settings are found in similar areas, but we’ll break the steps down into three parts for ease of reading.
How to Enter Your BIOS/UEFI
There are a couple of ways to enter your system BIOS/UEFI. The old tried and tested method of tapping a keyboard key during bootup still works, but you might not get the chance if you have fast boot enabled. If the boot screens whizz past and you end up in Windows 10, there is another way you can access the BIOS:
- Head to Settings > Update & Security > Recovery > Restart now.
- When your computer restarts, you’ll see a big blue screen with several options. Select Troubleshoot > Advanced Options > UEFI Firmware Settings > Restart.
You should be in your BIOS/UEFI settings menu when the computer restarts again.
How to Enable TPM in Your BIOS/UEFI
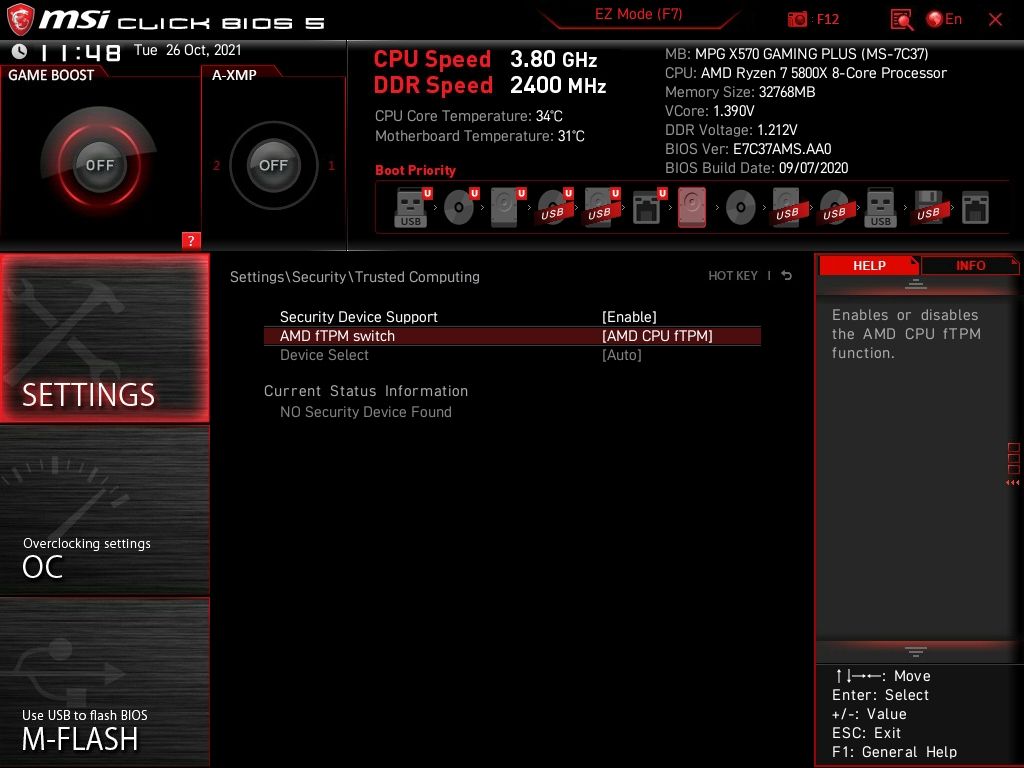
The location of the TPM settings in your BIOS will differ depending on your motherboard manufacturer. The following images are taken from an X570 MSI motherboard, though where you find the TPM option won’t necessarily be similar.

Be aware that the TPM might be listed under a different name on some motherboards, depending on your CPU manufacturer:
- Intel Platform Trust Technology (PTT)
- AMD fTMP
On my motherboard, TPM options are found at Settings > Security > Trusted Computing > TPM Device Selection, where I’ll switch on AMD fTMP.
Once switched on, you can save the settings and return to Windows 10. Once Windows boots, you can check your TPM status within the OS to ensure it’s running properly.
Press Windows key + R to open the Run dialog, then input tpm.msc and press Enter. The TPM management console will load, indicating if TPM is enabled—and if so, which version you’re using.

WPS Office Premium ( File Recovery, Photo Scanning, Convert PDF)–Yearly
How to Enable Secure Boot
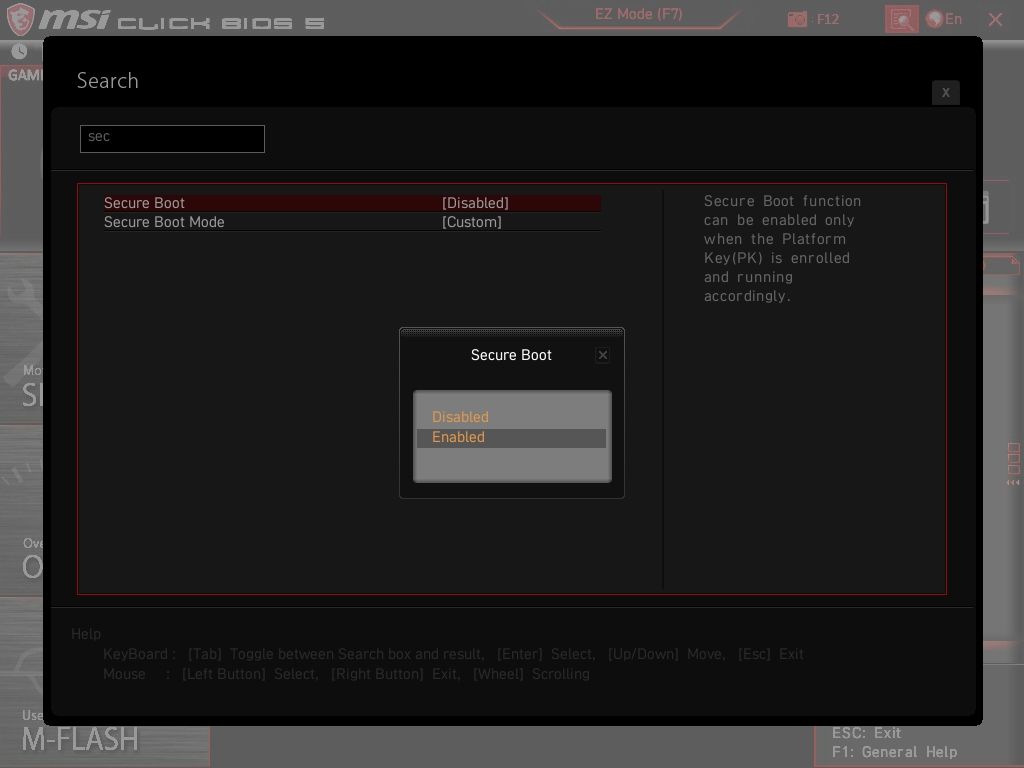
While you’re deep in your system settings, take a moment to check if Secure Boot is enabled.
Like the TPM options, where you find the Secure Boot option will differ depending on hardware, but it is generally located in the Boot tab. Find your Boot tab, scroll down to find the Secure Boot option, and ensure it’s enabled.

Note that Secure Boot requires your drives to use GUID Partition Table (GPT) rather than the older master boot record (MBR). As the newer partition table, GPT comes with several enhancements over MBR. If Secure Boot doesn’t enable, you may need to convert your MBR drive to GPT .
Alternatively, your computer or hardware may be too old to enable Secure Boot.
Use Microsoft’s PC Health Check App to Check If Your Hardware Is Compatible
Microsoft recommends using its PC Health Check App , which you’ll find at the bottom of the linked page, to check for hardware compatibility. Download and fire it up to check your system’s compatibility with Windows 11.
Alternatively, you could check out WhyNotWin11 , an open-source alternative that may provide more detailed insight into your Windows 11 compatibility.
So there you have it. You’ve enabled two of the most important settings that will block your Windows 11 upgrade path. Once enabled, and presuming you’re running compatible hardware, Microsoft will offer you the Windows 11 upgrade. To check if your Windows 11 upgrade is ready, head to Settings > Update & Security > Windows Update, where you’ll find the big update button.
- Title: Security Essentials: Pre-Upgrade Activation of TPM & Secure Boot
- Author: David
- Created at : 2024-08-15 23:41:11
- Updated at : 2024-08-16 23:41:11
- Link: https://win11.techidaily.com/security-essentials-pre-upgrade-activation-of-tpm-and-secure-boot/
- License: This work is licensed under CC BY-NC-SA 4.0.


 Simple and intuitive video editing
 Glarysoft File Recovery Pro Annually - Helps to recover your lost file/data, even permanently deleted data.