Securing a Seamless Software Shift with Windows 11 Upgrade

Securing a Seamless Software Shift with Windows 11 Upgrade
Setting up Windows 11 on your PC, or another PC is a laborious task. After installing the operating system and the OEM drivers, there is still a lot of work left. You need to reconfigure your system settings, re-download, and install all the Microsoft Store apps. Along with that, you need to individually download and install each third-party software, which makes it more challenging.
But what if you could eliminate the hours spent in finding and installing every single app, and configuring every setting? We will discuss two methods to effortlessly migrate most of your old apps to your new PC.
Disclaimer: This post includes affiliate links
If you click on a link and make a purchase, I may receive a commission at no extra cost to you.
1. Using Microsoft Account
If you used a Microsoft account on your old PC, Windows 11 offers multiple options to back up your App list, Preferences, and use OneDrive for personal files. To do that, you must enable OneDrive and back up all your personal files and folders to it. It will only take care of the files part but the apps and preferences are still left. But you must also enable the backup of these two things on your old PC before reinstalling Windows 11 or migrating to a new PC.
Repeat the following steps to enable apps and settings backup:
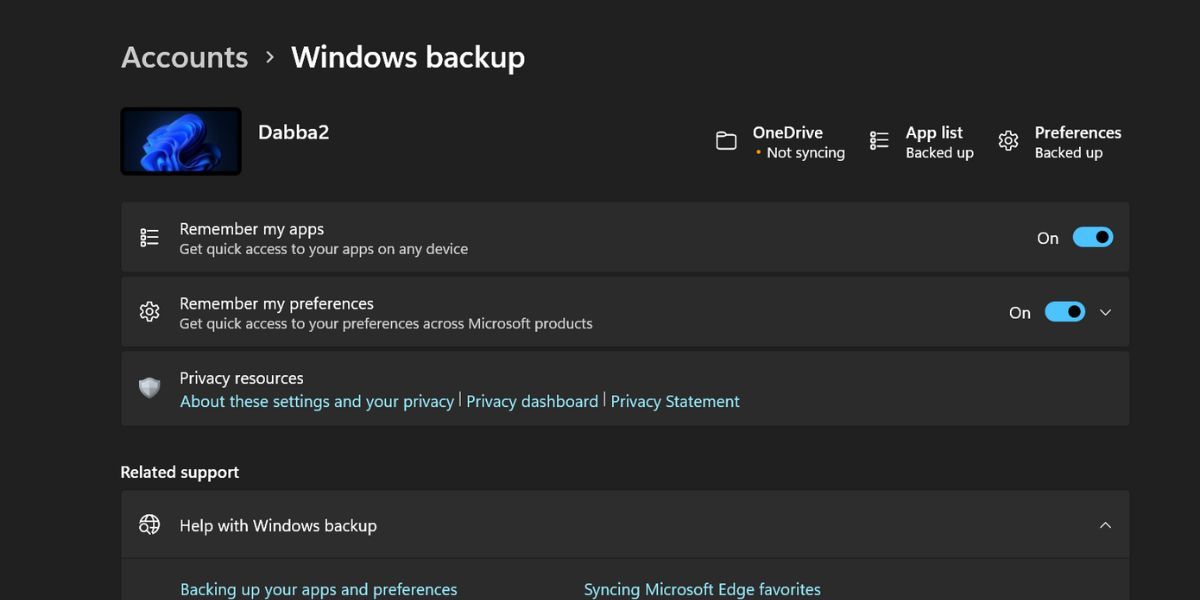
- Press Win + I to launch the Settings app. Navigate to Accounts > Windows backup section.
- Go to the Remember my apps option and click on the toggle next to it to enable the settings.
- Next, click on the toggle next to Remember my preferences option to back up your settings as well.

- You will notice that the top section of the Windows backup page will mark each of these features as “backed up”.
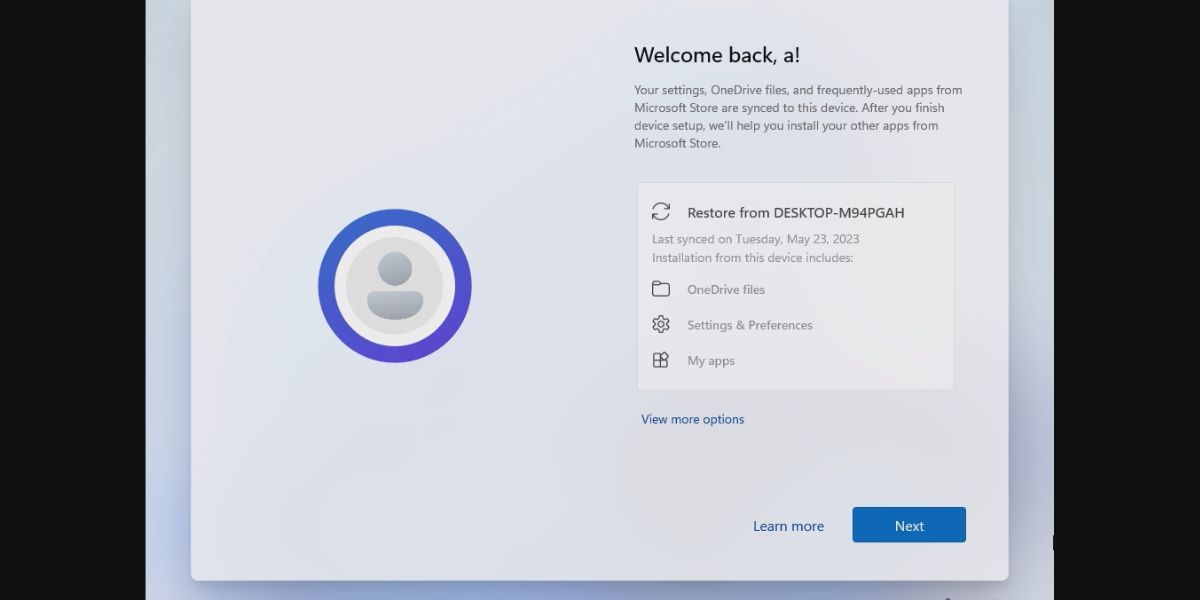
After you reinstall Windows 11, the OOBE page will ask you to sign in with a Microsoft account . Enter your credentials, and you will see a “Welcome back, User!” message with an option to restore all apps, settings, and files present on your previous machine. Click on the Next button and proceed setup up your new PC
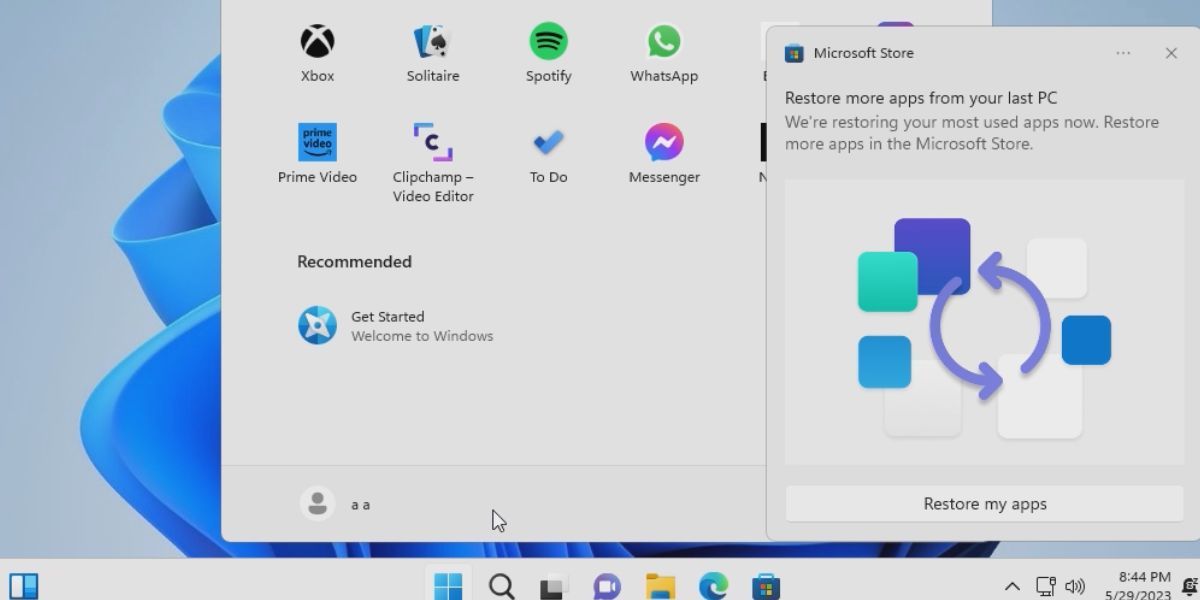
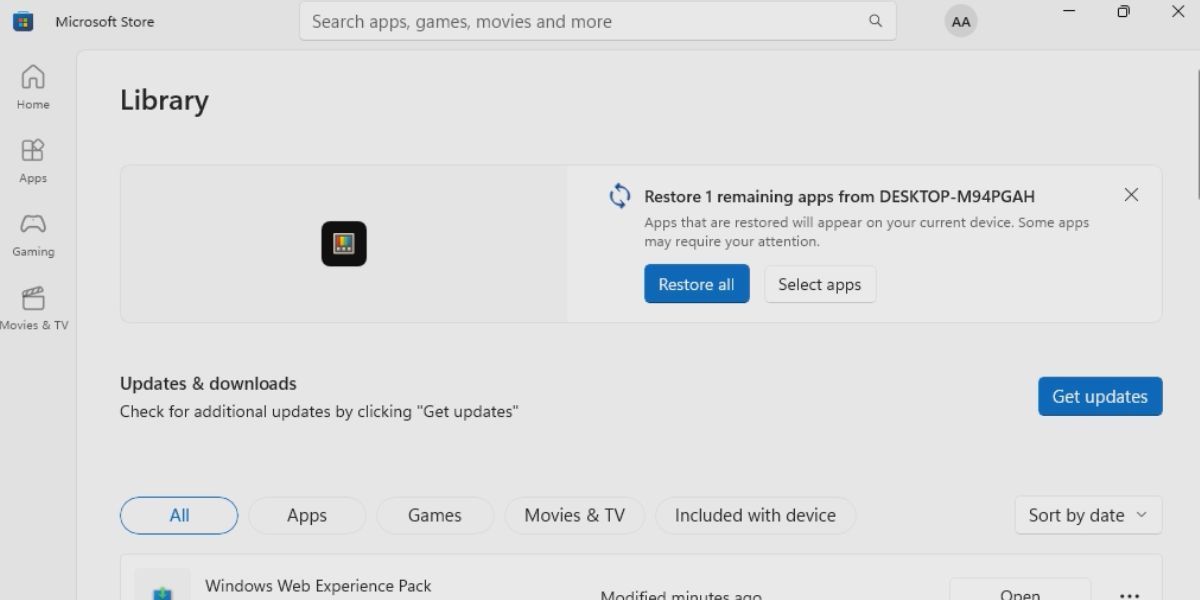
As soon as you boot to the desktop, you will see a popup that Windows is trying to restore the most used apps from before. It will ask you to open Microsoft Store to restore additional apps from your old PC. Click on the Restore my apps button.
Microsoft Store will display all the remaining apps available for restoration. Click on the Restore All button if you want to bring back every app. Wait for the apps to install and then close Microsoft Store.
2. Using a Winget JSON File
The first method of using Microsoft Account has its limitations. It only includes Windows apps and settings but leaves many other third-party apps that you installed from the Winget repository or from the web. So you can use Winget to export the app list into a JSON file and then import it to your new Windows 11 PC. You must execute this method after Windows 11 brings back all the settings and Microsoft apps, and you boot to the desktop.
Repeat the following steps to import a Winget JSON file:
- Download or copy the Winget export file on your system.
- Press Win + R to open the Run dialog box. Type cmd and press Ctrl + Shift + Enter to open Command Prompt with administrator privileges .
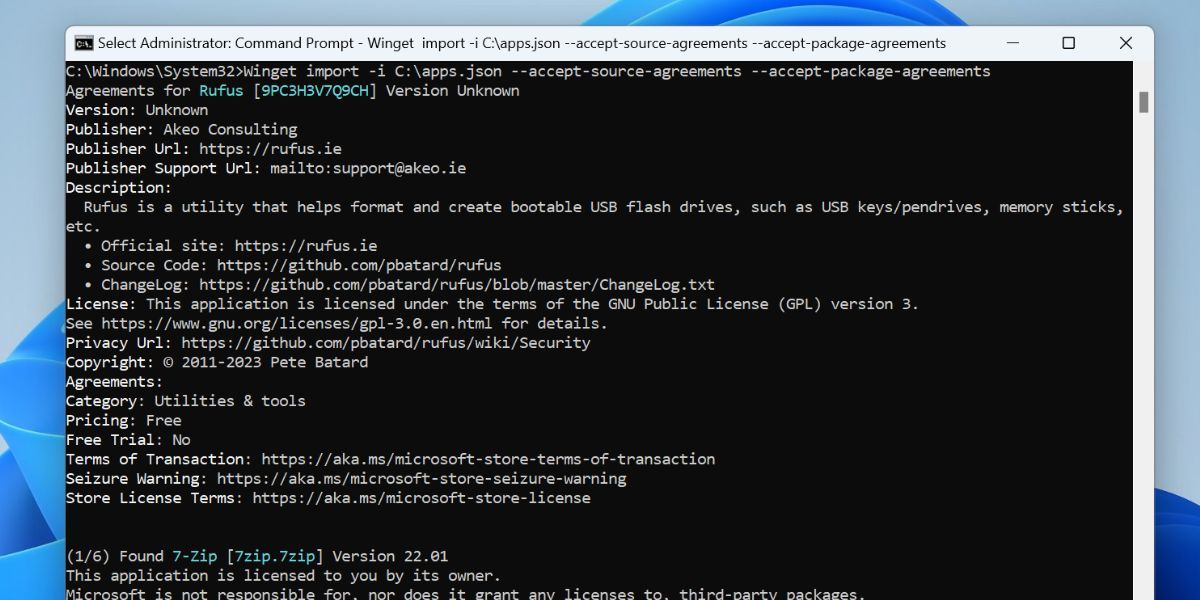
- Now, use the winget import -i command to import the JSON file. Type the following command and press the Enter key:
winget import -i C:\apps.json --accept-source-agreements --accept-package-agreements - Replace the folder location and name with the storage location and name of the winget export file on your system.

- Patiently wait while winget downloads and installs all the packages in the JSON file one by one. Then, close the Command Prompt window.
What About Any Left Out Apps?
Even after using both methods, some apps will still be left out. It is because Microsoft Account sign-in only brings back Windows settings and Microsoft Store apps. The winget export file can restore only the apps listed in its official repository.
As such, you still need to download the programs that aren’t included in both of these methods. But it will be a very short list compared to the effort you would have to put in if you just performed a normal installation.
Save Time When Setting Up Windows 11
Make sure to enable files, apps, and preferences backup on your PC and create a winget export file beforehand. After you have both these backups in place, you can begin reinstalling Windows 11 on a different PC or reinstalling on the same PC.
But what if you could eliminate the hours spent in finding and installing every single app, and configuring every setting? We will discuss two methods to effortlessly migrate most of your old apps to your new PC.
Also read:
- [New] Spatial Realities Compared The Meta and Omni Experience
- [Updated] Perfectly Organizing Weekly Google Meeting Times
- Does find my friends work on Nubia Red Magic 8S Pro+ | Dr.fone
- In 2024, How-To Wipe Your YouTube Watch Later Playlist Cleanly
- Mastering Steam Display Fixes on Microsoft OS
- Minimize Intruding Windows Tips and Tricks Alerts
- Swift & Easy Video-to-SWF Conversion | Download Our FREE Tool!
- Switch to Gesture-Based Navigation in MS Edge on Windows 11
- The Ultimate Guide to the Leading Health Bands
- Top IMEI Unlokers for Your Vivo S18 Phone
- Windows Masterclass: Silent Images for Hidden Archives
- Title: Securing a Seamless Software Shift with Windows 11 Upgrade
- Author: David
- Created at : 2024-10-24 02:23:32
- Updated at : 2024-10-26 23:44:06
- Link: https://win11.techidaily.com/securing-a-seamless-software-shift-with-windows-11-upgrade/
- License: This work is licensed under CC BY-NC-SA 4.0.
