Resurrecting Gaming Classics: Mastering Shaders in RetroArch

Resurrecting Gaming Classics: Mastering Shaders in RetroArch
People often recommend you play your favorite games using RetroArch’s multi-emulator front end. However, you might still find they look slightly “off” compared to how you remember them from when you first played them decades ago. Thankfully, RetroArch supports various shaders, with which you can emulate the look of the ancient CRT on which you first met Mario, Sonic, and their friends.
So, let’s see how those shaders work and how you can configure them to turn your old games into their former, blurry, old-phosphor-distorted, and shadow-mask/Trinitron glory.
Disclaimer: This post includes affiliate links
If you click on a link and make a purchase, I may receive a commission at no extra cost to you.
How Do RetroArch Shaders Work?
Shaders are snippets of code that run on the GPU and alter the appearance of graphics produced by a game or, in this case, an emulator.
You can think of shaders as visual filters that can radically change how games look on your screen. To use a real-world example, consider how the world looks different when wearing tinted classes. The classes don’t change the world around you; they affect your perception of the world’s colors, brightness, and contrast.
RetroArch comes with various shaders that allow you to apply dozens of effects on your games. Some change the games’ colors; others try to make graphics look sharper to enhance details or smoother to reduce “jaggies” (the prominent pixels appearing because of the difference between your monitor’s and the game’s original target resolution). And many are not standalone shaders, but groups of multiple individual shaders to achieve more detailed visual results.
However, since we are talking about emulation and retro gaming, the most popular are “CRT shaders”. Those aim to make our modern flat-panel monitors look like the CRT screens on which we originally played the emulated games back in the day.
The Different “Types” of Shaders in RetroArch
RetroArch supports various graphic APIs. As we will see later, it also comes with shaders in multiple languages. And not all of them are compatible with all APIs.
To complicate things further, one API might work better on your particular GPU compared to the rest and also might lead to better or worse results, depending on the emulator core you choose to play a game.
You might need to experiment to achieve the best results for the combination of your hardware and the games you want to play.
Most users on a relatively new PC with a GPU by Nvidia or AMD should first try theVulkan API, followed byOpenGL , and thenDirect3D .
As we will see later, you can choose from three types of shaders:CG ,GLSL , andSlang . Ideally, go for the third option, Slang, which is compatible with the Vulkan, Direct3D, and OpenGL APIs. According to the official RetroArch documentation, it’s the newest and recommended shader format.
Your second option should beGLSL , but those shaders are only compatible withOpenGL and best for use on phones and tablets.
CG should be your last option, as they are officially considered old, deprecated, and not even supported by some versions of RetroArch.
Before Choosing a Shader
Before moving to the shaders themselves, let’s go over some other options in RetroArch that are just as important for how your emulated games will look.
Note that, for this article, we take for granted that you have a basic setup of RetroArch up and running. If not, check our guide onhow to set up RetroArch on Windows .
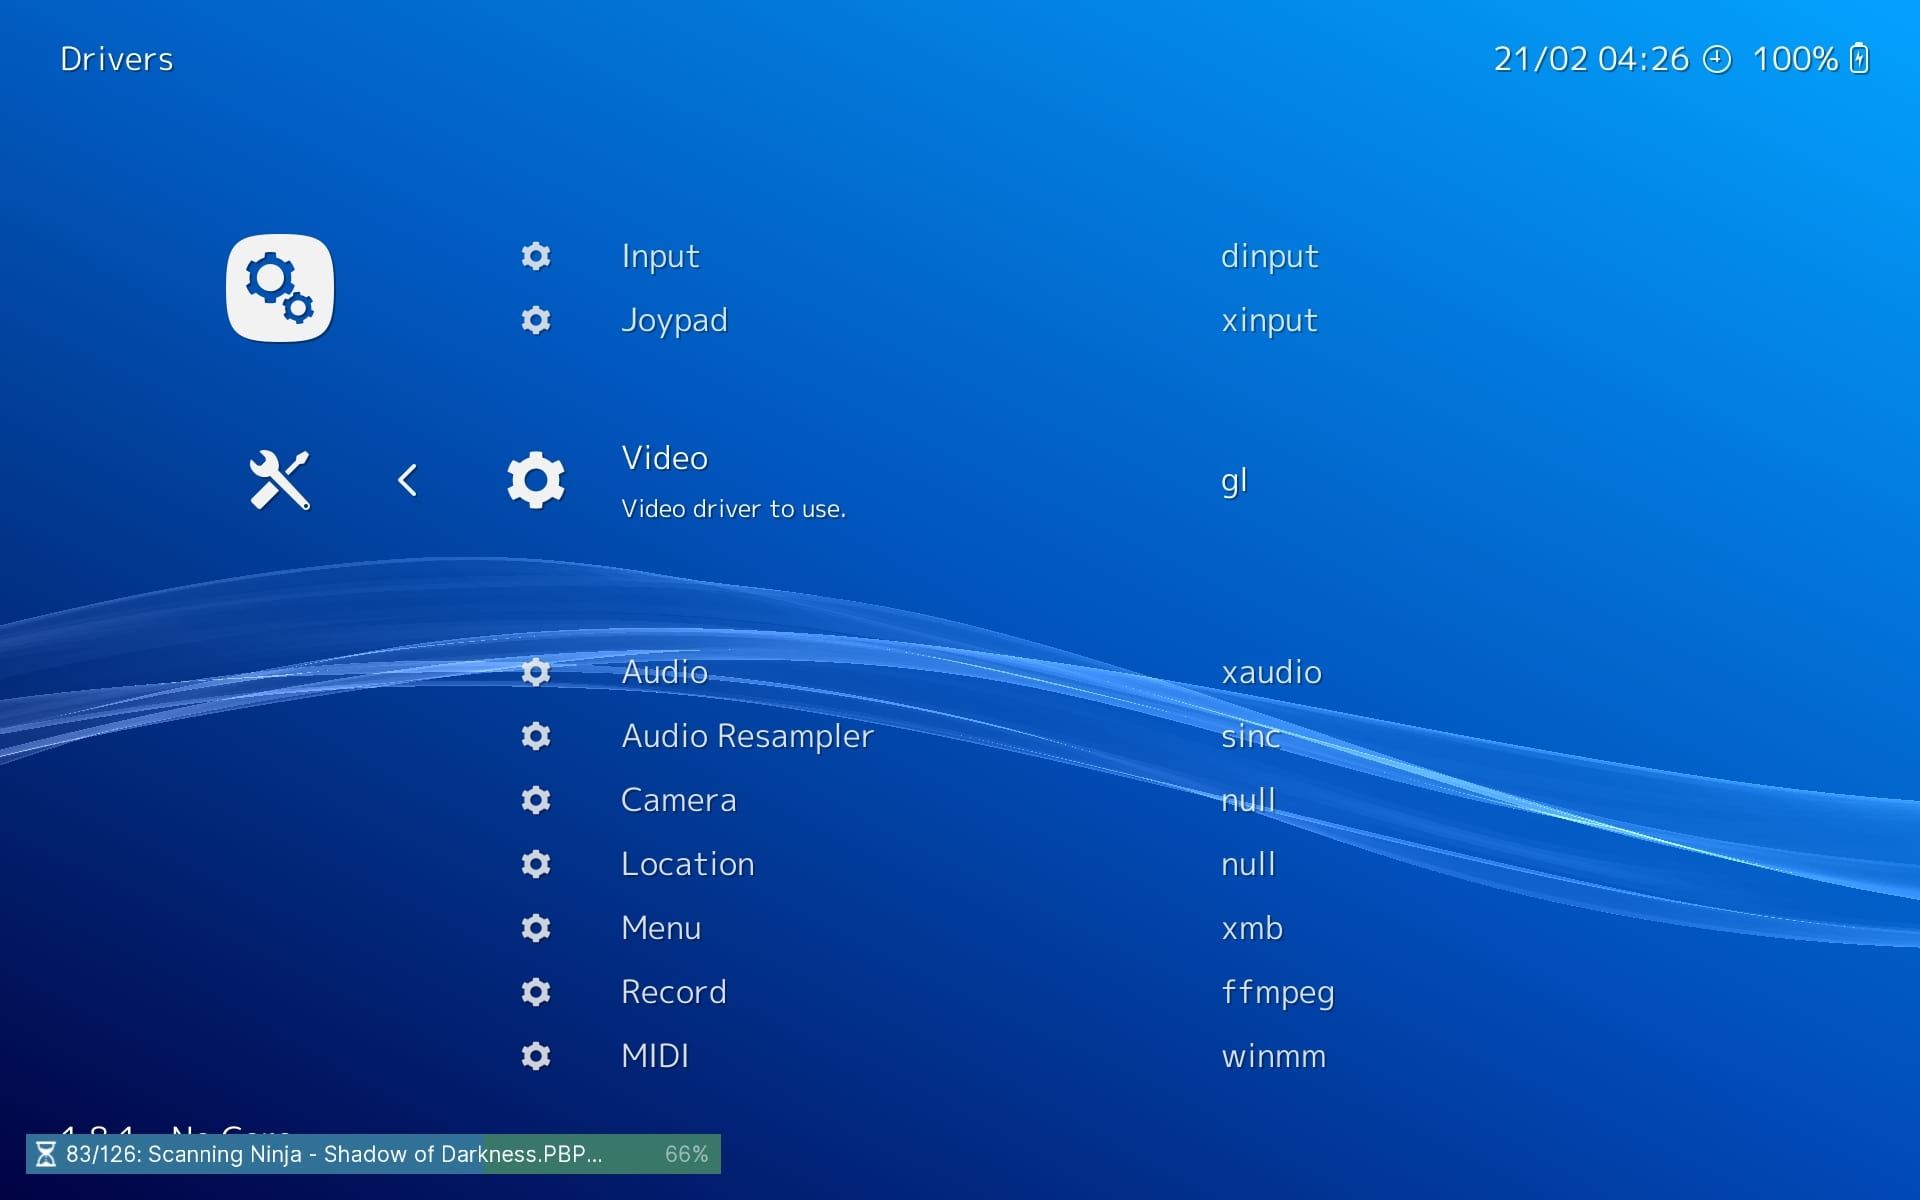
- While using RetroArch’s full-screen menu, move toSettings and enter theDrivers submenu.

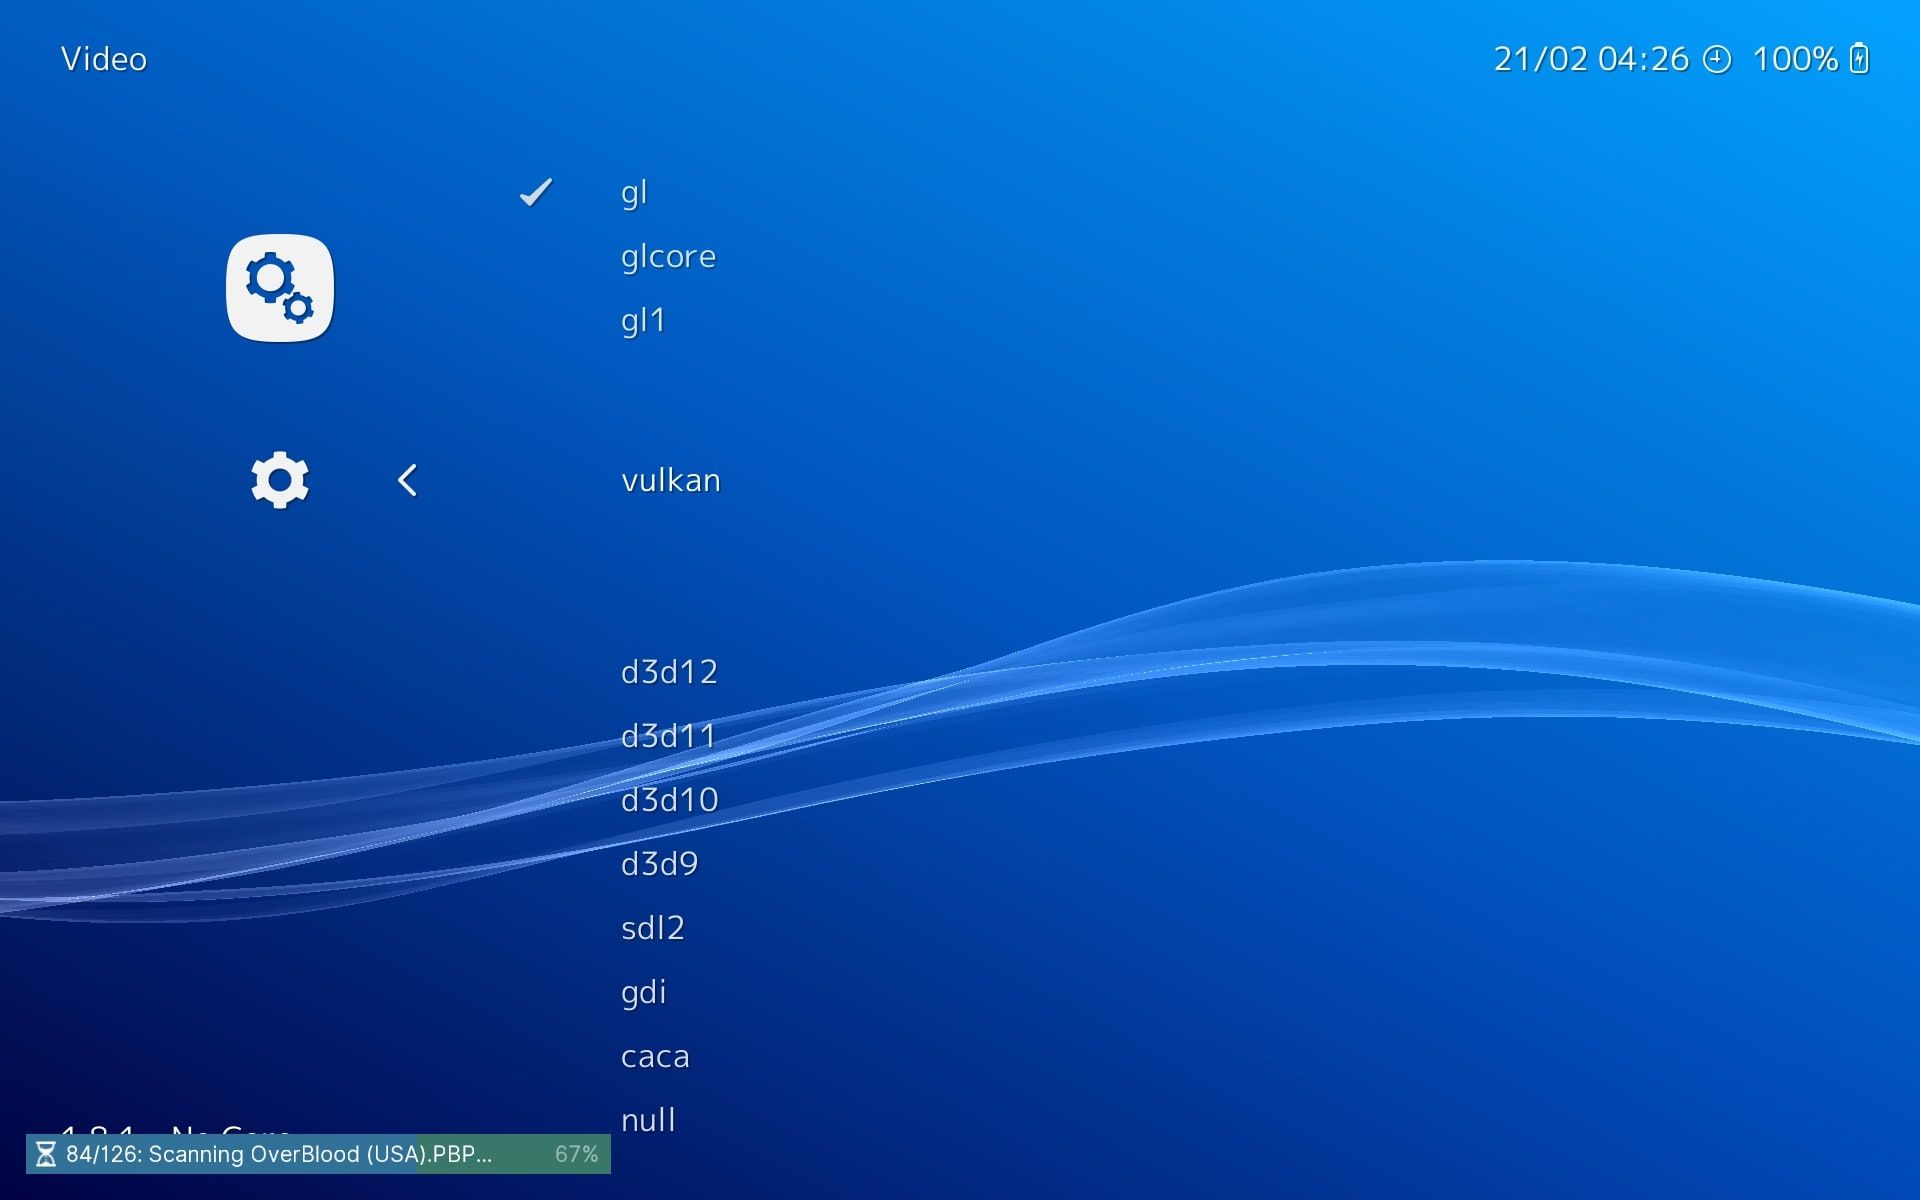
- Move to theVideo option and choose the video driver for the graphics API you want to use (which, in our case, will beVulkan).
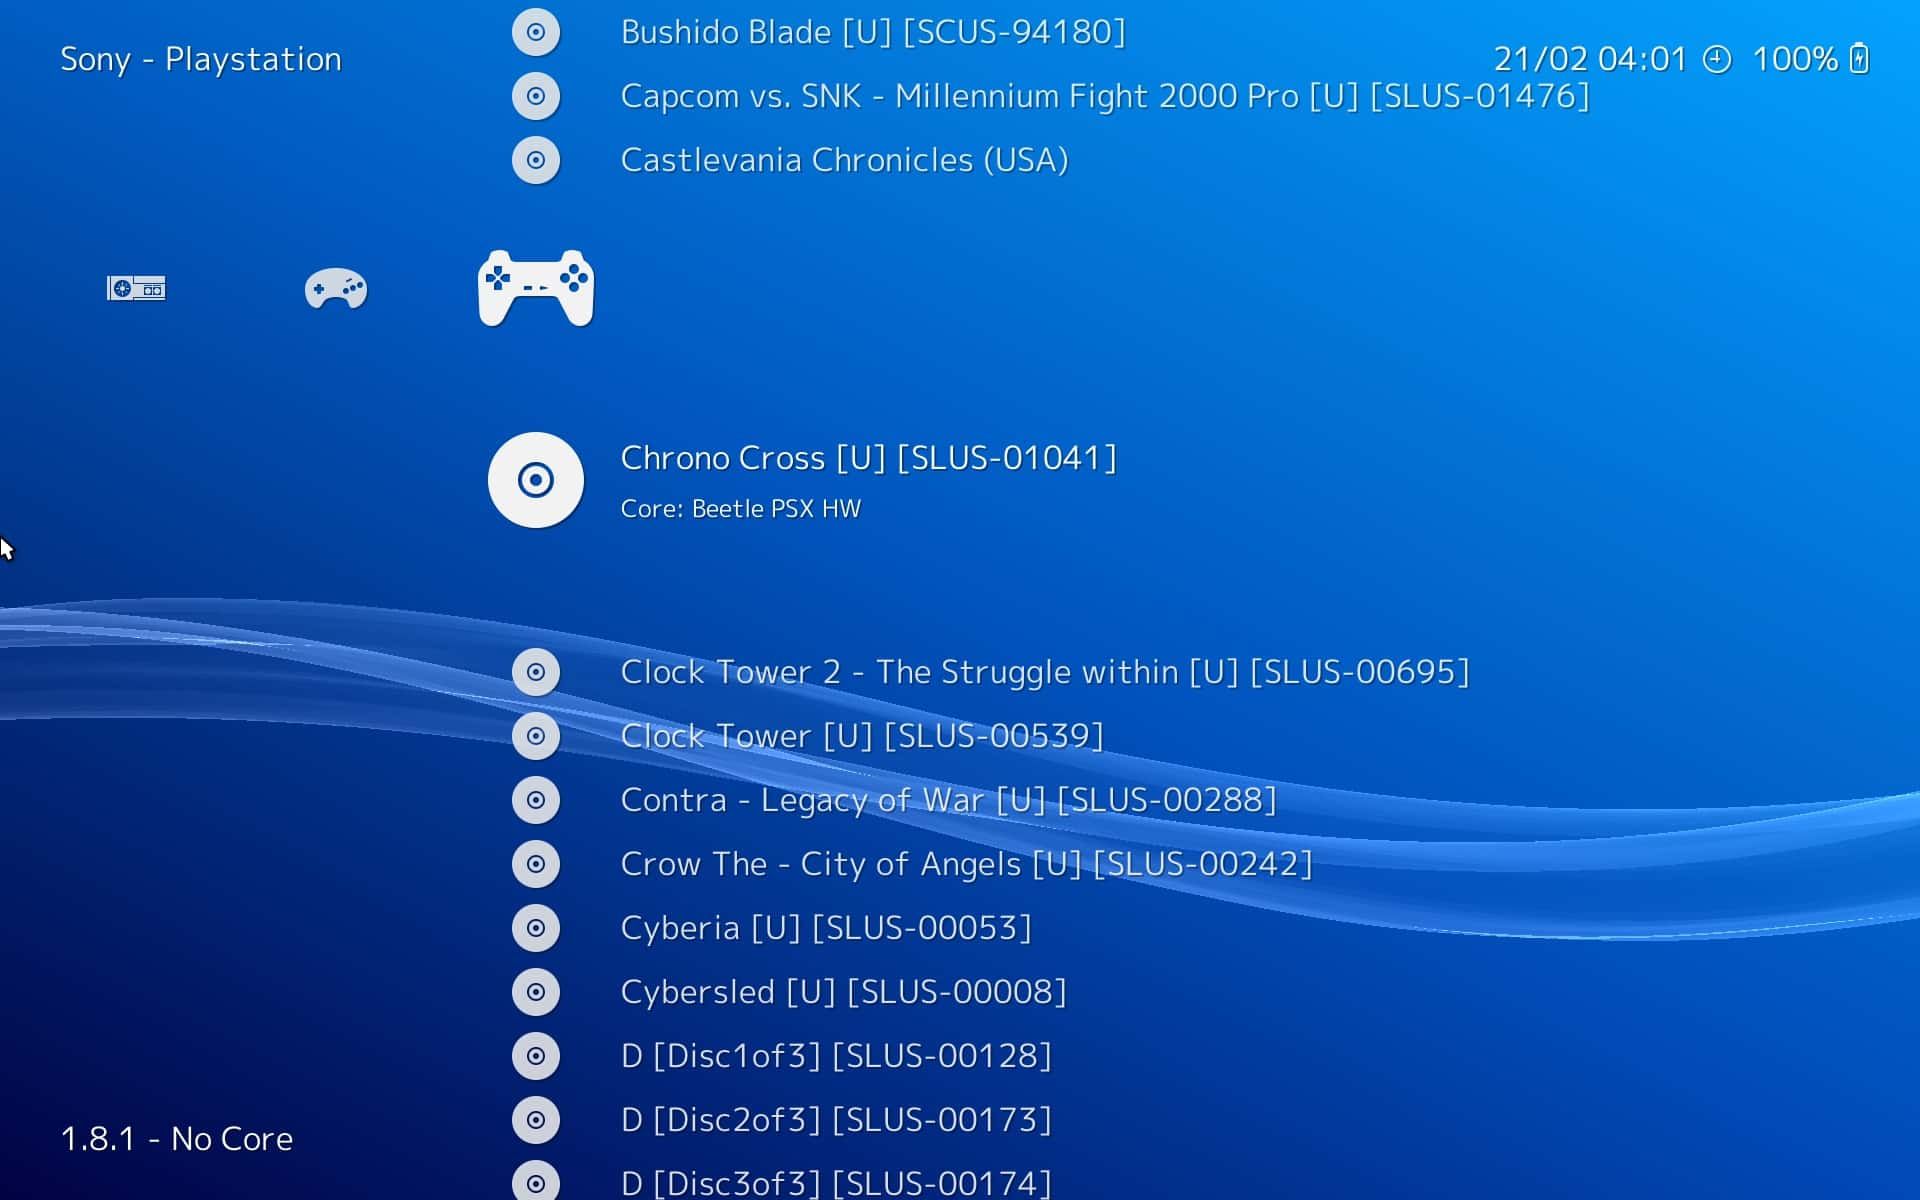
3. Return to the RetroArch menu’s top level and launch any game you wish to play. In this article, we will use classic games for Sony’s first PlayStation console with theBeetle PSX-HW emulation core.
4. With the game up and running, return to RetroArch’s menu (by default, it’s accessible by pressing F1 on your keyboard). You will find yourself on a menu for the active game. Scroll down and choose theOptions entry.
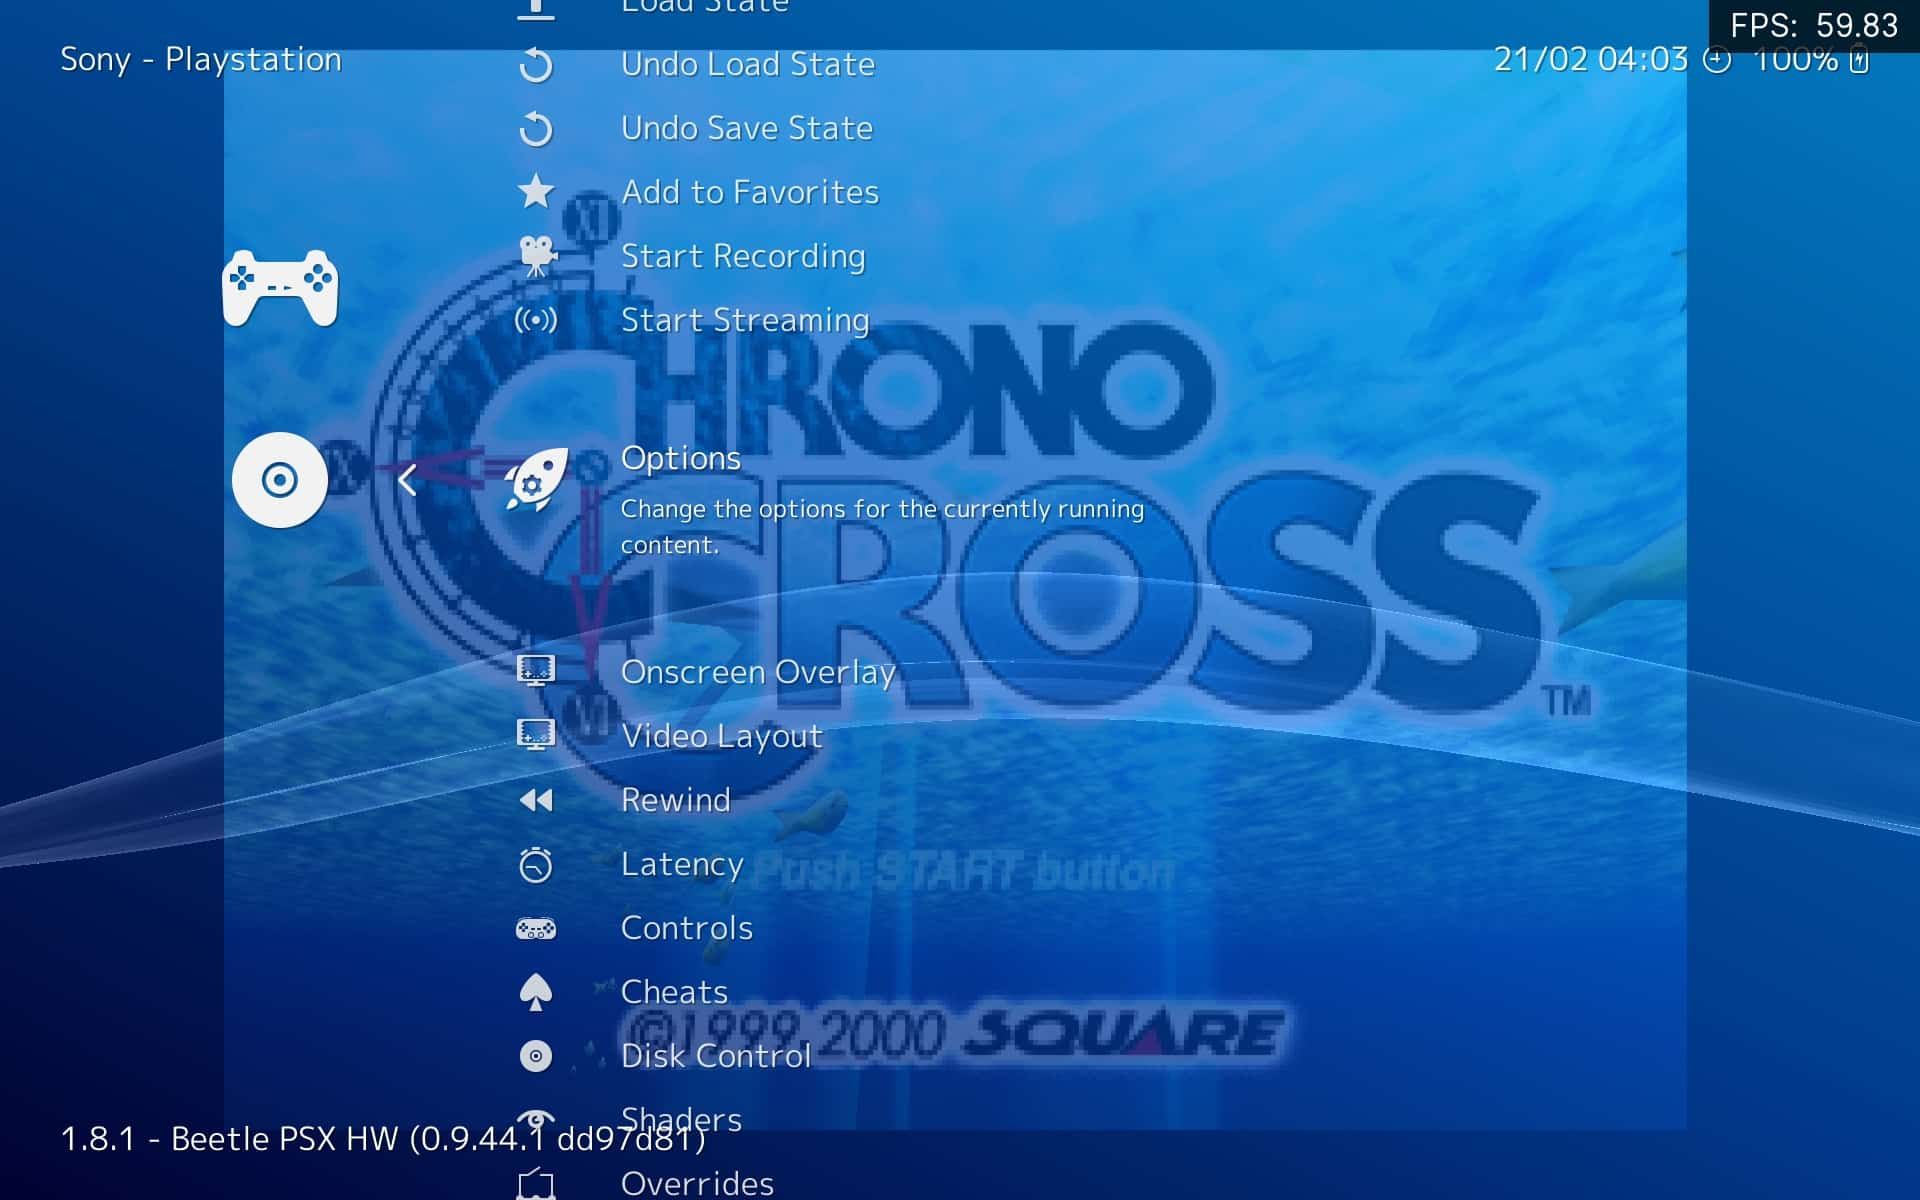
5. Scroll down to find theTexture Filtering entry. Although it’s unrelated to the shaders we will see next, it’s just as important for how your games look. Set its value toNearest to have your game’s graphics look as close to the original hardware as possible,Bilinear or3-point if you want to make them look smoother through playing, andSABR ,xBR , orJINC2 for more advanced smoothing algorithms that make games look more cartoonish.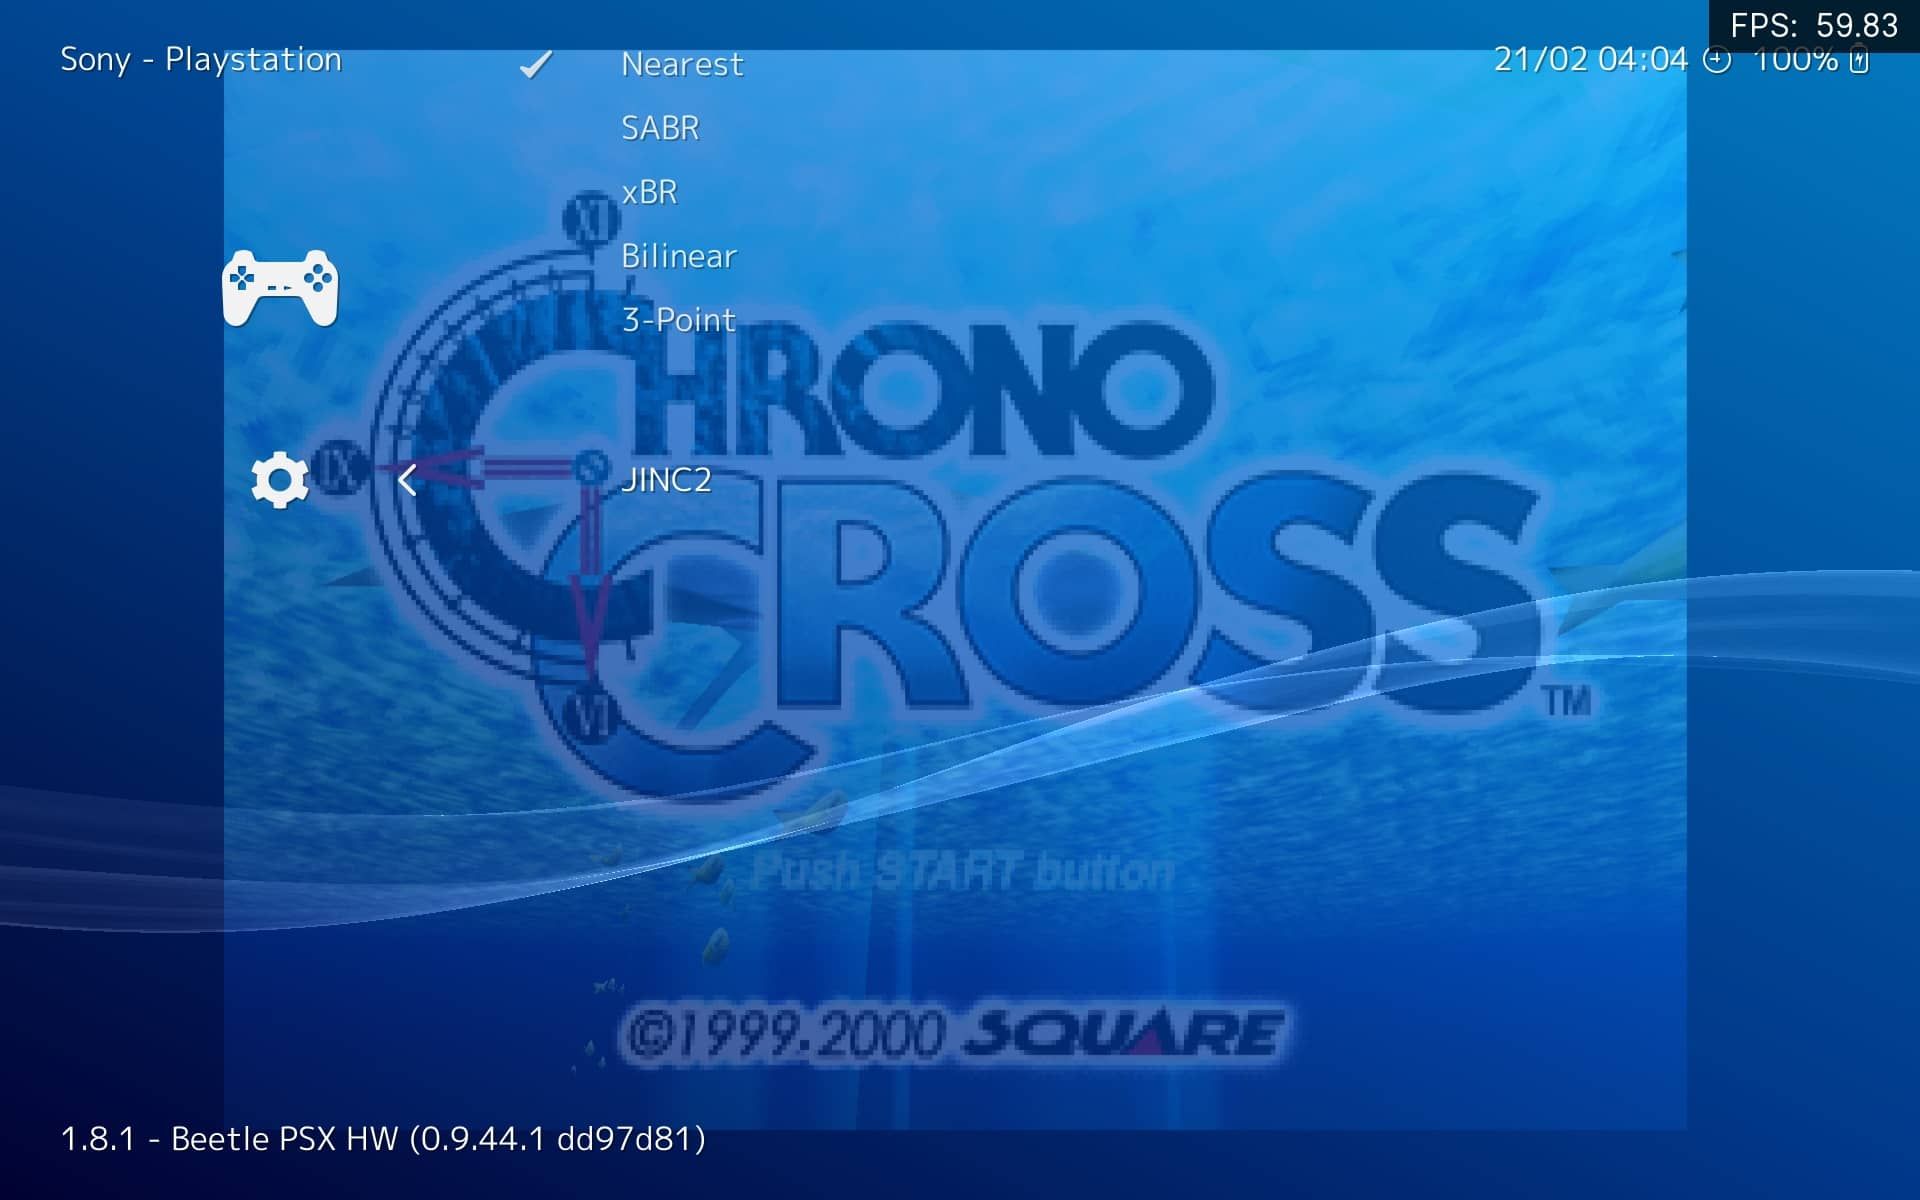
DIY Retrogame Remastering With RetroArch’s Shaders
Using shaders in RetroArch is as easy as selecting them through its menu. What’s hard is finding the best one for what you prefer, making the games you like look how you remember them—and then tweaking them further to perfect RetroArch’s visual output.
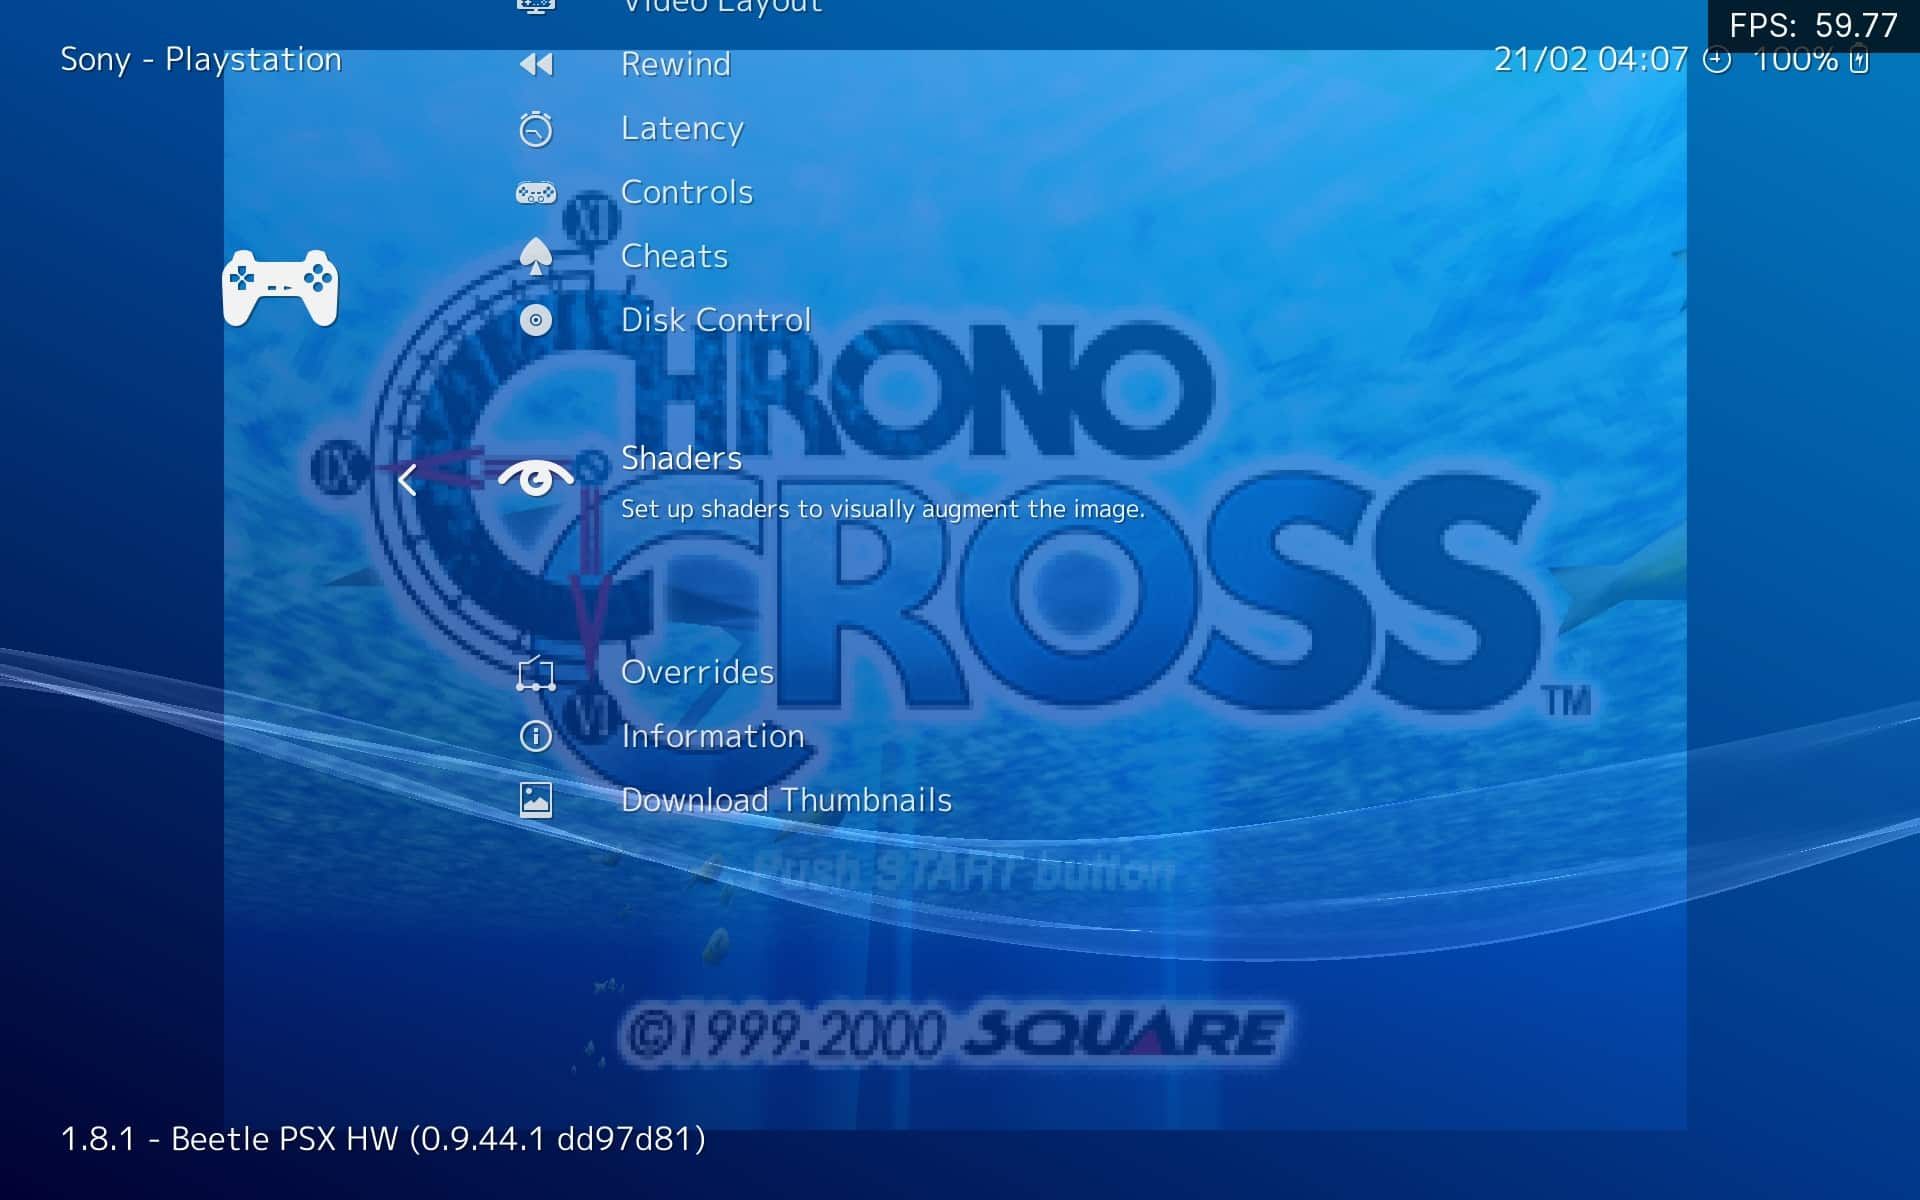
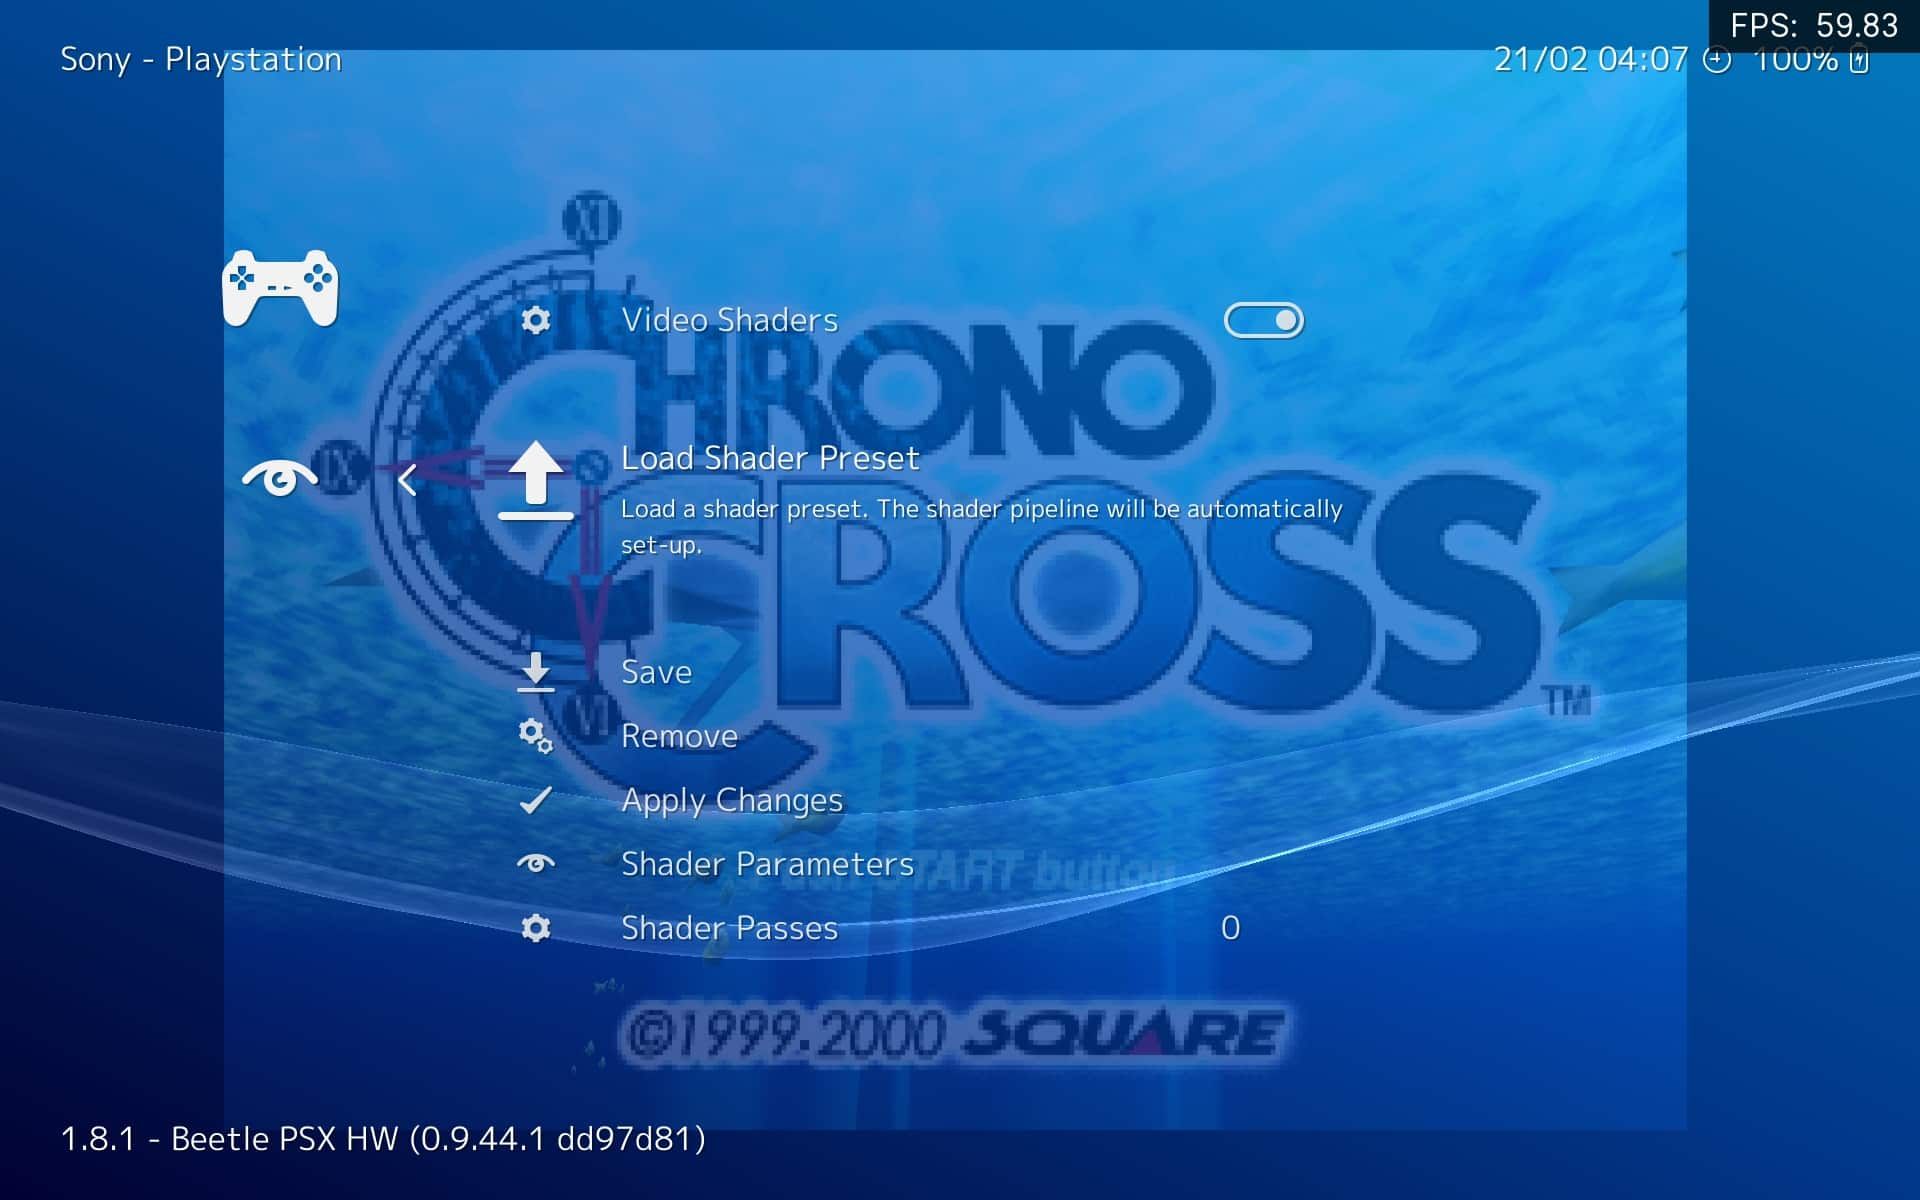
Start by returning to the previous menu level (by default, using backspace). Scroll down to find and enter the Shaders submenu. Then…
- Switch theVideo Shaders toggle toON to enable the use of shaders.

- ChooseLoad Shader Preset to load a shader.
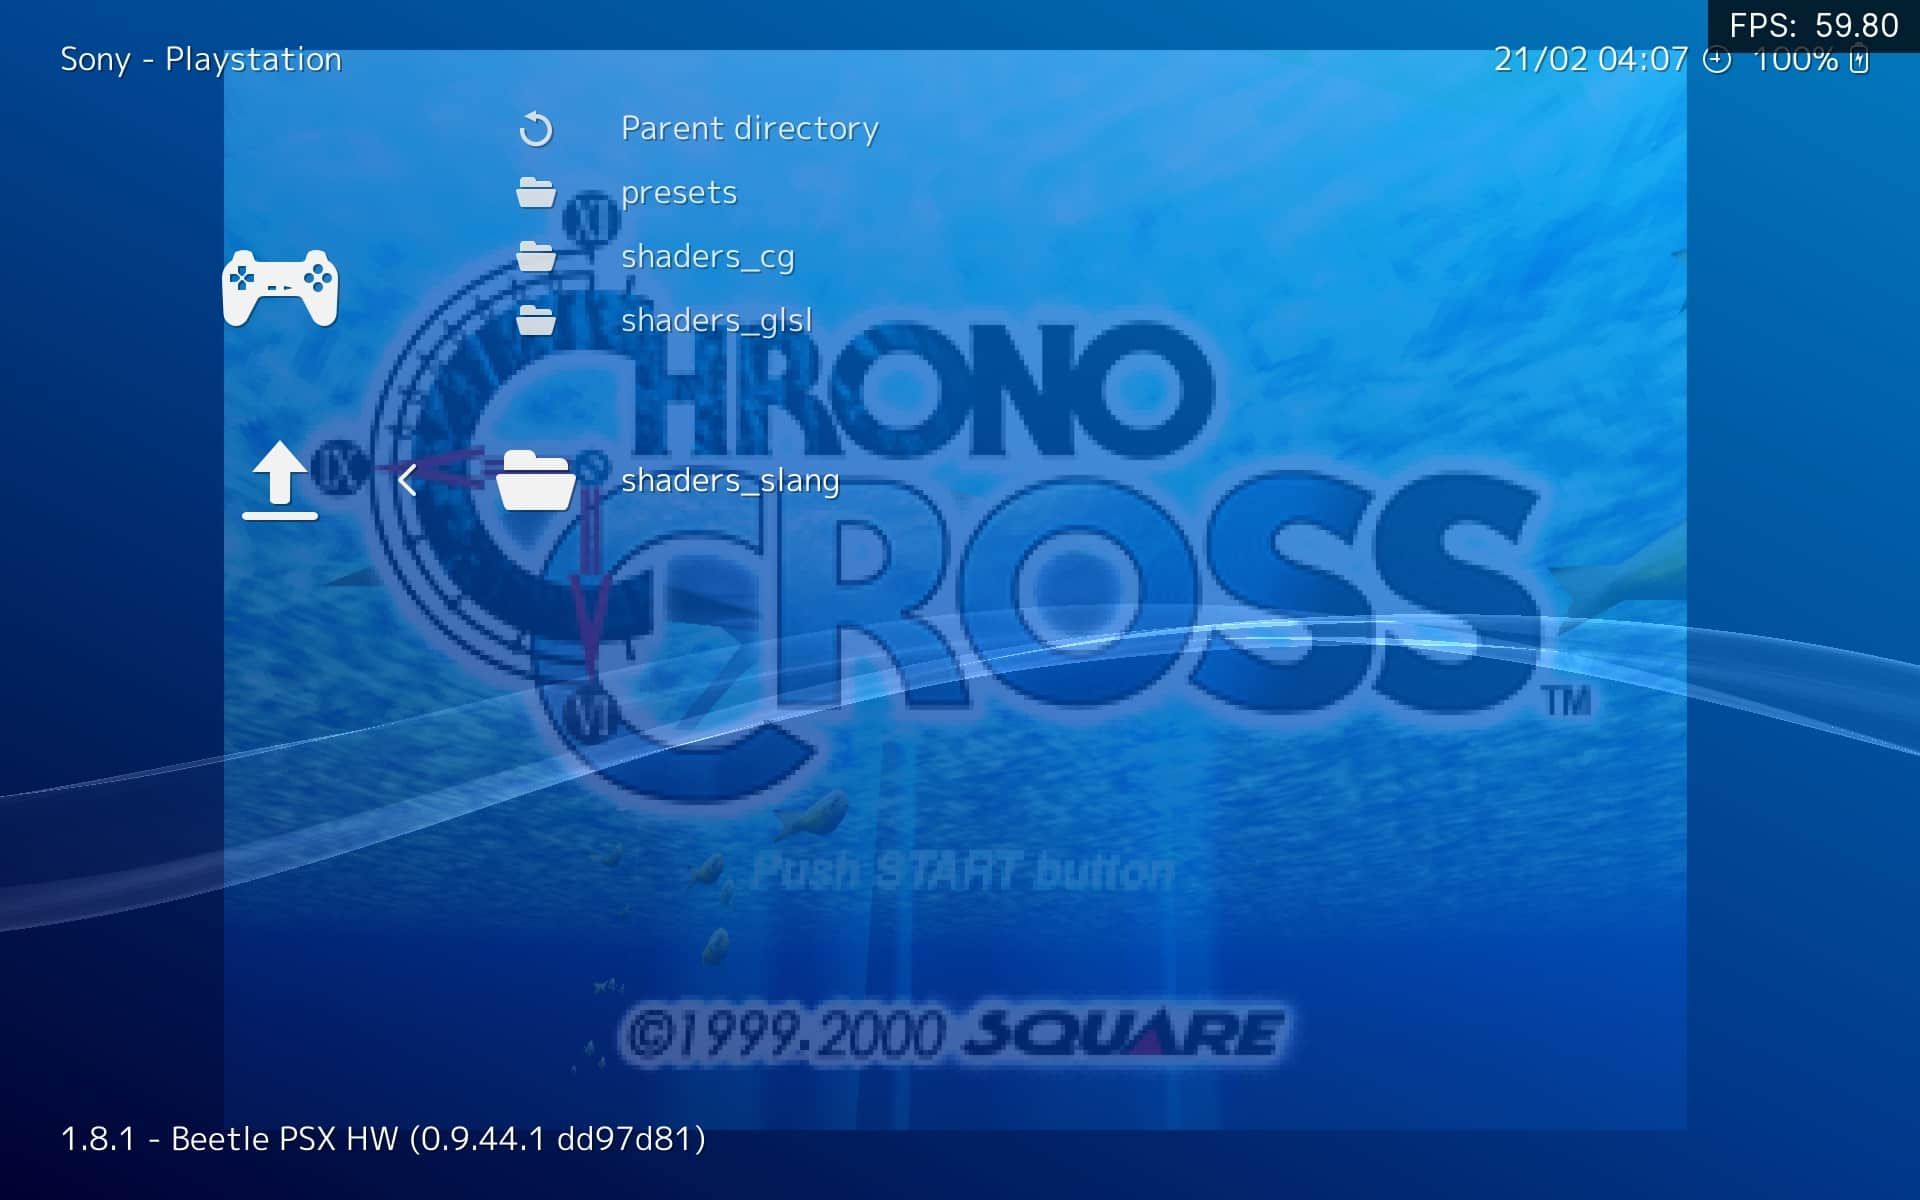
3. Move to the last folder,shaders_slang , and enter it.
4. To help you make sense of its shader collection, RetroArch has them grouped in folders according to their type. For this article, we will go for a CRT shader to make games look like they did when displayed on old CRT monitors. You can find those shaders in theCRT subfolder.
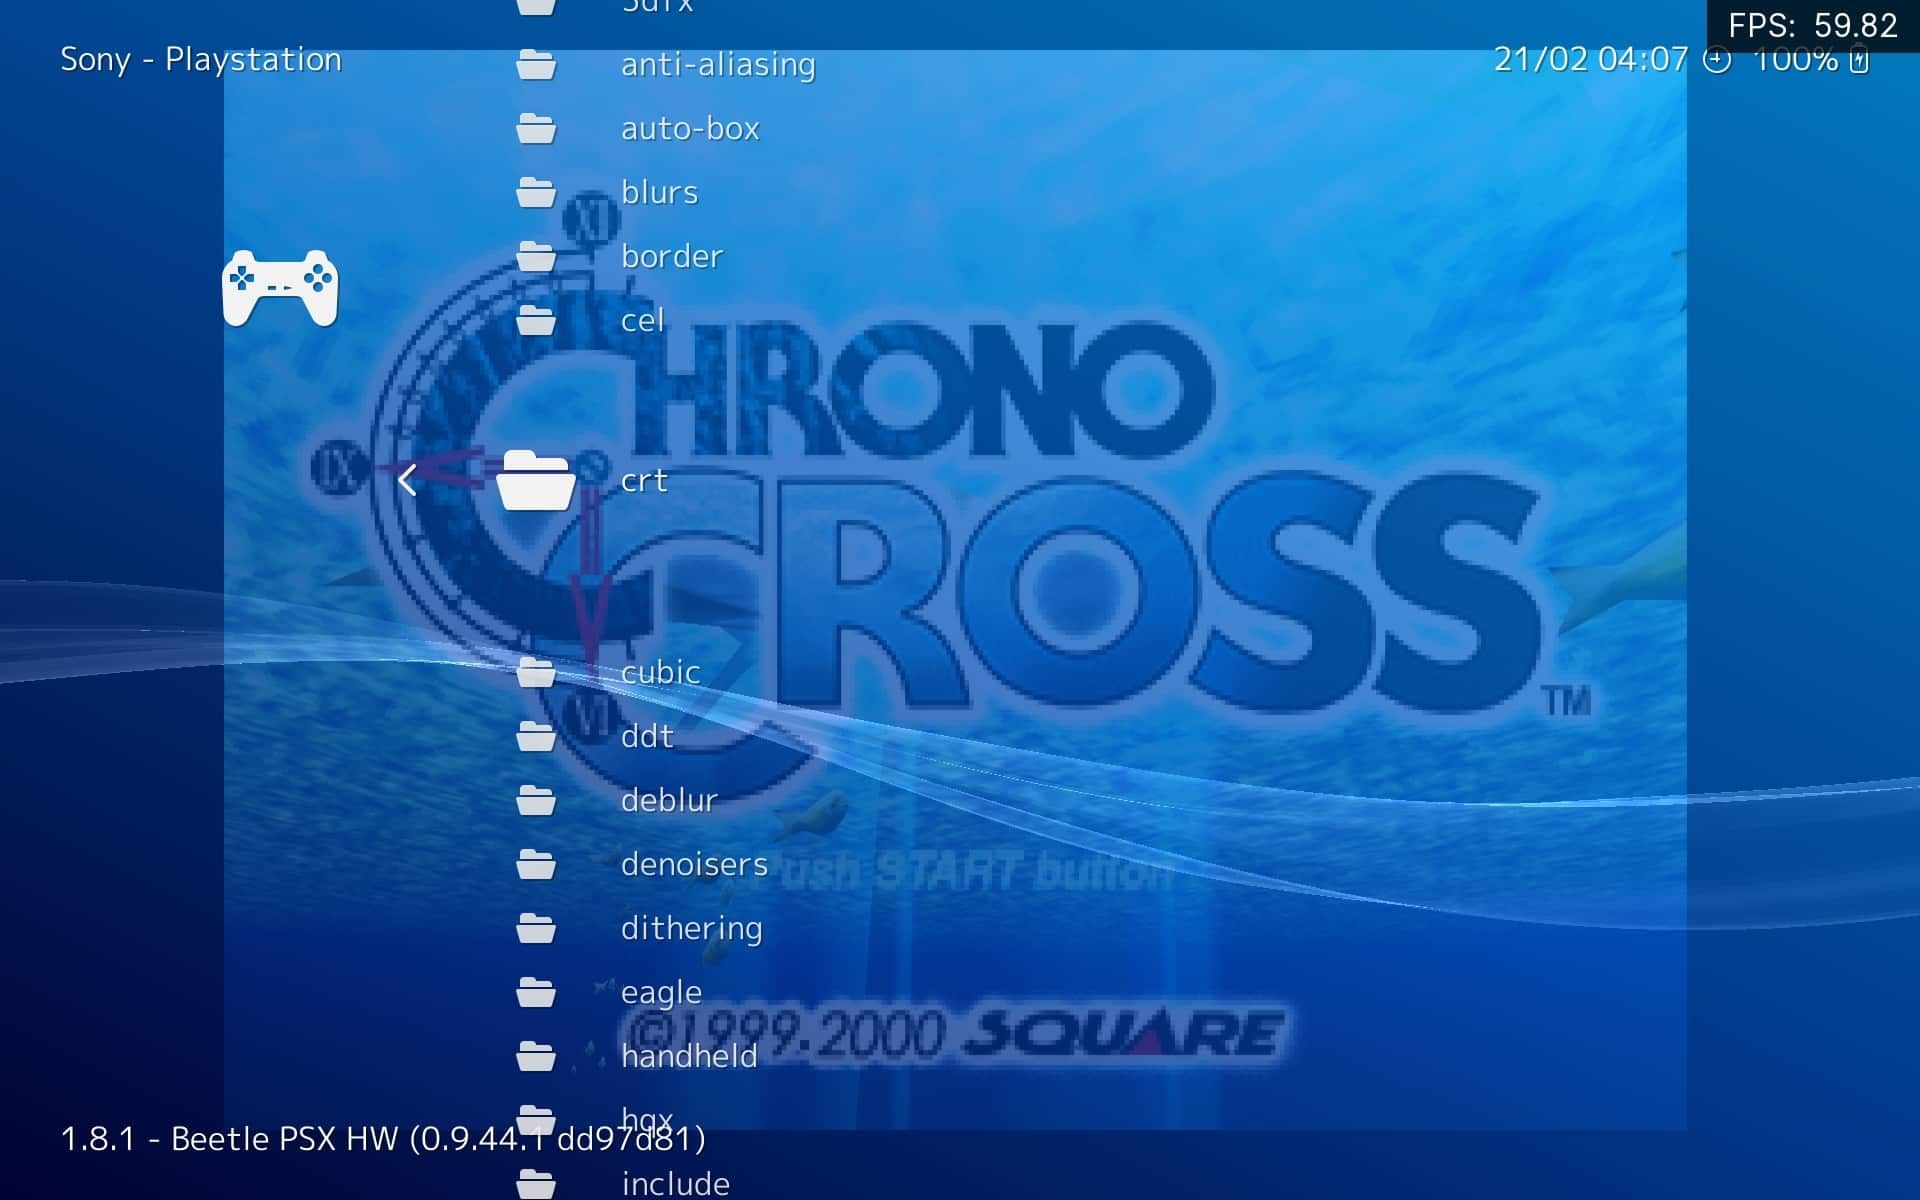
5. RetroArch offers many CRT shaders, each replicating different CRT screen “looks”. Some merely add scanlines to mimic how CRT monitors looked uneven, with every other line a darker color. Others combine more effects like glow, blurring, color distortion, etc.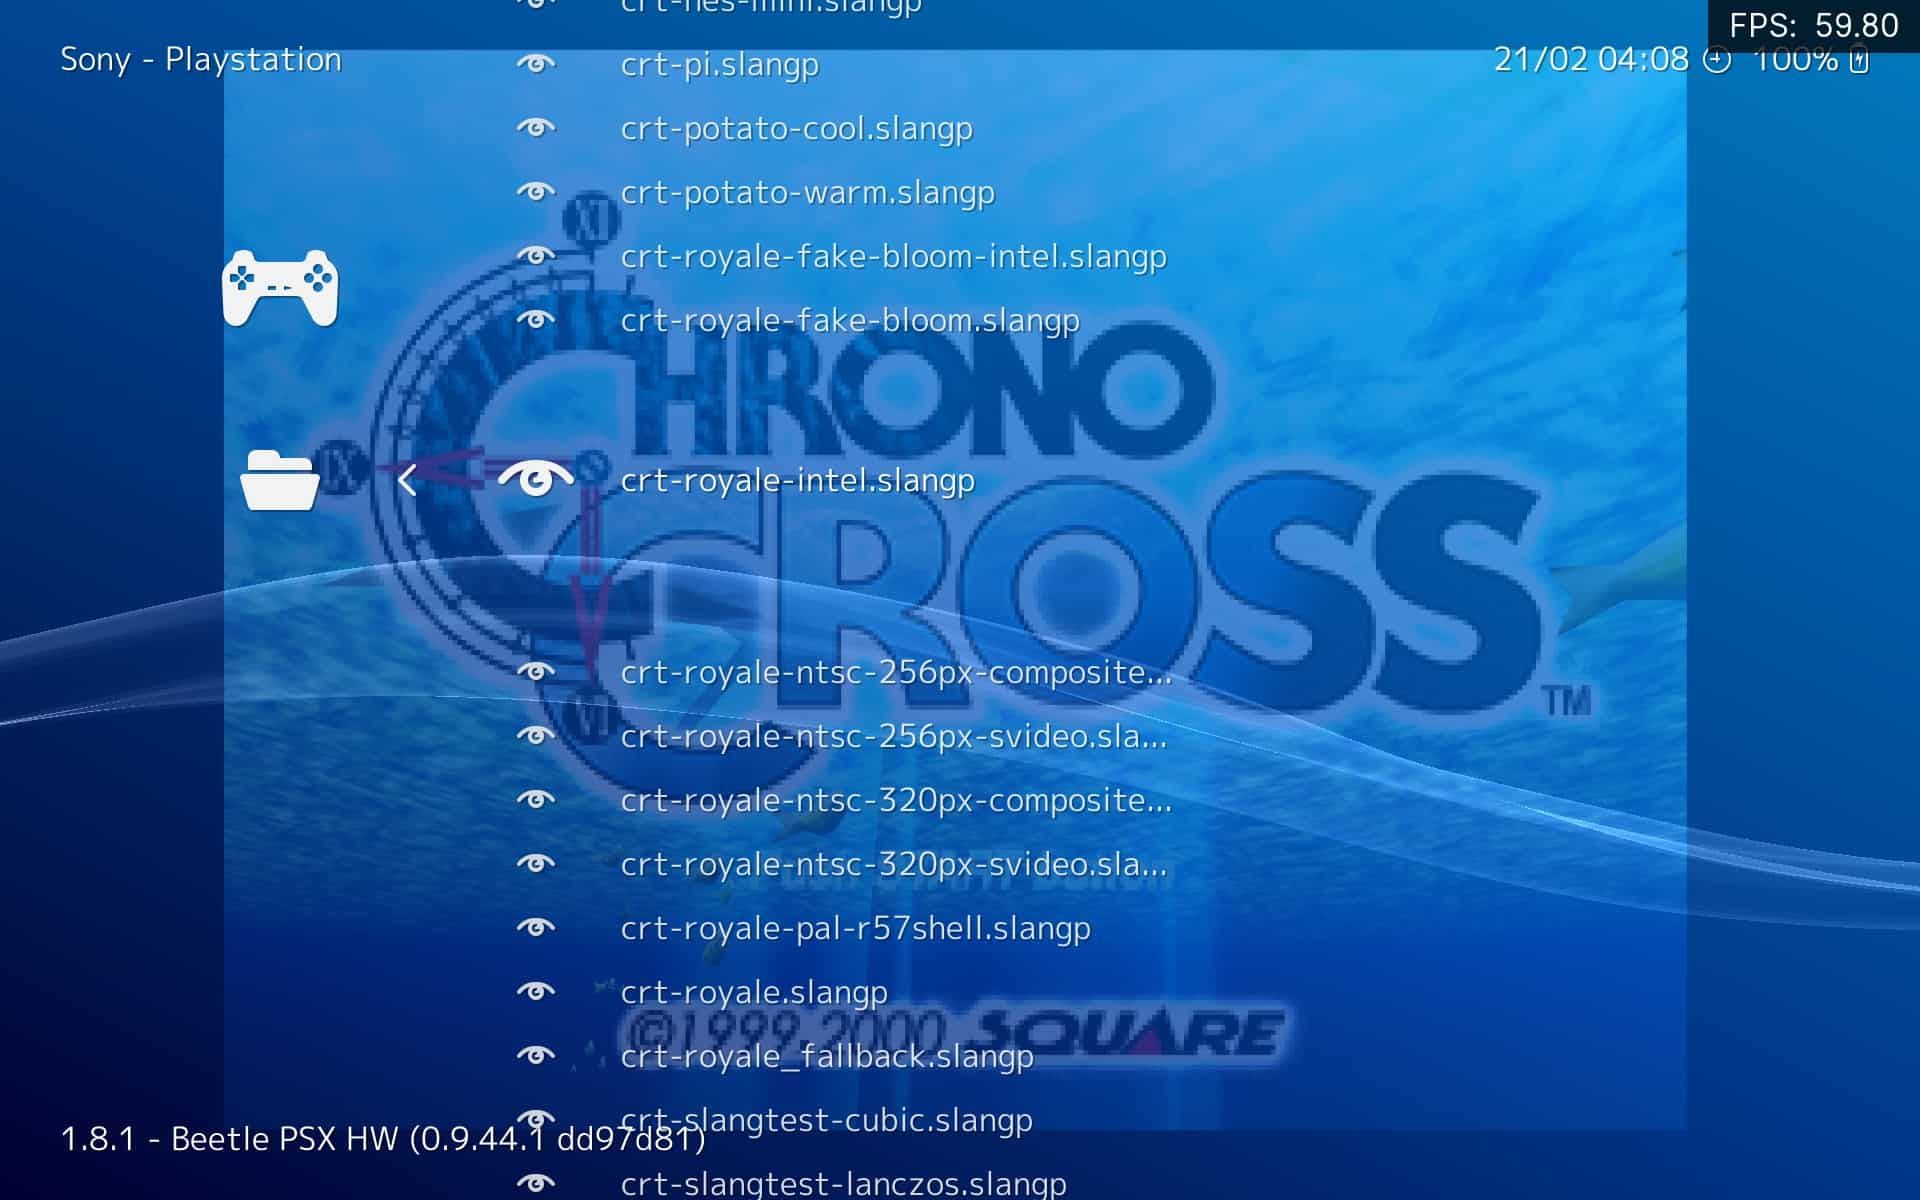
6. We went for theCRT Royale shader, which stacks various effects to achieve a look akin to Sony’s old Trinitron TVs.
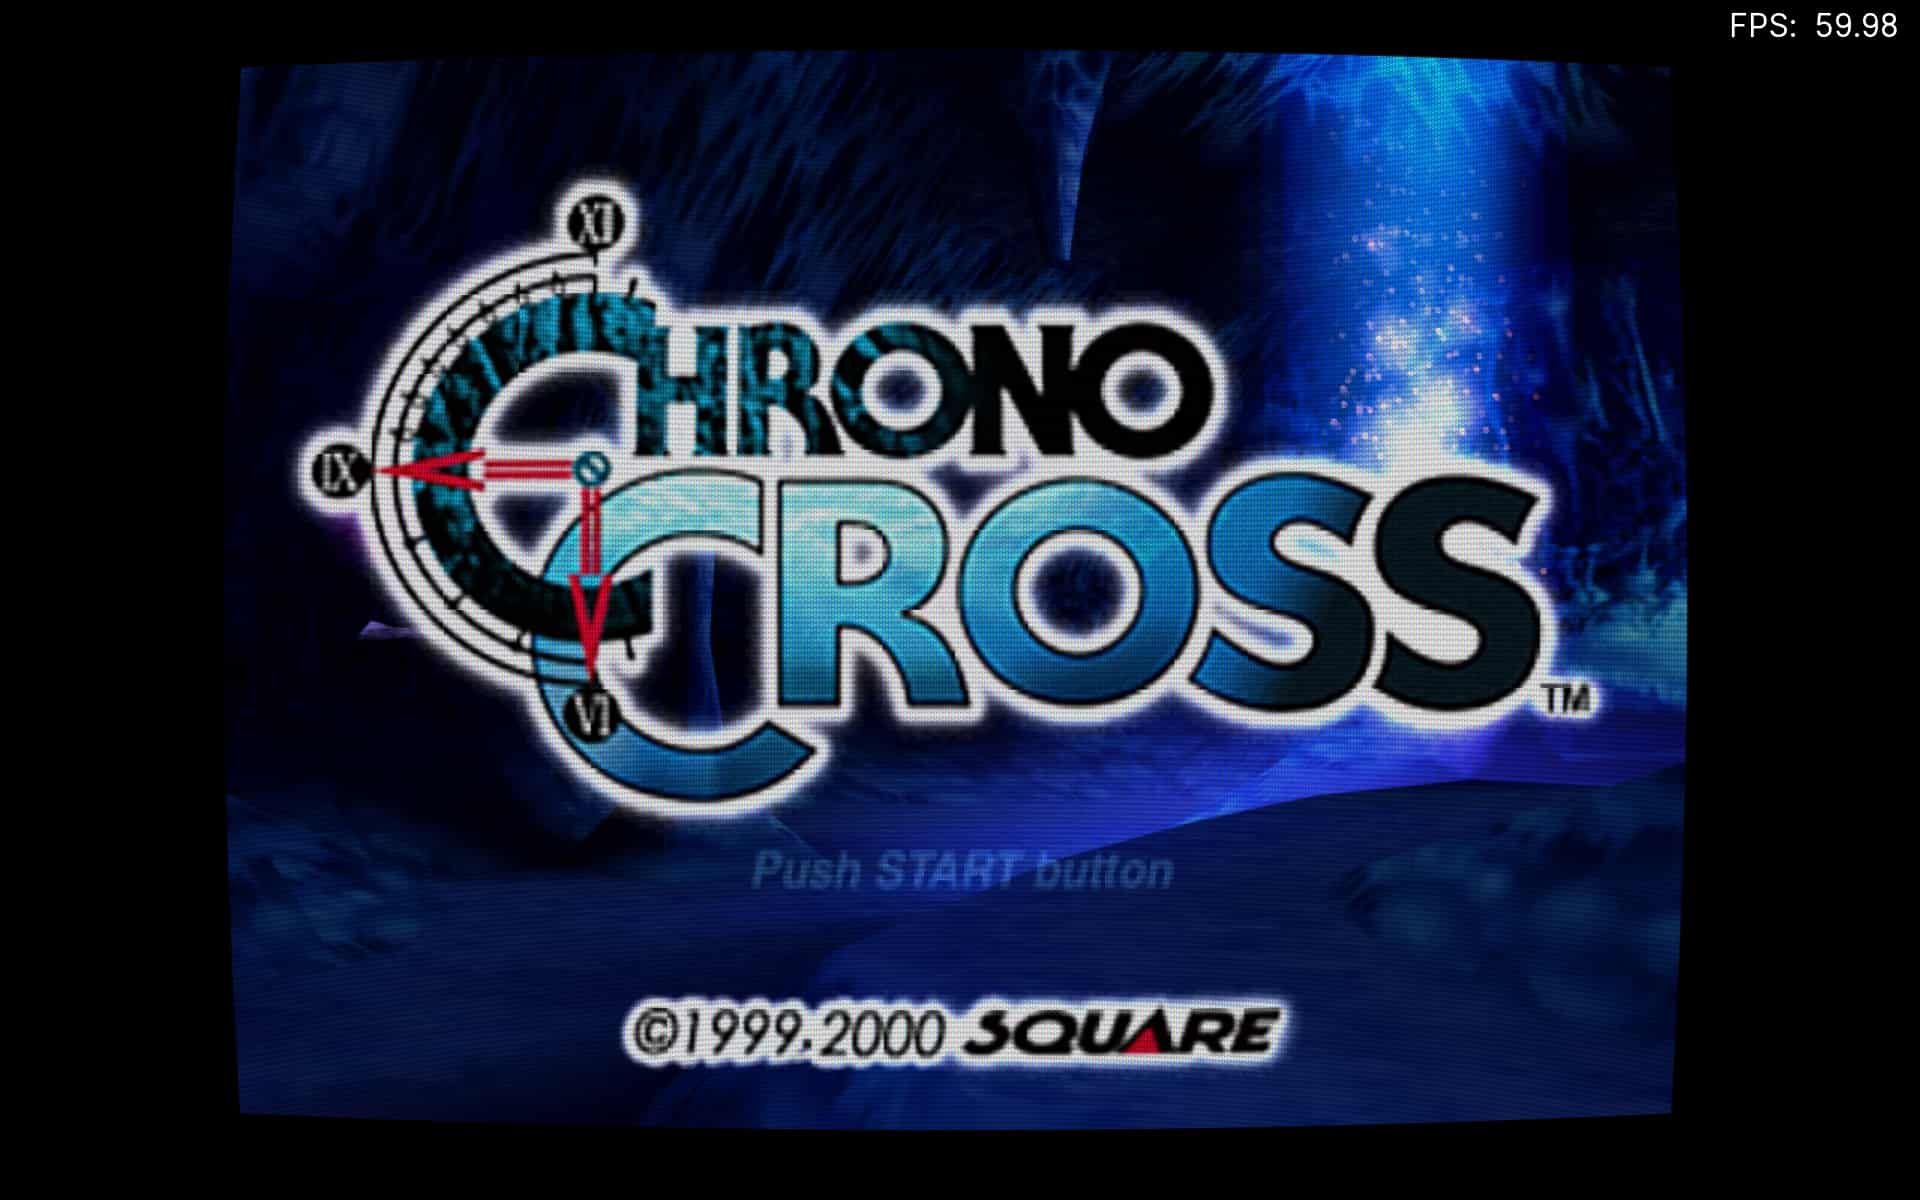
7. You don’t like how a game looks with the shader you chose? Return to theShaders menu and flick theVideo Shader toggle back to off and back to on. This action should unload your active shader and allow you to choose a new one.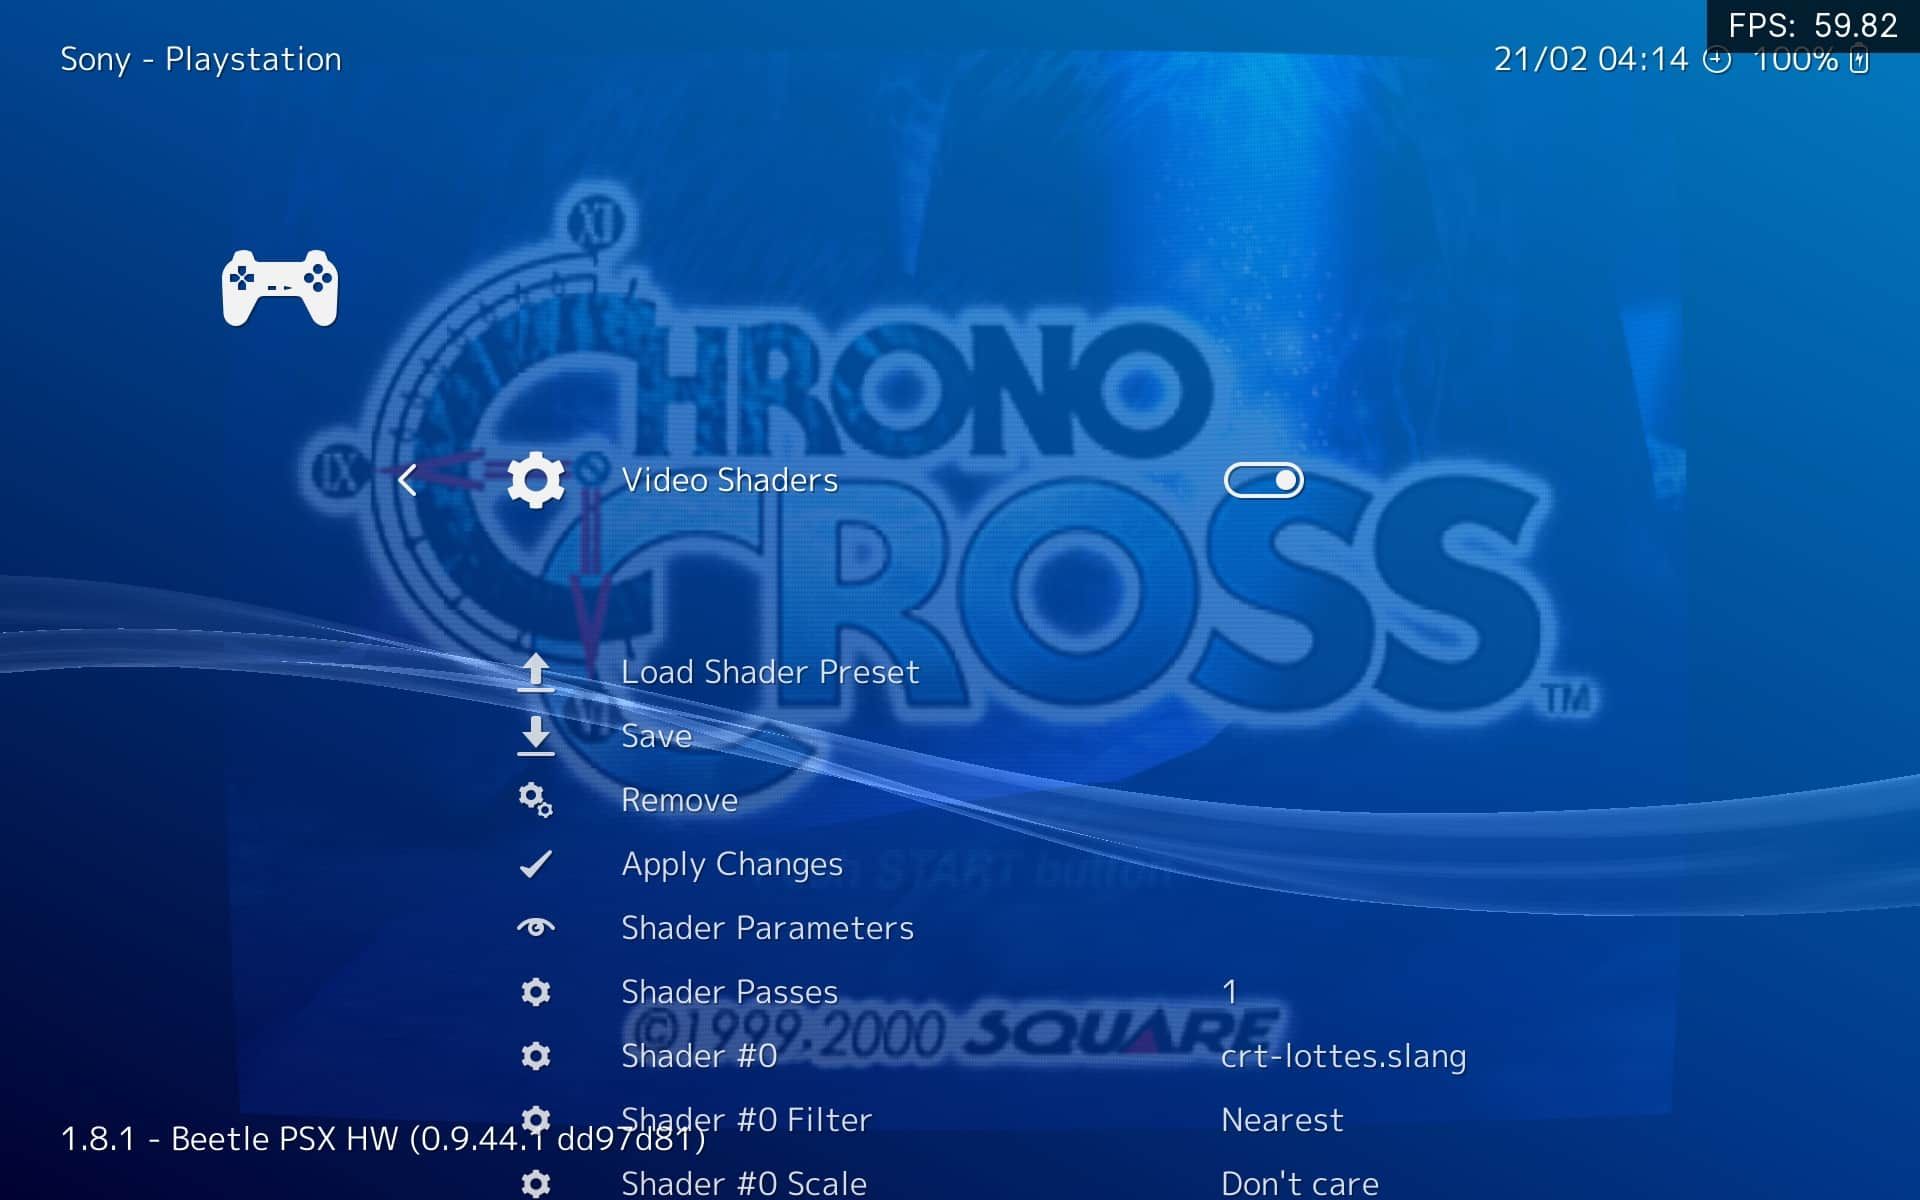
8. If you find a shader you mostly like but feel looks a tad “off”, don’t seek further alternatives: tweak it! Return to theShaders menu and scroll further down. The shader you chose will probably offer some options to tweak how it looks. For example, theCRT Royale shader is a package of various shaders you can tweak individually. By doing so, you can customize the amount ofbloom , the impact of thescanlines , and so on.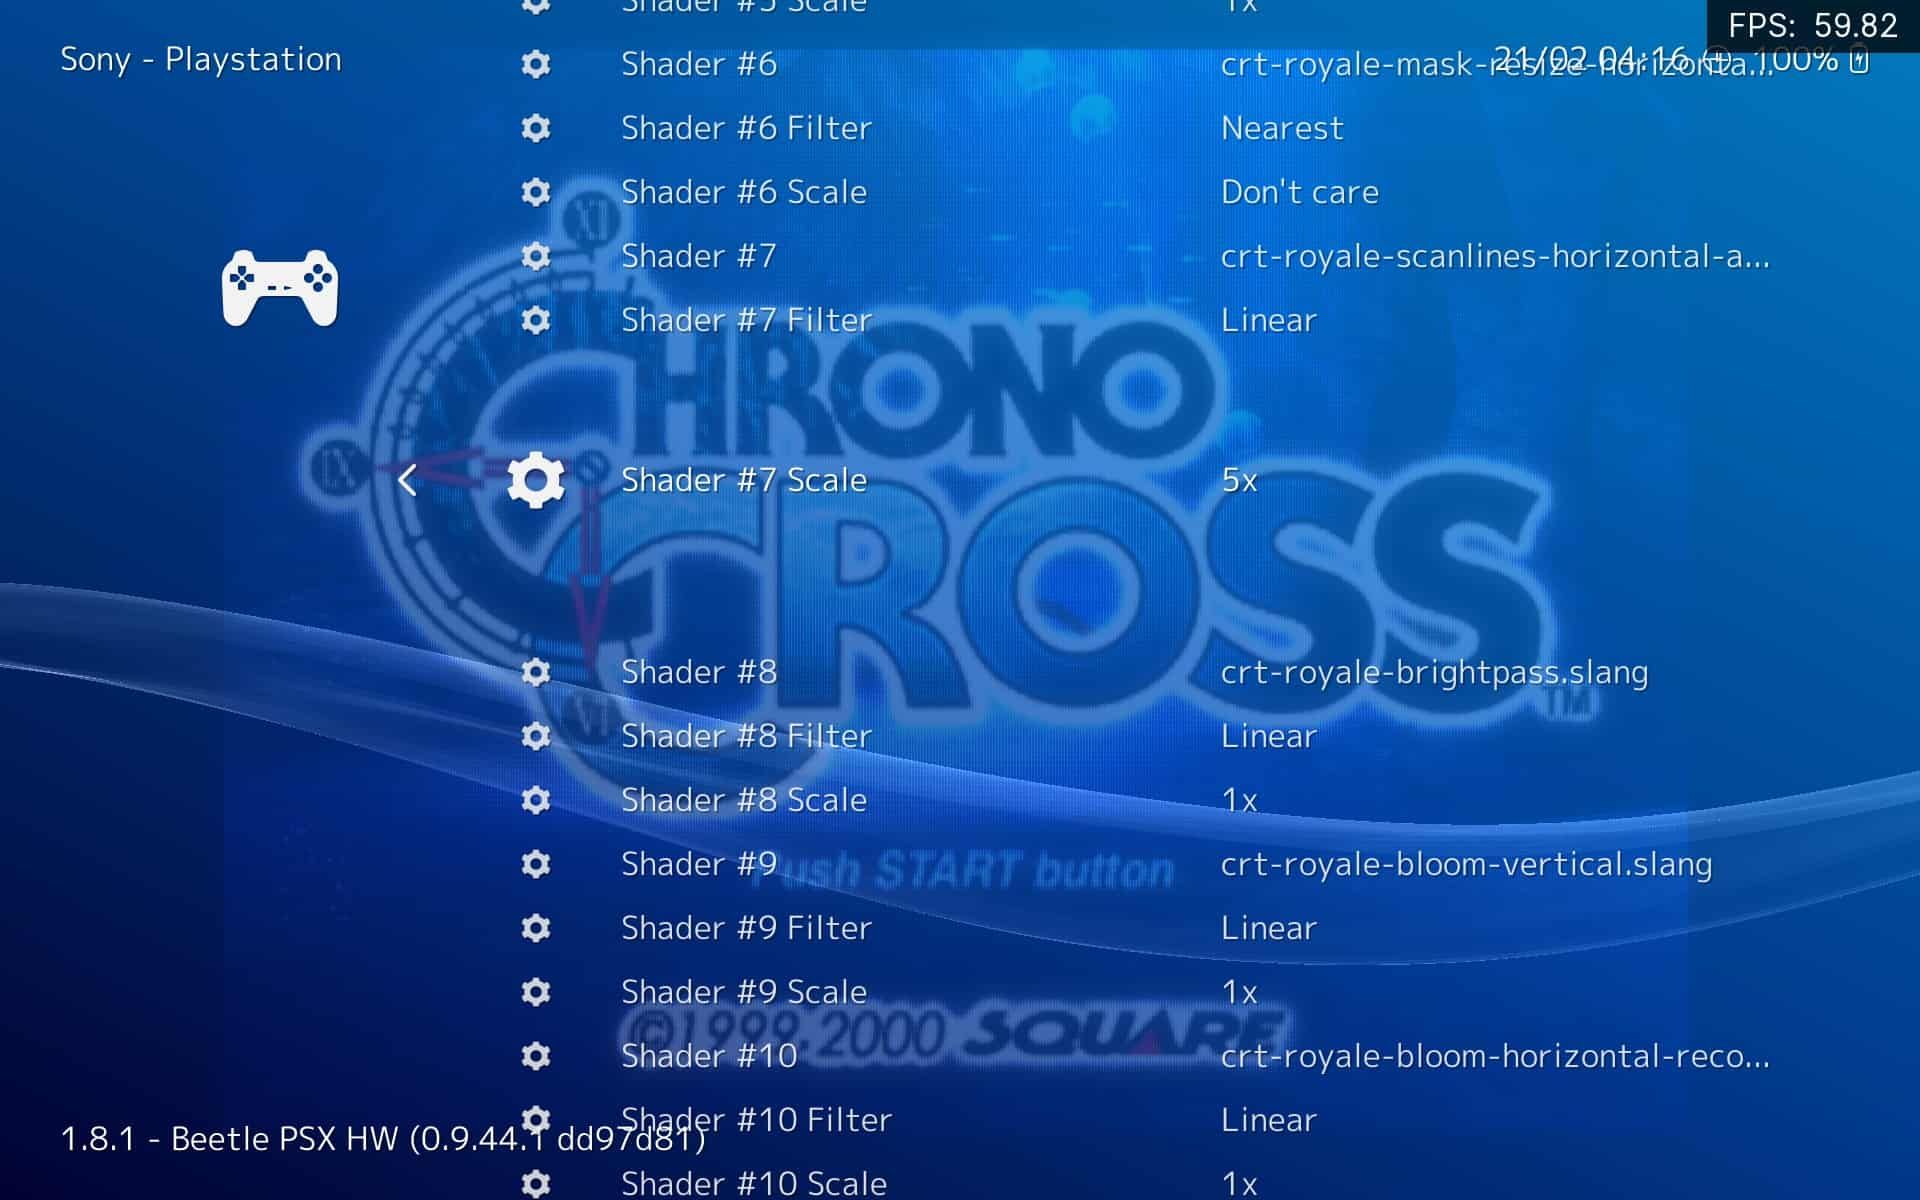
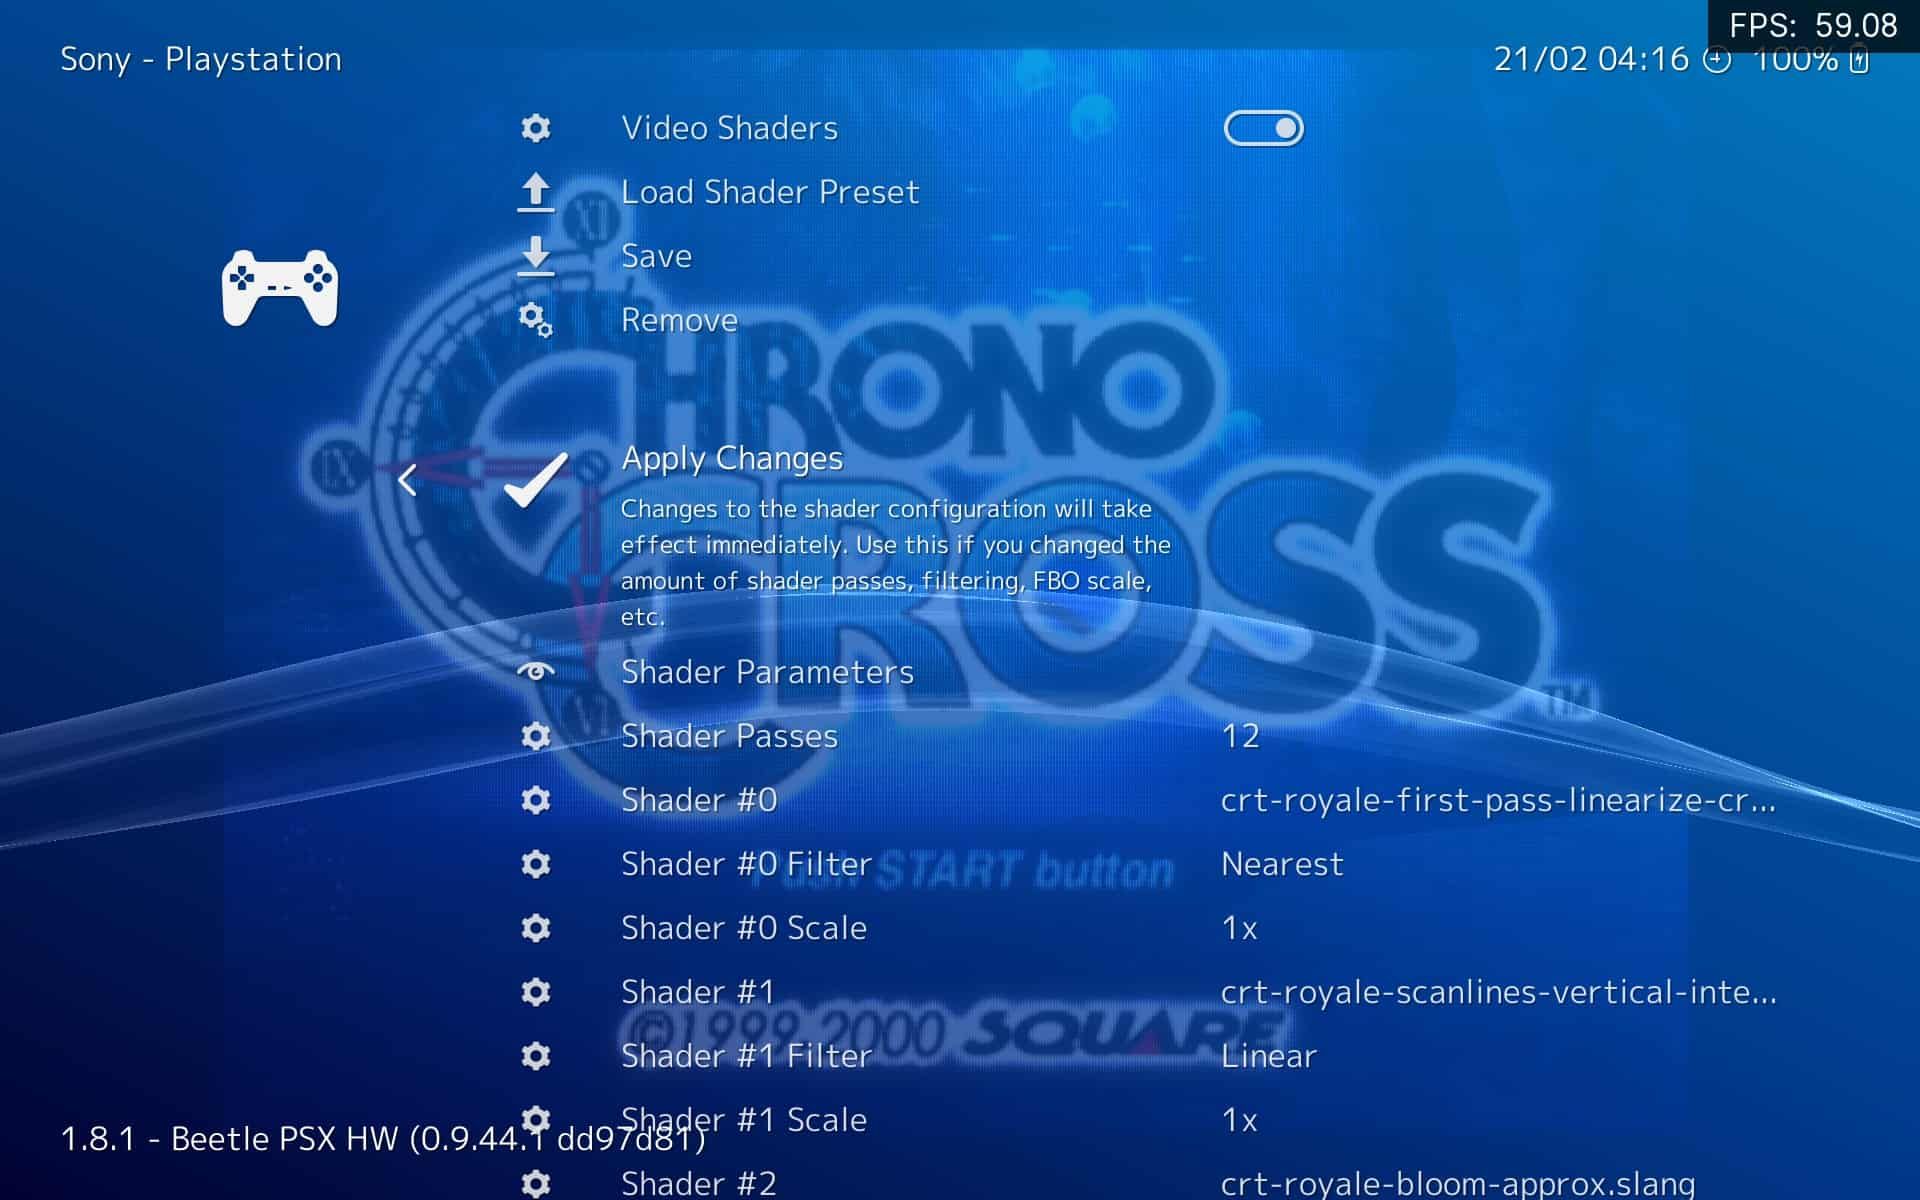
9. After you tweak a shader’s configuration, you won’t see any change in your game’s graphics. For that, you’ll have to scroll up near the top of the same menu and selectApply Changes .
Can You Use Multiple Shaders, and Is It Even Worth Doing?
RetroArch allows you to use multiple shaders on top of each other, and you are free to mix them and experiment as you please. Still, as a rule of thumb, avoid mixing shaders that try to achieve similar results.
For example, you might further improve the visuals of your games by combining aCRT with ananti-aliasing shader, but not by trying to stack three different CRT shaders on top of each other. In an extreme example, by stacking scanlines on top of scanlines, you might end up looking at a black screen instead of improved visuals.
Shaders are great for making your games look the way you remember them, but they can’t help you beat that final level boss. Don’t fret, we won’t tell anyone if you check our guide onhow to use RetroArch to make old games easier to beat !
Retro Games, the Way You Remember Them
As you will see for yourself when you use shaders with your emulated games, there’s no going back after trying them out. Old games weren’t meant to be played on modern flat-panel monitors.
Our modern screens are great at presenting crisp and vivid graphics, but when playing old games, the result can look like a pixelated mess.
Using RetroArch’s shaders, you can bring your game’s visuals closer to how they were intended to look on a classic CRT screen and, more importantly, to how you remember they used to look when you first played them.
Also read:
- [New] 2024 Approved Infinite Inspiration Cost-Free YouTube Theming
- [New] 2024 Approved Ownership Deciphering in InstaSongs
- [New] Comparing Top Free Players VLC or MPC?
- [New] In 2024, Speedy Conversion Techniques for Your SRT to TXT Tasks
- Apple iPhone 6s Mirror to PC? Top Apps You Must Know | Dr.fone
- Easily Install Your Logitech BRIO Camera on Windows - Drivers Available Here!
- Effective Fixes to Stop Severe JS Problems From Appearing in Discord
- How to Resolve Loading Failures in Discord PC App
- How to Squash the Microsoft Store Error Code X in Windows 11
- In-Depth Analysis of Cyberpower's CP685AVRG Uninterruptible Power Supply: Reliable Protection for Essential Devices
- Overcoming Fluctuating Default Printer Settings
- Resolving Glitches: Steps to Improve Performance of Your Inked Device on Windows OS
- Solving Incorrect System Token Access Error in Windows 11/10
- Stripping Backgrounds with Ease Using Paintbrushes
- Unlock the Secrets to Restored JPEGs
- Title: Resurrecting Gaming Classics: Mastering Shaders in RetroArch
- Author: David
- Created at : 2024-11-22 21:06:20
- Updated at : 2024-11-27 16:08:32
- Link: https://win11.techidaily.com/resurrecting-gaming-classics-mastering-shaders-in-retroarch/
- License: This work is licensed under CC BY-NC-SA 4.0.
