
Resolving Task Manager's Empty Startup Section

Resolving Task Manager’s Empty Startup Section
While using the Windows Task Manager, you may suddenly come across an error message that reads, “There are no startup items to display in Task Manager.” It’s a confusing error message, but don’t fret; it’s very easy to fix.
Let’s check out the best ways to fix Task Manager’s “no startup items” error.
Disclaimer: This post includes affiliate links
If you click on a link and make a purchase, I may receive a commission at no extra cost to you.
1. Restart File Explorer
Restarting File Explorer is one of the easiest ways to resolve this issue. The best way to do this is to restart your Windows PC completely.
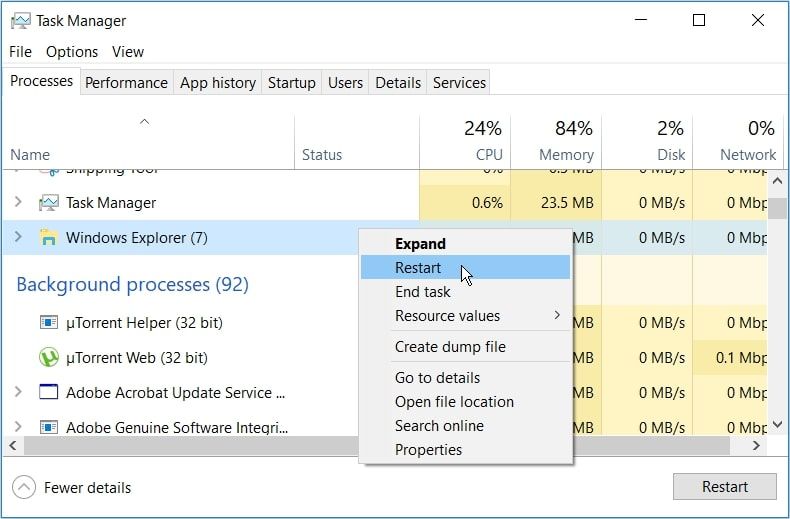
If that doesn’t resolve the problem, or you’d rather not restart your PC, you can restart File Explorer through these steps:
- PressWin + X to open the Quick Access menu.
- SelectTask Manager from the options.
- Right-click on theWindows Explorer option and then selectRestart .
2. Create a New Startup Folder
In some cases, you’d run into the issue at hand if the startup folder is corrupted. So, the best way to resolve the problem is to create a new startup folder.
Now, here are the steps for creating a new startup folder on Windows:
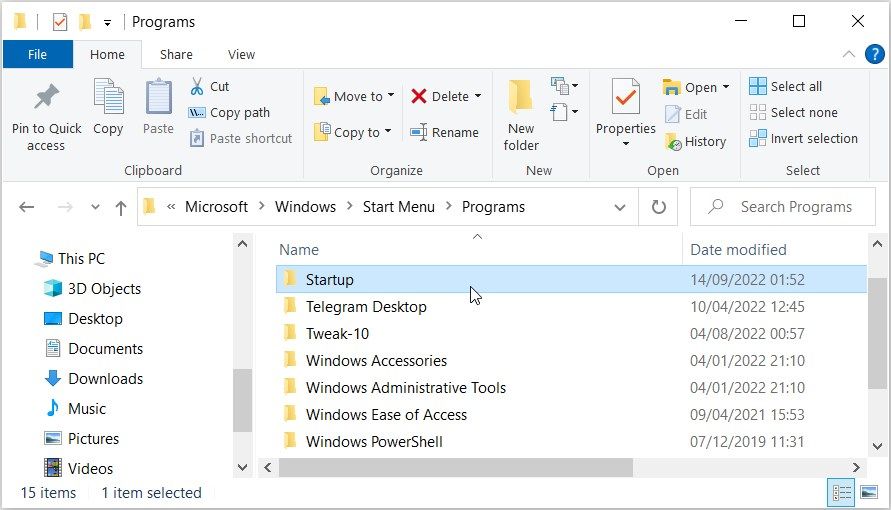
- PressWin + E to open File Explorer.
- Copy-paste the command into the File Explorer address bar and pressEnter :
C:\Users\%username%\AppData\Roaming\Microsoft\Windows\Start Menu\Programs\
From there, follow these steps:
- Locate and delete theStartup folder .
- Create a new startup folder by right-clicking on a blank space and selectingNew > Folder .
- Name the folder asStartup and pressEnter .
Finally, restart your device to save these changes.
3. Perform a Check Disk Scan

There’s a possibility that the issue at hand might be caused by system issues. In such instances, scanning and repairing your device’s hard drive could help.
Here’s how you can resolve the problem using a Check Disk (CHKDSK) scan:
- TypeCommand Prompt in the Start menu search bar.
- Right-click on theBest match result and selectRun as administrator .
- Type the following command and then pressEnter to scan and repair your hard drive:
chkdsk C: /f
If your Windows operating system (OS) is installed on a different drive, then replaceC: in the command with the letter of the relevant drive.
Finally, restart your device when the scan is complete.
4. Scan and Repair Windows Using the DISM and SFC Tools
If a normal disk scan doesn’t help, then you’d need to scan and repair your hard drive using advanced tools such as DISM and SFC. As we covered in our guide onhow to repair corrupted files with built-in Windows tools , DISM and SFC are handy services that can help repair Windows errors.
Let’s start by checking out how you can run the DISM tool:
- PressCtrl + Shift + Esc to open the Task Manager.
- ClickFile in the top-left corner and selectRun new task .
- TypeCMD and then check theCreate this task with administrative privileges box.
- PressOK to run the Command Prompt.
- Type the following command and pressEnter :
DISM /Online /Cleanup-Image /ScanHealth
Wait for the process to complete. From there, type the following command and pressEnter :
DISM /Online /Cleanup-Image /RestoreHealth
Finally, restart your device once the DISM scan is complete.
Now, you can run the SFC tool through these steps:
- Open theCommand Prompt by following the previous steps.
- Type the following command and pressEnter to run the scan:
sfc /scannow
Wait for the scan to complete and then restart your device.
5. Run the System Maintenance Troubleshooter
Still struggling to resolve the issue? If so, you might be experiencing a system maintenance problem. In this case, you could tackle the error by running the System Maintenance troubleshooter.
Here are the steps you need to follow:
- TypePerform recommended maintenance tasks automatically in the Start menu search bar and pressEnter .
- Click theNext button and then follow the on-screen instructions.
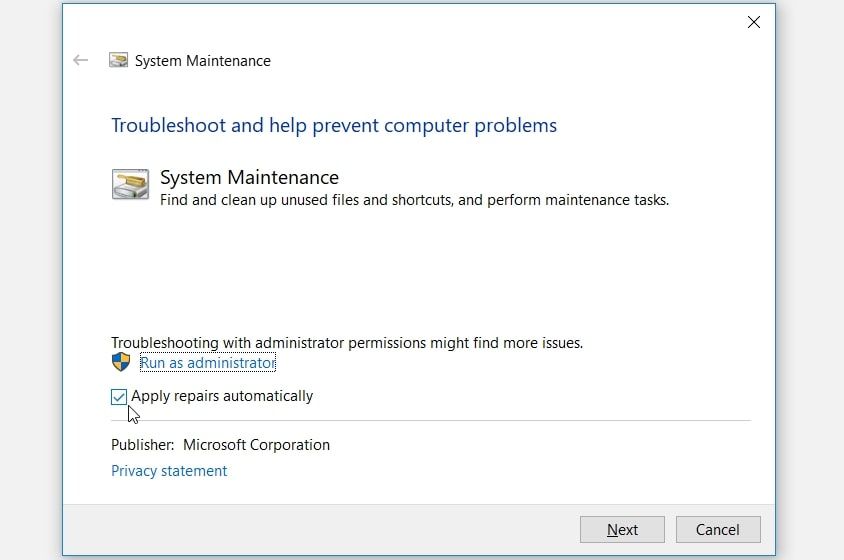
Wait for the process to complete and then restart your PC.
6. Temporarily Disable the Windows Defender Firewall
In some instances, temporarily disabling the Windows Defender Firewall could tackle the problem. However, don’t forget to re-enable the tool later.
Now, here are the steps for disabling the Windows Defender Firewall:
- TypeControl Panel in the Start menu search bar and select theBest match .
- Click theView by drop-down menu and then selectLarge icons .
- SelectWindows Defender Firewall from the options.
- Click theTurn Windows Defender Firewall on and off option.
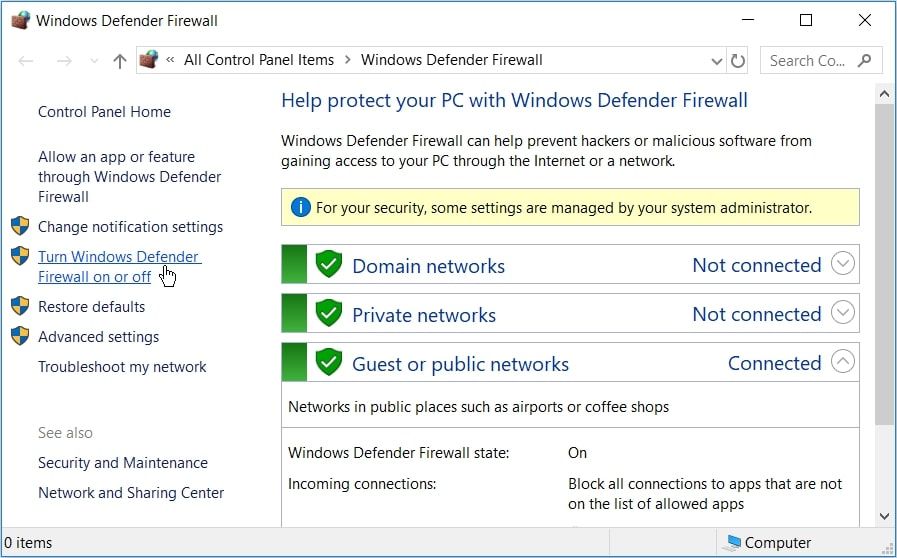
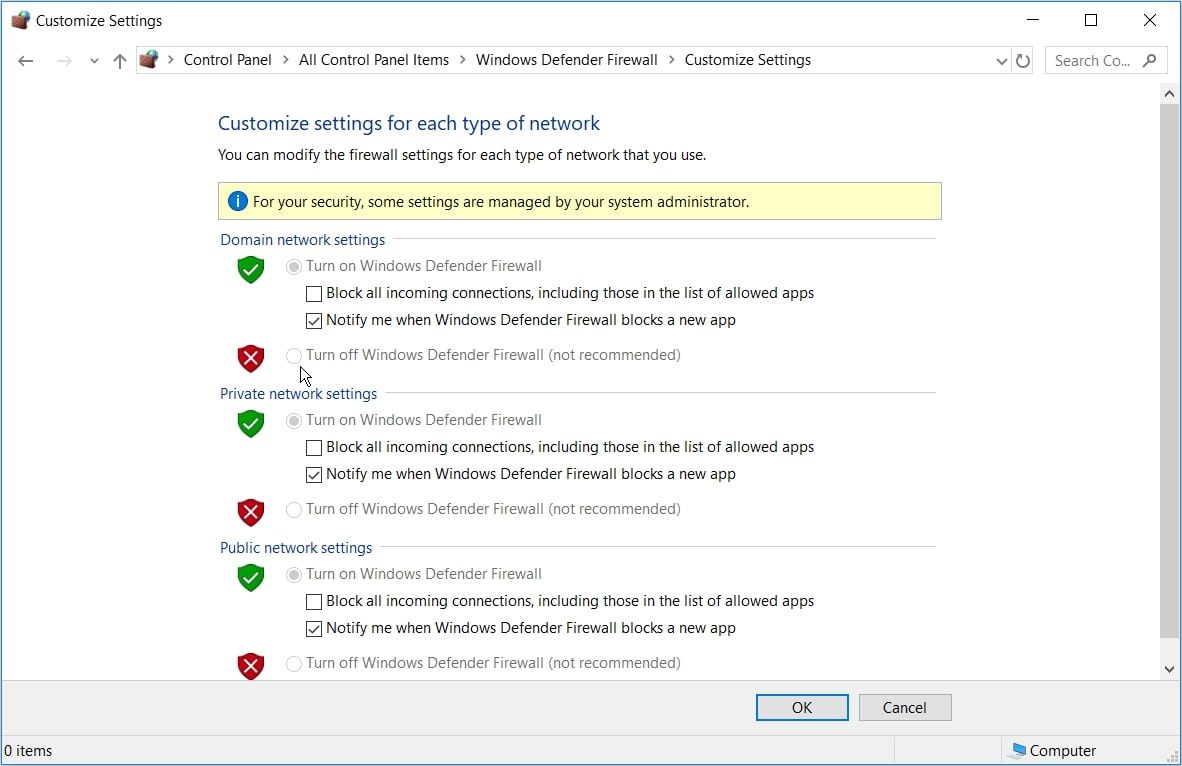
Locate theDomain ,Private , andPublic network settings and then check theTurn off Windows Defender Firewall boxes next to them. Finally, pressOK and then restart your computer.
7. Use a System Restore Point
Using a system restore point can help you tackle the issue at hand. However, this approach will only help if you’ve already learnedhow to create a system restore point in Windows and made one.
During the restoration process, the system restore tool will revert your PC to a previous state. As such, this tool will help only if the Task Manager error only started appearing recently.
Here’s how you can tackle the issue at hand using a restore point:
- Type “Create a restore point” in the Start menu search bar and select theBest match .
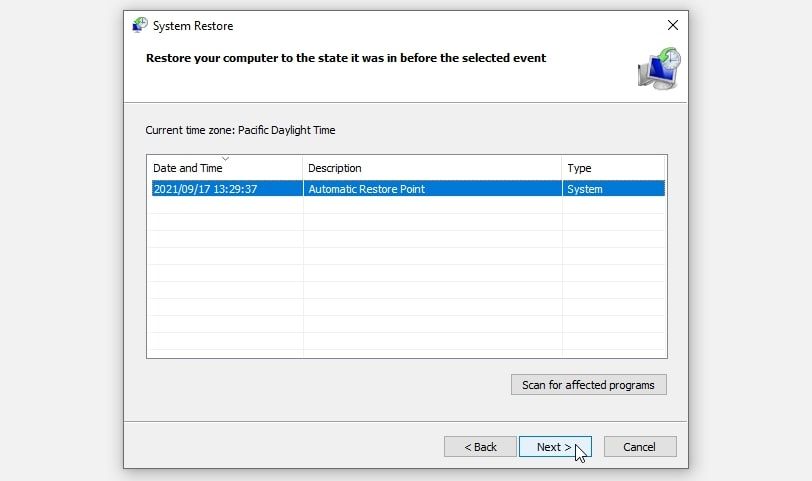
- Click theSystem Protection tab and then selectSystem Restore from the options.
- PressNext to continue.
- SelectShow more restore points and then pick a restore point.
- ClickNext and then clickFinish to finalize the process.
8. Update Your Device
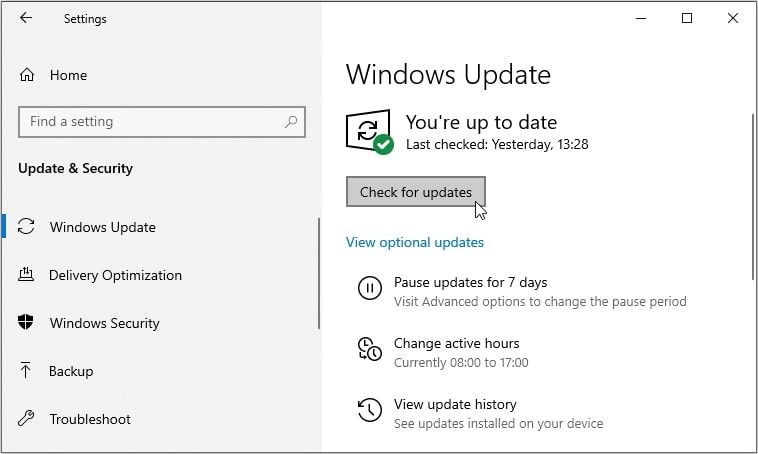
In some instances, updating your Windows device might be the best solution. Ideally,you should always update Windows to the latest version , but if you’ve put it off for a while, try updating your PC.
Here are the steps for updating Windows:
- TypeSettings in the Start menu search bar and select theBest match .
- SelectUpdate & Security from the options.
- Select theWindows Update option on the left.
- Click theCheck for updates button on the right and then follow the on-screen steps.
You’ve Successfully Resolved Your Task Manager Issues
The Task Manager is a reliable tool that helps you close slow programs and improve your PC’s performance. However, this tool also often runs into various problems. If it’s experiencing issues with startup programs, you can easily resolve the error using any of the solutions in this article.
If the issue persists, then maybe it’s time to start exploring some Task Manager alternatives.
Also read:
- [New] 2024 Approved Redefining Content Creation Beyond Vimeo Tools
- [New] Innovative Storytelling in Book Trails
- [Updated] In 2024, Scrutinizing HDR Performance in Luminance Tech
- Crafting Compelling Narratives in Instagram Ads Top 10 Tips for Success
- Disabling Secure Boot: A Rufus-Based Approach
- Enhance PC Efficiency: Memory Reset W11
- Fixing Endless Login Prompts on the Teams Windows Interface
- HP Ultrabook Prodigy: Equipped with Latest AMD Ryzen AI 300 Processors and Fast Thunderbolt
- Magic Photo Management Decoded by Reviews for 2024
- New Unlocking Creative Power in Logic Pro X with These Top 8 Plugins
- Overcoming 'Unrecognized Devices' On W11/W10 PCs
- Techniques to Uncover Inaccessible Ubisoft Hub
- The Ultimate List of Android's Best Music Video Apps
- Top 10 Strategies for Swift Desktop Connection, W11 Edition
- Ukrainian-Russian Relations Through Language
- WinTime Troubleshoot: Harmonize Your System's Hours
- Title: Resolving Task Manager's Empty Startup Section
- Author: David
- Created at : 2024-12-06 08:30:37
- Updated at : 2024-12-07 01:38:11
- Link: https://win11.techidaily.com/resolving-task-managers-empty-startup-section/
- License: This work is licensed under CC BY-NC-SA 4.0.