Resolving Null Sound Driver Error on Windows PC

Resolving Null Sound Driver Error on Windows PC
Your Windows computer automatically detects all the connected audio devices and installs the necessary drivers to get the audio working. Sometimes, however, you may encounter the No Audio Output Device is installed error message when you hover your mouse over the audio icon in the system tray.
This error occurs when Windows fails to detect your connected audio devices. It can be a temporary glitch, a driver-related issue, or, in some cases, caused by system file corruption. Here are a few troubleshooting steps to help you fix the No Audio Output Device installed error on Windows.
Disclaimer: This post includes affiliate links
If you click on a link and make a purchase, I may receive a commission at no extra cost to you.
1. Run the Audio Troubleshooter to Fix Sound Problems
You can run the built-in audio troubleshooter to fix various sound issues in Windows. The troubleshooter will check your PC for common audio issues and try to fix them automatically; for instance, it can help you fix when you have no audio in Windows 11 .
To run the audio troubleshooter on Windows 11:
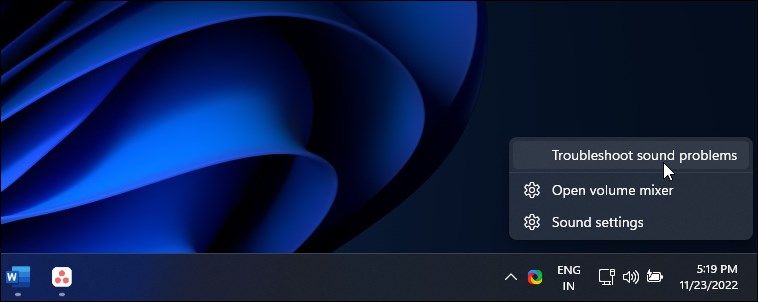
- Right-click on the Sound icon (Speaker) in the Taskbar.

- Select Troubleshoot sound problems. This will open the Help app with the Help with audio problems in Windows query selected.

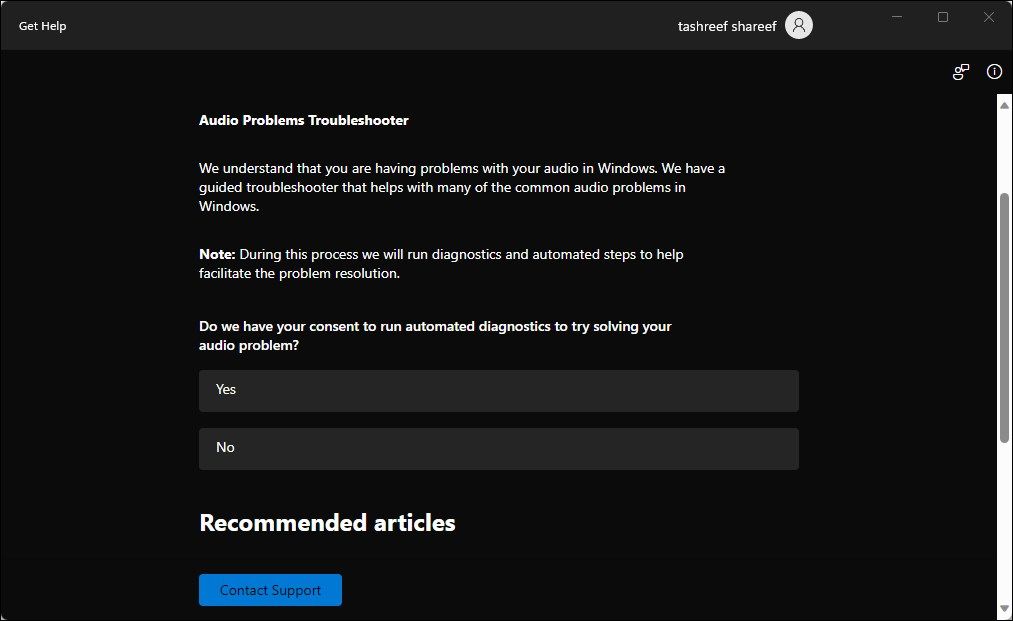
- Click Yes to run the automated diagnostic to solve audio problems. The troubleshooter will start scanning your computer for audio issues. This may take a while, so wait till you hear a beep or see the next option.
- If you didn’t hear the beep, select No and follow the on-screen instructions to try other troubleshooting steps.
Run the audio troubleshooter on Windows 10:
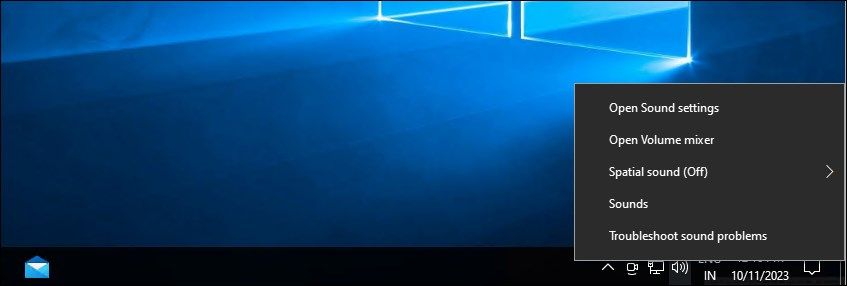
- Right-click the Speaker icon in the system tray and select Troubleshoot sound problems.
- Similar to Windows 11, This will launch the Get Help app. Follow the on-screen instructions to scan your system for audio issues and fix them automatically.
2. Install the Generic Audio Device Driver
You can fix a corrupt driver by reinstalling the audio output driver with a generic device driver. This is useful if the proprietary audio device driver for your equipment is not working or corrupt. You can use the Device Manager to update and reinstall device drivers on your Windows PC .
To reinstall the generic audio output device driver:
Press Win + R to open Run.
Type devmgmt.msc and click OK to open Device Manager.
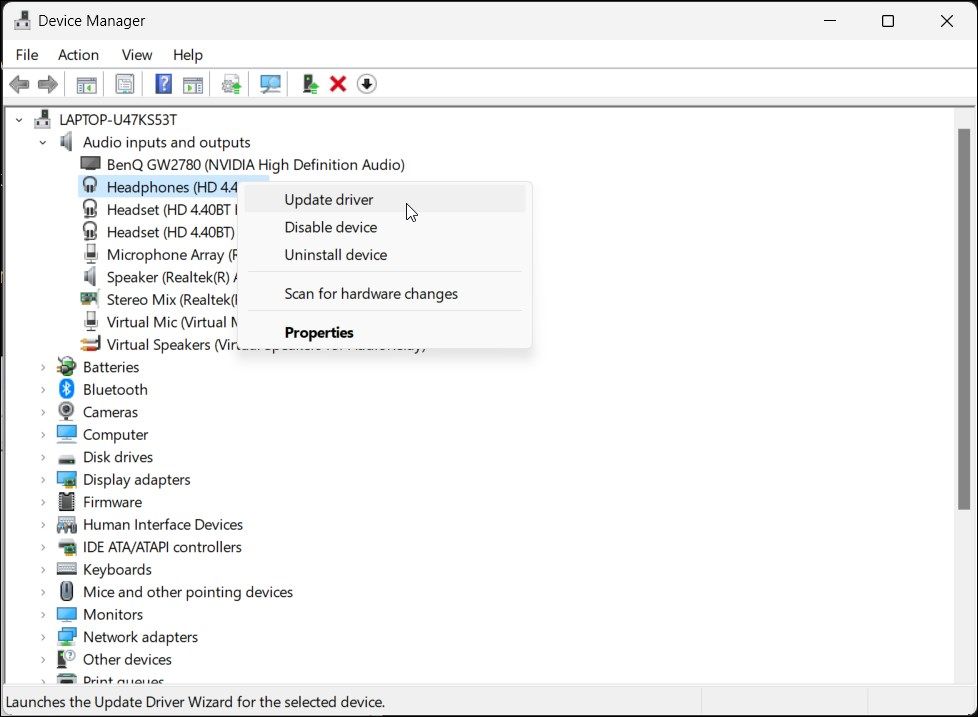
In Device Manager, expand the Audio inputs and outputs section**.**
Make sure your output device is listed. If not, click on View and then selectShow Hidden Devices.
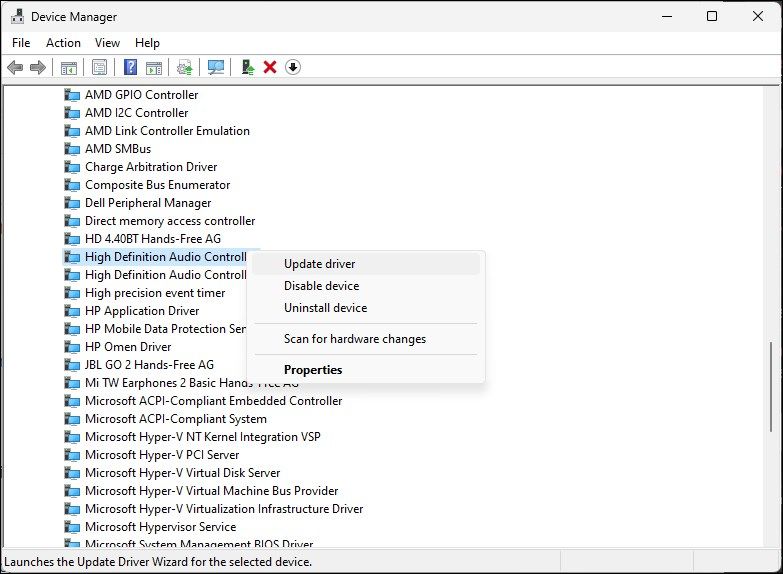
Next, select and right-click on your audio device and select Update Driver.

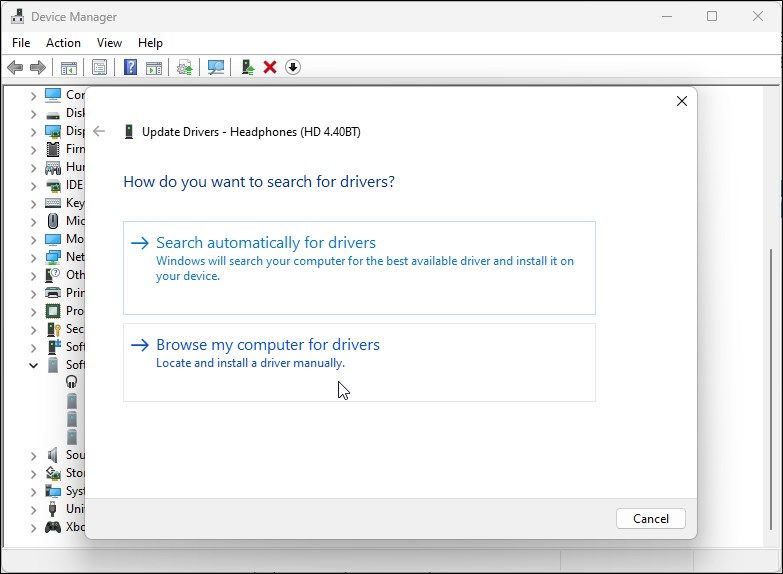
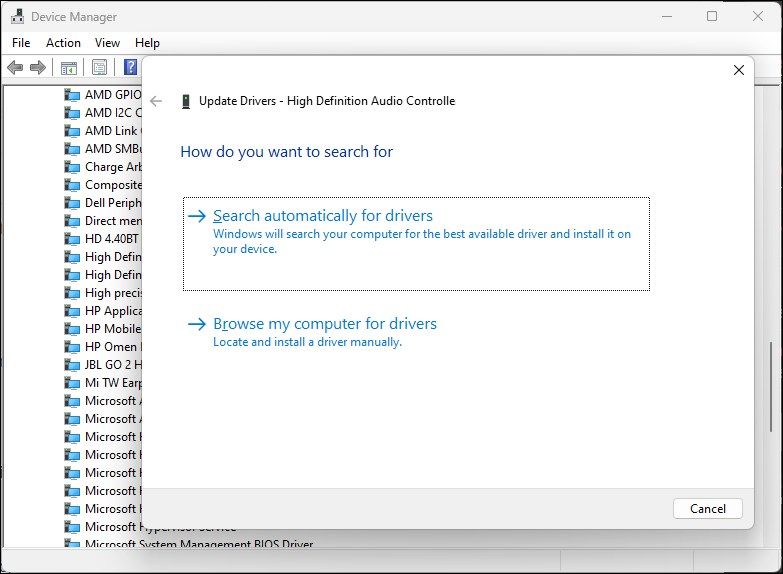
Click on Browse my computer for drivers.

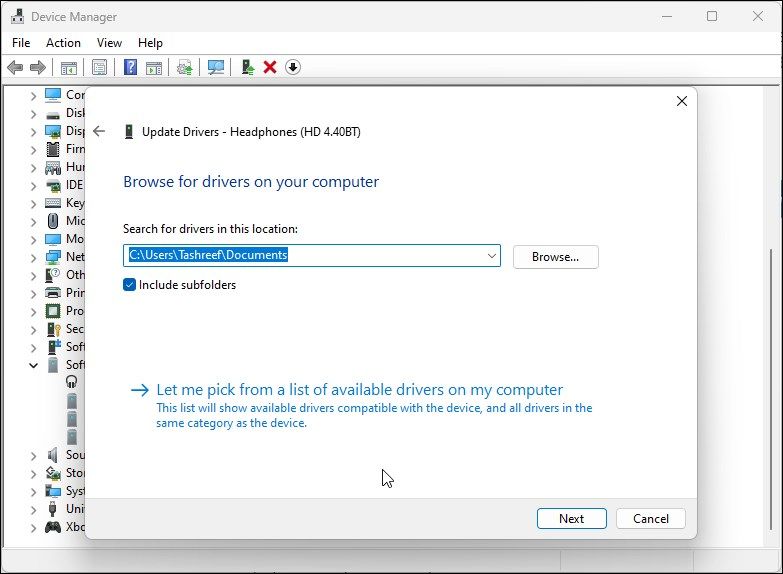
Next, click on Let me pick from a list of available drivers on my computer.

Check the Show compatible hardware option**.**
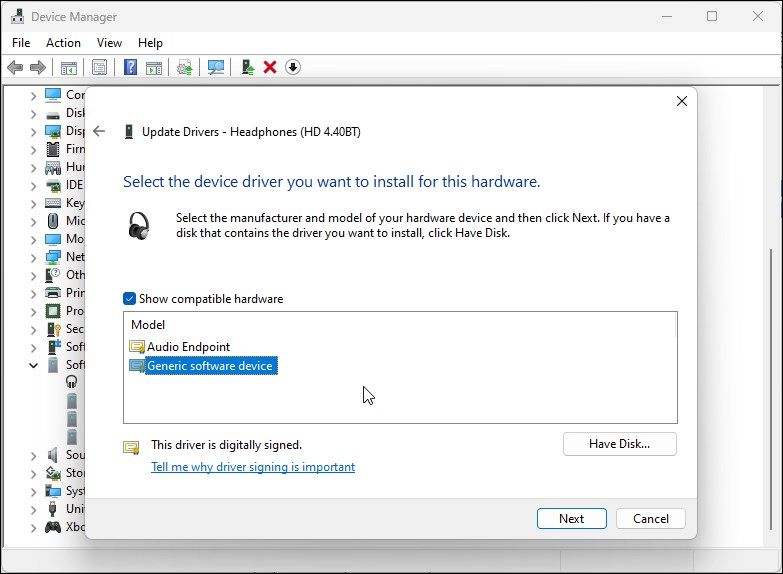
4. Next, select Generic software device and click Next.
5. Wait for Windows to finish installing the drivers for the device.
6. Close the Device Manager and check for any improvements.
If updating the audio device driver didn’t help, check your audio device manufacturer’s website to find updated drivers. If you are using a laptop, visit your computer manufacturer’s website to find the latest drivers for your computer.
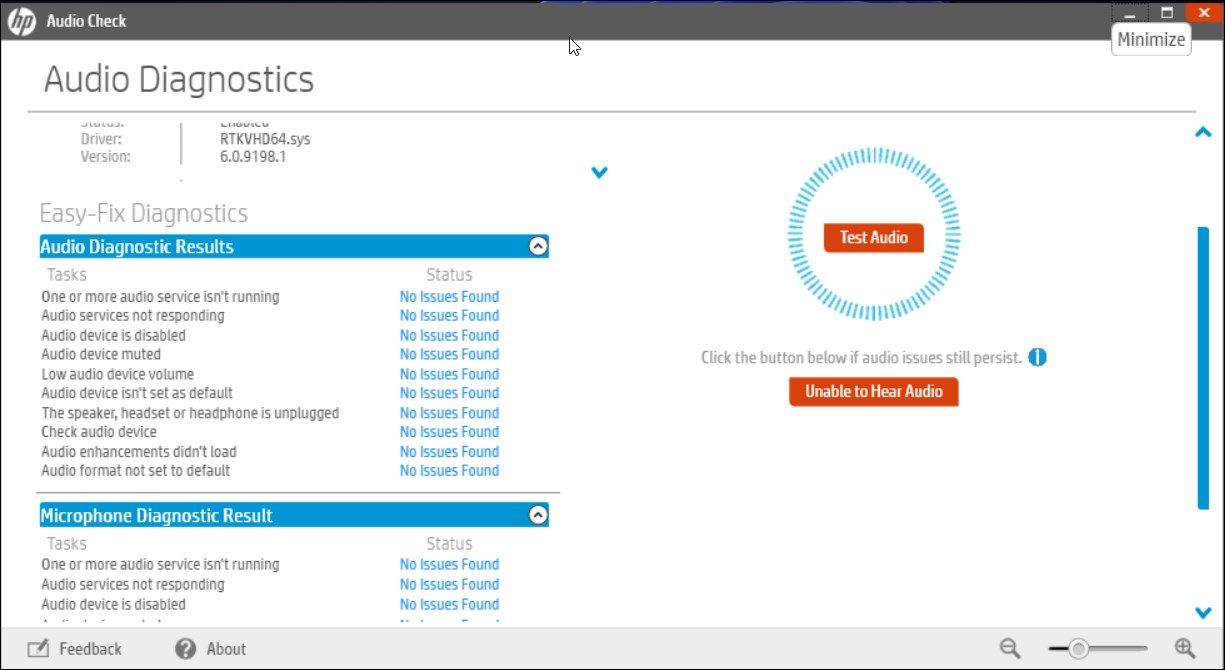
Additionally, if you are using a laptop, try to use the troubleshooting option available in your system management utility. For example, the HP Support Assistant app can check HP laptops for various issues, including audio problems.
Lenovo, Dell, Asus, and all the major laptop manufacturers offer similar tools bundled with their devices. Run any such diagnostic tool available on your PC to see if that helps restore your audio.
3. Manually Reinstall the System Audio Device Drivers
You can manually reinstall the system audio device driver to resolve this error on your Windows computer. Here’s how to do it:
- Open Device Manager by pressing Win + X and select the best matching result from the list of options.
- In Device Manager, expand the System devices section.
- Next, look for and locate any audio devices such as High Definition Audio Controller.

- Right-click on the audio device and select Update driver.
- Select the Browse my computer for drivers option.

- Click the Let me pick from a list of available drivers on my computer option.
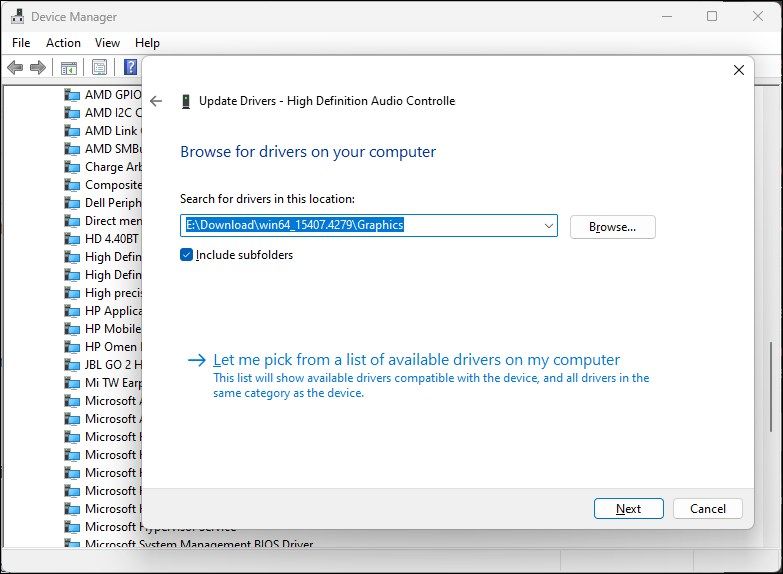
7. Select the driver under the Model section and click Next to install the driver.
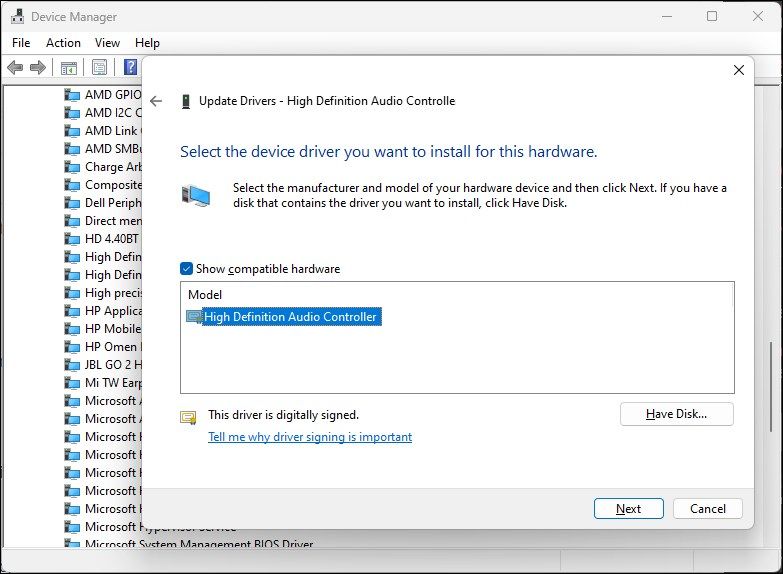
8. Once installed, close Device Manager. This should fix the error and restore audio on your computer.
3. Install the Generic Audio Device Driver Using Device Manager
You can also install the generic USB audio device driver using the “Add legacy hardware” option in Device Manager. Here’s how to do it.
Press Win + X to open the WinX menu.
Click on Device Manager from the context menu.
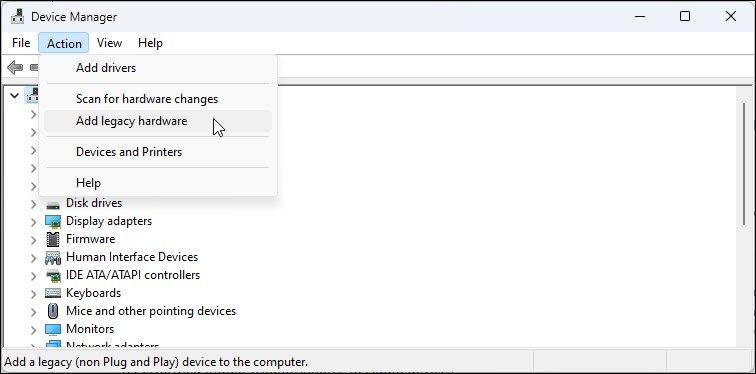
In Device Manager, select your computer name and click on Action.
Select Add legacy hardware.

Click Next to proceed.
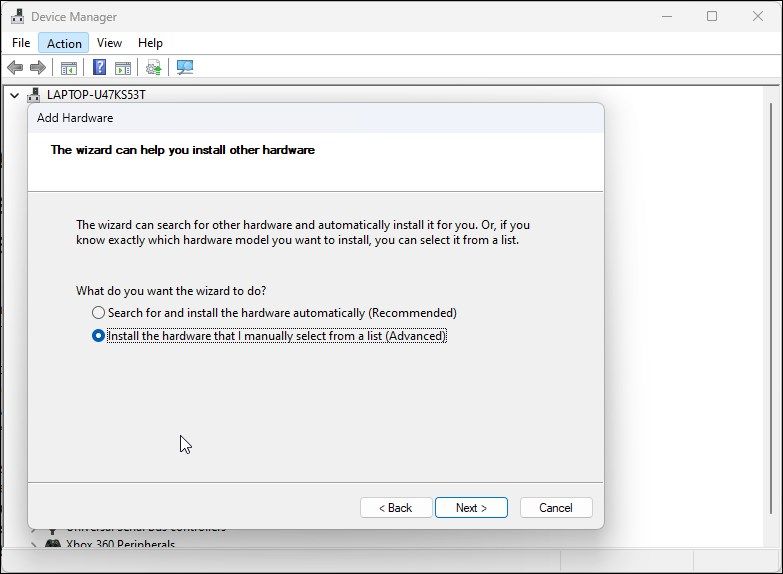
Next, select the Install the hardware that I manually select from a list (Advanced) option.

Click Next.
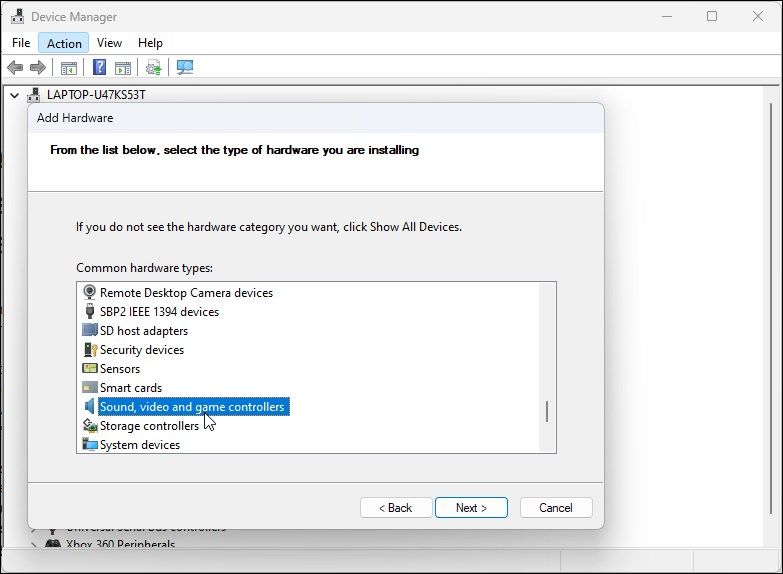
- Under Common hardware types, scroll down and select Sound, video and game controllers.

- Click Next.
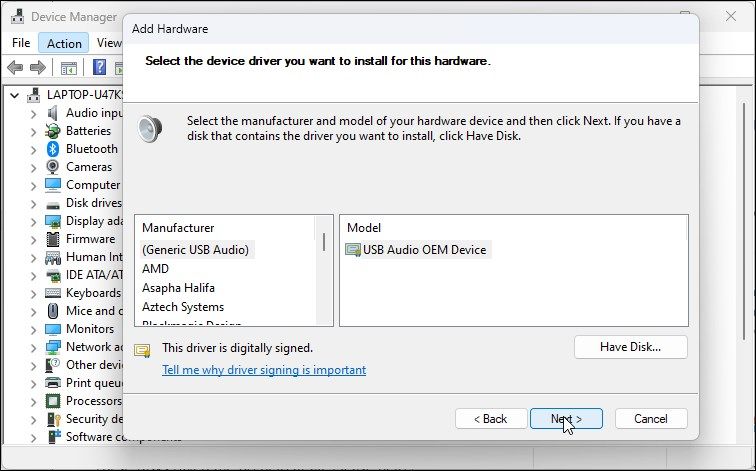
- Select Generic USB Audio under Manufacturer. In the right pane, select USB Audio OEM Device.

- Click Next.
- Click Next once again to confirm the action.
- Wait for the installation to complete and click Finish. Restart your PC and check if your audio device is detected and working again.
4. Check if Your Audio Device Is Disabled
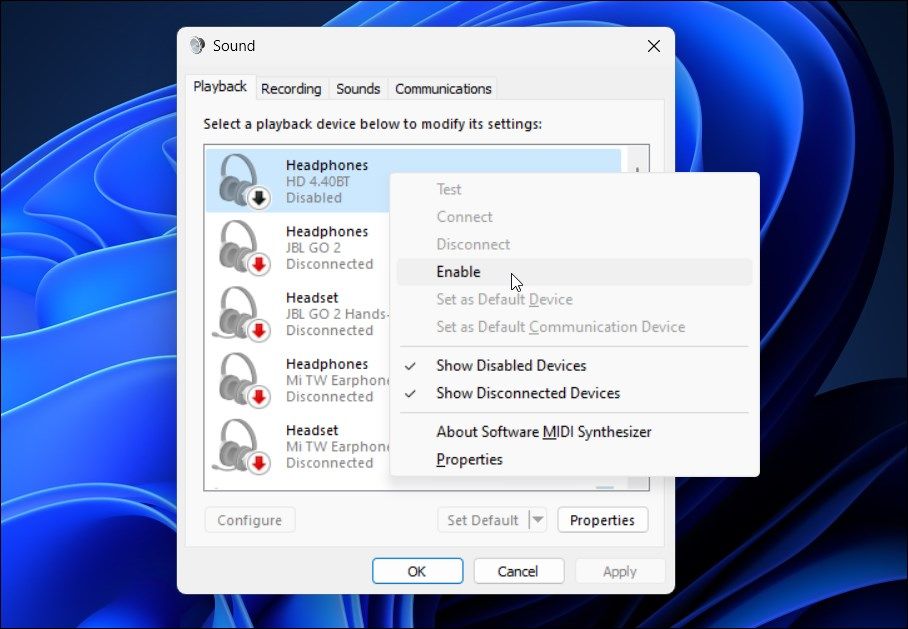
Check if you have accidentally disabled your audio device. While the audio troubleshooter should be able to detect and recommend the same, you can also enable the audio device manually.
To check and enable your audio output device:
- Press Win + R to open the Run dialog.
- Type mmsys.cpl and click OK to open the Sound dialog.
- In the Playback tab, locate your audio output device. If no device is listed, right-click within the Playback section and select Show disabled devices.
- If your audio device is greyed out, right-click and select Enable.
- Next, select the device and click the Set Default button to set the device as default**.**
- Restart your PC and check if the no audio output device is installed error is resolved.
5. Check if the Audio Services are Running
The Windows Audio Endpoint Service and Windows Audio Service are the two essential services for the audio to work on your PC. If these services are not running, your audio device may not function properly.
So, ensure the two services are running and set to startup automatically. Follow these steps to do the same:
- Press Win + R to open Run.
- Type services.msc and click OK to open the Services snap-in.

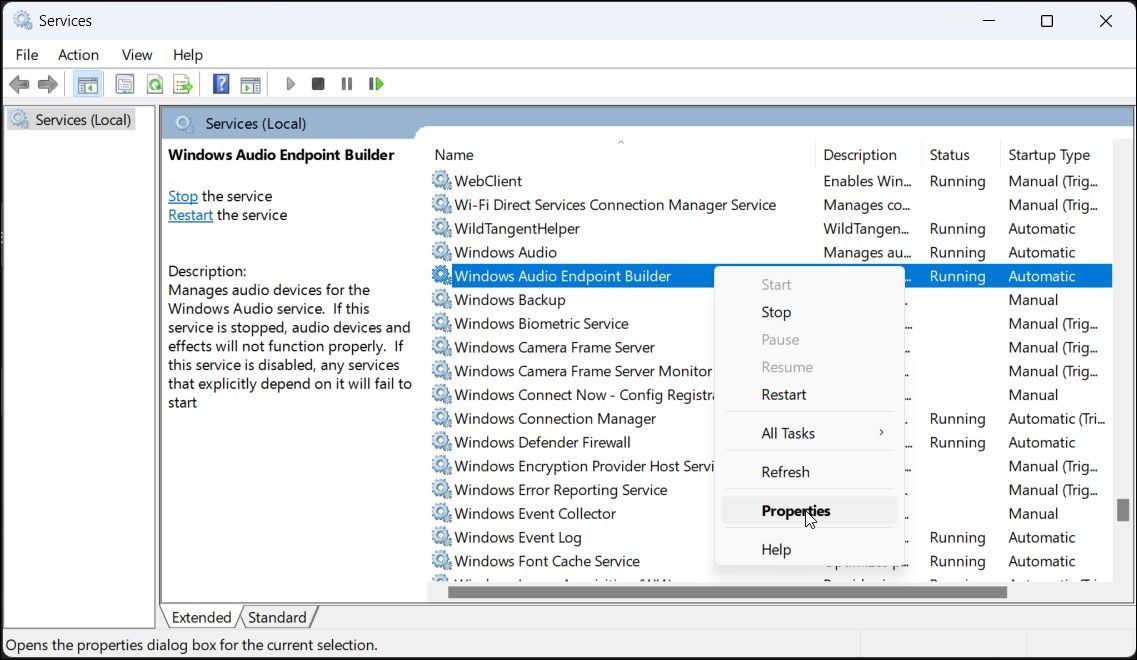
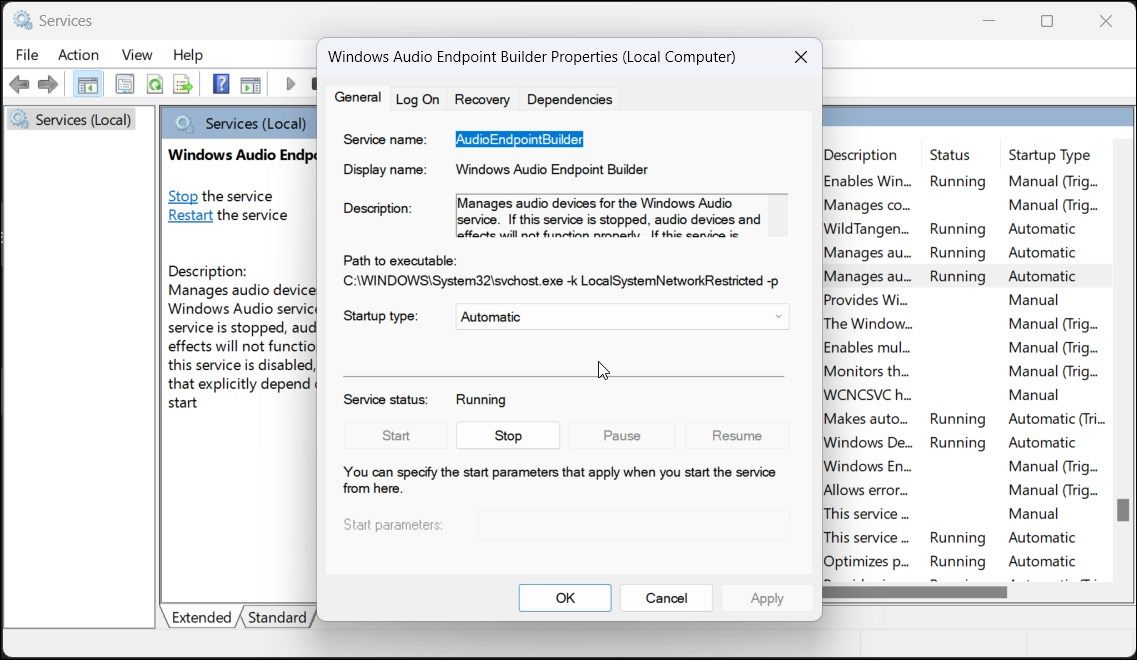
- Next, locate and right-click on Windows Audio Endpoint Service Builder.
- Select Properties from the context menu.

- Click the drop-down for Startup type and select Automatic.
- Click OK to save the change.

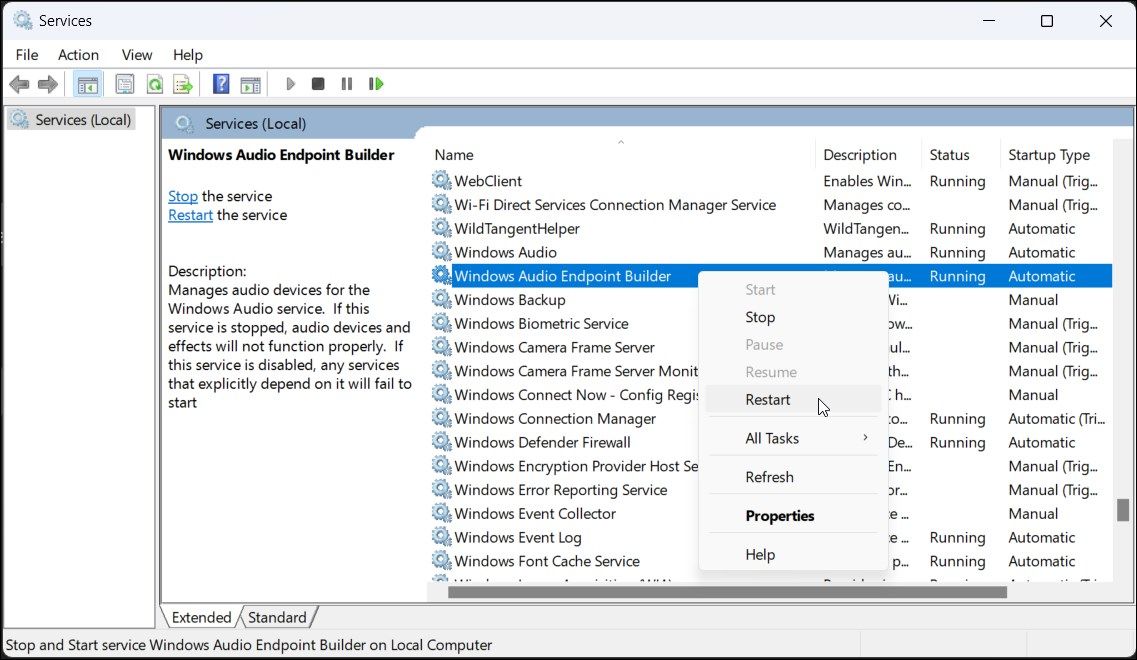
- Right-click on Windows Audio Endpoint Builder service again and then select Restart.
- Next, repeat the steps for the Windows Audio service.
- Once done, close the Services snap-in.
6. Uninstall or Disable Any Third-Party Driver Updater Tools
Third-party driver update utilities allow you to scan and update all the drivers for your computer from one place. While a handy tool, this may conflict with your audio component and Windows’s ability to detect the device.
To fix the problem, disable or remove any driver update utility such as Avast Driver Updater installed on your PC. Then run the audio troubleshooter again to see if that helps resolve the issue. Sometimes, you may need to remove the updater app to disable it completely.
7. Repair the Windows Image With DISM
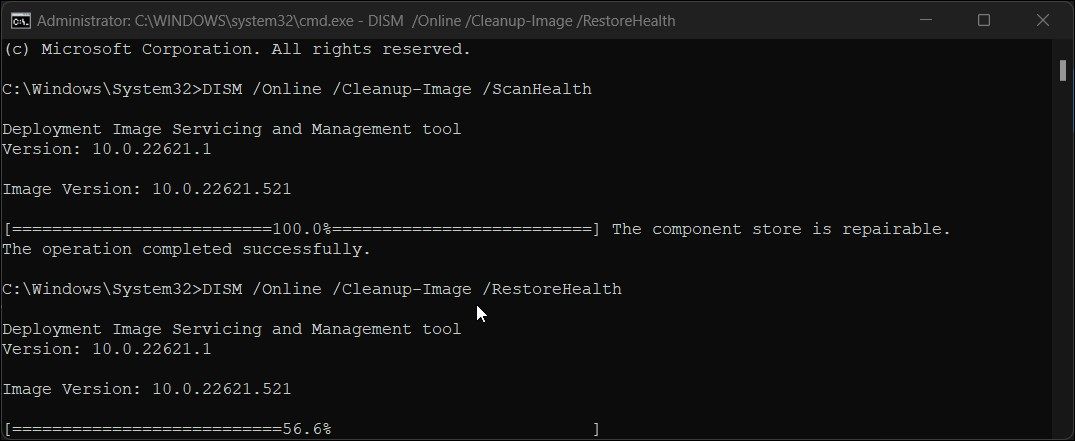
Deployment Image Service Management (DISM) is a built-in Windows image repair command-line utility. If the audio problem is triggered by an issue with your system image, this tool can repair the image to restore the audio functionality on your PC.
To run the DISM tool in Command Prompt :
- Press Win + S to open Windows Search.
- Type cmd and then click Run as administrator under the Command Prompt option.
- In the Command Prompt window, type the following command and press Enter:
DISM /Online /Cleanup-Image /ScanHealth - It will scan your system image for any issues. Once the process is 100% complete, you may see The component store is reparable message if a problem is detected.
- Next, run the following command and press Enter to repair the image. You may need an Internet connection to execute this command and download the necessary files.
DISM /Online /Cleanup-Image /RestoreHealth - This process may take some time, so wait for it to complete.
- Once the restore operation is complete, close the Command Prompt and restart your PC.
- After the restart, check if your audio device is working.
Fix the “No Audio Output Device Is Installed” Error
When connected, Windows will detect all the audio input and output devices and install the necessary drivers automatically. To fix the no audio output device is installed error, make sure your audio device is enabled in the Sound settings.
If the error is resolved, but the audio is still not working, make sure you have the right audio device set as default. Also, try to reinstall the affected driver, restart audio services, and check your audio device for hardware failure.
Your Windows computer automatically detects all the connected audio devices and installs the necessary drivers to get the audio working. Sometimes, however, you may encounter the No Audio Output Device is installed error message when you hover your mouse over the audio icon in the system tray.
This error occurs when Windows fails to detect your connected audio devices. It can be a temporary glitch, a driver-related issue, or, in some cases, caused by system file corruption. Here are a few troubleshooting steps to help you fix the No Audio Output Device installed error on Windows.
Also read:
- [New] In 2024, Full Guide to Creating Minecraft Mashups
- [Updated] Invaluable List of Prime No-Charge Sites for Seamless Video Editing Experience for 2024
- 4 Ways to Transfer Music from Apple iPhone SE to iPod touch | Dr.fone
- Convert M4A Files To AIFF Without Cost - Use Movavi's Web Tool!
- Elevate Android Studio Speed and Productivity on Windows
- Embrace Passion: Italy's Romantic Flirtations
- Eradicating LSA Offline Security Alarm in Windows
- How to Migrate Android Data From Oppo Reno 11 Pro 5G to New Android Phone? | Dr.fone
- In 2024, How to Reset a Nokia C300 Phone that is Locked?
- Navigating Windows 11 Install on No Wi-Fi
- Quench the High Contrast Flame in Windows Display
- Regionskodenknackung Für DVDs: Frei Handhabung Mit Windows 10, 11 Oder 7 - Schritt-Für-Schritt-Anleitung Zur Regionsumstellung Kostenlos
- Remedying Common Office Crash on Windows XP/Vista
- The Foundation of Victory in the World of Diablo
- Title: Resolving Null Sound Driver Error on Windows PC
- Author: David
- Created at : 2024-11-06 16:39:32
- Updated at : 2024-11-07 23:23:59
- Link: https://win11.techidaily.com/resolving-null-sound-driver-error-on-windows-pc/
- License: This work is licensed under CC BY-NC-SA 4.0.
