
Reinstating Detection of Razer Devices by Synapse Software
Reinstating Detection of Razer Devices by Synapse Software
Razer Synapse is the official software for configuring Razer devices, such as keyboards and mice. However, Synapse sometimes doesn’t detect connected Razer devices. Consequently, users can’t configure their devices because they don’t show up in the Synapse software.
The issue of Synapse not detecting devices is mostly reported for Razer mice and keyboards. However, that issue can also occur for Razer headphones, broadcast microphones, and other accessories that software will usually detect. This is how you can fix the Synapse software not detecting Razer devices within Windows 10 and 11.
But First, Double-Check Device Compatibility With Razer Synapse
First, before you hop into the troubleshooting steps, note that Synapse will not detect non-Razer devices. There are even some Razer products Synapse 3.0 and 2.0 don’t support. It might be the case Synapse isn’t detecting your hardware because it doesn’t support it. So, double-check your Razer Synapse software supports the device it’s not detecting.
You can check supported hardware at the Razer Synapse 3 supported device page . Click a category on that page to see if your device is listed there. You can also check compatibility for version 2.0 at the Razer Synapse 2.0 supported device page. If your device is listed among the supported hardware on one of those pages, your Synapse software should detect it.
1. Run the Hardware and Devices Troubleshooter
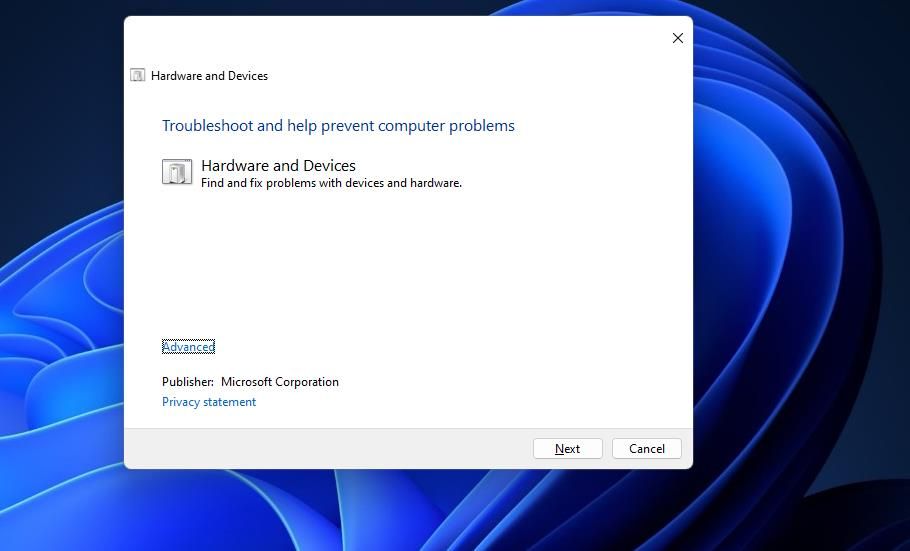
Windows has a Hardware and Devices troubleshooter that could identify and even resolve issues with the Razer device Synapse isn’t detecting. However, that troubleshooter isn’t visible within Settings. Nevertheless, you can run the Hardware and Devices troubleshooter from Command Prompt like this:
- Make sure your Razer device is connected to your PC.
- Click aType here to search (magnifying glass) button or box on your Windows 11/10 taskbar.
- To find Command Prompt, input the phrasecmd in theType here to search box.
- Select the Command Prompt app in the Windows search tool.
- Execute this Hardware and Devices troubleshooter command:
msdt.exe -id DeviceDiagnostic
- ClickNext in the Hardware and Devices troubleshooter.
- SelectApply this fix for resolutions the troubleshooter suggests.


2. Plug the Razer Device into an Alternative USB Port
This issue can occur because of USB port connection issues. Some users have revealed that plugging Razer devices into different USB ports on their PCs resolved the issue of synapse not detecting them. So, try unplugging your Razer device and plugging it into an alternative USB port. Also, plug the device directly into your PC without using any intermediary USB hubs.
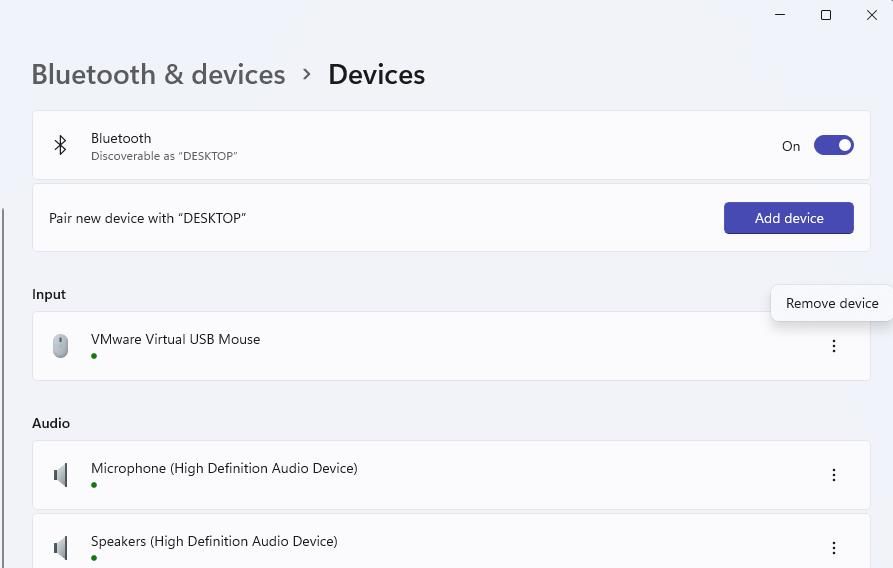
It’s also recommended to select aRemove device option in Settings before plugging your device into another port. To do that, press theWindows logo +I key, selectBluetooth and devices , and clickView more devices . Then click the three-dot button for your Razer hardware and selectRemove device . In Windows 10’s Settings app, you can select a Razer peripheral on theBluetooth & other devices tab and pressRemove device .
 Project Manager - Asset Browser for 3Ds Max
3. Select Synapse’s Repair Option
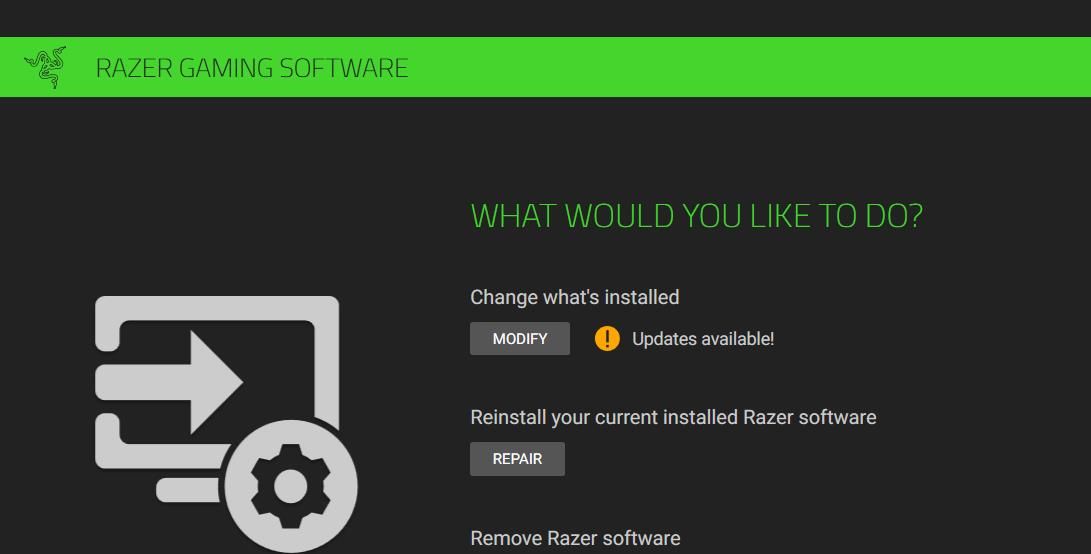
A lot of users have also said they’ve been able to fix Synapse not detecting devices by selecting aRepair option for that software. Synapse has aRepair option you can select on a Razer Gaming Software window. This is how you can select that option in Windows 11/10:
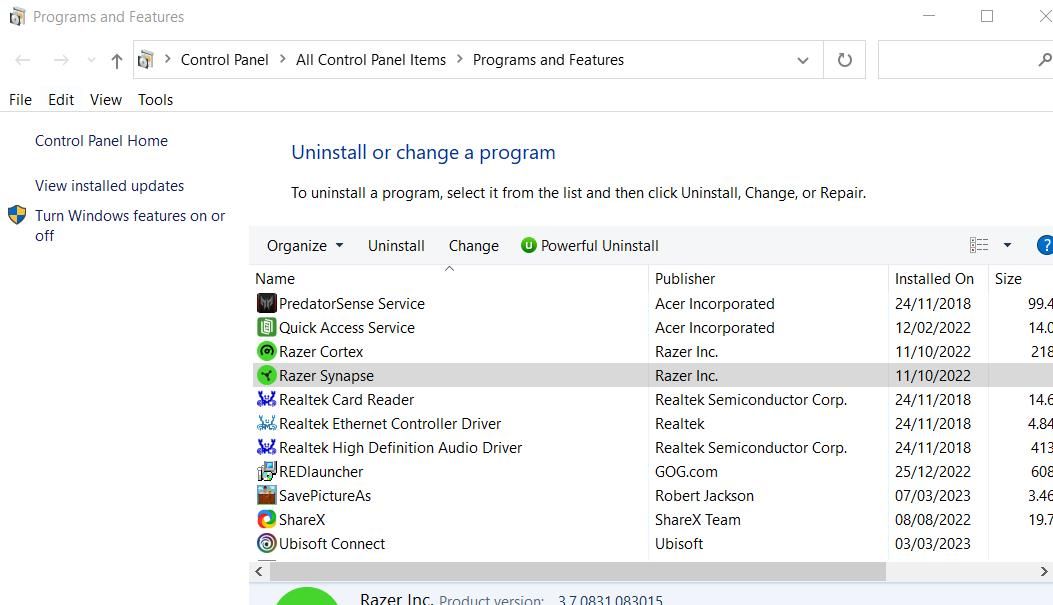
- Bring up the Windows uninstaller utility in the Control Panel with a method in our guide for opening Programs and Features on Windows .
- Then select Razer Synapse in Programs and Features.
- Click theChange button for Razer Synapse.
- Select theRepair option in the window that opens.
- Sign back into Razer Synapse after selectingRepair .
- Then selectRestart in Windows 11/10 before launching Synapse.

4. Reinstall Razer Synapse
Corrupted or missing Synapse modules can cause the issue of Synapse not detecting Razer devices. So, thoroughly uninstalling Synapse by erasing leftover data and reinstalling the software will often resolve that issue. Reinstall Razer Synapse as follows:
- Open the Programs and Features applet.
- Click Razer Synapse to select that software.
- SelectUninstall in Programs and Features to open a Razer Gaming Software window.
- Then click theUninstall option in the window to remove Synapse.
- Uninstall Cortex and any other associated Razer sub-programs.
- Press theWindows logo key +R to access a Run command box.
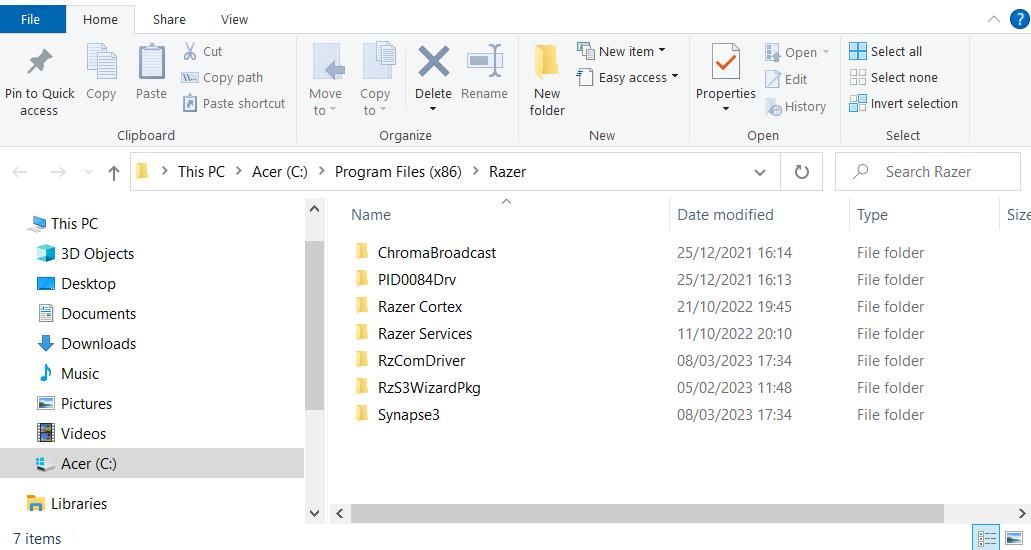
- Input this folder directory in Run and clickOK :
C:\Program Files (x86)\Razer
- PressCtrl +A to select any remaining files in the Razer folder.
- Press theDel key to erase the selected files.
Next, input this Razer directories path in Explorer’s address bar and hitEnter :
C:\ProgramData\Razer
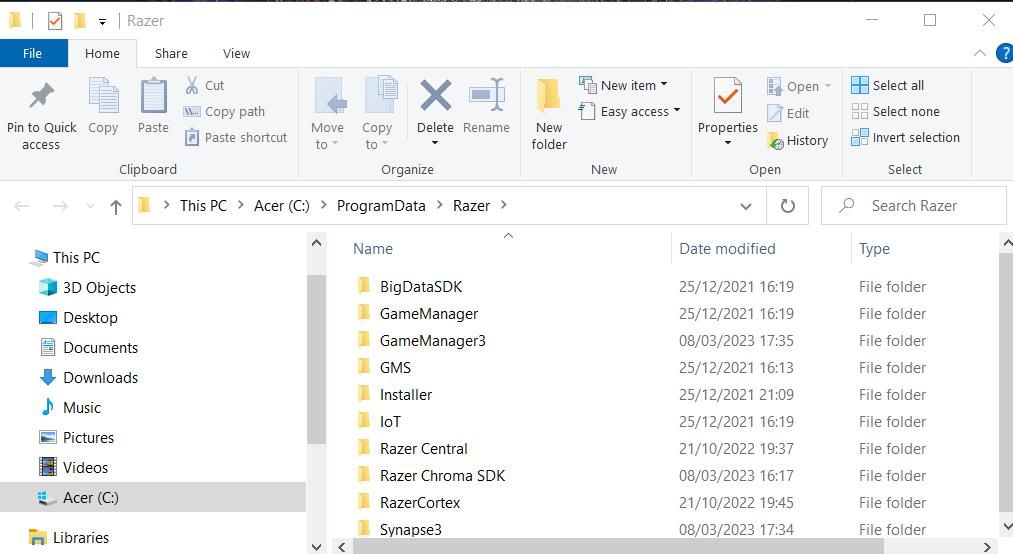
Repeat steps eight and nine to delete all files in the Razer directories folder. Once done, restart your PC.
- ClickDownload Now on the Razer Synapse page.
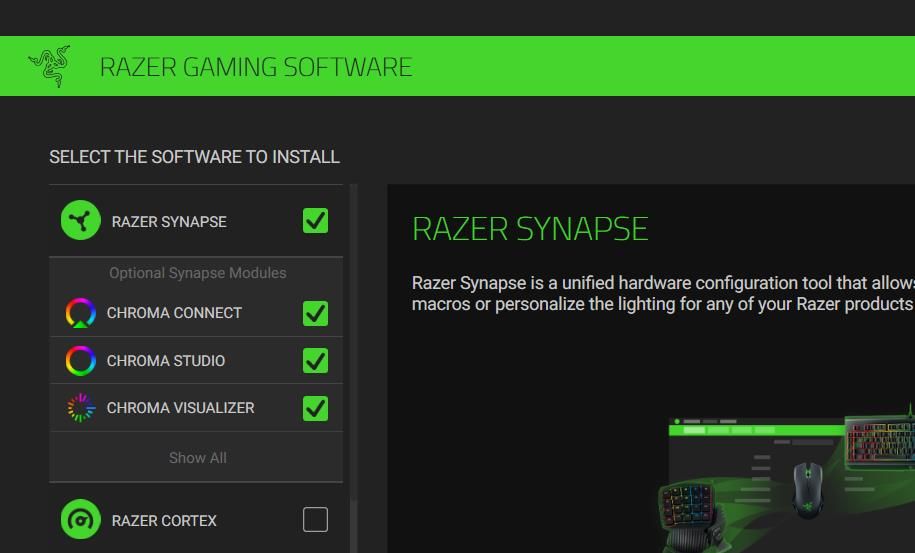
- Double-click the downloadedRazerSynapseInstaller_V1.12.0.385.exe file to open the setup wizard.
- Select theSynapse checkbox along with other Razer software to reinstall, and click theInstall option.
 With Screensaver Wonder you can easily make a screensaver from your own pictures and video files. Create screensavers for your own computer or create standalone, self-installing screensavers for easy sharing with your friends. Together with its sister product Screensaver Factory, Screensaver Wonder is one of the most popular screensaver software products in the world, helping thousands of users decorate their computer screens quickly and easily.
5. Reinstall Mouse and Keyboard Device Drivers
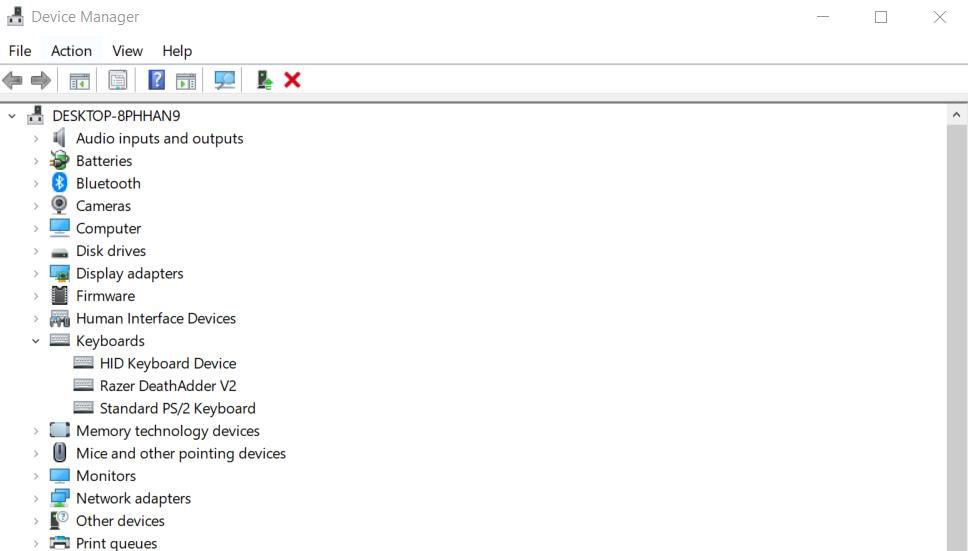
Another fix confirmed to work for this Synapse issue is to reinstall all Razer and HID-compliant mouse and keyboard devices. Applying that potential resolution can resolve device driver conflicts. You can reinstall HID mouse and keyboard drivers as follows:
- Press theWin + X keyboard shortcut that brings up a Power User menu.
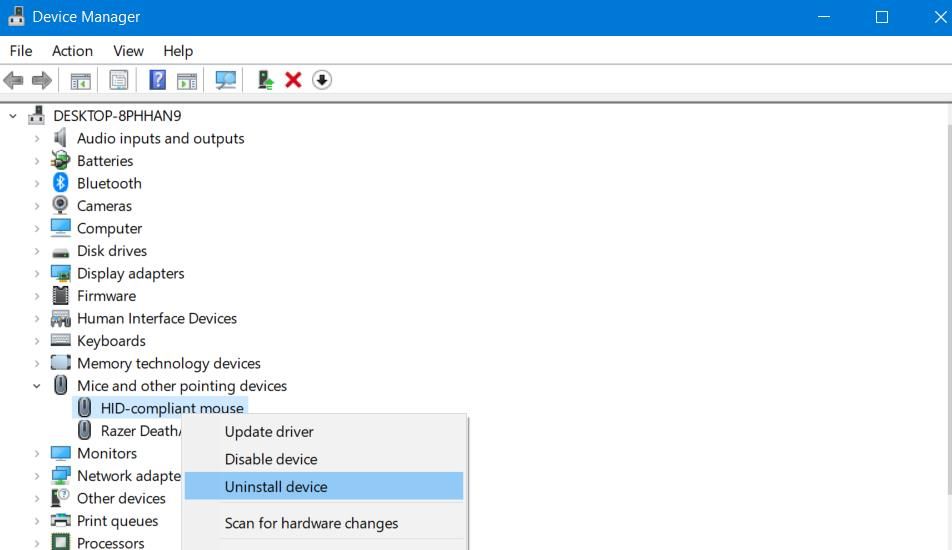
- ClickDevice Manager to view that tool’s window.
- Double-clickMice and other pointing devices to view peripherals for that category.
- Right-click a Razer mouse and selectUninstall device >Uninstall .
- Repeat the previous step for all HID mice devices listed.
- Then double-click theKeyboards category.
- Uninstall all Razer and HID keyboard devices listed there as outlined in step four.
- Reboot the Windows PC for the automatic reinstallation of device drivers. You can also selectAction andScan for hardware changes in Device Manager to reinstall uninstalled peripherals.
6. Disable Antivirus Utilities
Temporarily antivirus apps on your PC to ensure they aren’t blocking Synapse in any way. You can disable Windows Security’s real-time protection as outlined in our guide for disabling Microsoft Defender . If there’s a third-party antivirus tool on your PC, turn off its shield via its system tray icon’s context menu.

 SwifDoo PDF Perpetual (1 PC) Free upgrade. No monthly fees ever.
Launch Razer Synapse to see if it detects your devices after disabling antivirus software on your PC. If this potential resolution works, consider adding Razer Synapse to the exclusion list in Windows Security or alternative security software. Then turn your antivirus protection back on.
 OtsAV TV Webcaster
Configure Your Razer Devices in Synapse Again on Windows
Those potential solutions will most likely resolve Synapse not detecting connected devices. Then you can reconfigure your Razer mouse, keyboard, or any other supported hardware with that software. However, any users who still need more troubleshooting guidance for this issue can submit a ticket to Razer’s support service by clicking theContact Support button on this Synapse 3 page .
- Title: Reinstating Detection of Razer Devices by Synapse Software
- Author: David
- Created at : 2024-08-15 23:29:41
- Updated at : 2024-08-16 23:29:41
- Link: https://win11.techidaily.com/reinstating-detection-of-razer-devices-by-synapse-software/
- License: This work is licensed under CC BY-NC-SA 4.0.