
Rebuilding with Purpose: Windows 11 From Scratch
Rebuilding with Purpose: Windows 11 From Scratch
Quick Links
- How to Clean Install Windows 11
- What Is the Windows 11 Installation Assistant?
- Can You Install Windows 11 on a Virtual Machine?
 OtsAV Radio Webcaster
Key Takeaways
- Upgrading to Windows 11 is easy and can be done directly through Windows 10, or with a clean install for a fresh operating system feeling.
- To clean install Windows 11, you need to prepare a Windows 11 ISO and a bootable USB flash drive. Make sure your device meets the minimum specifications for Windows 11.
- You can also install Windows 11 on a different device or virtual machine to test it out before committing to the newer operating system. Make sure your system resources are adequate for running Windows 11 smoothly.
Considering an upgrade to Windows 11? You can upgrade directly through Windows 10, but you might prefer a clean Windows 11 install to start with a fresh OS. Or you might want to install Windows 11 on a different device entirely. Whatever your reasons, it’s easy to install Windows 11.
How to Clean Install Windows 11
There are a few things you need to prepare before you can proceed with your Windows 11 installation—specifically the Windows 11 ISO and the bootable Windows 11 USB flash drive you’ll install it from. Furthermore, if you’re installing Windows 11 on a new device, it’s worth considering Windows 11’s minimum specifications to make sure your machine is up to scratch.

1. Download the Windows 11 Media Creation Tool
The first thing you need is a copy of the Windows 11 ISO, which is the disk image containing the Windows 11 installation files:
- Head to the Windows 11 Download page.
- Under Create Windows Media, select Download Now.
- Run the Media Creation Tool once it finishes downloading, then accept the terms and conditions.

Download Windows 11 Disk Image ISO
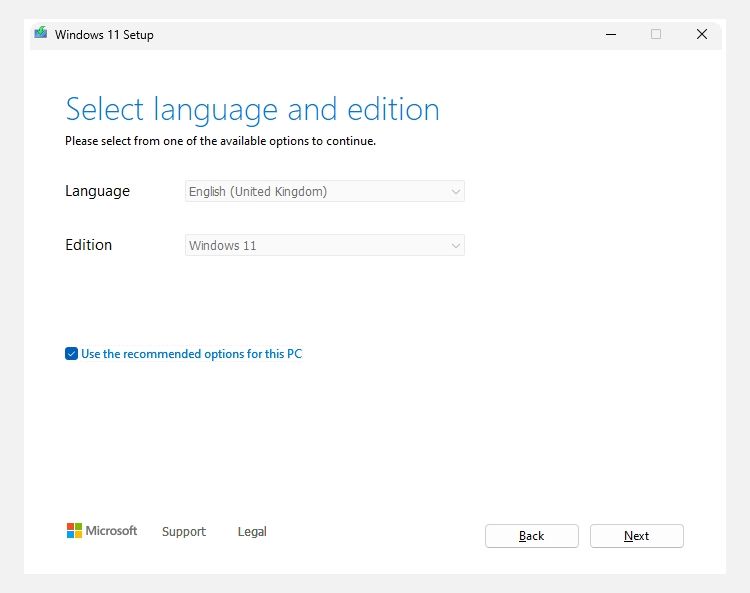
On the Windows 11 Download page, there is also the option to download the Windows 11 Disk Image ISO directly:
- Select Windows 11 using the dropdown menu.
- Select the language you want Windows 11 to use.
- Select the download link to begin the download process.
Once downloaded, move to section three on how to burn your ISO to a USB flash drive.

2. Create a Bootable Windows 11 USB Drive
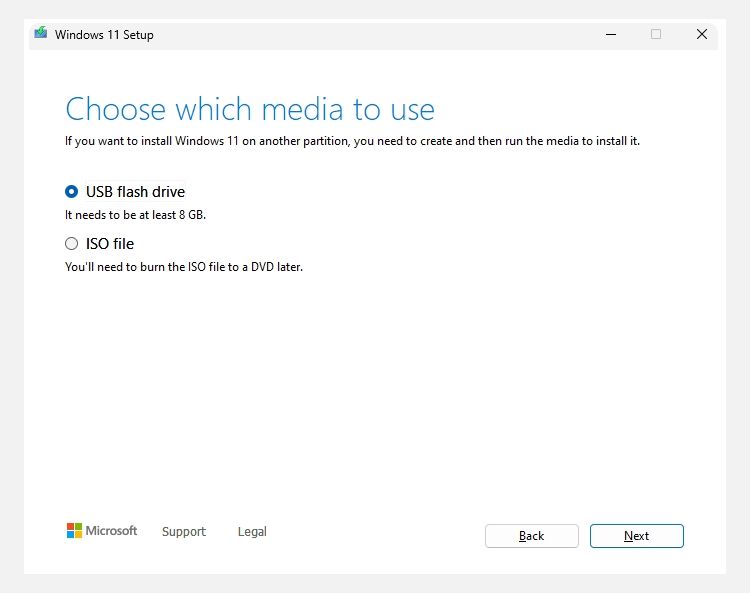
Now, the Windows 11 Media Creation Tool gives you two options: create a USB flash drive or download a Windows 11 ISO. You can use either option for a clean Windows 11 installation, with the only major difference being that you’ll have to create a bootable USB flash drive yourself if you download the ISO. Either option works well, though.
Windows 11 USB Flash Drive
- Select USB flash drive > Next.
- Choose the USB flash drive you want to use, followed by Next.
- The Media Creation Tool will begin the process of downloading Windows 11 and creating the bootable flash drive.
Windows 11 ISO File
- Select ISO file > Next.
- Choose a memorable location to save the ISO file, and give it a handy name (like Windows 11).
- The Media Creation Tool will begin the process of downloading Windows 11 and saving it to your computer.
Once finished, move to the next section.
3. Burn the Windows 11 ISO to a Bootable USB Flash Drive
If you used the Windows 11 Media Creation Tool to create a bootable USB flash drive, you can skip forward to the next section.
If you chose to create a Windows 11 ISO, you’ll now need to create a bootable Windows 11 USB flash drive (or DVD) for installation. There are many tools you can use to create a bootable ISO . However, in this example, I’ll be using Rufus , which is a handy, lightweight tool that assists you with the ISO burning settings. You’ll also need a USB flash drive with at least 8GB of storage. The drive will be completely wiped during the ISO burning process, so make sure you back up any existing data from it before proceeding.
Insert your USB flash drive, then:
- Open Rufus.
- Hit the Select button. Browse to the location of your Windows 11 ISO file and select it.
- Rufus will update the drive and burning properties automatically. Press Start when you’re ready to proceed.
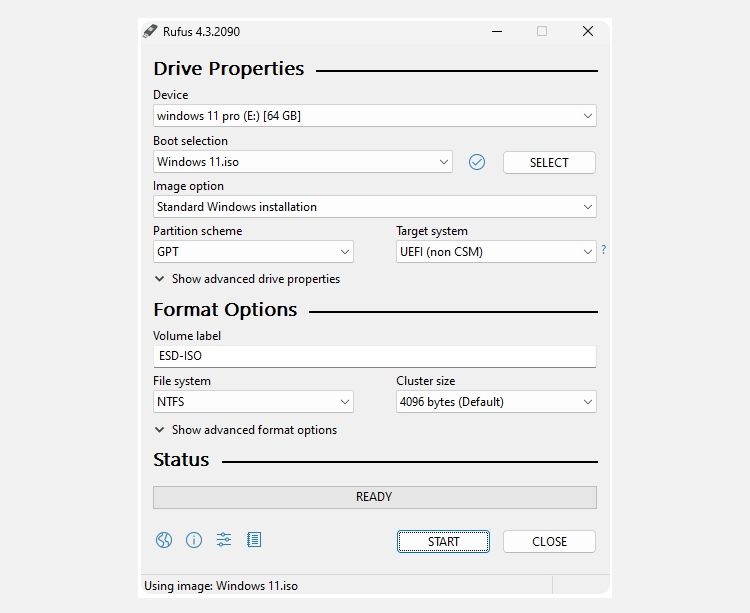
The Windows 11 ISO burning process will take a few minutes, so go and make a cup of tea or coffee, and it’ll be done when you return.

4. Install Windows 11 Using the Bootable USB
Once Rufus finishes burning your bootable Windows 11 USB flash drive (or if you created your Windows 11 installation media using the Media Creation Tool), you can use it to install the new operating system. Here’s the process:
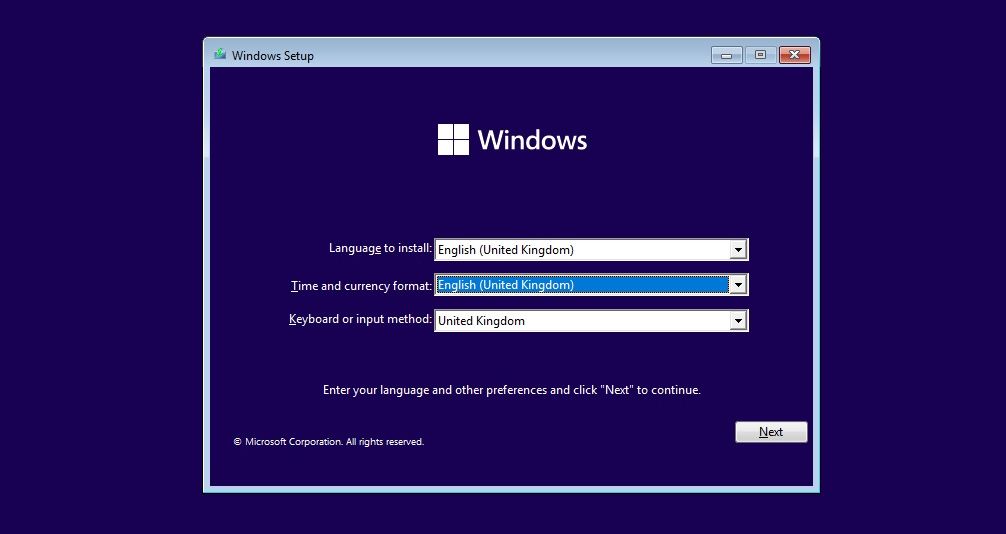
- Make sure the PC you’re installing Windows 11 on is switched off. Insert the Windows 11 installation media.
- Switch the computer on and tap your BIOS/UEFI entry key .
- Once in your BIOS/UEFI settings, you’ll have to find an option to boot from the USB through a temporary change to the boot order. The menu is likely under Boot Options or something similar. Move the Windows 11 installation USB flash drive into the primary boot position.
- Save and Exit the BIOS/UEFI. Your machine will reboot. After it boots, you’ll launch into the Windows 11 installation process.
- When the Windows 11 installation process begins, select Install Now. On the next screen, select Custom to continue with the Windows 11 clean install. You’ll also be asked for your Windows product key. However, you can input your product key later or import it from your Microsoft account after installation.
- Next, you must choose the drive you want to install Windows 11 on. If you’re dual-booting Windows 11, select your secondary drive. Otherwise, if you’re going for the full clean installation of Windows 11, select the appropriate drive followed by Next.
- The Windows 11 installation process will begin. When the installation finishes, you can begin entering your login credentials, keyboard configurations, and more. At this point, if you enter your Microsoft account credentials, your Windows product key will also automatically update, validating your Windows 11 installation (if you are eligible for a free upgrade to Windows 11).
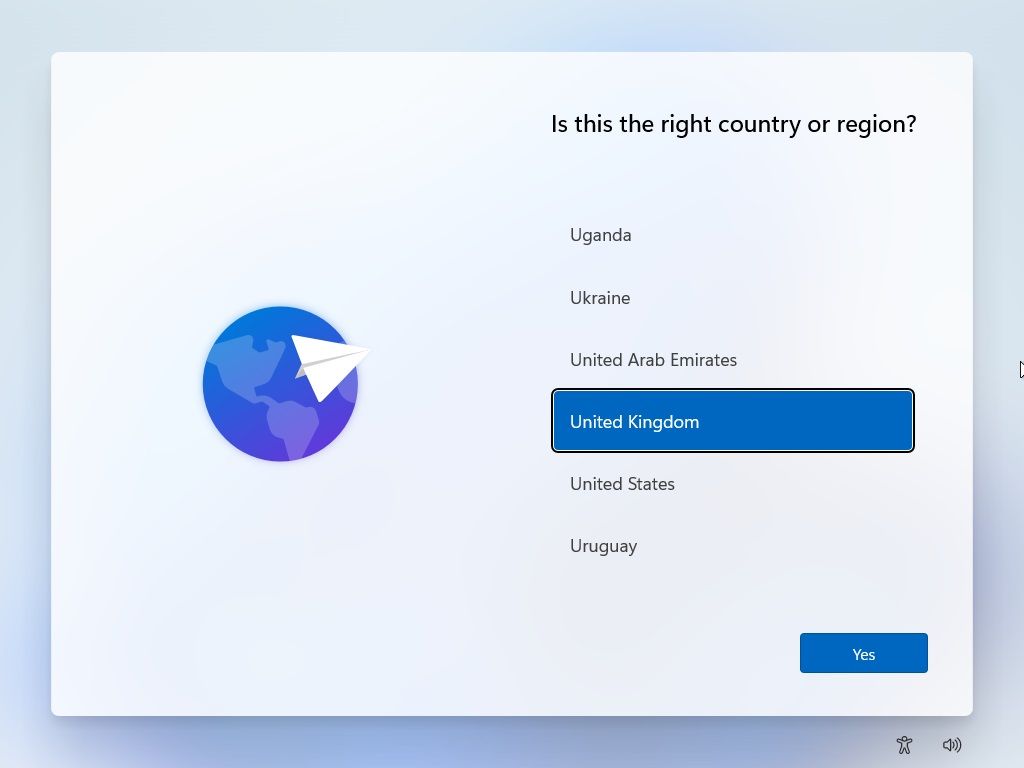
Work through the Windows 11 setup pages one by one, checking them as you go. There are options for privacy, location, data sharing, and more.
What Is the Windows 11 Installation Assistant?
The Windows 11 Installation Assistant is a Microsoft tool that guides you through the update process from Windows 10 to 11 “on a device you’re currently using.”
What this means is that you won’t complete a clean Windows 11 installation but instead upgrade from Windows 10, which can leave behind some files, artifacts, and so on.
However, it’s still a useful way to upgrade to Windows 11, especially if you’re not bothered about installing Windows 11 yourself and just want to get the upgrade done.
 Glarysoft File Recovery Pro Annually - Helps to recover your lost file/data, even permanently deleted data.
Can You Install Windows 11 on a Virtual Machine?
If you don’t want to install Windows 11 on your main computer, you could always install it on a virtual machine instead. The virtual machine option gives you a way of testing Windows 11 without fully committing to the new operating system.
Installing Windows 11 on a virtual machine like VMWare Workstation Player follows much of the same process as installing directly to your hard drive or solid-state drive, only you don’t need to worry about burning the Windows 11 ISO to a USB flash drive. Instead, virtual machine software can boot the installation files from the ISO directly without the need for a bootable flash drive.
Just remember that you need adequate system resources to run Windows 11. If you don’t have a powerful enough CPU or enough RAM, your Windows 11 experience will suffer.
- Title: Rebuilding with Purpose: Windows 11 From Scratch
- Author: David
- Created at : 2024-08-16 00:17:19
- Updated at : 2024-08-17 00:17:19
- Link: https://win11.techidaily.com/rebuilding-with-purpose-windows-11-from-scratch/
- License: This work is licensed under CC BY-NC-SA 4.0.