
Proper Methods to Turn Windows Key On/Off
Proper Methods to Turn Windows Key On/Off
While a handy feature, a common annoyance with the Windows key is accidental presses, which can disrupt your workflow or gaming sessions. If you don’t have a use for this little funky key, you can disable it using the built-in option on your keyboard or by modifying the Windows Registry.
Here’s a step-by-step guide on how to turn the Windows key on and off in Windows 10 and 11.
How to Enable the Windows Key on Windows
If the Windows key is not working on your computer, check if your keyboard has a “gaming mode”. If yes, turn off gaming mode to enable the Windows key. Some gaming keyboards feature a dedicated switch or Fn key combination to turn on and off the Windows key to prevent accidental presses.
For example, you can press Fn + F10 to enable or disable gaming mode on a Razer keyboard. Similarly, the Alienware, Logitech, and Azio MGK series keyboards also feature a hardware solution to turn off the Windows key.
Additionally, check your keyboard customization software (Corsair iCUE, Razer Synapse, Logi Options+, etc.) to see if the Windows key is disabled or gaming mode is on. If the issue persists, check out our extensive troubleshooting guide to fix a broken Windows key . Go through the guide to find and fix issues preventing your Windows key from working.
How to Disable the Windows Key Using Microsoft PowerToys
Microsoft PowerToys is a set of system utilities available on Microsoft Windows. It includes some handy utilities such as “Color Picker,” “Always On Top” to keep any app on top, and “Awake” to stop your PC from sleeping.
However, the PowerToys utility we are interested in is the Keyboard Manager. It lets you reconfigure your keyboard by remapping keys and shortcuts. Using this you can remap and disable one or both (Let/Right) Windows keys.
To turn off the Windows key using PowerToys:
- Download and install Microsoft PowerToys from the official page. After installation, launch the app.
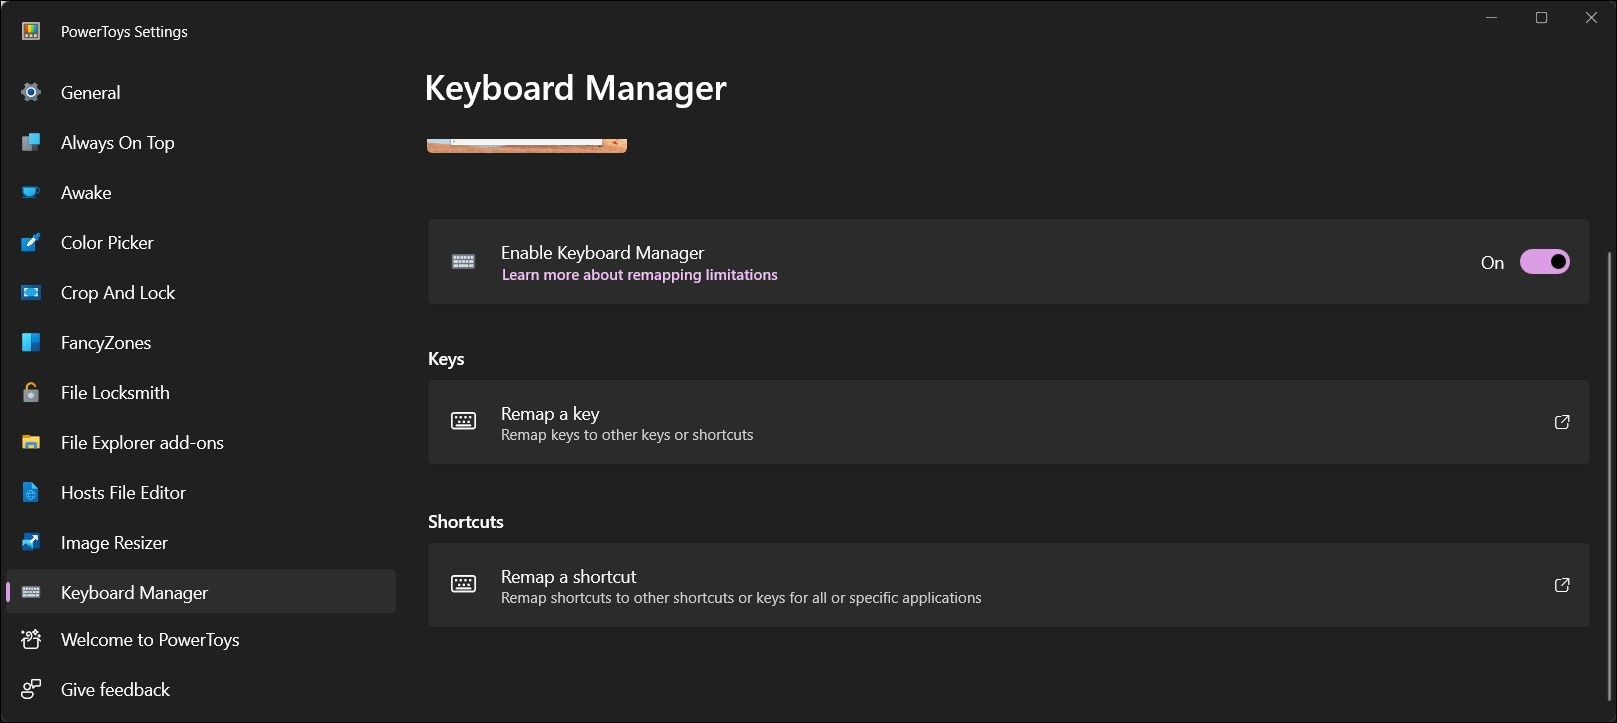
- Open the Keyboard Manager from the left pane.
- Click Remap a key under the Keys section.

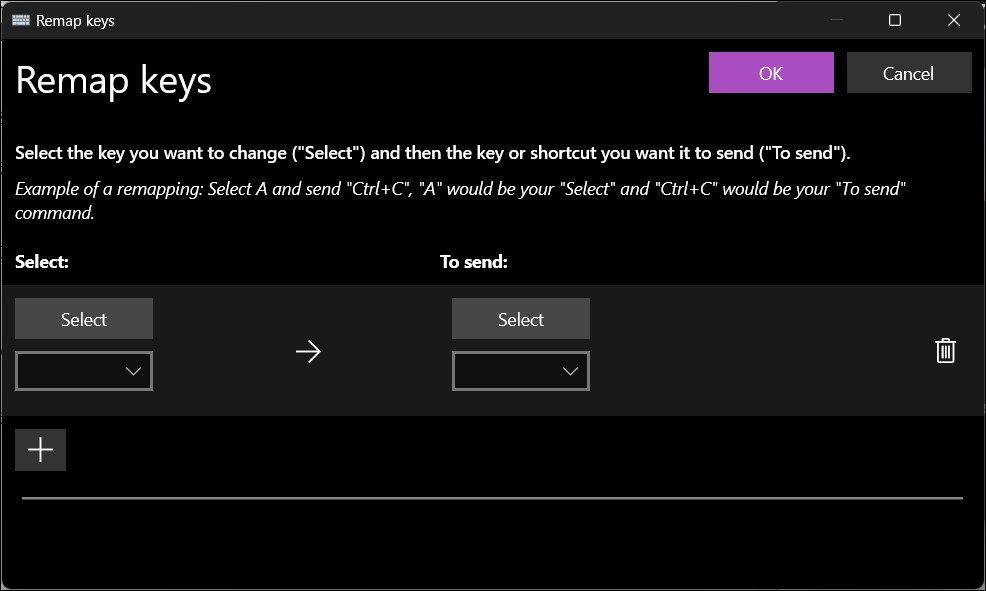
- Click the Add (+) icon under Select.
WonderFox DVD Ripper Pro
- Next, click the Select button and press the Windows key on your keyboard. Assuming you want to disable the Win(Left) key, you’ll see Windows (Left) as the selected option. Click OK.
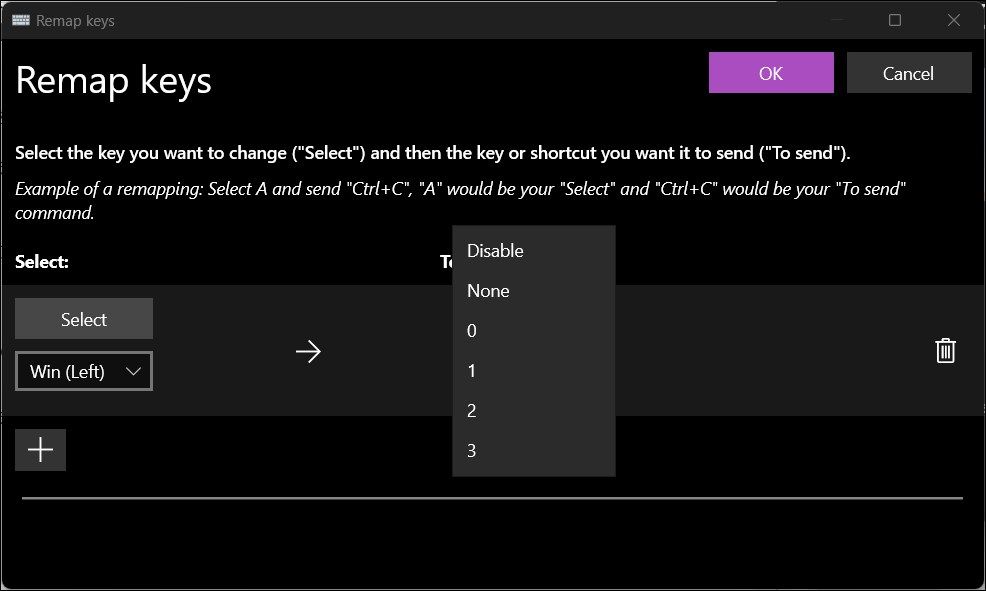
- Alternatively, click the drop-down menu and select the Windows key from the list of keyboard keys.
- Next, click the To Send drop-down menu. Scroll to the top and select Disable. Alternatively, press D on your keyboard to locate the Disable option.
- Click the OK button in the top-right corner to save the changes.
- Click Continue anyway if a warning prompt appears.
 WonderFox DVD Ripper Pro
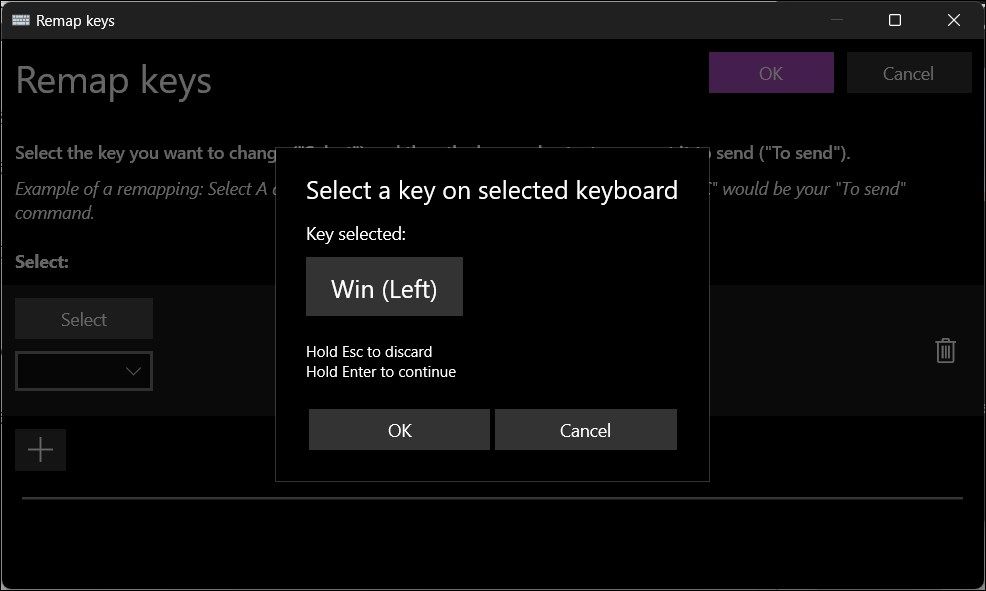
When you press the Windows key again, it will not work or trigger the Start menu. This will also disable all the Windows key combinations, including the shortcuts Windows + R to open Run and Windows + I to open Settings. However, the Windows + L combination continues to work and locks your computer when pressed. You can view all the disabled and remapped keys in the Keyboard Manager tab.
To enable the Windows key again:
- Open the Keyboard Manager tab in PowerToys and click on Remap keys.
- Click the Delete (trashcan) icon to remove the remapping.
- Click OK to save the changes.

How to Disable the Windows Key Using Your Keyboard Software / Fn Key
If you are using a gaming keyboard, check if your keyboard has support for gaming mode. On supported hardware, you can activate gaming mode using a Fn key combo. For example, press Fn + F6 to activate gaming mode on an Alienware gaming keyboard.
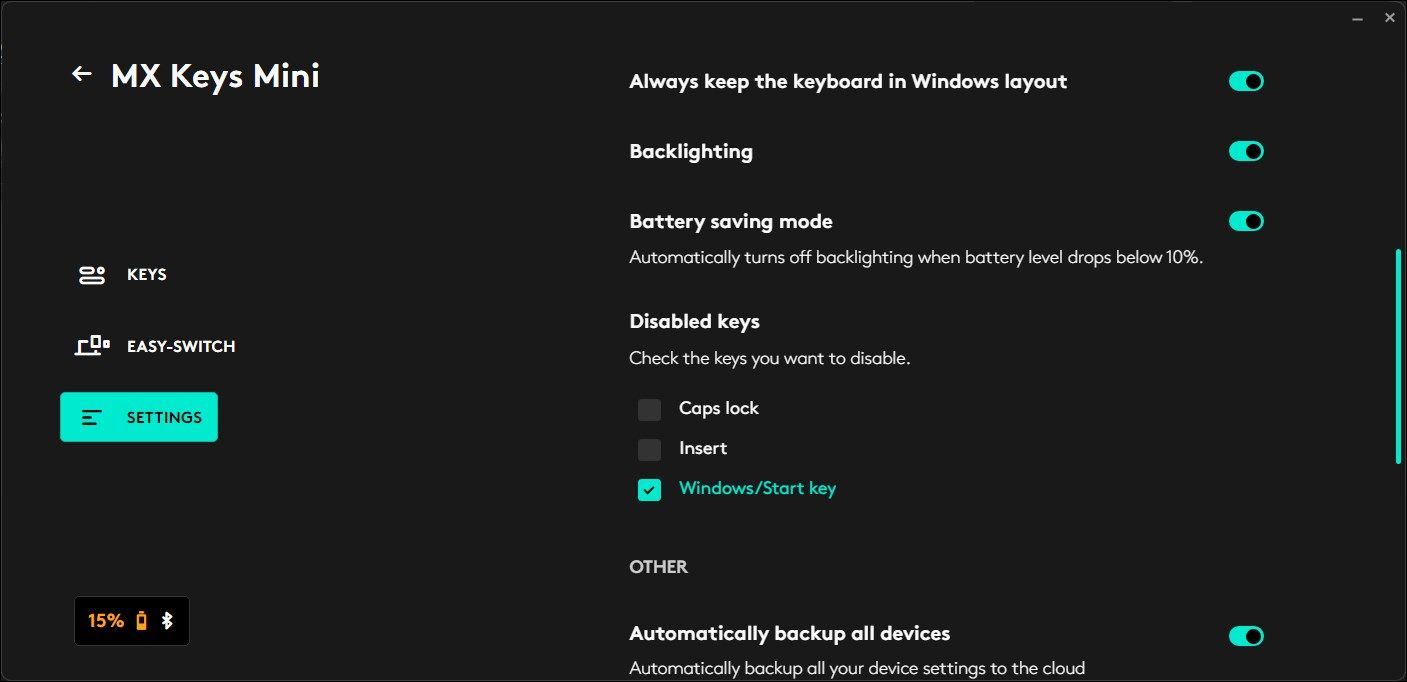
Other premium keyboards ship with a proprietary software application for configuration and customization purposes. For instance, if you own the Logi MX Keys Mini, you can use the Logi Options+ tool to configure the keyboard’s media keys and other functions. This includes the ability to disable a few specific keys, such as the Caps lock, Insert, and Windows/Start key.
Similar functionality is also available on the Razer Synapse and Corsair iCUE software for the Razer and Corsair keyboards, respectively. Depending on your keyboard, the process to disable the Windows key may vary.
If you use a Logi Options+ compatible keyboard, here’s how to permanently disable the Windows key on your keyboard:
- Launch Logi Options+ and make sure your keyboard is detected.
- Click on your keyboard to access the configuration menu.
- Open the Settings tab in the left pane.
- Scroll to the Disabled keys section and select the Windows/Start key option.
This will immediately turn off the Windows key. If you need to enable it again, uncheck the Windows/Start key option, and the Windows key will start working again.

How to Permanently Disable the Windows Key Using the Registry Editor
Another way to turn off the Windows key is via the Windows Registry. We’ll modify the entries associated with the Keyboard Layout sub-key to stop the Windows key from getting triggered accidentally.
Modifying the Windows Registry involves risk. You should create a restore point and take a registry backup before attempting to modify any registry values. Once done, follow these steps:
- Press Windows + R to open Run.
- Type regedit and click OK to open Registry Editor. Click Yes if prompted by User Account Control.
- In the Registry Editor, navigate to the following path. You can copy/paste the path for quicker navigation:
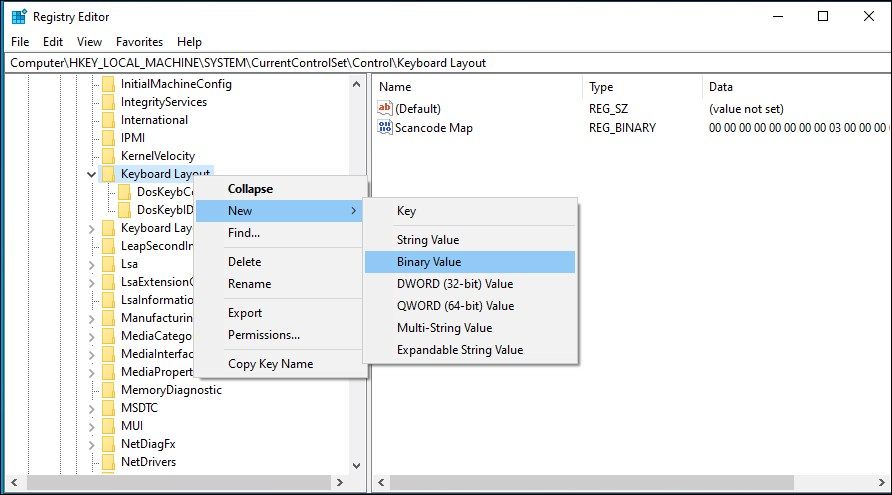
HKEY_LOCAL_MACHINE\SYSTEM\CurrentControlSet\Control\Keyboard Layout - With the Keyboard Layout sub-key selected, locate the Scancode Map binary value in the right pane.
- If the value doesn’t exist, you’ll need to create one. So, right-click on the Keyboard Layout sub-key on the left and select New > Binary Value. Rename the value as Scancode Map.
CalendarBudget - Monthly subscription membership to CalendarBudget via web browser or mobile app. Support included.
- Next, right-click on Scancode Map and select Modify.
- Type the following binary value in the Value data field:
00, 00, 00, 00, 00, 00, 00, 00 03, 00, 00, 00, 00, 00, 5B, E0, 00, 00, 5C, E0, 00, 00, 00, 00 - Click OK to save the changes.
- Restart your computer to apply the changes.
 CalendarBudget - Monthly subscription membership to CalendarBudget via web browser or mobile app. Support included.
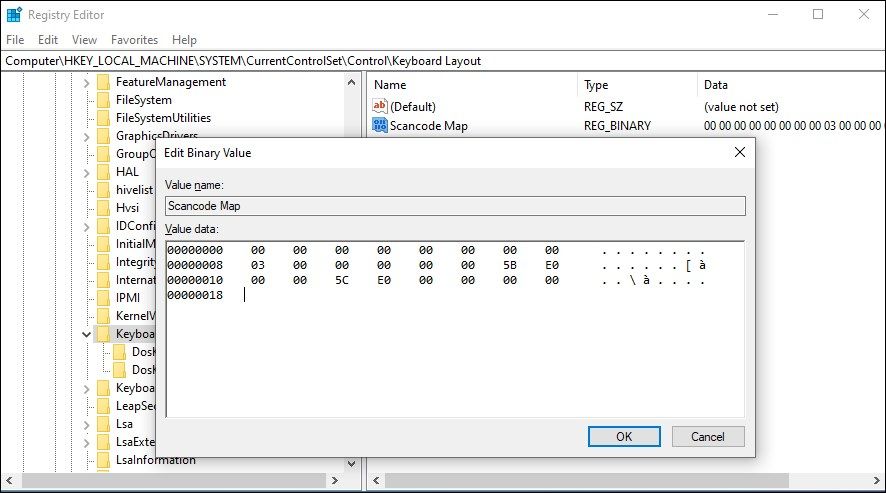

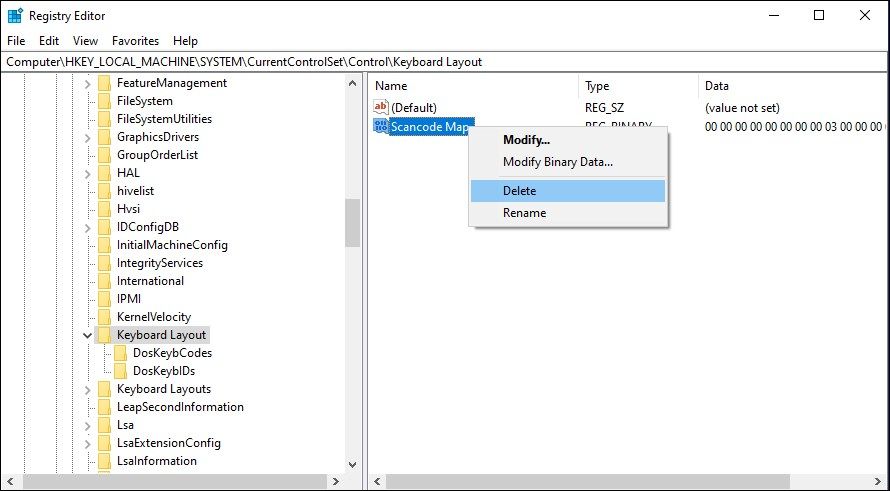
To enable the Windows key again, delete the Scancode Map binary value using the Registry Editor. This will disable the policy and restore the Windows key function.
How to Disable the Windows Key Using the Group Policy Editor
You can configure a File Explorer policy using the Group Policy Editor to turn off Windows Key hotkeys on your computer. This way, you can keep the Windows key active but disable its associated hotkeys, including Windows + R, Windows + E, etc.
Group Policy Editor is part of Windows Pro, Enterprise, and Education editions of the OS. If you are running the Home edition, follow these steps to enable GPEdit in Windows Home .
To disable the Windows key using Group Policy Editor:
- Press Windows + R to open Run.
- Type gpedit.msc and click OK. Click Yes if prompted by User Account Control.
- In Group Policy Editor, navigate to the following location:
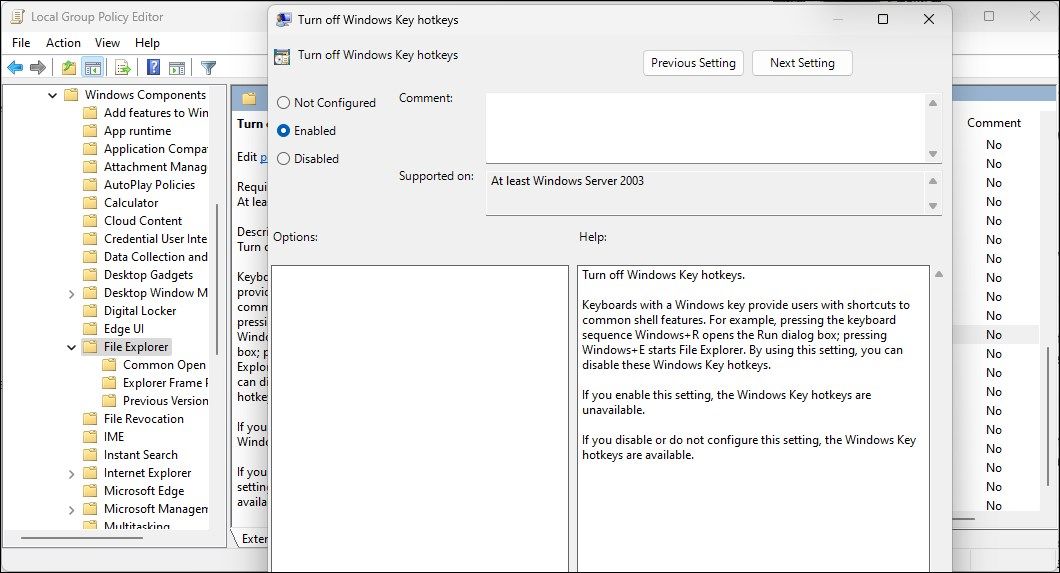
User Configuration > Administrative Templates > Windows Components > File Explorer - In the right pane, locate and double-click on Turn off Windows Key hotkeys.
- Select Enabled and click Apply to save the changes.

To apply the changes, you’ll need to restart your computer; alternatively, open Command Prompt as administrator, type gpupdate /force, and hit Enter to apply the changes immediately.
If you need to re-enable the policy, open the Turn off Windows key hotkeys policy and set it to Not Configured. Click Apply to save the changes.
Taking Control of Your Windows Key
On gaming keyboards, you can flip a switch or use a Fn key combination to turn the Windows key on or off. If no such key exists, check your keyboard’s customization software settings to configure the Windows key.
If your keyboard doesn’t feature customization software, you can disable or enable the Windows key by modifying the Scancode Map registry entry.
While a handy feature, a common annoyance with the Windows key is accidental presses, which can disrupt your workflow or gaming sessions. If you don’t have a use for this little funky key, you can disable it using the built-in option on your keyboard or by modifying the Windows Registry.
Here’s a step-by-step guide on how to turn the Windows key on and off in Windows 10 and 11.
- Title: Proper Methods to Turn Windows Key On/Off
- Author: David
- Created at : 2024-08-16 00:30:32
- Updated at : 2024-08-17 00:30:32
- Link: https://win11.techidaily.com/proper-methods-to-turn-windows-key-onoff/
- License: This work is licensed under CC BY-NC-SA 4.0.