Preventing Default Save Issues in Modern Windows

Preventing Default Save Issues in Modern Windows
Users have reported error 0x80070005 or 0x80070539 arises when they try to set new apps to save to different external drive locations with Settings. Those error codes have the same message that says, “We couldn’t set your default save location.” This means users can’t change the default save location for apps.
Is that error also preventing you from changing where new apps save to? If it is, this is how you can fix error codes 0x80070005 or 0x80070539 on Windows 11/10.
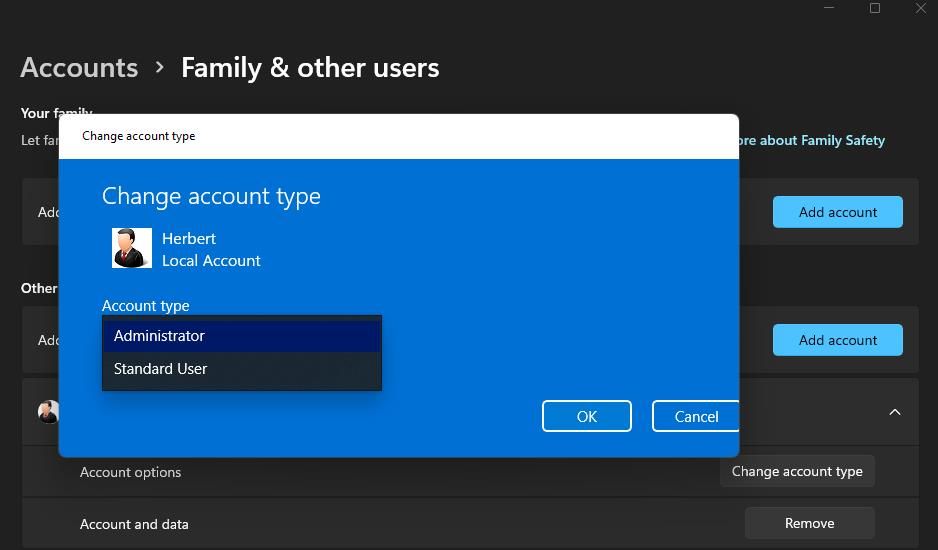
1. Set Your User Account to Administrator
If you’re utilizing a standard Windows account, change your user account type to an administrative one. A standard user account will prevent you from applying any more complicated system changes. Changing the save location for apps is something you might need admin privileges for.
2. Rename the WindowsApps Directory
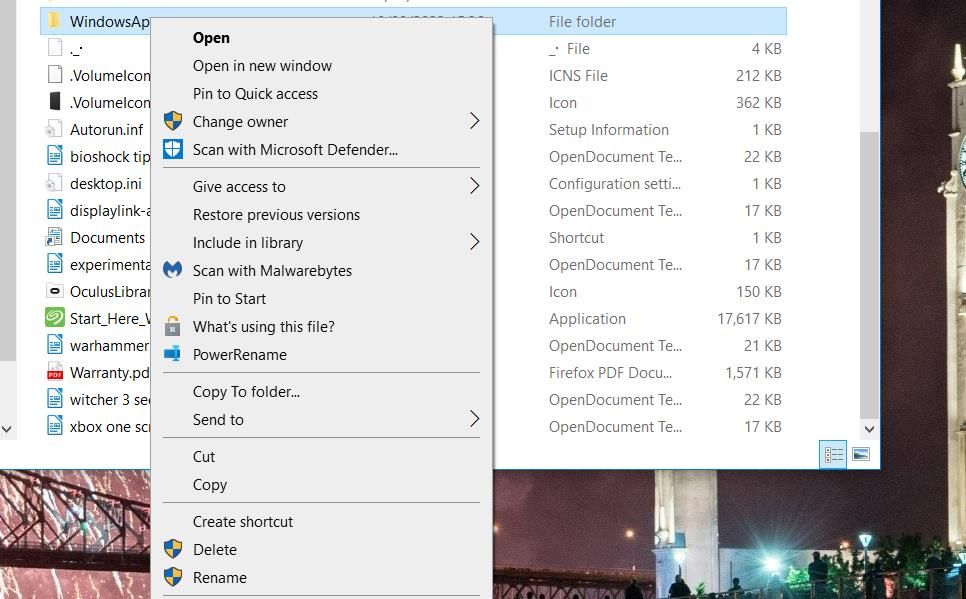
This error can arise because the WindowsApps folder where apps save is corrupted. Renaming the WindowsApps folder on the drive or partition you want to save apps can address such an issue. To do so, rename that folder as follows:
- If you’re trying to set apps to save on an external drive, connect that hard drive to your PC.
- Open the File Explorer folder navigator and click This PC.
- Double-click the drive/partition you want to set as your default save location for apps.
- Then, right-click on the WindowsApps folder and select its Rename context menu option. You should find that directory within the drive’s root directory.

- Rename the folder to WindowsApps.old and press Enter.
- Thereafter, try changing the default save location for apps again via Settings.
If that still doesn’t work, then proceed to the next resolution.
3. Delete or Rename the WpSystem Folder
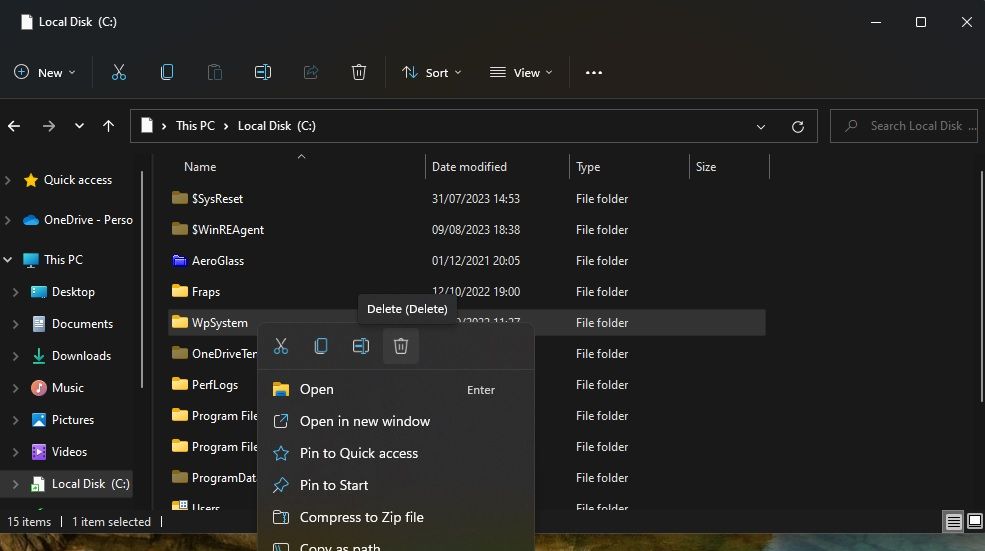
Many users confirm that renaming or deleting the WpSystem folder fixes error 0x80070005. WpSystem is a folder created to store app data. Try renaming that folder to WpSystem.old on the drive you can’t set to be a save location for apps, as outlined for the previous method. The WpSystem will be in the same directory as the WindowsApps folder.
Alternatively, delete the WpSystem folder. You can erase a file or folder in Explorer by right-clicking it and selecting Delete. If you can’t find that folder or this potential solution doesn’t work, try the next resolution.
4. Set Full System Permission for the System Volume Folder
Setting full permission for the System Volume folder is another confirmed fix for error 0x80070005. Follow these steps to set full permission for the System Volume directory:
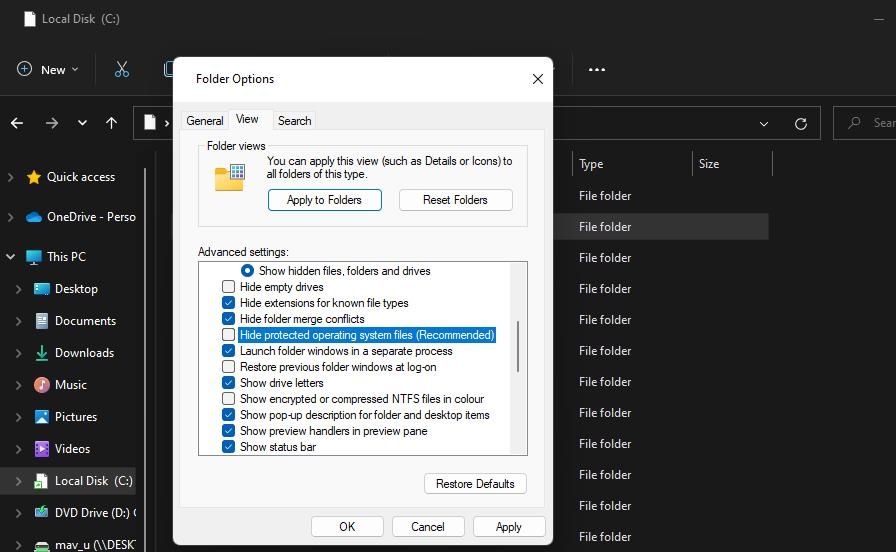
Go into File Explorer and click the three-dot See more menu > Options. In Windows 10, click Options on the View tab.
Select View on the Folder Options window.
Deselect the Hide protected operating system files (Recommended) option.

Select the Show hidden files, folders and drives radio button.
Click Apply to save the new Explorer settings.
Select the drive you need to set as the default save location for apps.
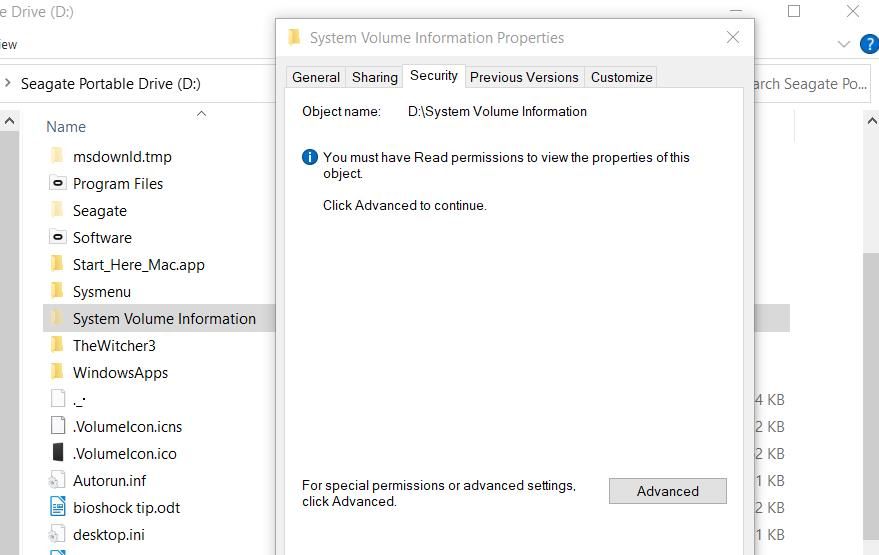
Right-click the System Volume Information folder and select Properties.
Click Security > Advanced to bring up an Advanced Security Settings window.

Press the Continue button.
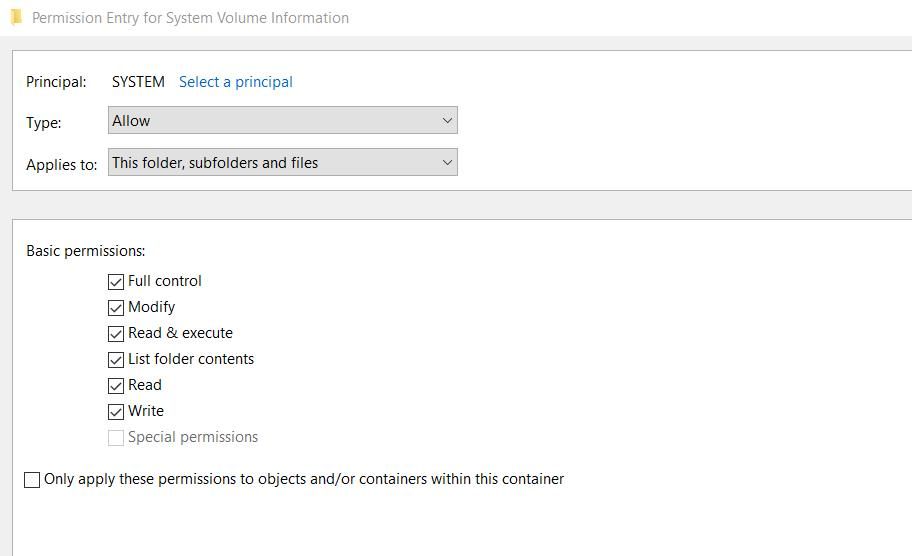
Next, click Add to view a Permission Entry window.
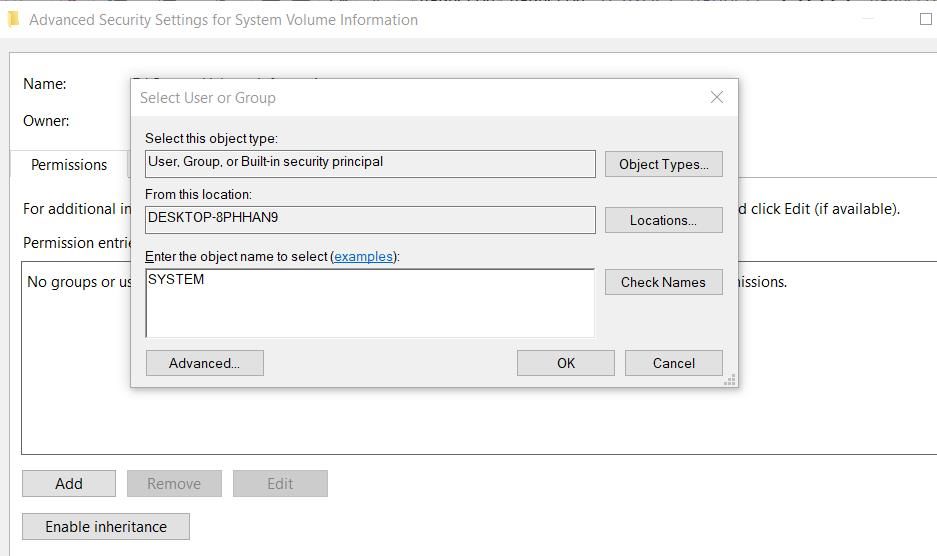
Click the Select a principal option.
Input SYSTEM inside the object name box.

Click on the OK button.
- Select the Full control permission setting.

- Then select the OK options on the Permission Entry and Advanced Security Settings windows.
Close all remaining open windows. Then, restart your PC and try changing the default save location.
Set a New Default Save Location in Windows 11/10
Many users have needed to fix error 0x80070005 and have done so by applying the potential solutions in this guide. The WpSystem folder is often the source of the error, and resolution two is the most widely confirmed method for fixing this issue.
However, some users have also fixed the issue by applying the less widely cited fourth method.
Is that error also preventing you from changing where new apps save to? If it is, this is how you can fix error codes 0x80070005 or 0x80070539 on Windows 11/10.
Also read:
- [New] 2024 Approved Share Tunes MP3 From FB
- [New] Share Wisdom Top Strategies for Video Sharing on Instagram
- [Updated] Optimal Recording Is 30Fps or 60Fps Superior for Videos for 2024
- Command Prompt Access for Admin Tasks on PC
- Controlling Data Size & Space Usage with Win11's NTFS Features
- Correcting Issues with Elevated User Roles and Privileges
- How to recover deleted contacts from Oppo Find X6.
- In 2024, 9 Best Phone Monitoring Apps for Samsung Galaxy S23 | Dr.fone
- In 2024, How To Bypass iCloud By Checkra1n Even From Apple iPhone 11 Pro If Youve Tried Everything
- Inside the World of Toolwiz An In-Depth Software Review for 2024
- Mastering Technology Choices: Why Experts Agree, Apple's iPad Pro (201E, 11-Inch) Is Unbeatable
- Maximize Efficiency with Widget-Driven Hardware Insights
- Optimize Gameplay: Smart Adjustments for AMD GPU Performance on PC
- Sniping in Windows 10: PrtSc Vs. Snip & Sketch Showdown
- Speed Up Typing on Win 11: Combat Keyboard Lag Effectively
- Step-by-Step Guide to Moving WhatsApp Messages Between Two iPhone Devices by Bypassing the iCloud Route
- Steps for Correcting Messages Not Rendering in Discord
- Tricks to Tackle Frozen Power Settings on Windows 11
- Unmatched Comfort & Efficiency - Leading Windows Laptops
- Title: Preventing Default Save Issues in Modern Windows
- Author: David
- Created at : 2024-12-10 23:48:31
- Updated at : 2024-12-12 17:18:26
- Link: https://win11.techidaily.com/preventing-default-save-issues-in-modern-windows/
- License: This work is licensed under CC BY-NC-SA 4.0.
