
Personalizing Your Windows Environment: Adding to the Desktop Menu
Personalizing Your Windows Environment: Adding to the Desktop Menu
Windows 11’s desktop context menu is a place where you can add many software shortcuts even though the platform doesn’t include built-in customization settings for that menu. Many users add shortcuts to that menu with third-party software, but you can manually customize it with Registry Editor.
If you add many shortcuts to that menu, organizing them into submenus is a good idea. Doing so will enable you to add more shortcuts without greatly extending the length of the classic context menu. This is how you can add new submenus to the Windows 11’s desktop context menu.
How to Add a Submenu to the Context Menu by Manually Editing the Registry
You can manually create a context menu submenu that includes any number of software shortcuts with the Registry Editor. For the sake of example, here we’ll create a submenu that includes shortcuts for opening the Notepad and Remote Desktop Connection apps. Then you can add more shortcuts for software on your PC. First, you’ll need to lay the foundation for the submenu as follows:
To access the registry app, check out this guide about how to open Registry Editor .
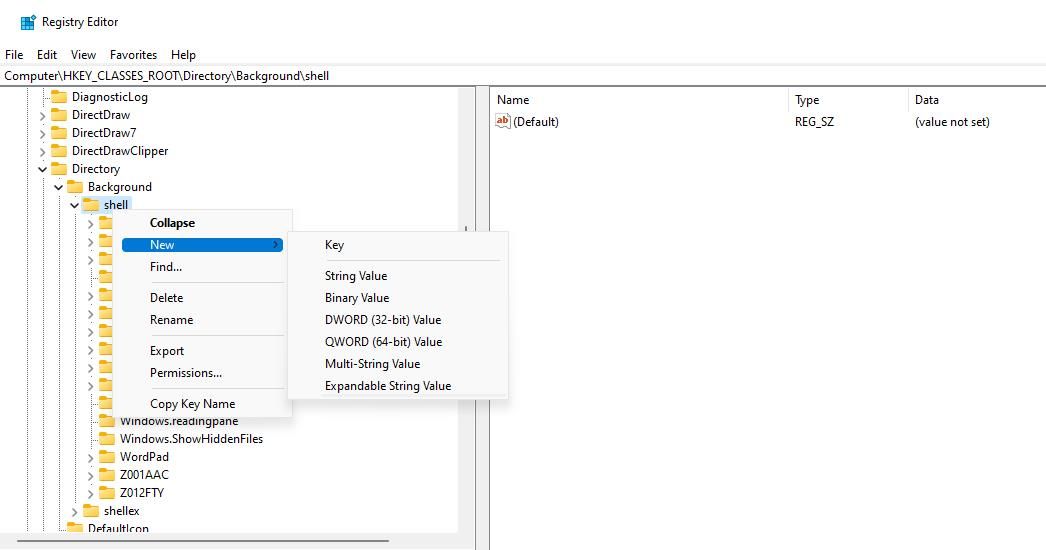
Go to a shell key by inputting the following location into the Registry Editor’s address bar:
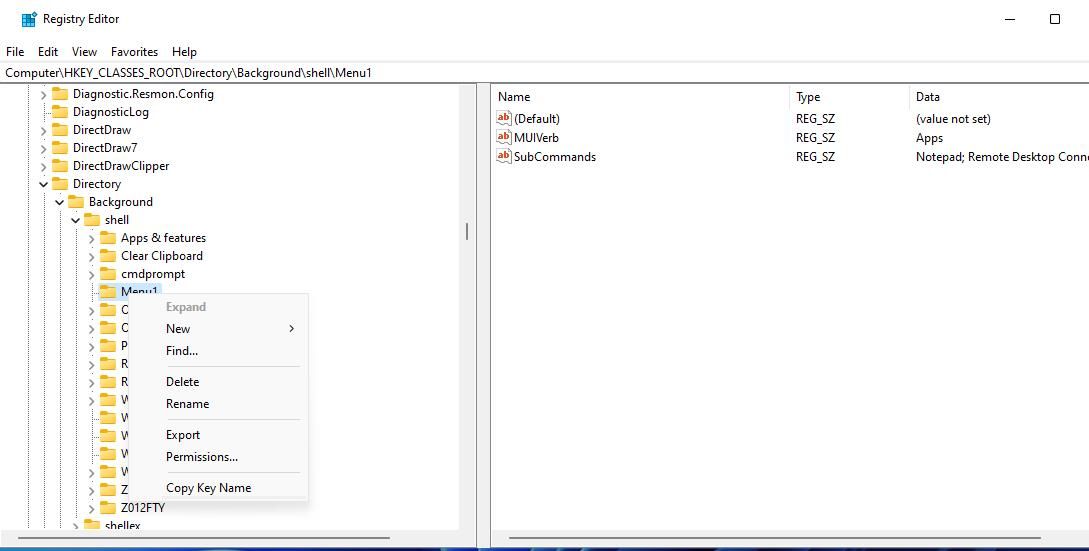
Computer\HKEY_CLASSES_ROOT\Directory\Background\shellRight-click the shell key in the left sidebar and select the New > Key options for adding a new registry entry.

Enter Menu1 to be the new key’s name.
Right-click Menu1 to select the New > String Value options.
Input MUIVerb for the new string’s name.
Repeat step five to add another new string to the Menu1 key. However, enter SubCommands to be this new string’s name.
Double-click the MUIVerb string added to the Menu1 key.
Enter Apps in the Value box for the MUIVerb string, which will be the heading for your new context menu submenu. Or you can input a different submenu heading in the Value data box if preferred.
Click OK to exit the Edit String window for MUIVerb.
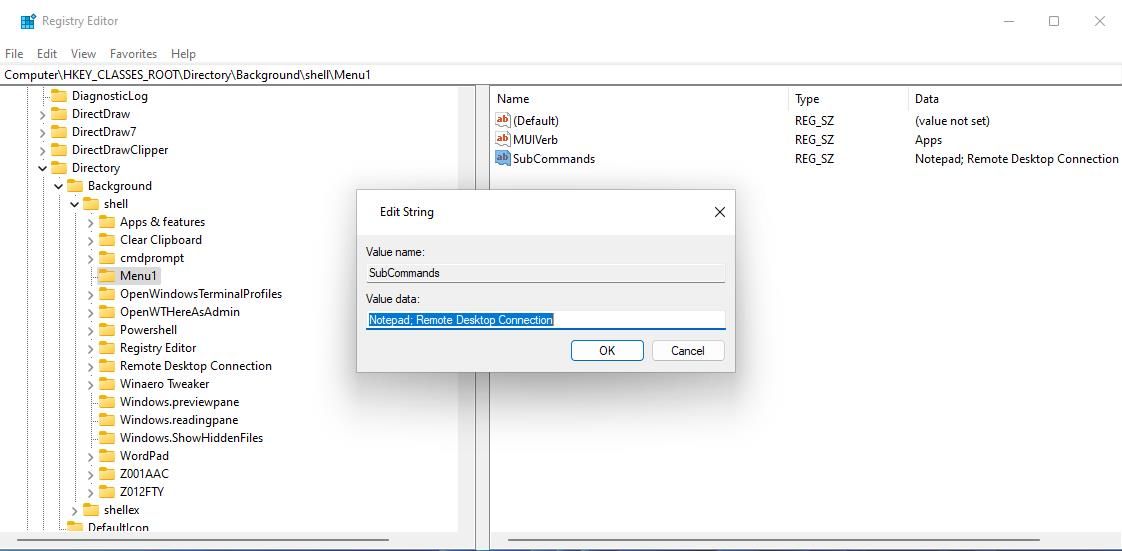
Next, double-click on the SubCommand string inside the Menu1 key.
Input Notepad; Remote Desktop Connection inside the Value box for the SubCommands string and click OK.


Now a new App submenu will be visible on Windows 11’s classic context menu. However, it won’t include any shortcuts. So, you will need to do some further editing of a different shell key to add functionality to the submenu. Edit the registry like this to complete the submenu:
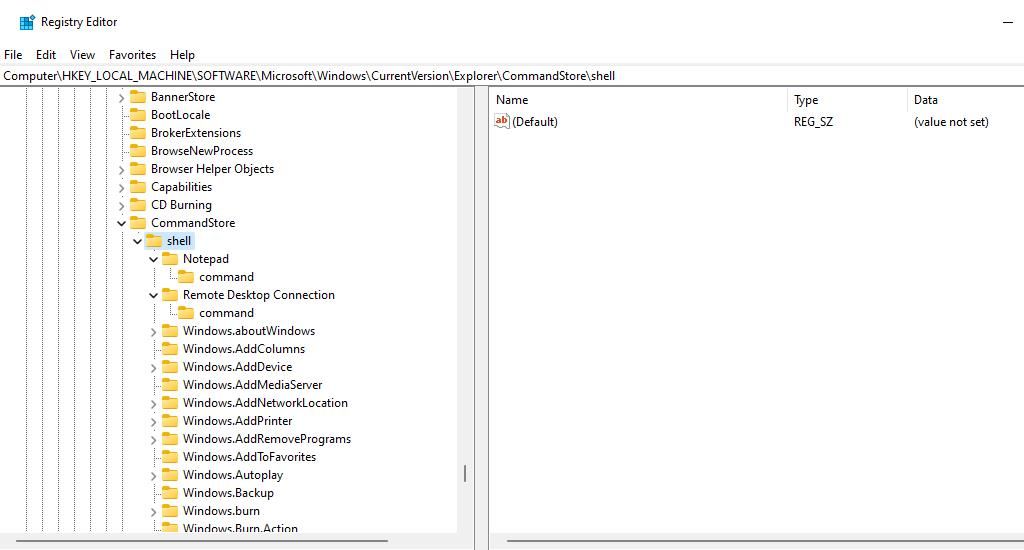
- Return to the Registry Editor and input this location into its address bar:
HKEY_LOCAL_MACHINE\SOFTWARE\Microsoft\Windows\CurrentVersion\Explorer\CommandStore\Shell - Right-click shell to select Key on the New submenu.
- Input Notepad to be the title for this new registry key.
- Right-click on Notepad in Registry Editor’s left sidebar to select New > Key.
- Enter command to be the name of the subkey.
- Double-click (Default) in the Notepad key.
- Input Notepad into the Value box and click OK.
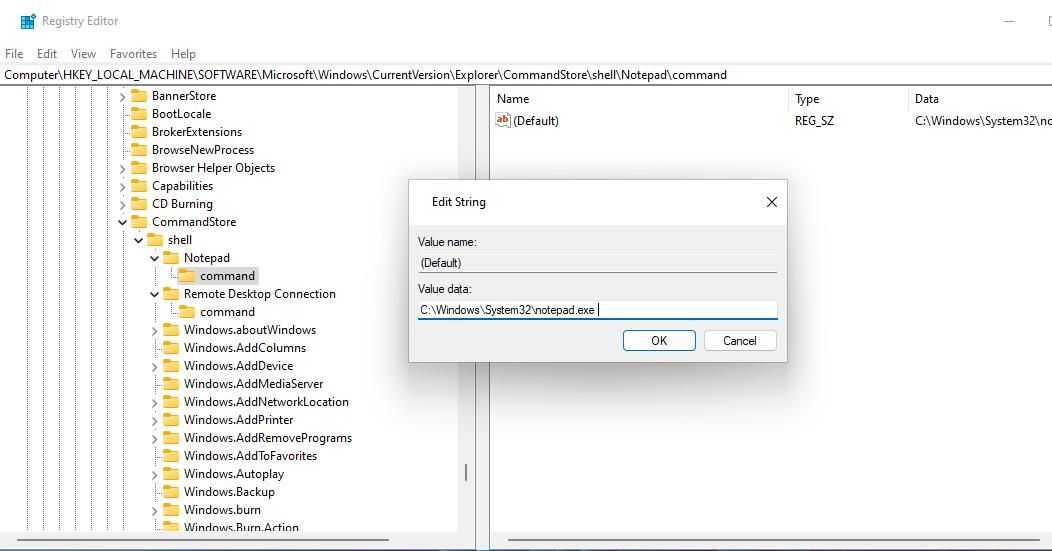
- Double-click the (Default) string in the command subkey.
- Enter this Notepad location into the Value box and select OK:
C:\Windows\System32\notepad.exe - Repeat steps two to five to create a Remote Desktop Connection key with a command subkey, as shown in the snapshot directly below. Instead of naming the key Notepad, input Remote Desktop Connection for the new key’s title.
- Double-click the (Default) string for the Remote Desktop Connection key you created.
- Input Remote Desktop Connection into the Value box and select OK.
- Select the command subkey for the Remote Desktop Connection key and double-click its (Default) string.
- Enter the following Remote Desktop Connection app path in the Value box and click OK:
"C:\Windows\System32\mstsc"
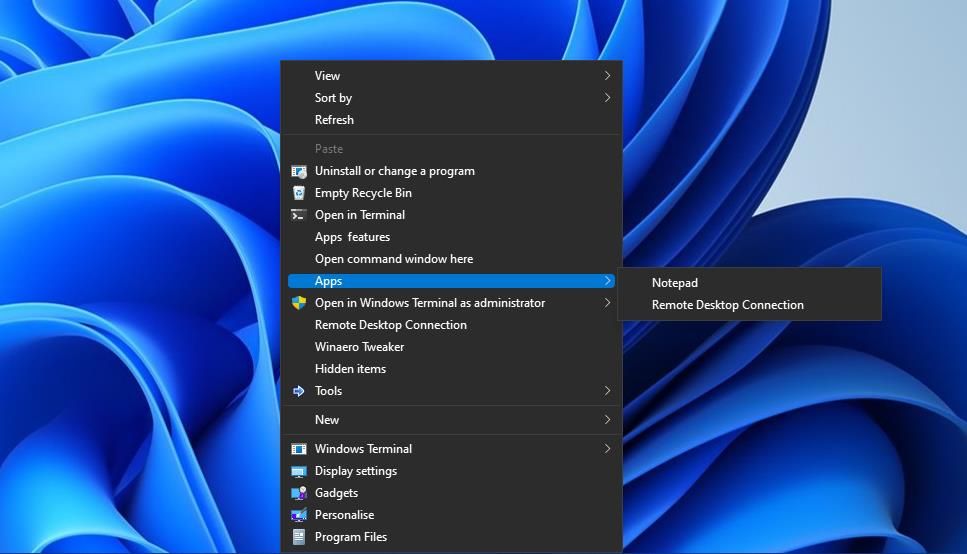
Now the new context menu submenu is complete. Right-click within an area of the Windows 11 desktop and select Show more options to view the secondary classic context menu. Move the cursor over the new Apps submenu from which you can select to open Notepad and Remote Desktop Connection.
You can add more software shortcuts to that submenu. Note that the values you input for the SubCommands string must match the names of the registry keys created for the software shortcuts. In the example above, the Notepad and Remote Desktop Connection registry keys matched values input for the SubCommands string.
You must also input the exact and full paths for whatever software you want the shortcuts to open within the (Default) strings of the command subkeys. In the example above, the (Default) strings of the command subkeys within the Remote Desktop Connection and Notepad keys include the paths for opening those apps.
If you ever want to remove the submenu from the context menu, delete the key that created it. To do so, return to the registry location that includes the Menu1 key. Right-click the Menu1 key to select Delete and Yes for confirmation.
How to Add a Submenu to the Context Menu With Easy Context Menu
Easy Context Menu is a freely available context menu customization desktop app. That software enables you to add custom software shortcut submenus to the right-click menu without manually editing the registry .
You can create a custom software shortcuts submenu with Easy Context Menu like this:
Navigate to the Easy Context Menu download page.
Click Direct Download on that page to save the ZIP archive for Easy Context Menu.
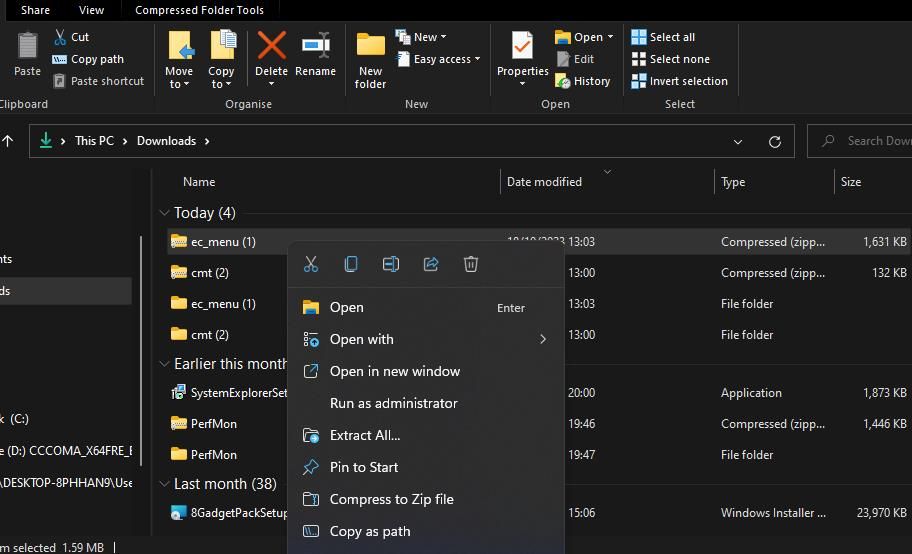
Extract the ec_menu ZIP with a method in this guide for unzipping ZIP archives within Windows.
Open the extracted folder for Easy Context Menu and double-click the EXE file that runs the software from there.
Click the List Editor button in Easy Context Menu.
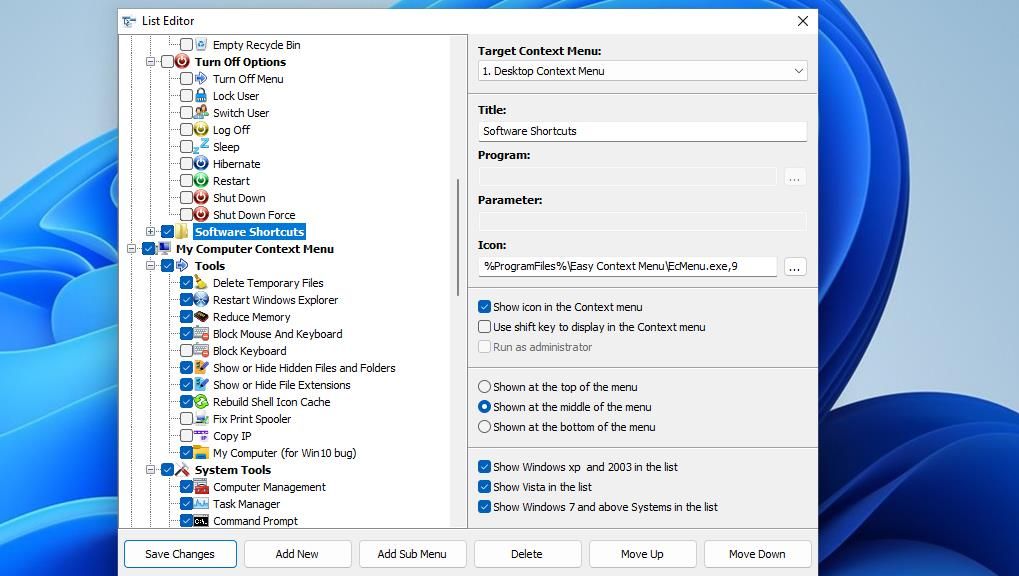
Select Desktop Context Menu and press the Add Sub Menu button.
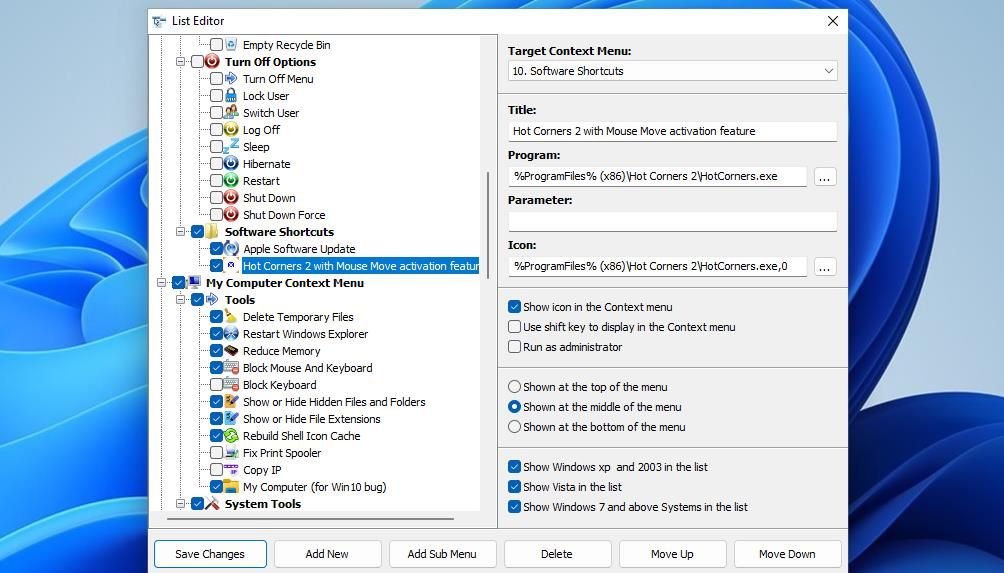
Input Software Shortcuts in the Title box for the new submenu.
Click the Add New button with the Software Shortcuts submenu selected.
Select a program you want to include in the submenu and click Open.
Repeat the previous two steps to add more programs to the submenu.
Select the checkboxes for the new Software Shortcuts submenu and the programs added to it in the List Editor window.
Press the Save Changes button and close the List Editor window.
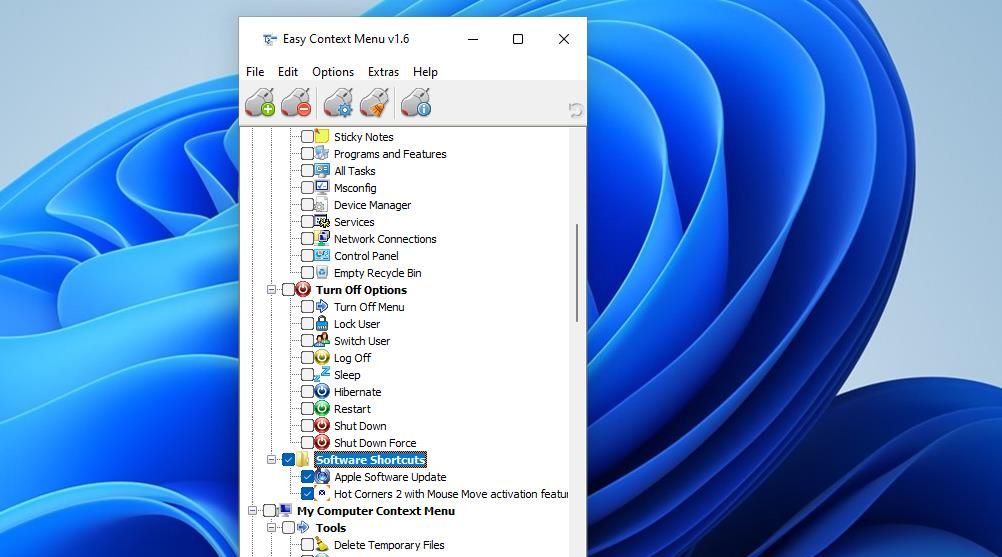
Select the checkboxes for the Software Shortcuts submenu and the program options it includes within the Easy Context Menu window.
Click Apply Changes to add the new submenu.

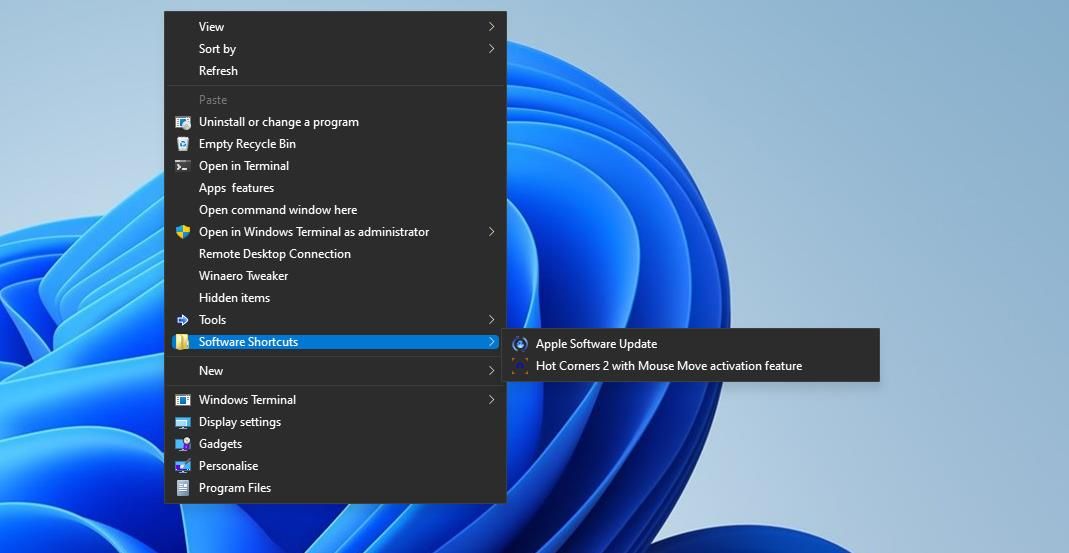
Now check out the new Software Shortcuts submenu on Windows 11’s classic desktop context menu. That cascading menu will include all the programs you selected to add to it. It will also include program icons, so long as you leave the Show icon in the Context Menu checkboxes selected.
Another advantage of utilizing Easy Context Menu is that it includes options for positing the submenu. You can configure the approximate position of that submenu by selecting one of the three Show at options for it within the List Editor window. You can also reposition the submenu or items in it by selecting them and clicking the Move Up or Move Down buttons.
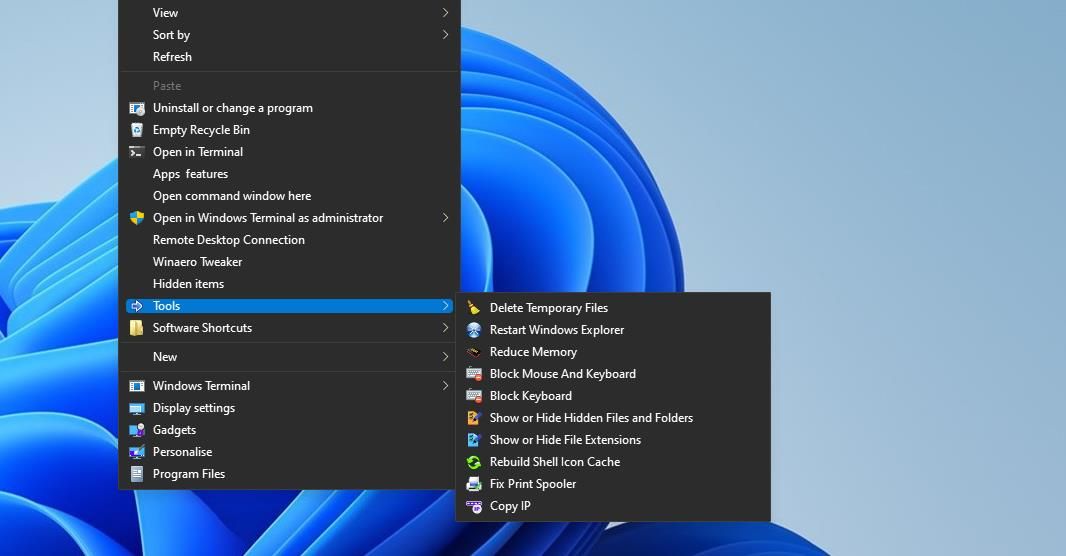
Easy Context Menu also includes Tools, System Tools, and Turn Off Options submenus for you to add to the right-click menu. To add those submenus, select the System Tools, Turn Off Options, and Tools checkboxes for the desktop context menu and click Apply Changes. You can also deselect some of the checkboxes for those submenus to remove certain shortcuts from them.

Organize Your Windows Desktop Context Menu Shortcuts With Submenus
Adding one or more submenus to Windows 11’s desktop context menu will enable you to organize the software shortcuts added to it.
You could create multiple submenus on the context menu that include shortcuts for opening different software categories, such as web browsers, media players, productivity apps, etc. Or you can add a new desktop context menu submenu for accessing Windows tools and turn off options with Easy Context Menu.
If you add many shortcuts to that menu, organizing them into submenus is a good idea. Doing so will enable you to add more shortcuts without greatly extending the length of the classic context menu. This is how you can add new submenus to the Windows 11’s desktop context menu.
- Title: Personalizing Your Windows Environment: Adding to the Desktop Menu
- Author: David
- Created at : 2024-08-16 00:33:37
- Updated at : 2024-08-17 00:33:37
- Link: https://win11.techidaily.com/personalizing-your-windows-environment-adding-to-the-desktop-menu/
- License: This work is licensed under CC BY-NC-SA 4.0.