
Personalizing Your PC: Saving Spotlight Pictures as Wallpapers
Personalizing Your PC: Saving Spotlight Pictures as Wallpapers
Windows Spotlight delivers spectacular images on your lock screen and desktop every day—and they usually make for amazing wallpapers. However, you have no control over what images Windows Spotlight will display or when it will show them.
Thankfully, there’s a way around this. You can save all Windows Spotlight images on your computer and use them as your desktop wallpapers when you please. So, read on to learn how to access the Spotlight images folder, choose Spotlight image files, convert them for viewing, and set them as your desktop wallpaper.
Windows Spotlight and Its Spectacular Images
If you’re on Windows 10, you might enjoy the beautiful Windows Spotlight images on the lock screen. If you’ve upgraded to Windows 11 or bought a new PC with Windows 11, you can personalize your lock screen with Windows Spotlight and set your desktop wallpaper to Windows Spotlight images.
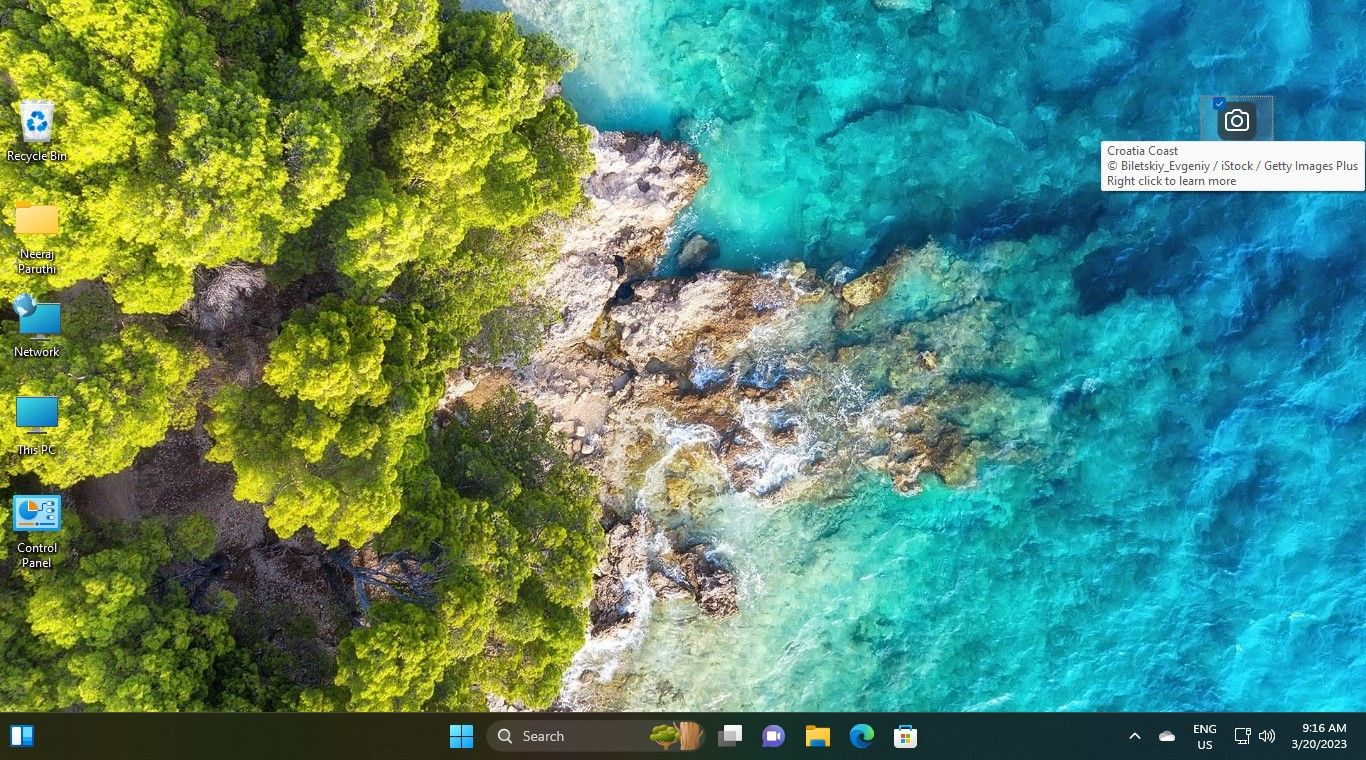
Windows Spotlight brings your PC to life with awesome images. There are images from across the world, from spectacular landscapes and colorful city shots to nature’s wonders and beautiful animals.
To learn more about a Spotlight desktop image on Windows 11, right-click the desktop camera icon and click Open. If you’re on Windows 10, there are a few easy ways to know where the lock screen images were taken .
And though it’s easy to switch to a new Spotlight picture if you don’t like the one displayed, your chosen image will change to a new one in a day or two—that’s how Windows Spotlight works.
But what if you like a particular Windows Spotlight image? How do you keep it permanently as your desktop wallpaper? First, you need to find where the Windows Spotlight images are saved, then save them in your personal folder. Here’s how.
How to Access Windows Spotlight Images on Your PC
Windows Spotlight images are not easy to find. You’ll have to dig a little in your PC as they are inside a hidden folder. However, here’s how you can reach that folder easily:
- Open File Explorer by clicking on its taskbar icon or use one of the many ways to open File Explorer .
- Then, copy and paste this path into the File Explorer address bar:
%LocalAppdata%\Packages\Microsoft.Windows.ContentDeliveryManager_cw5n1h2txyewy/LocalState/Assets

- Finally, hit enter. The folder that opens will be the hidden Assets folder that contains Windows Spotlight images.
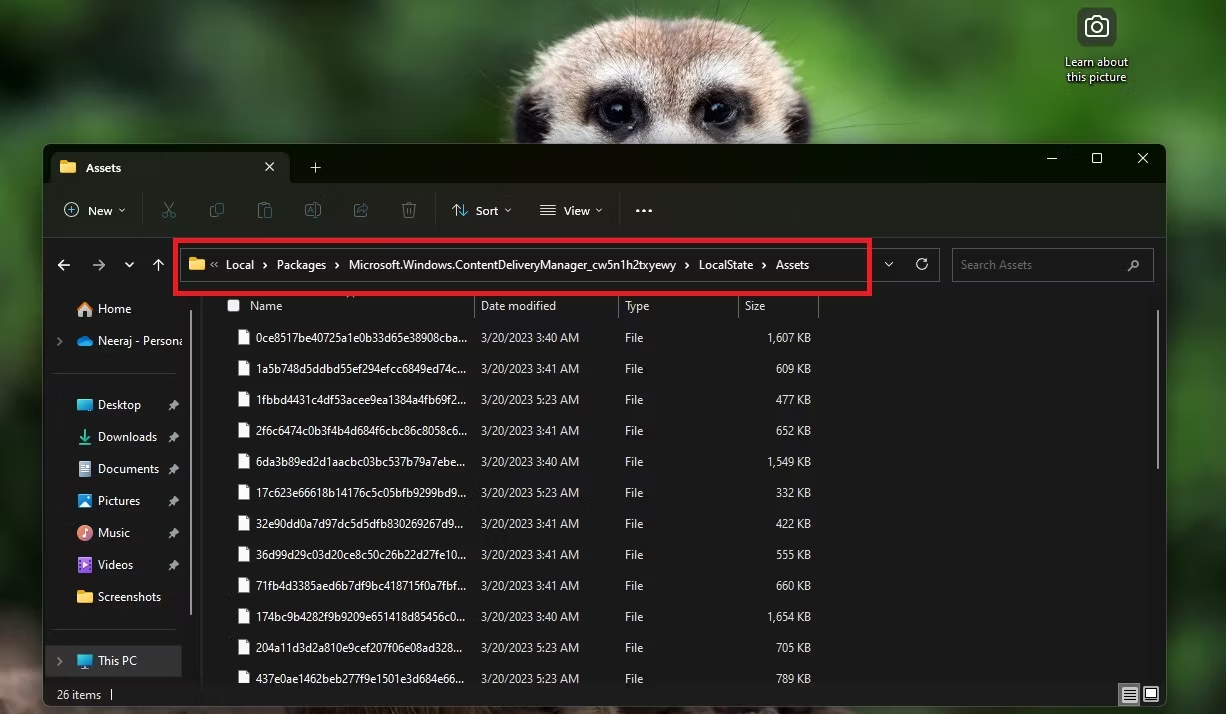
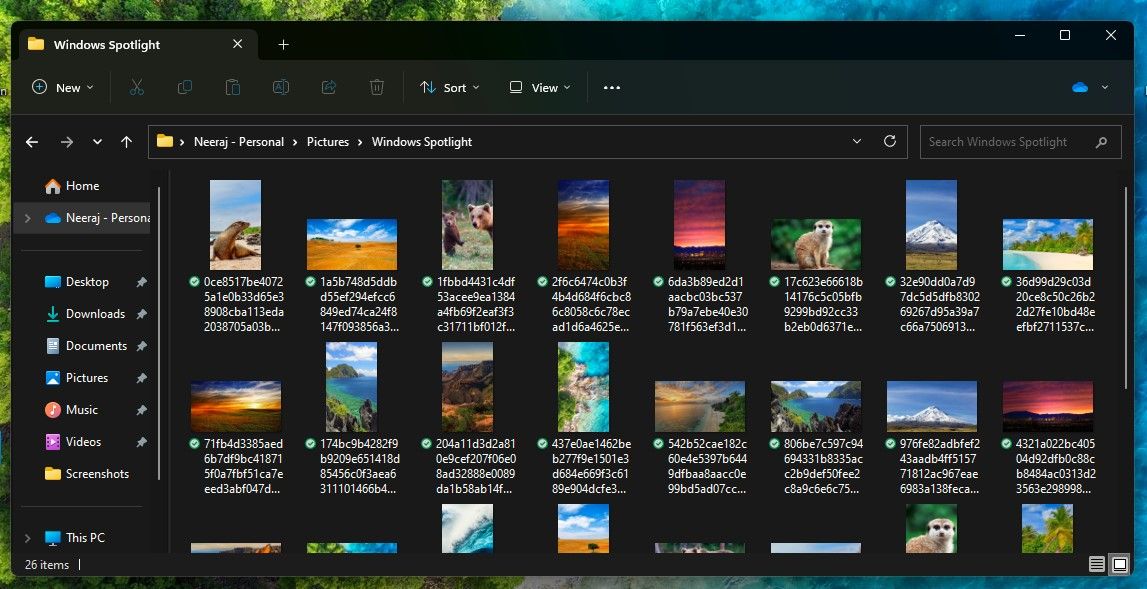
In this Assets folder, you’ll probably see white thumbnails with long file names made of numbers and letters. These are not only the Spotlight images but also smaller image files and some that are not even images. So it’s better if you sort them out first.

How to Sort and Save Only the Spotlight Images
Sorting images in the Assets folder will make copying and saving only the Windows Spotlight images easier. Here’s how:
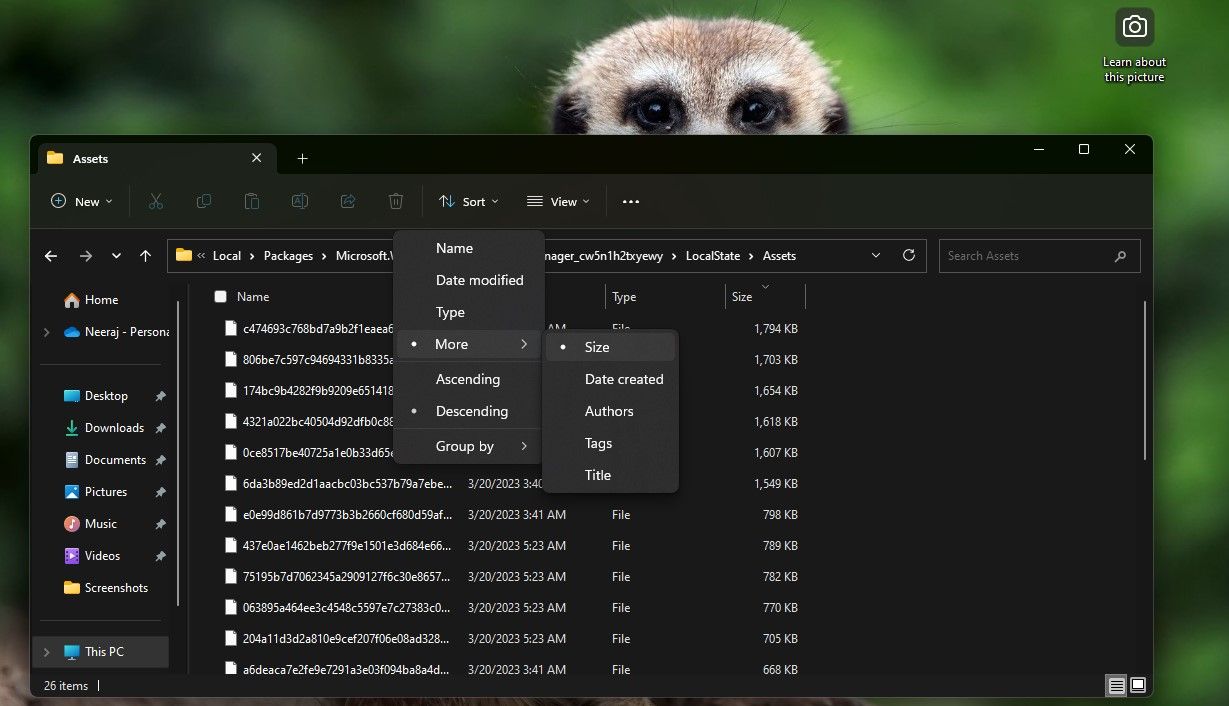
- With the Assets folder open, click the Sort menu on the File Explorer ribbon.
- Select More and then Size.
- The files will get sorted in ascending order. Change to descending order by clicking on Size.
- You can copy all the files into the Assets folder. However, it will be easier if you select files that are over 300 kb—anything smaller will not be a Spotlight image.
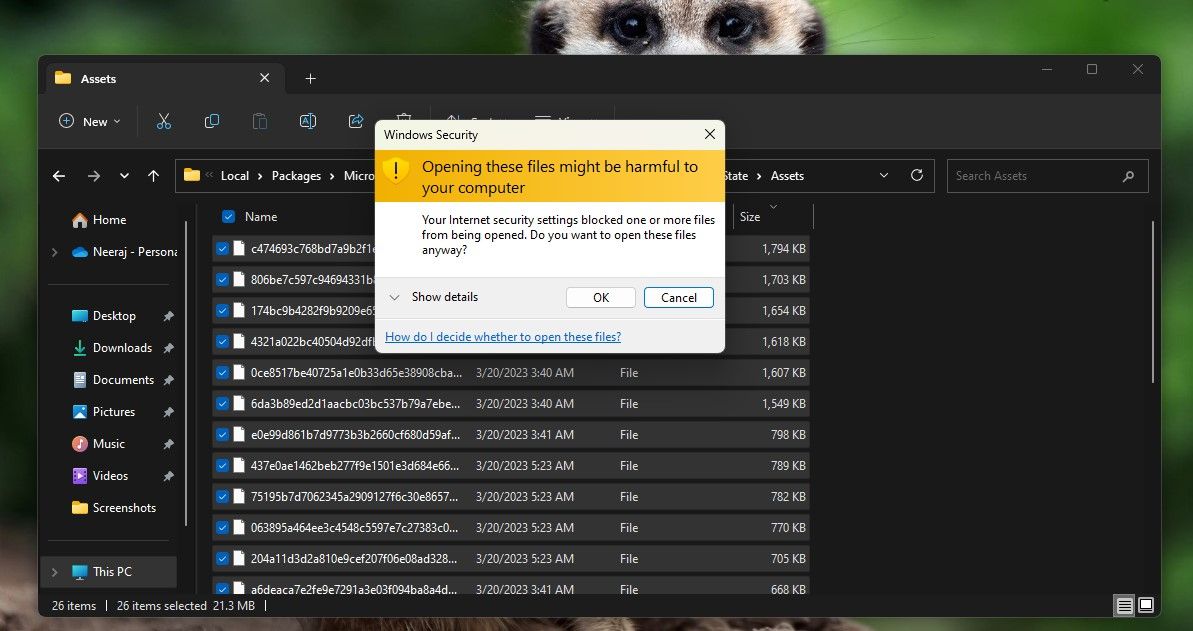
- Now right-click the selected files in the Assets folder and select the Copy option. When copying the files, you might get a warning message that these might be harmful to your computer. It’s because these files are from a System folder and have no extension. Click OK to continue copying.
Jutoh is an ebook creator for Epub, Kindle and more. It’s fast, runs on Windows, Mac, and Linux, comes with a cover design editor, and allows book variations to be created with alternate text, style sheets and cover designs.
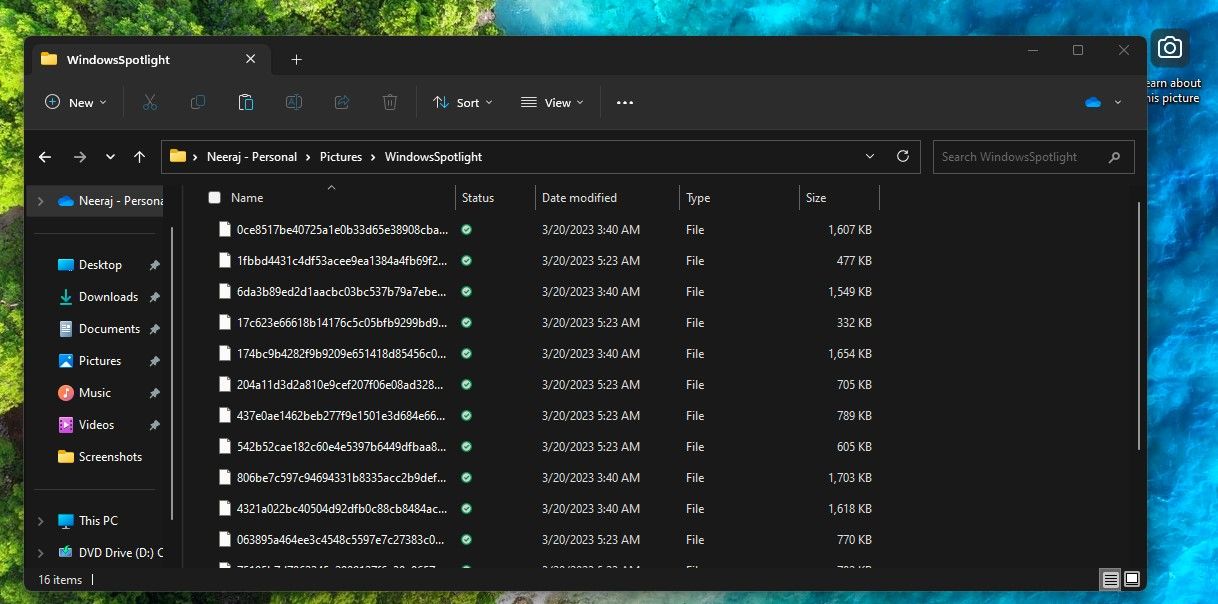
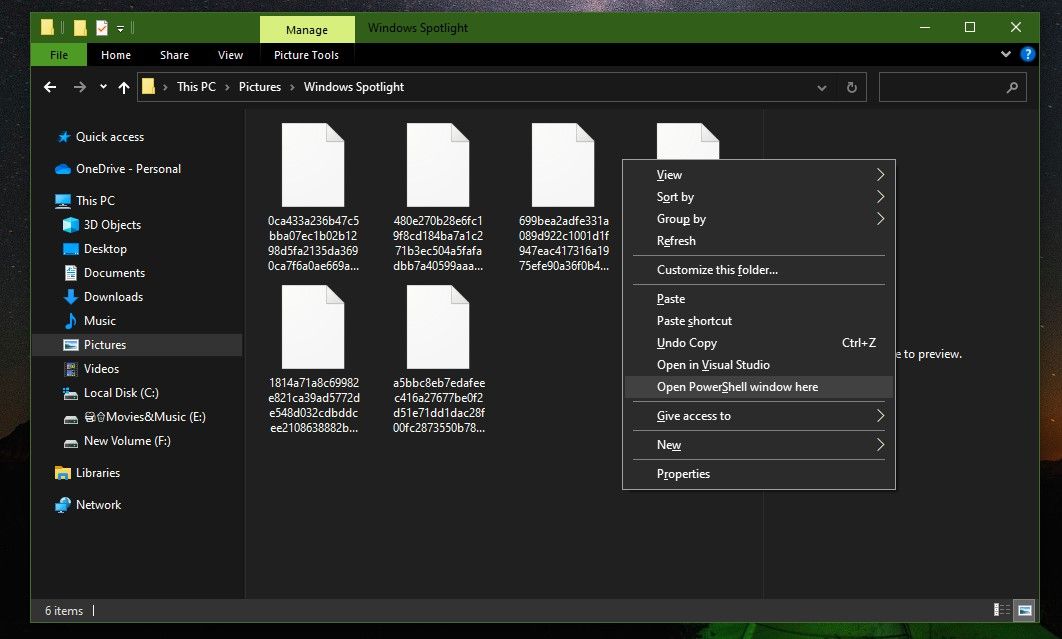
- Create a folder on your PC from where you can easily access Windows Spotlight images to use as wallpapers. Name the folder Windows Spotlight or whatever you like.
- Right-click inside the folder you just made and select the Paste option or use the shortcut Ctrl + V to save the chosen Spotlight images from the Assets folder.
How to Convert Spotlight Images to Picture Files
Windows Spotlight images are now saved on your PC. However, you can’t use them or even see what each image file looks like as they do not have any extensions.
So you’ll need to give them an image file extension and convert them to JPG image files. You can do that one by one. Add the .jpg extension after the long file name. It will get converted to a jpg file. You can then double-click the file to open and view it.
 Jet Profiler for MySQL, Enterprise Version: Jet Profiler for MySQL is real-time query performance and diagnostics tool for the MySQL database server. Its detailed query information, graphical interface and ease of use makes this a great tool for finding performance bottlenecks in your MySQL databases.
 How to Rename Files En-Masse on Windows 11
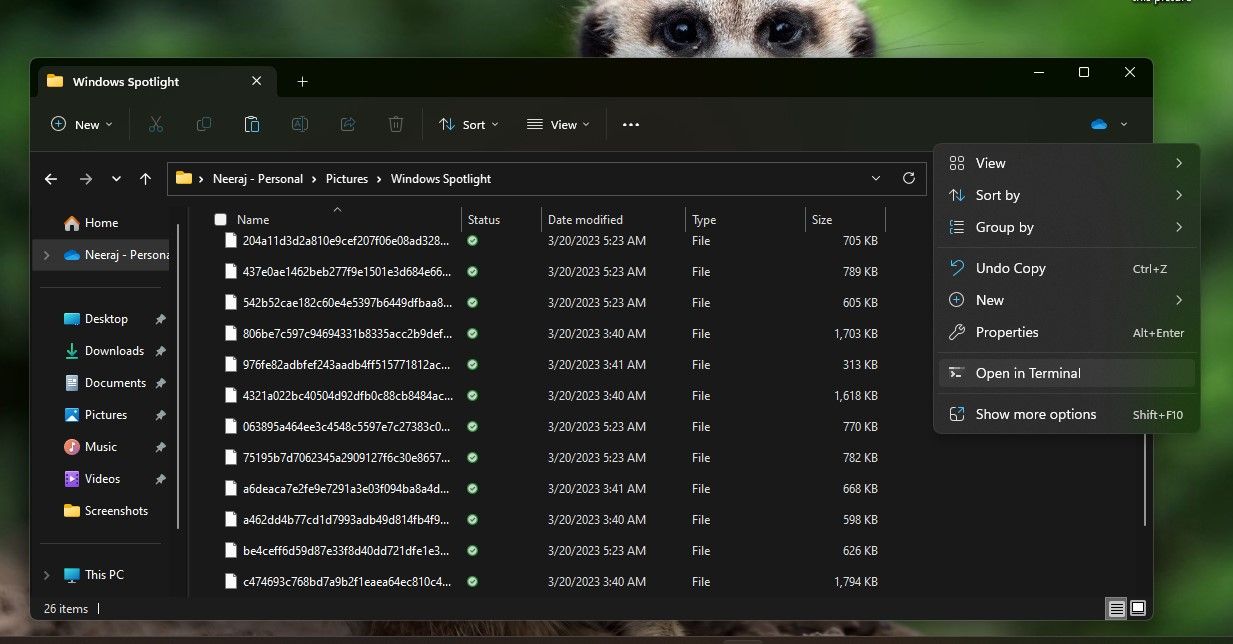
However, instead of converting one file at a time, take the easy and speedy way and convert all of them to .jpg files. If you’re on Windows 11, here’s how. But if you’re on Windows 10, scroll down to the next section.
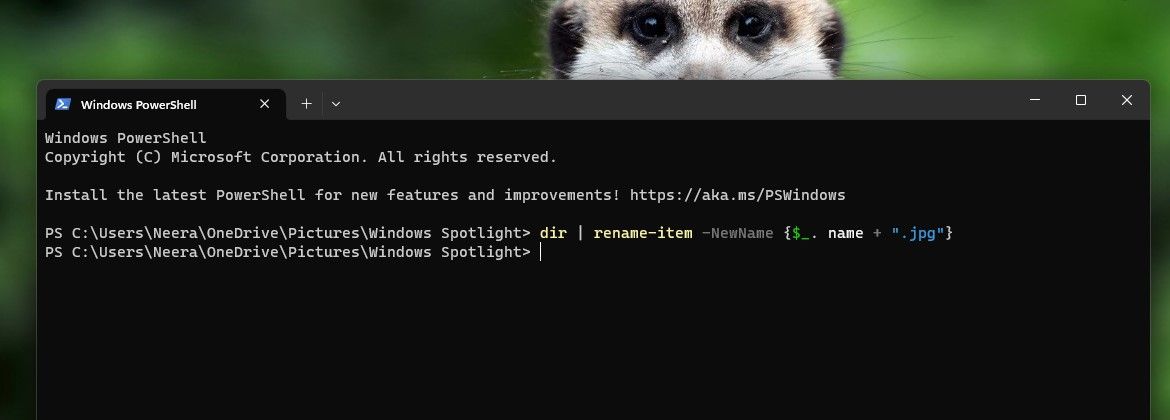
- Right-click on a space inside the newly created Windows Spotlight folder and select Open in Terminal.
- Windows Powershell opens. Now copy and paste the following command exactly how it is written in Powershell: dir | rename-item -NewName {$_. name + “.jpg”}
- Press enter and exit Windows PowerShell.
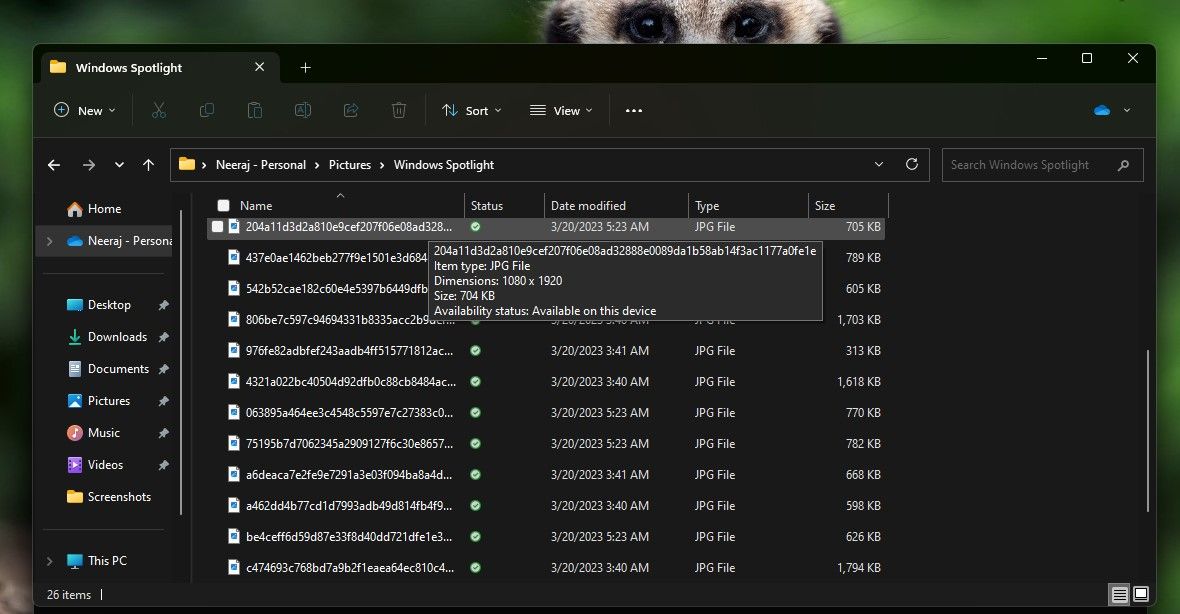
- Now check the Windows Spotlight folder. You will see that all the files have been converted to JPG image files.
- You can now view their thumbnails by clicking View > Extra Large Icons or Large Icons.

How to Rename Files En-Masse on Windows 10
If you’re on Windows 10, you can still rename the Windows Spotlight files and convert them to .jpg files as a batch. Here’s how.
- Hold the Shift key on your keyboard and right-click a space inside the Windows Spotlight folder. From the menu, select Open PowerShell window here.
ZoneAlarm Extreme Security NextGen
- In PowerShell, type cmd and press enter.
- In the following line, type ren * *.jpg and hit enter. This command will convert all the files in the folder to JPG files.
 ZoneAlarm Extreme Security NextGen
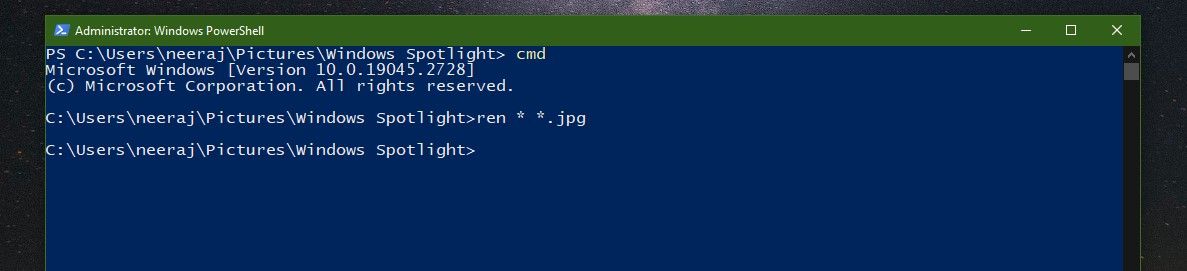
Once you’ve converted all the files to .jpg, you can view the picture thumbnails in the folder.
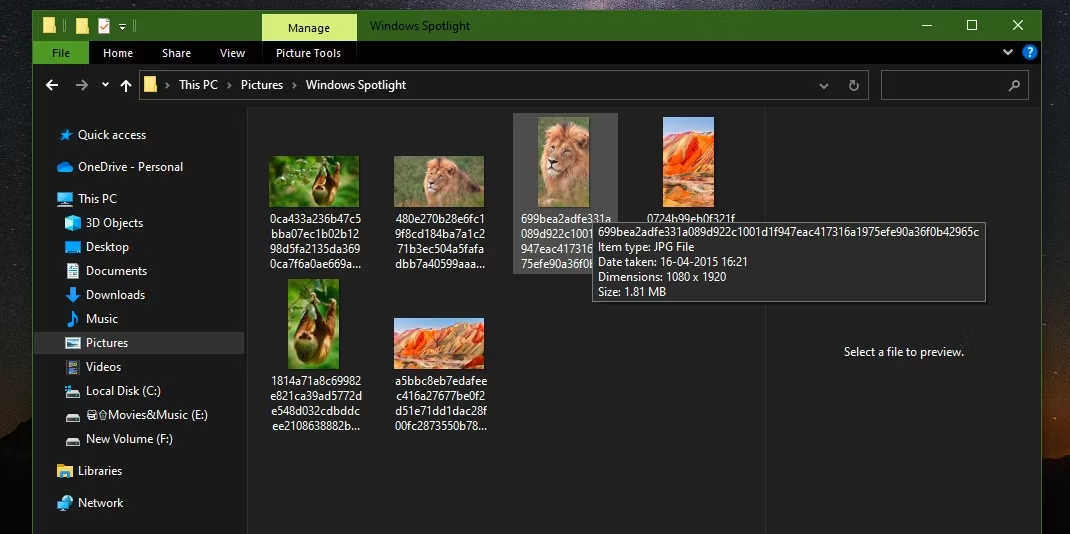

With that, the spectacular Windows Spotlight images are ready for you to use as your desktop wallpapers. You’ll find HD images in the horizontal 1920 x 1080 dimension that you can just right-click and save as a desktop background on your Windows PC.
Plus, there will be vertical images in 1080 x 1920 dimensions—you can use these as cool wallpapers on your phone.
Enjoy Awesome Wallpapers Whenever You Want
Undoubtedly, Windows Spotlight comprises some of the most stunning images. Plus, there is a new one added almost every day. And now that you have learned how to save them, use the ones you like to deck up your Windows PC and enjoy the view.
You can also explore some cool ways to give a new look and feel to your Windows 10 desktop.
- Title: Personalizing Your PC: Saving Spotlight Pictures as Wallpapers
- Author: David
- Created at : 2024-08-16 00:02:55
- Updated at : 2024-08-17 00:02:55
- Link: https://win11.techidaily.com/personalizing-your-pc-saving-spotlight-pictures-as-wallpapers/
- License: This work is licensed under CC BY-NC-SA 4.0.