
Overcoming Memory Hurdles: 4 Tips for Better Windows RAM
Overcoming Memory Hurdles: 4 Tips for Better Windows RAM
RAM is an essential component in increasing the speed and performance of a computer system. However, in some cases, Windows may not utilize all the installed RAM, which can lead to annoying performance issues.
This issue can be particularly frustrating if you’ve invested in additional RAM. If not used correctly, it can result in longer load times and other similar problems. In this guide, we’ll explore the potential causes of this problem and provide you with practical troubleshooting methods to help you fix it for good.
Why Won’t Windows Let Me Use Full RAM?
If you are struggling to use full RAM on Windows, here are a few potential causes behind the problem.
- 32-bit operating system version - The 32-bit Windows version only allows you to use up to 4 GB of RAM. If you have additional RAM that you want to use, you must switch to the 64-bit version.
- BIOS settings - Your BIOS settings might be incorrectly configured, allowing you to only use a fixed percentage of the RAM.
- Memory allocation for hardware - Some of the hardware components installed in the system might be using a significant portion of the RAM. You can adjust the memory allocation to fix the problem in this case.
- Memory limitations - If the issue appears when using a certain program, then your system is likely to have imposed a limitation on how much RAM that program can use.
- Faulty RAM - There can be an issue with the RAM itself. It can get damaged or just might be outdated, which is resulting in the issue at hand.
- Virtual memory settings - If the Virtual Memory feature is enabled, it might be consuming a significant portion of the RAM. If this scenario is applicable, you can either adjust the Virtual Memory settings or disable it to fix the problem.
Now that you have an idea about what might be resulting in the problem, let’s take a look at the troubleshooting methods that can help you fix the issue for good.
1. Check BIOS Settings
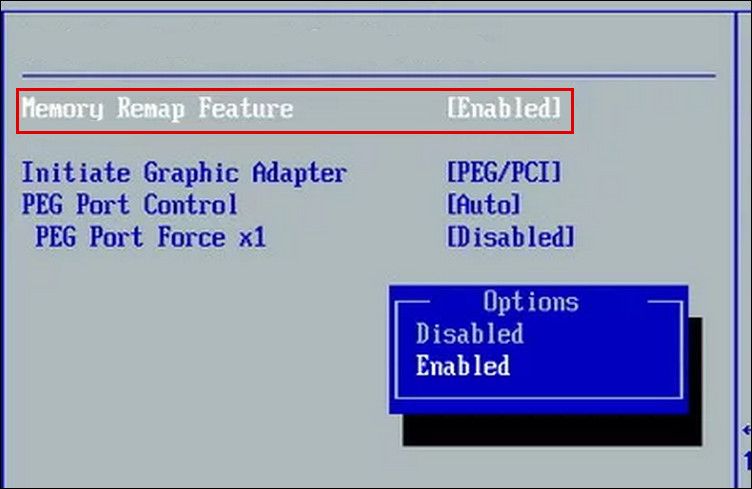
The first thing that we recommend doing is checking if the BIOS settings are configured accurately. In this method, we will start by ensuring that the BIOS recognizes the RAM. Then, we will enable the memory remapping feature (which allows the operating system to access memory that was previously inaccessible) and change the AGP video aperture size.
Here is all that you need to do:
- Restart your PC and while it’s booting, press the F2, F10, Esc, or Del keys repeatedly. You might require different keys to boot into BIOS, so we recommend checking your manufacturer’s site for this information.
- Once you are in the BIOS, check if all the modules are present.
- Then, head over to theAdvanced orChipset settings menu and locate the memory remapping feature. The name for this feature might be slightly different on your device, depending on the manufacturer.
 SwifDoo PDF 2-Year Plan
 - Enable this feature and save the changes.
- After this, check how much size of the memory is allocated to AGP video aperture. Keep in mind, that the memory you allocate here cannot be used by the system, so adjust it accordingly.
- Finally, exit BIOS and restart your computer. Upon reboot, check if the issue is resolved.
 SwifDoo PDF 2-Year Plan
 WonderFox DVD Ripper Pro
2. Modify System Configuration Settings
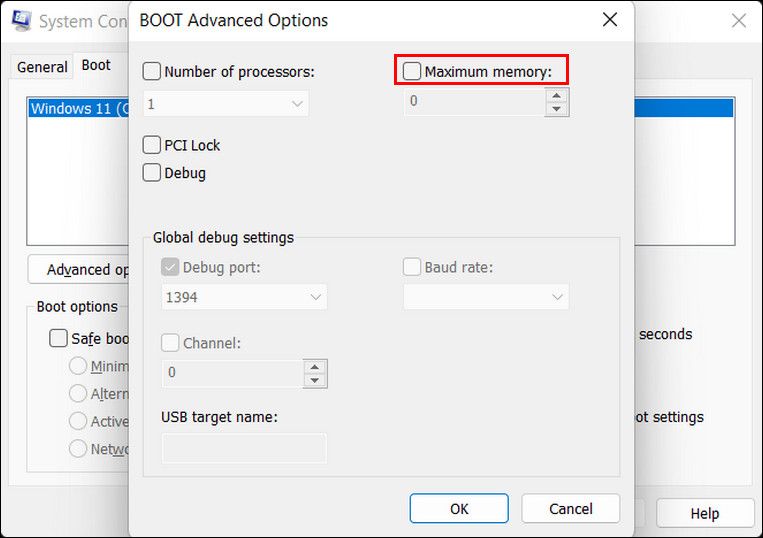
You might also have selected the Maximum memory option in the System Configuration window, which is causing the problem. This happens when the maximum memory is set to a value lower than the total RAM installed, forcing Windows to recognize only a specific portion of the RAM.
By unchecking this option, you will allow Windows to manage the entire RAM installed, fixing the issue in the process.
Here is how you can do that:
- Press theWin + R keys together to open Run.
- Type msconfig in Run and clickEnter .
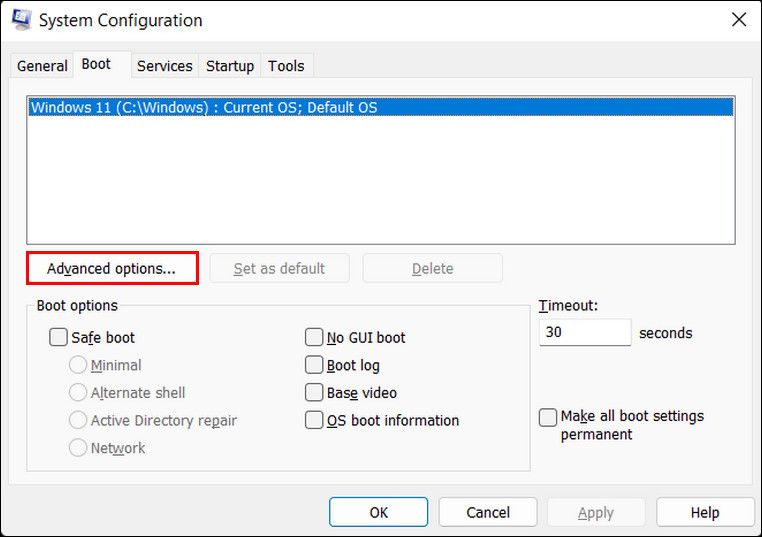
- In the following window, head over to theBoot tab and hit theAdvanced options button.
- Here, uncheck theMaximum Memory option and clickOK .
With Screensaver Wonder you can easily make a screensaver from your own pictures and video files. Create screensavers for your own computer or create standalone, self-installing screensavers for easy sharing with your friends. Together with its sister product Screensaver Factory, Screensaver Wonder is one of the most popular screensaver software products in the world, helping thousands of users decorate their computer screens quickly and easily.
- ClickApply >OK to save the changes and then restart your computer.

 With Screensaver Wonder you can easily make a screensaver from your own pictures and video files. Create screensavers for your own computer or create standalone, self-installing screensavers for easy sharing with your friends. Together with its sister product Screensaver Factory, Screensaver Wonder is one of the most popular screensaver software products in the world, helping thousands of users decorate their computer screens quickly and easily.
Hopefully, upon reboot, your system will be able to use all of your RAM.

3. Use the 64-bit Version of Windows
As we mentioned earlier, the 32-bit version of Windows can only use 4 GB of RAM. If you have more RAM available that you want to utilize, you can switch to the 64-bit version.
If you are not aware of the differences between the 32-bit and 64-bit versions of Windows, we have a detailed guide that covers this comprehensively.
To upgrade to the 64-bit Windows version, you must first check if the device’s hardware is compatible with it. For that, type msinfo32 in Run and hit Enter. In the following window, head over to theSystem type entry and check if it says x64-based PC. If it does, it means that your device can support a 64-bit system.
You can now use any one of the different methods to install Windows . Just make sure you choose the 64-bit version when asked to select the architecture for installation.
4. Identify Issues With the RAM
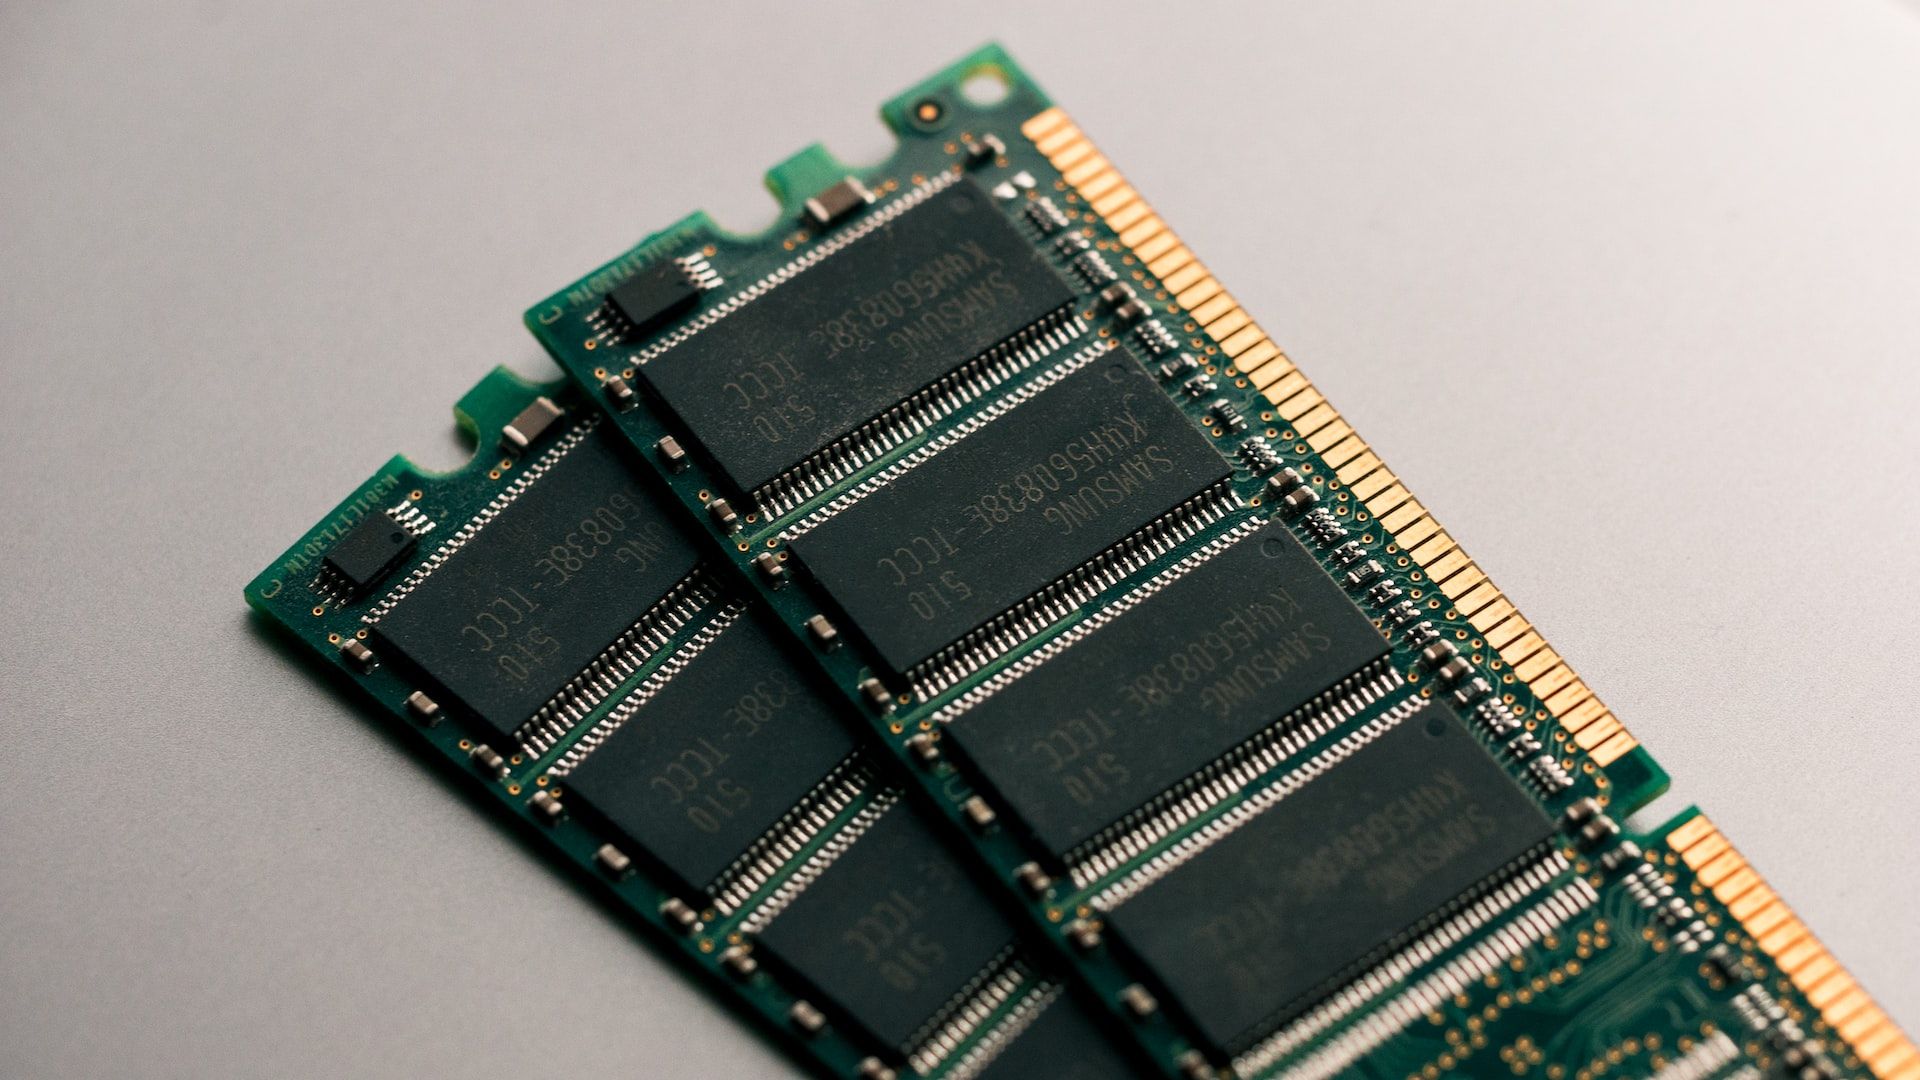
There can be issues with the RAM itself. To check if this is the case in your situation, the first thing we recommend trying is turning off the computer, unplugging the cords, and changing the order of the memory modules.
You can check the RAM for any physical damage like cracks or broken clips. If any such issue is identified, you might need to replace the module.
Another way of testing the RAM for issues is by using the Memory Diagnostic tool . This utility will scan the RAM for errors and notify you if any issues are found. You can then take appropriate steps to troubleshoot those problems.
We also recommend that you consult the manufacturer’s guide to ensure that all the memory modules are inserted in the right slots. In case your device requires you to use specific slots for certain modules, you might be facing a problem because of that.
Use All of Your RAM for a Performance Upgrade
Not utilizing enough RAM can significantly impact your system’s performance. Hopefully, the steps we have outlined above will help you resolve this issue once and for all. To avoid such problems in the future, make sure you keep the BIOS up-to-date and perform regular system maintenance.
- Title: Overcoming Memory Hurdles: 4 Tips for Better Windows RAM
- Author: David
- Created at : 2024-08-15 23:47:50
- Updated at : 2024-08-16 23:47:50
- Link: https://win11.techidaily.com/overcoming-memory-hurdles-4-tips-for-better-windows-ram/
- License: This work is licensed under CC BY-NC-SA 4.0.