Overcoming Graphic Failures: DXGI-ERROR Explained

Overcoming Graphic Failures: DXGI-ERROR Explained
The DXGI_ERROR_DEVICE_REMOVED error sometimes occurs when users try to start certain Windows games or when playing them. Players have reported this error to occur for games like FIFA 2022, Prepar3D, Need for Speed Rivals, Apex, and Crysis 3, among others. This DirectX error message says, “DirectX function ‘GetDeviceRemovedReason’ failed with DXGI_ERROR_DEVICE_REMOVED.”
Consequently, Windows games either don’t launch at all or crash with regularity because of the DXGI_ERROR_DEVICE_REMOVED error. The error message highlights that something associated with your graphics card has gone wrong. As such, these potential resolutions can fix the DXGI_ERROR_DEVICE_REMOVED error in Windows 10 and 11.
Disclaimer: This post includes affiliate links
If you click on a link and make a purchase, I may receive a commission at no extra cost to you.
1. Modify the GraphicsDriver Registry Key
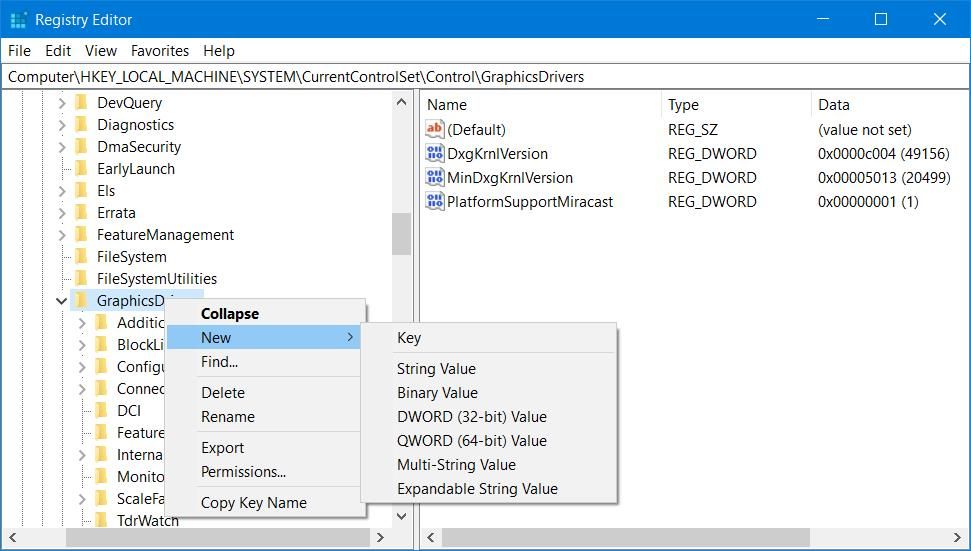
Modifying the GraphicsDriver registry key is the most widely confirmed potential fix for the DXGI_ERROR_DEVICE_REMOVED error. This resolution involves adding a TDR (Timeout Detection and Recovery) DWORD to the GraphicsDrivers key. Setting that DWORD to 0 disables TDR detection. You can apply this registry edit as follows:
- Press Win + S, type regedit inside the search tool, and click Registry Editor.
- Next, navigate to the GraphicsDrivers key at this registry location:
HKEY_LOCAL_MACHINE\SYSTEM\CurrentControlSet\Control\GraphicsDrivers - Right-click on GraphicsDrivers and select the context menu’s New and DWORD options.

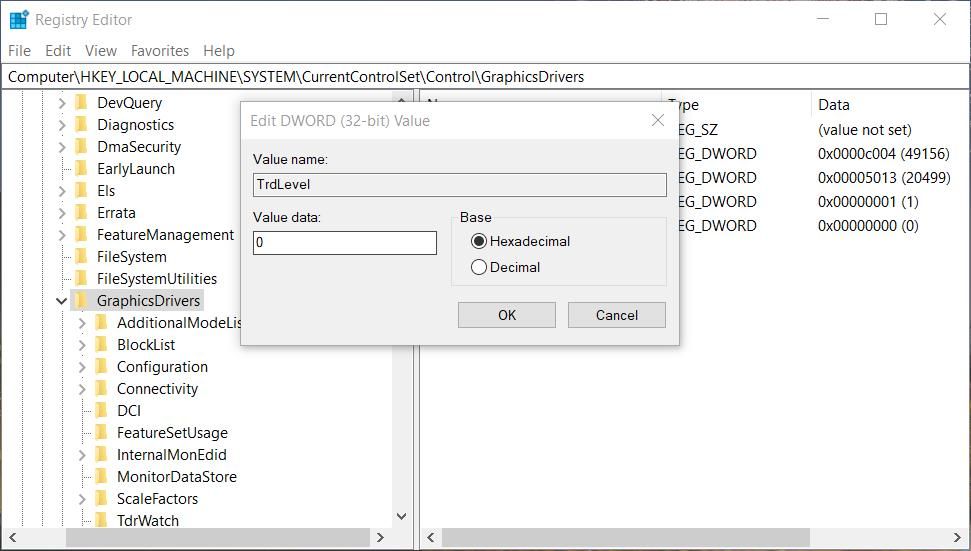
- Type in a TdrLevel title for the DWORD.
- Double-click on TdrLevel to activate its Value box.
- The DWORD’s value should already be set to zero by default. However, change that value to 0 if it’s not and click OK.

- Now close Registry Editor, click Start, and select Power > Restart.
A few users also confirm deleting a TdrDelay QWORD in the same key can also work for fixing the DXGI_ERROR_DEVICE_REMOVED error. If you can see a TdrDelay QWORD in the GraphicsDrivers key, try deleting it as well. To do so, right-click the TdrDelay QWORD and select Delete. Select Yes to confirm the erasure.
2. Disable the Antialiasing Setting
Antialiasing is a graphic setting that smoothens jagged lines when enabled. However, this graphical effect can sometimes cause crashing issues like the DXGI_ERROR_DEVICE_REMOVED error. This is how you can turn off Antialiasing within the NVIDIA Control Panel:
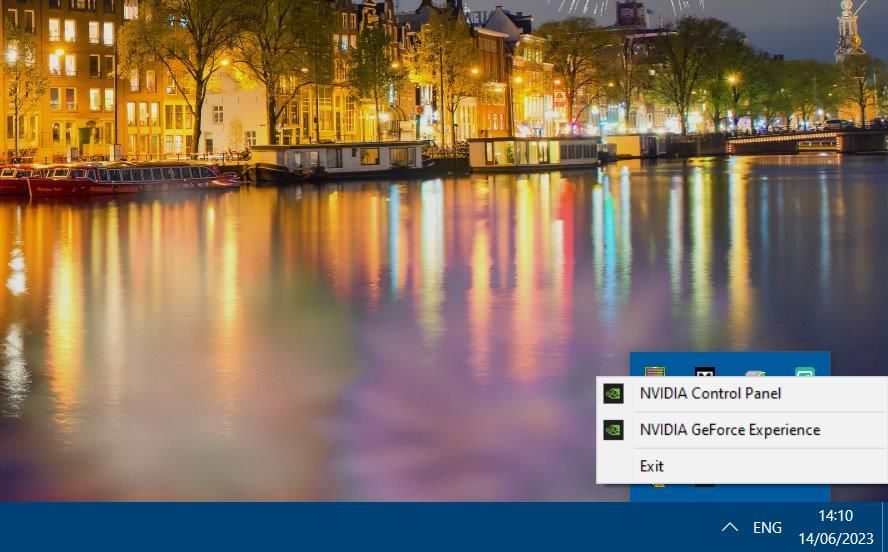
- Right-click on the NVIDIA logo in the system tray area and select NVIDIA Control Panel.

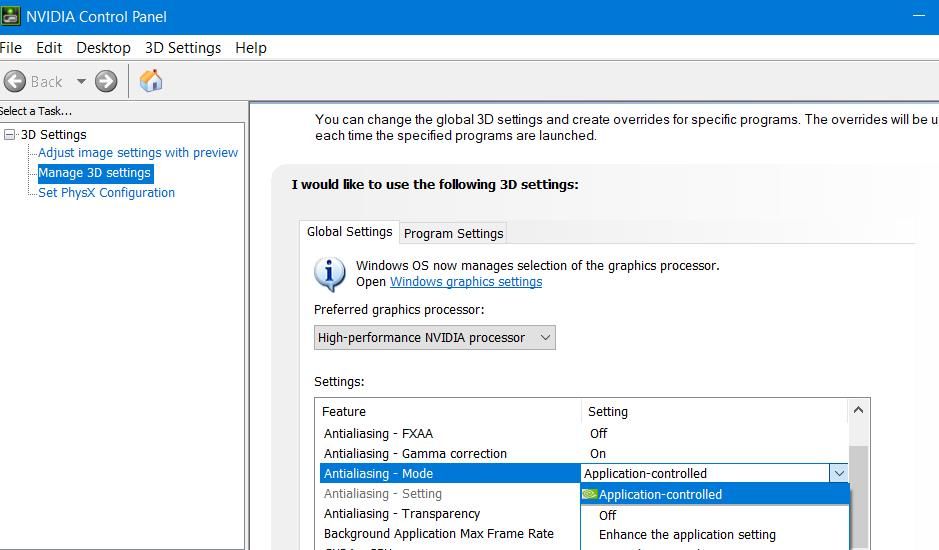
- Click the Manage 3D settings navigation option within the sidebar.
- Select NVIDIA Control Panel’s Global Settings tab.
- Next, click the Antialiasing – Mode option and select Off.

- Repeat the previous step for the Antialiasing – Transparency, FXAA, and Gamma correction options.
- Then select Apply to set the new graphics options.
You can also disable Antialiasing for AMD GPUs within the Radeon software. Check out our guide about tweaking AMD Radeon settings for further details about how to turn off Antialiasing there.
3. Turn Off the NVIDIA ShadowPlay (Overlay) Feature
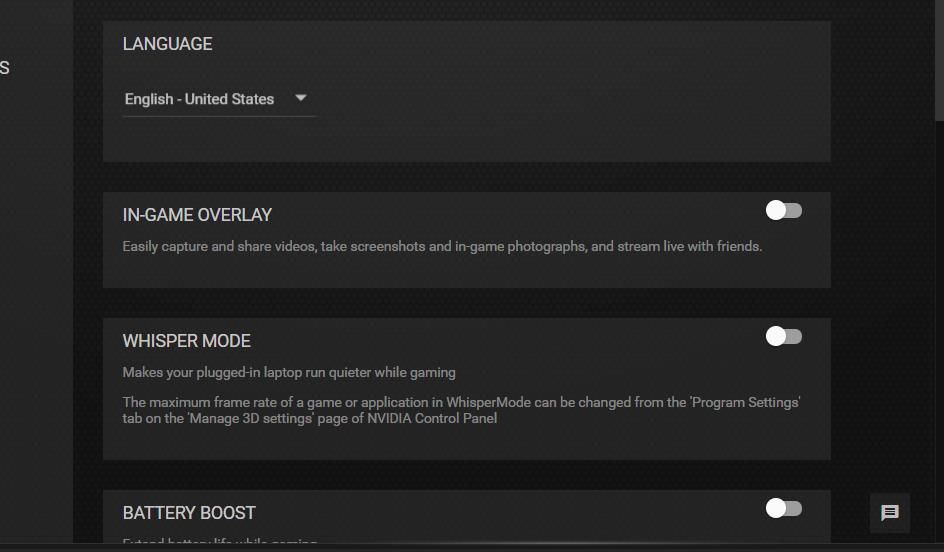
GeForce Experience’s ShadowPlay feature for game recording can place a notable burden on GPUs. So, we recommend that you turn that feature off for the sake of fixing the DXGI_ERROR_DEVICE_REMOVED error if it’s enabled. You can turn off NVIDIA ShadowPlay in GeForce Experience like this:
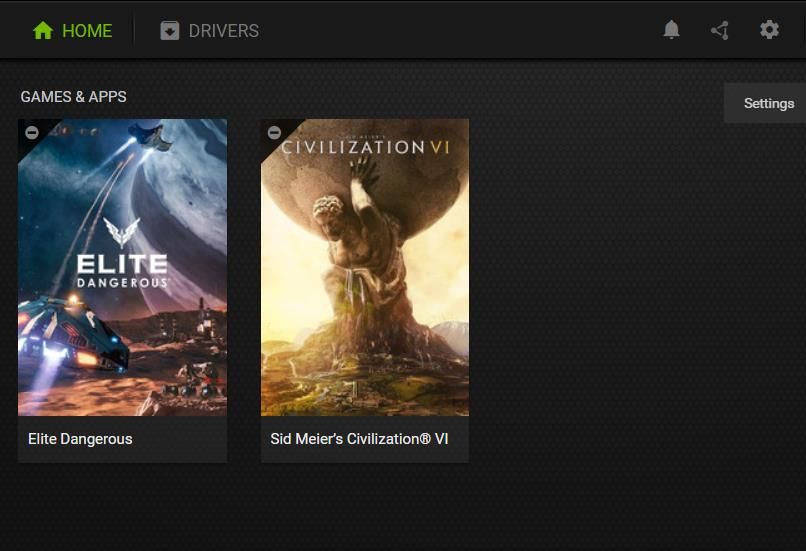
- To open GeForce Experience, right-click the NVIDIA system tray icon and select that software on the context menu.
- Then click on the cog (Settings) button to access further options.

- Toggle off the In-Game Overlay option.

- Exit the GeForce Experience software and try playing your games with ShadowPlay disabled.
4. Turn Off the DLSS Graphics Setting
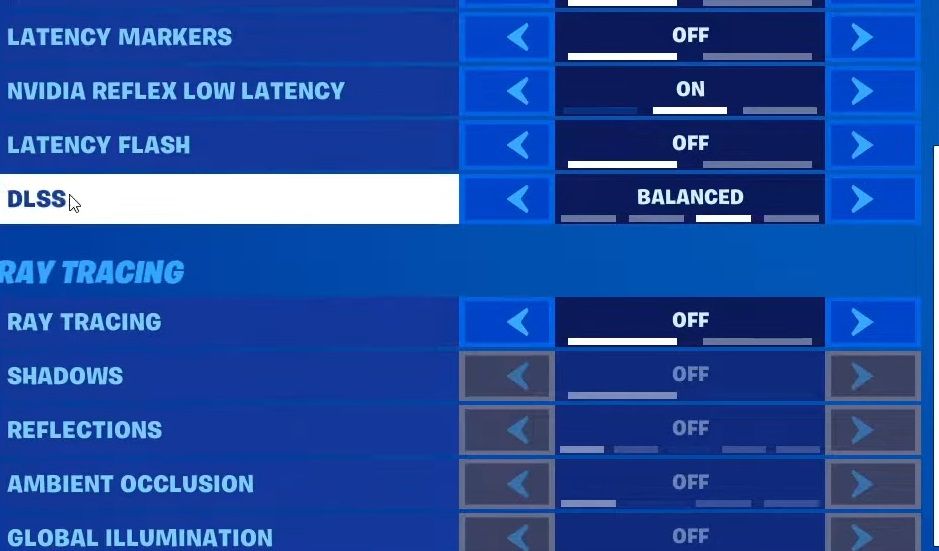
Some players confirm disabling DLSS graphics settings in games fixes the DXGI_ERROR_DEVICE_REMOVED error. If the affected game doesn’t always crash when you start it, try turning off its DLSS option. You can usually find that setting within a game’s video or graphics tab options.
5. Undo Overclocking
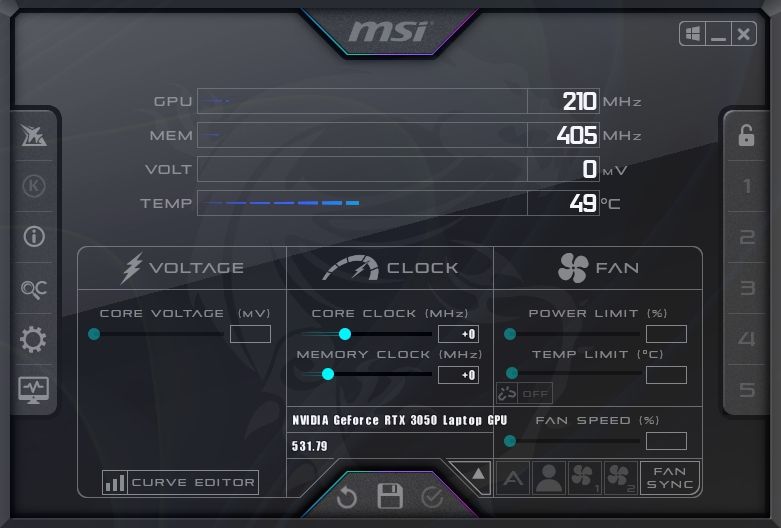
Have you done any GPU or processor overclocking on your PC? If you have, that overclocking could have caused the DXGI_ERROR_DEVICE_REMOVED error. Undo the overclocking with the software you applied it with. Or you can undo overclocking by resetting the BIOS (Basic Input Output System).
6. Run the DirectX Web Installer
DXGI_ERROR_DEVICE_REMOVED can occur because of DirectX issues. For example, some required DirectX components might be missing on your PC. You can address that by downloading and running the DirectX Web Installer like this:
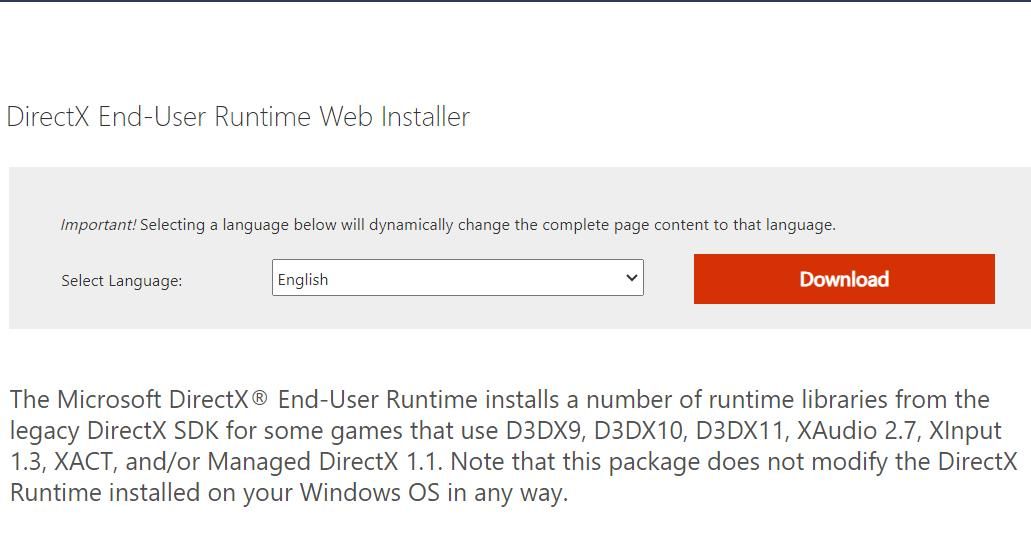
- Open this DirectX download page .
- Click on the orange Download button to obtain a DirectX setup file.

- To view File Explorer, hold the Windows logo button and press E. Then open the folder containing the Microsoft DirectX End-User Runtime package.
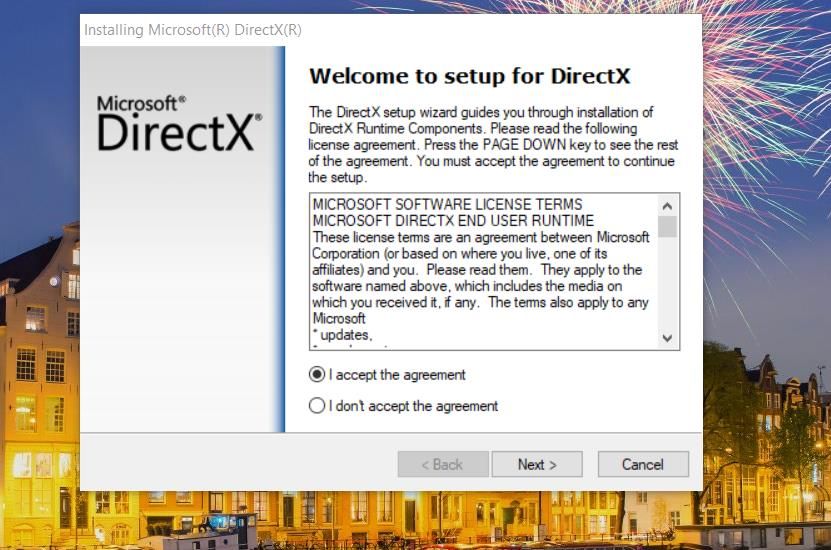
Double-click dxwebsetup.exe to bring up an Installing Microsoft (R) DirectX (R) window.
Click I accept the agreement and Next.

If you don’t want Bing Bar, uncheck the Install the Bing Bar option.
Select Next to install DirectX components.
Try Some Generic Windows Fixes
If nothing has worked yet, here are some generic fixes for GPU issues.
Update the Graphics Driver for Your GPU
The DXGI_ERROR_DEVICE_REMOVED error message clearly says that this issue is often the result of a graphics driver crash. It also suggests users update their GPU graphics drivers to remedy the error. You can update your PC’s graphics driver with the methods covered in this guide to updating a GPU’s driver in Windows .
Cleanly Reinstall the Graphics Driver
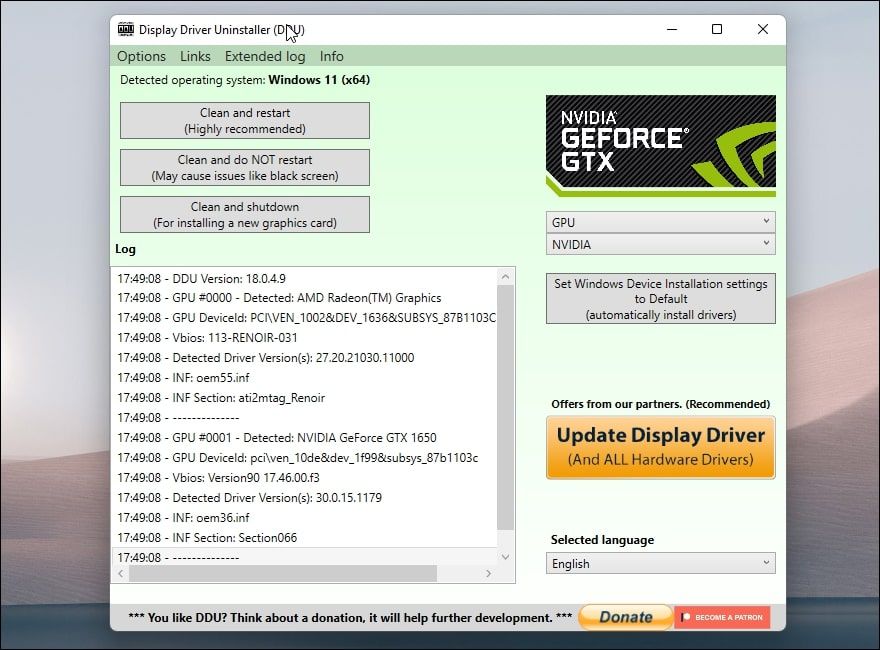
Cleanly reinstalling a graphics driver is a variation of the previous potential resolution for updating it. This involves completely uninstalling the current GPU driver and then installing the latest one. We recommend thoroughly uninstalling the graphics driver with the DDU software before installing the new one. You can apply this solution as covered in our article about reinstalling GPU drivers .
Run a Windows Memory Diagnostic Check
Some users have said they needed to replace faulty RAM modules to resolve DXGI_ERROR_DEVICE_REMOVED. So, try running a Windows Memory Diagnostic check if other resolutions here don’t work for you. Our guide to resolving RAM issues with Windows Memory Diagnostic includes full instructions for utilizing that tool.
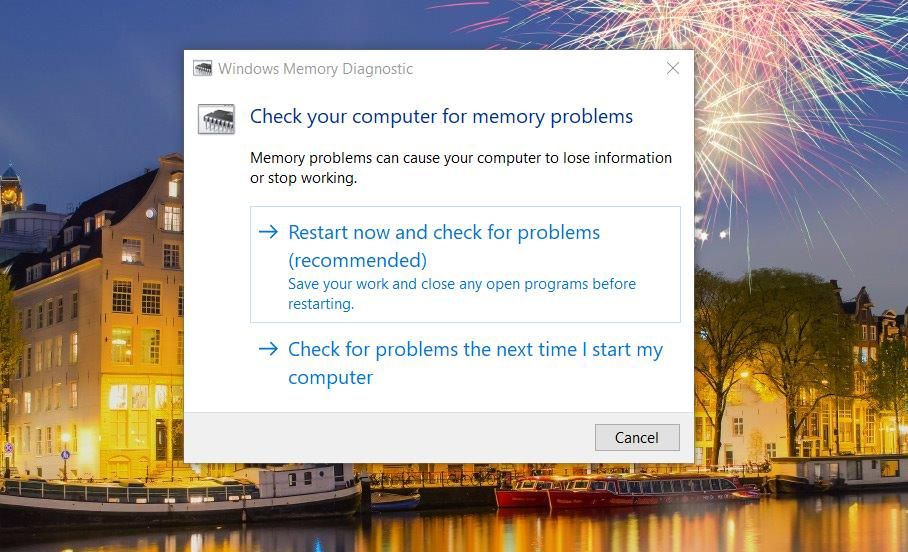
If that tool detects issues, removing the faulty RAM module from your PC will probably resolve the DXGI_ERROR_DEVICE_REMOVED error. However, you’ll still need enough RAM for the game. If removing RAM leaves insufficient system memory for the game, purchase and add a new RAM module to your PC.
Enjoy Your Windows Games Again
The potential fixes above have worked for many players who’ve needed to resolve the DXGI_ERROR_DEVICE_REMOVED error. That doesn’t necessarily mean they’re guaranteed fixes, but one will probably resolve that issue on your PC. Then you can play the Windows 11/10 games that error crashed without further issues.
If the solutions above don’t resolve the DXGI_ERROR_DEVICE_REMOVED error on your PC, there could be an issue with your graphics card. Persistent GPU crashing is one of the signs that it’s time to upgrade your graphics card.
Consequently, Windows games either don’t launch at all or crash with regularity because of the DXGI_ERROR_DEVICE_REMOVED error. The error message highlights that something associated with your graphics card has gone wrong. As such, these potential resolutions can fix the DXGI_ERROR_DEVICE_REMOVED error in Windows 10 and 11.
Also read:
- [New] 2024 Approved Instagram Video Magic Templates & Insights
- [New] Digital Filmmaking Implementing Callout Lines in Edits
- [Updated] Expert-Level Techniques in Video Spinning and Joining on Android
- 「一流のパソコントリートメント:消えてしまった写真を簡単に再生!」
- 2024 Approved Advanced Practices for Capturing IPTV Visuals
- 7 Game-Changing Bard AI Features Revealed at Google's 2023 Tech Expo
- Capturing Yesterday's Essence Your Path From Pixel to Playback
- Embrace Costly Luxury with Apple's New iPad Pro (M4): An Irresistible Tech Marvel!
- Enhancing Performance by Controlling CPU Hogs
- Getting Around a Non-Opening Windows Command Prompt
- How to Downgrade Apple iPhone 13 mini to the Previous iOS System Version? | Dr.fone
- How to Fix Broken Registry Items in Windows 11
- How to Use GitHub Desktop in Windows 11 and 11
- Lowering PC Resource Demand: Fixing WMI Usage Issues
- Master the Maze of Full-Screen Issues: Fix Sonic Adventure Crashes, Win! On Windows 11
- Renaming Microsoft Account Admin for Enhanced Security
- Seamless Driver Update Process for the ScanSnap S130e - Instructions Inside!
- Strategies for Quick SystemSettings Fix on Windows 11
- Unleash Full Potential: Chromium Setup for Windows 11
- Title: Overcoming Graphic Failures: DXGI-ERROR Explained
- Author: David
- Created at : 2024-10-22 01:07:23
- Updated at : 2024-10-26 16:51:02
- Link: https://win11.techidaily.com/overcoming-graphic-failures-dxgi-error-explained/
- License: This work is licensed under CC BY-NC-SA 4.0.
