
Navigating Deletion Warning Settings on PCs
Navigating Deletion Warning Settings on PCs
When you delete a file or folder on Windows, it is automatically moved to the Recycle Bin without any confirmation. If you don’t want that, you can configure Windows to display a confirmation dialog when deleting files.
You can enable or disable the delete confirmation dialog via Recycle Bin Properties, Registry Editor, or Group Policy Editor. Let’s go over each of these methods one by one.
1. Enable or Disable Delete Confirmation Dialog via Recycle Bin’s Properties
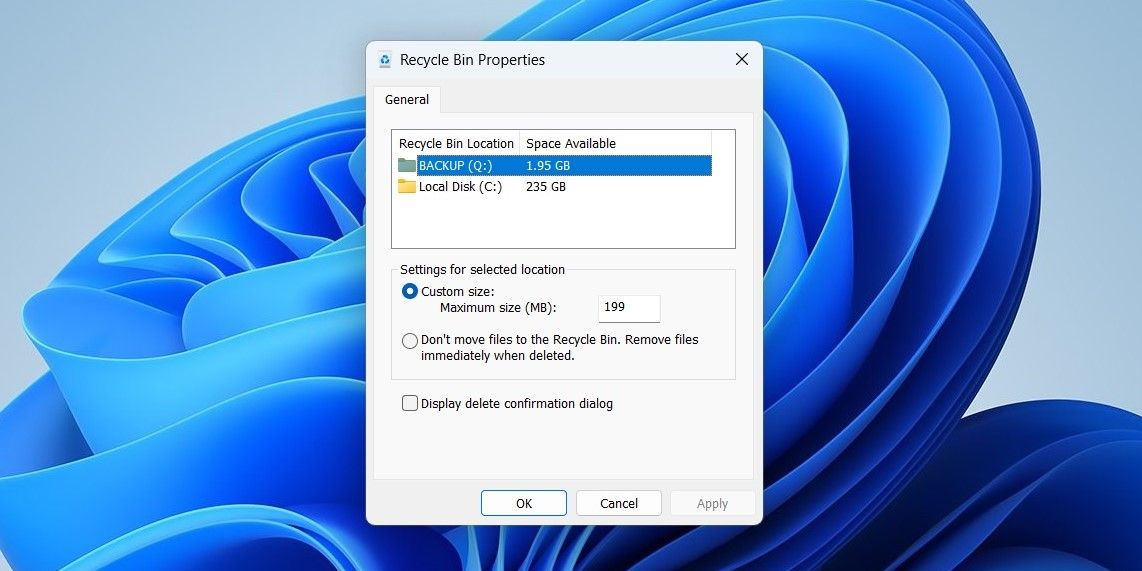
The easiest way to enable or disable the delete confirmation prompt on Windows is through Recycle Bin Properties. Here’s how to go about it.
- Right-click on theRecycle Bin icon on the desktop and selectProperties .
- In theRecycle Bin Properties window, tick theDisplay delete confirmation dialog checkbox.
- ClickApply followed byOK .

Once you complete the above steps, Windows should display the delete confirmation dialog every time you move something to the Recycle Bin.
If you want to disable the delete confirmation dialog in the future, repeat the above steps and uncheck theDisplay delete confirmation dialog checkbox.
2. Enable or Disable Delete Confirmation Dialog Using Group Policy Editor
If you’re a system administrator, you might prefer using the Group Policy Editor to make system-level changes. In that case, you can use the following steps to enable or disable the delete confirmation dialog on Windows.
Note that Group Policy Editor is a feature reserved for the Professional, Enterprise, and Education editions of Windows. If you’re using Windows Home, you’ll need to enable the Group Policy Editor first. Check out how to access the group policy editor on Windows Home and follow the steps outlined there.
- PressWin + R to open the Run dialog.
- Typegpedit.msc in the box and pressEnter . This will open the Local Group Policy Editor .
- Use the left pane to navigate to User Configuration > Administrative Templates > Windows Components > File Explorer .
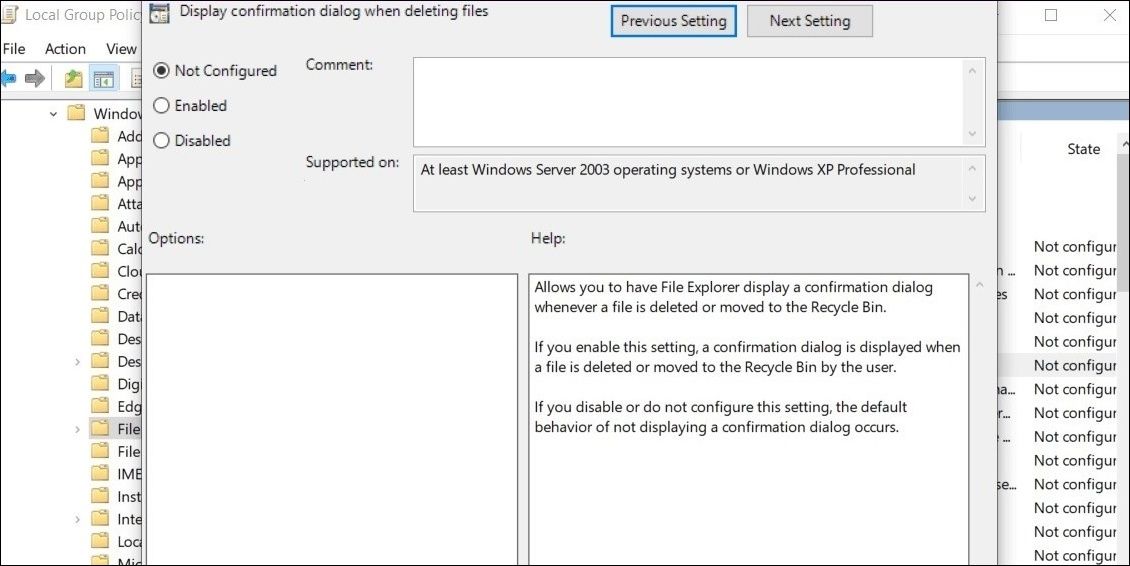
- Double-click theDisplay confirmation dialog when deleting files policy.
- Select theEnabled radio button.
- ClickApply followed byOK .
PDF application, powered by AI-based OCR, for unified workflows with both digital and scanned documents.
 PDF application, powered by AI-based OCR, for unified workflows with both digital and scanned documents.
WPS Office Premium ( File Recovery, Photo Scanning, Convert PDF)–Yearly
3. Enable or Disable Delete Confirmation Dialog With Registry Editor
If the above methods do not work for some reason, you can make a few changes in the Registry Editor to enable or disable the delete confirmation prompt on Windows. Since Windows Registry holds critical settings for Windows operating system, make sure you back up all the registry files or create a restore point before proceeding.
To enable or disable the delete confirmation dialog using Registry Editor:
- PressWin + S to open the search menu.
- Typeregistry editor in the box and select the first result that appears.
- SelectYes when the User Account Control (UAC) prompt appears.
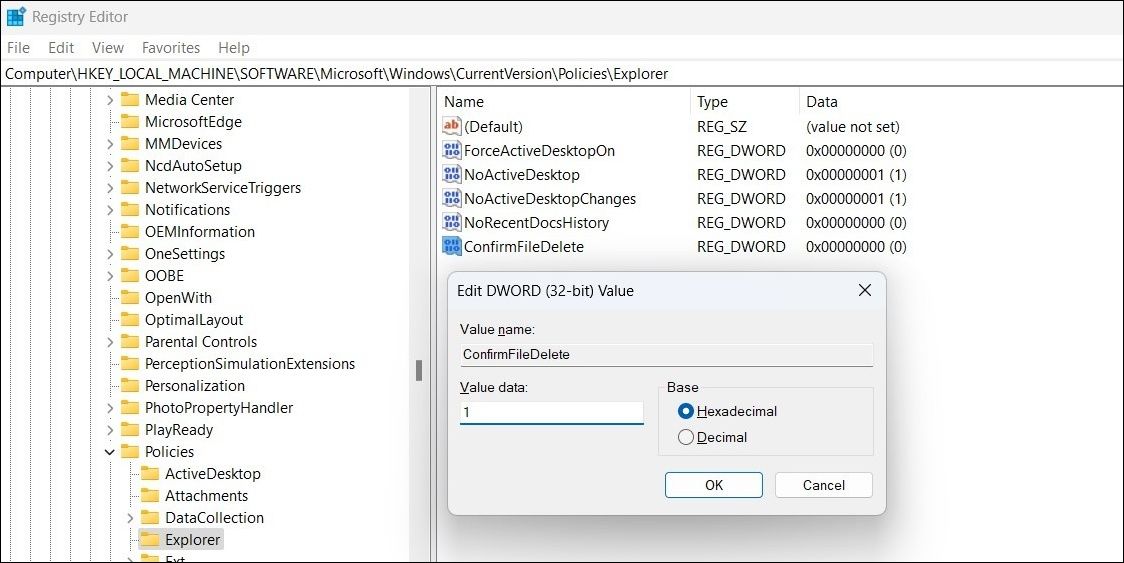
- Use the left pane to navigate to HKEY_CURRENT_USER > Software > Microsoft > Windows > CurrentVersion > Policies > Explorer .
- Right-click on the Explorer key and selectNew > DWORD (32-bit) Value . Name itConfirmFileDelete .
- Double-click the newly created DWORD.
- In theValue data field, enter1 to enable the delete confirmation dialog.
- ClickOK and restart your PC to apply the changes.
FX PRO (Gold Robot + Silver Robot(Basic Package))
After the reboot, Windows should display the delete confirmation dialog when you try to delete something. If you want to undo this change at any time, follow the same steps above and change the value data forConfirmFileDelete to0 . Alternatively, you can delete theConfirmFileDelete entry altogether.

Enabling or Disabling the Delete Confirmation Dialog on Windows
The delete confirmation dialog might not be exciting to see, but it is definitely useful. On the other hand, if you’re cleaning up old files on your computer, you might want to disable the confirmation dialog for a while. Either way, enabling or disabling the delete confirmation dialog is pretty simple.
And as difficult as it may sound, it’s actually very easy to restore accidentally deleted files on Windows.
- Title: Navigating Deletion Warning Settings on PCs
- Author: David
- Created at : 2024-08-15 23:52:33
- Updated at : 2024-08-16 23:52:33
- Link: https://win11.techidaily.com/navigating-deletion-warning-settings-on-pcs/
- License: This work is licensed under CC BY-NC-SA 4.0.