Navigate and Rearrange OneDrive on Windows 11

Navigate and Rearrange OneDrive on Windows 11
If you don’t already know, OneDrive is Microsoft’s online storage service that you can use with your Microsoft account. You can save your files to the cloud and access them on any PC, tablet or phone by signing in to your Microsoft account. By default, your OneDrive folder is found in your user folder, but you can change where it is located. However, it isn’t a simple cut-and-paste operation; you have to make sure the new location syncs to the cloud. Here’s how to move your OneDrive folder to a new location.
Disclaimer: This post includes affiliate links
If you click on a link and make a purchase, I may receive a commission at no extra cost to you.
How to Change the Location of Your OneDrive Folder
When you change where your OneDrive folder is located, you’ll also have to set it to sync with your files on the cloud. You’ll have to unlink your OneDrive folder on your PC first, then move the folder to a new location, and finally re-link your PC to your Microsoft account. These steps will help you set that up.
If you’re new to the concept, check out our articles onwhat OneDrive is andwhy you should use it .
1. Unlinking OneDrive
The first thing to do is tounlink your OneDrive folder from your Microsoft account so that files on the cloud no longer sync to their current location.
Your OneDrive files on your PC will no longer synchronize to the cloud. Don’t worry; a little later you’ll be re-linking your OneDrive folder to your Microsoft account.
Once you’ve done this, you will be presented with a window to set up OneDrive. Leave this open for the moment. You will need to revisit it once you’ve moved your OneDrive folder to a different location on your PC.
2. Moving Your OneDrive Folder
With that done, you can now relocate your OneDrive folder.
- Navigate to where your OneDrive folder is currently located. It should be in your user files by default.
- Click on theHome tab on the File Explorer ribbon.
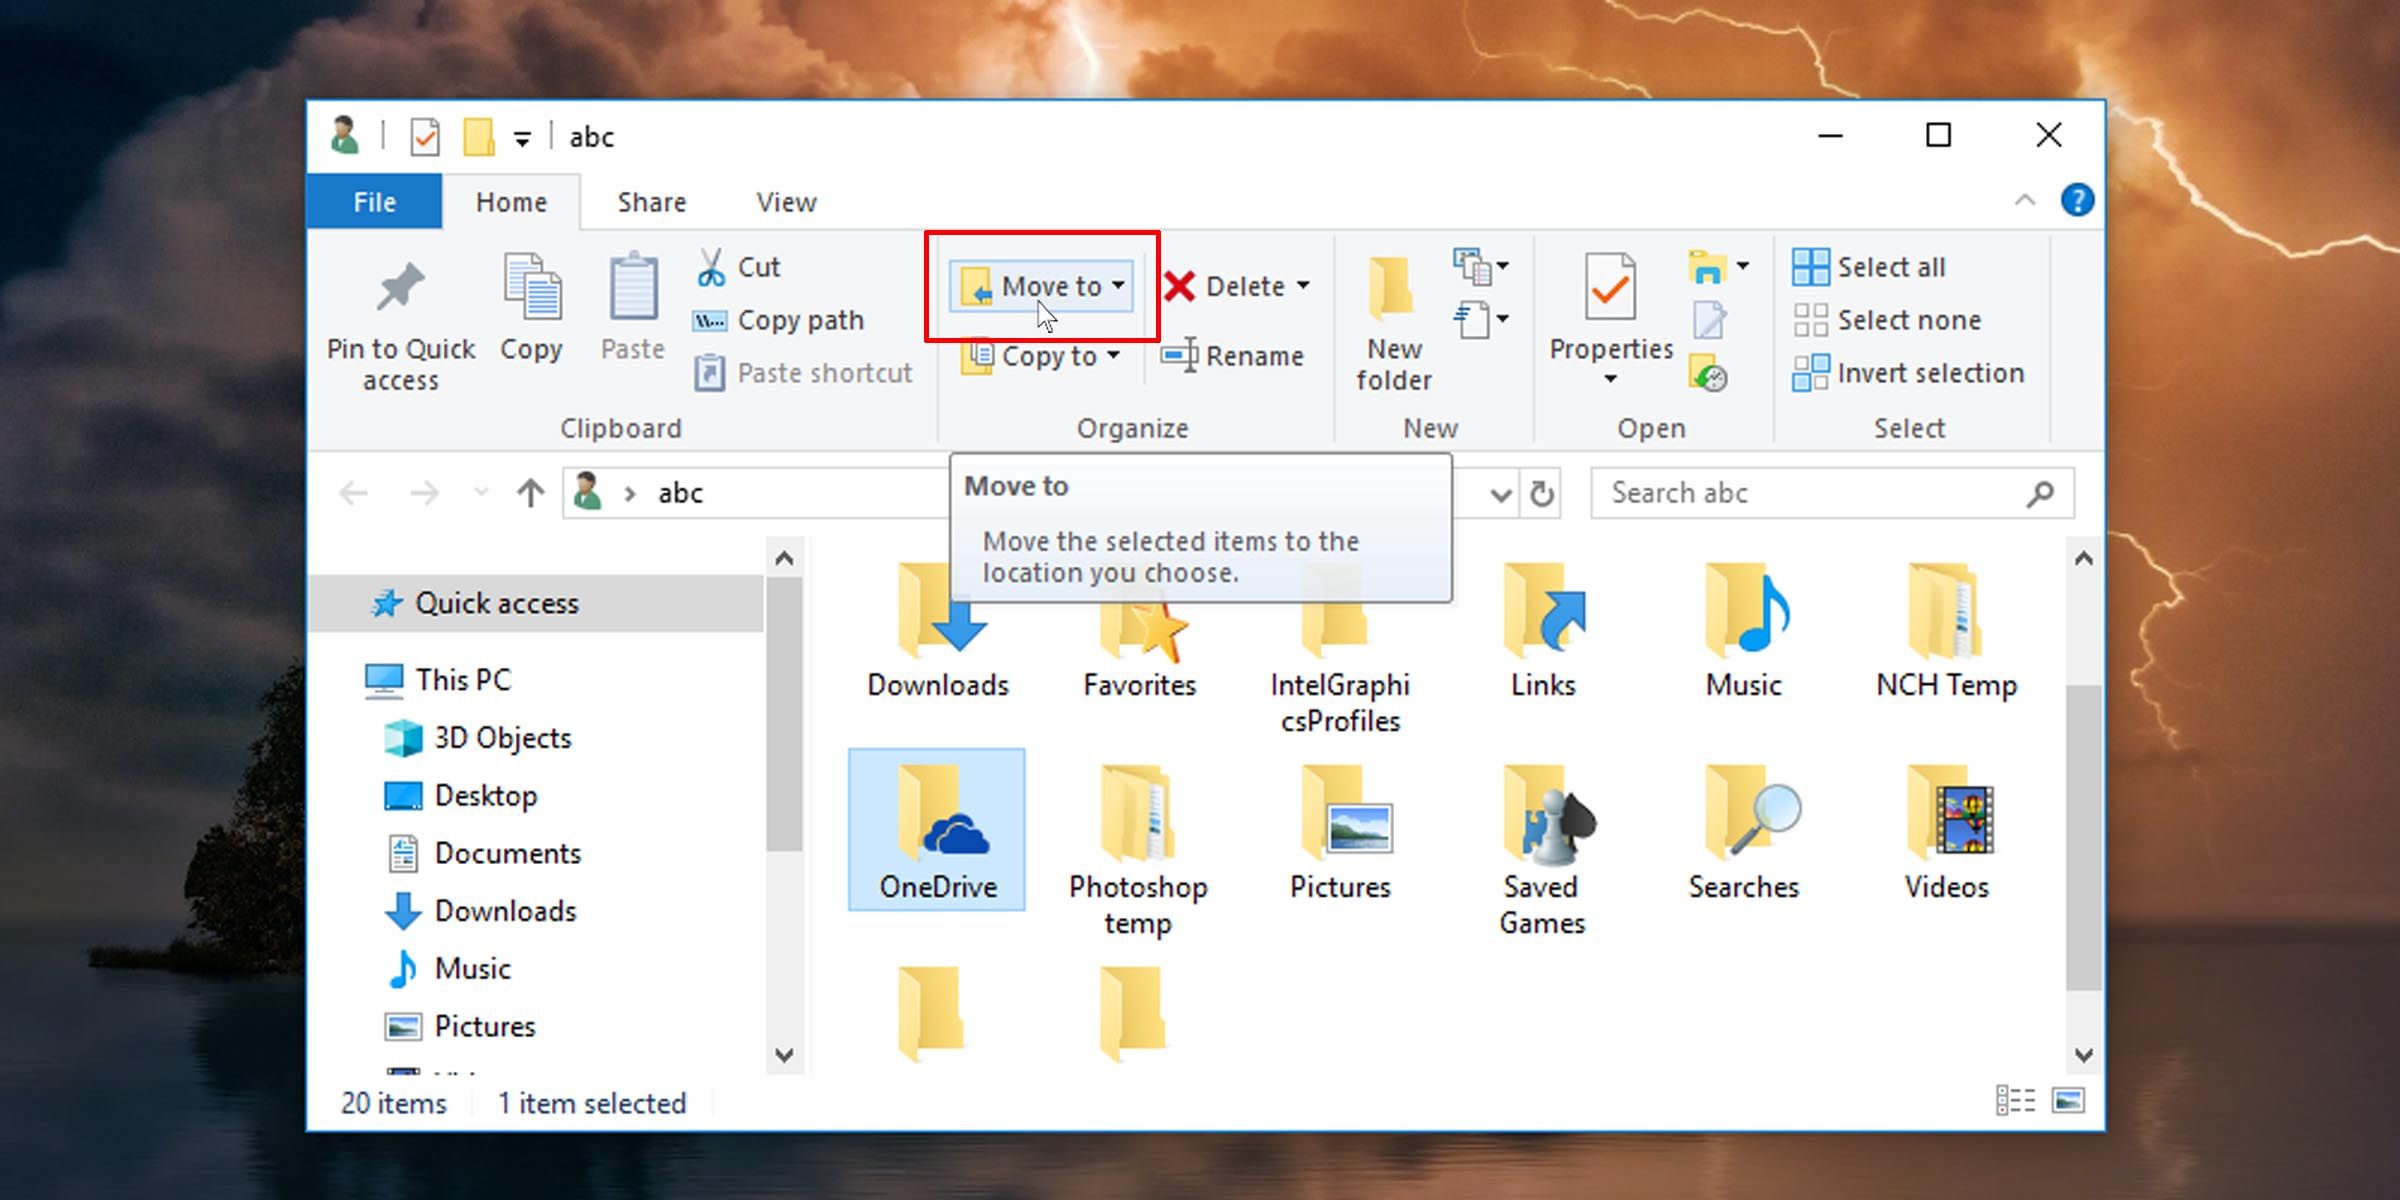
- Select your OneDrive folder and in the ribbon click on theMove to button.

- From the drop-down that appears, click on theChoose location option.
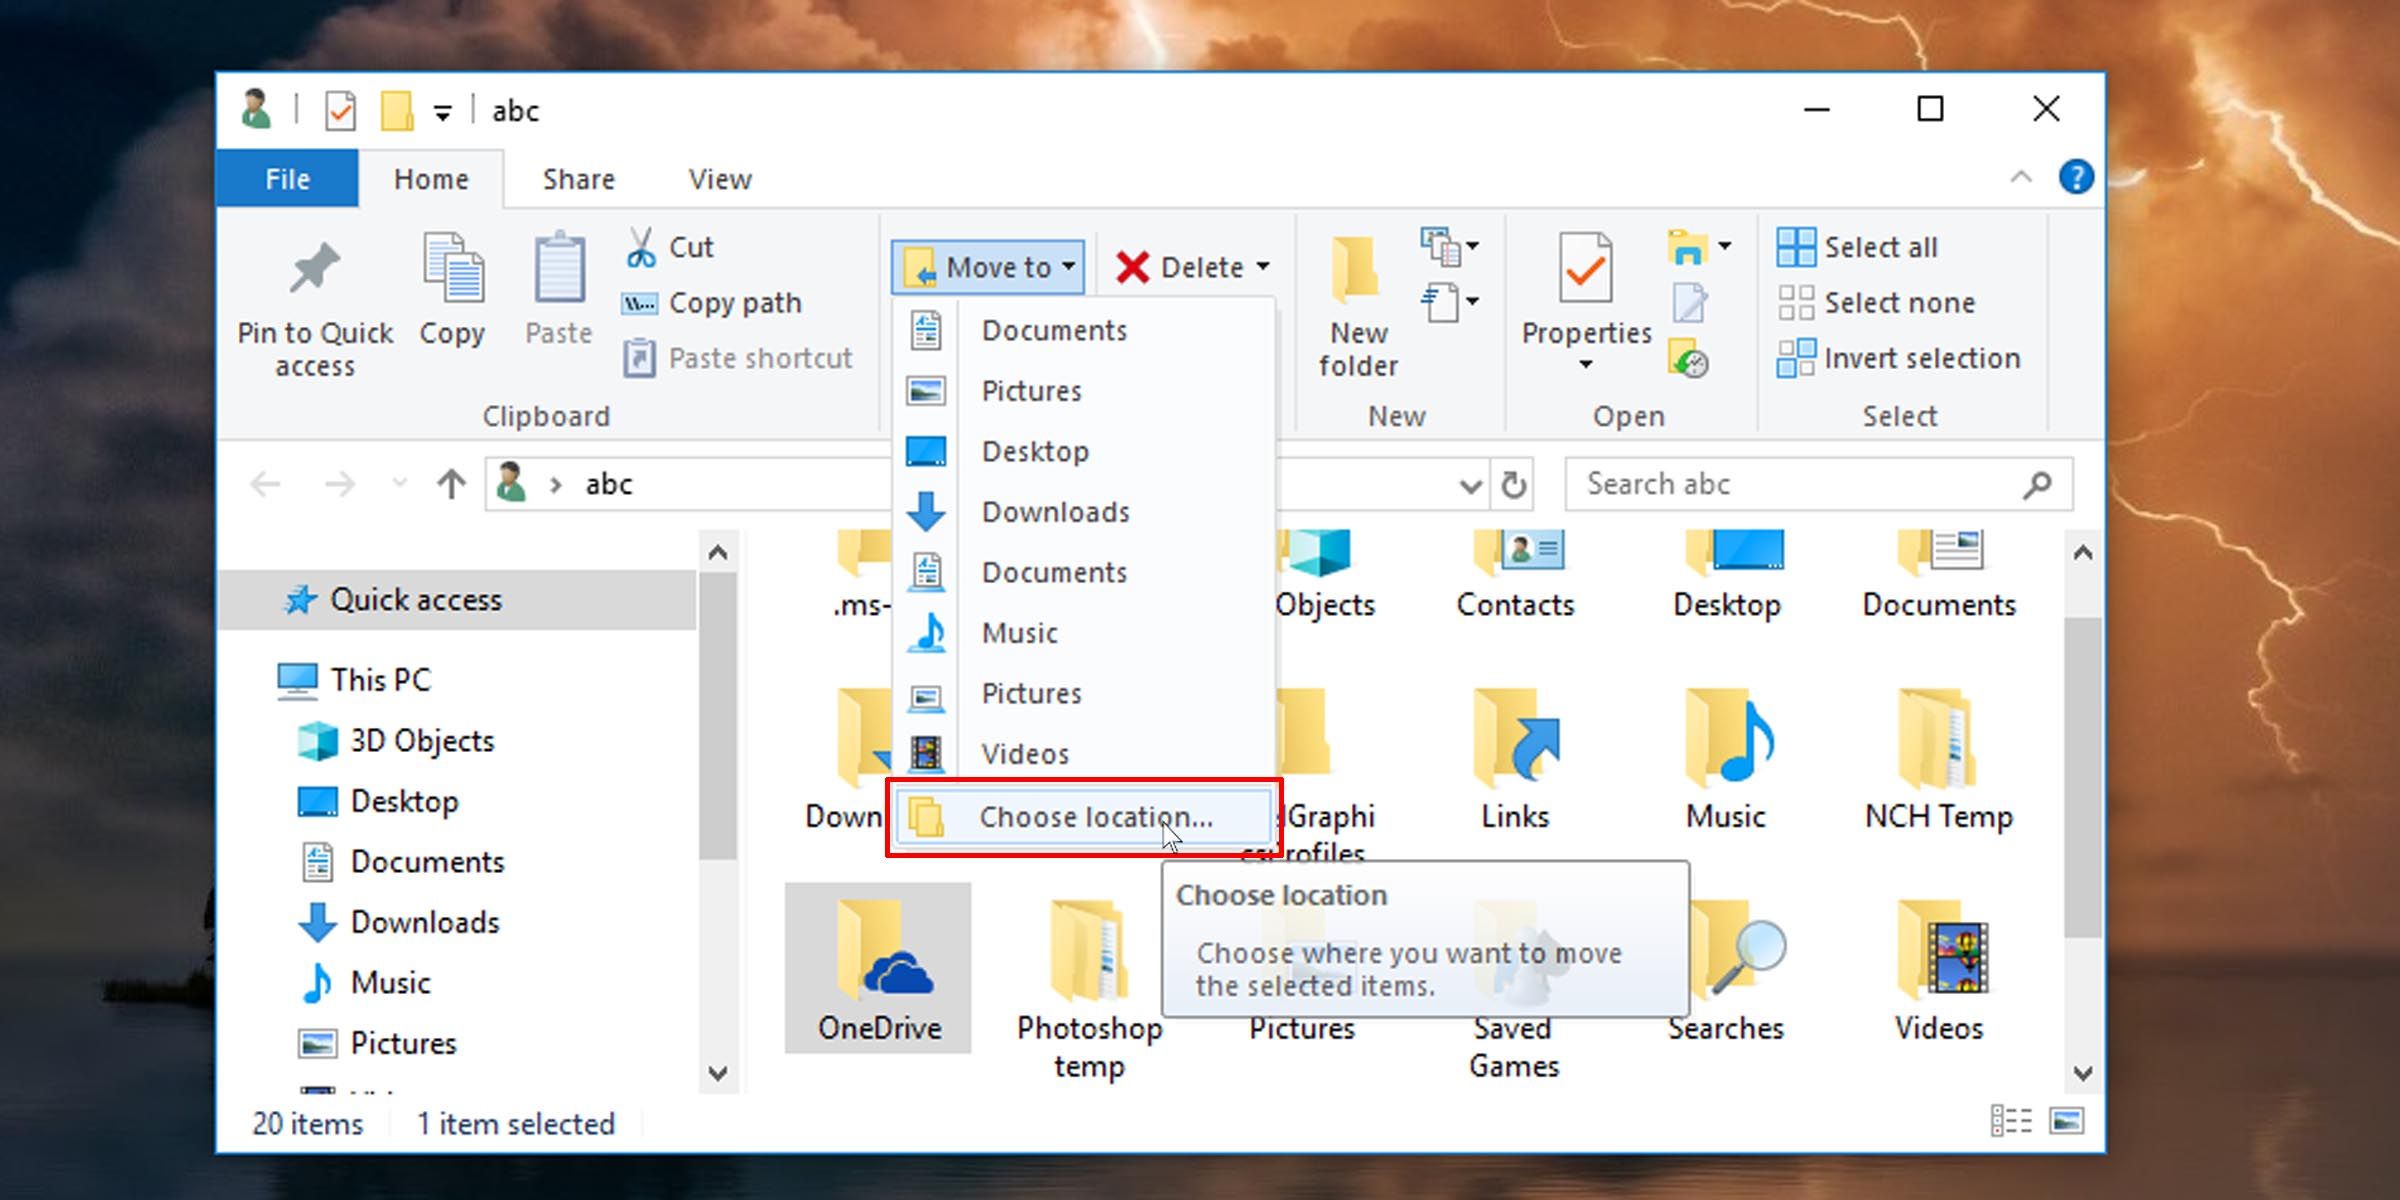
5. A pop-up will appear. Browse to the location you want your new OneDrive folder to reside, and click on theMove button on the bottom of the pop-up.
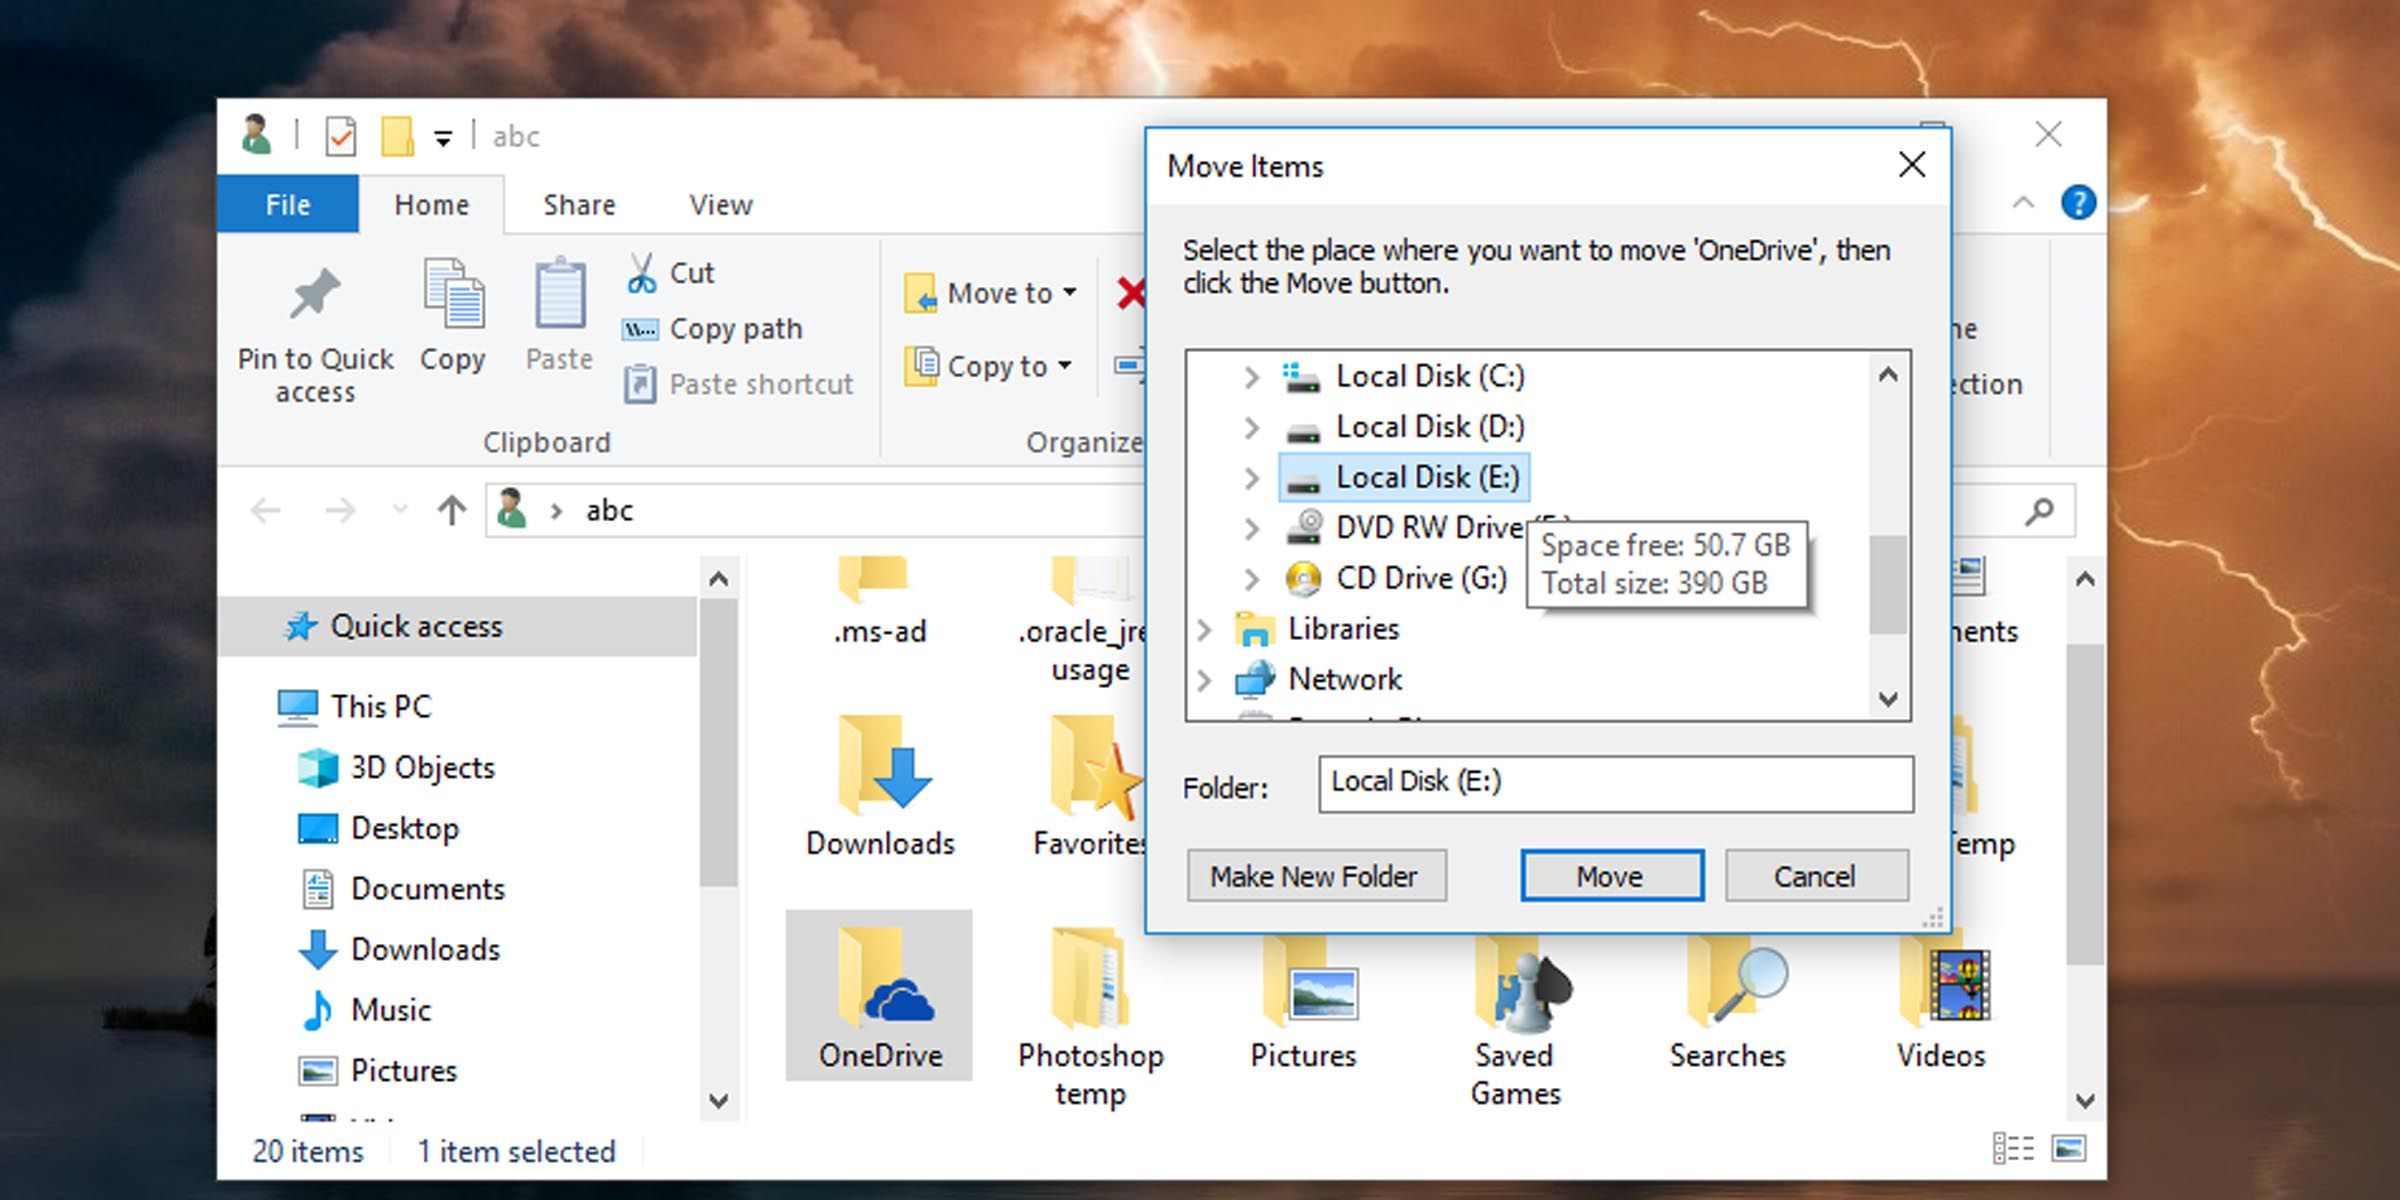
6. Windows will start to move your OneDrive folder and all of its contents to the new location you’ve selected. This may take a while depending on the size of the folder.
That’s it! You’ve moved your OneDrive folder to a new location on your Windows PC.
3. Re-Linking OneDrive
Now all that’s left is to re-link your Microsoft account with OneDrive on your PC, this time pointing to the new location. Follow the steps below to do that.
Return to theSet up OneDrive window you left open earlier. (If you didn’t leave it open, or it got shut, you can pull it up again by opening the OneDrive application.) This is how you’llre-link your OneDrive account to your PC .
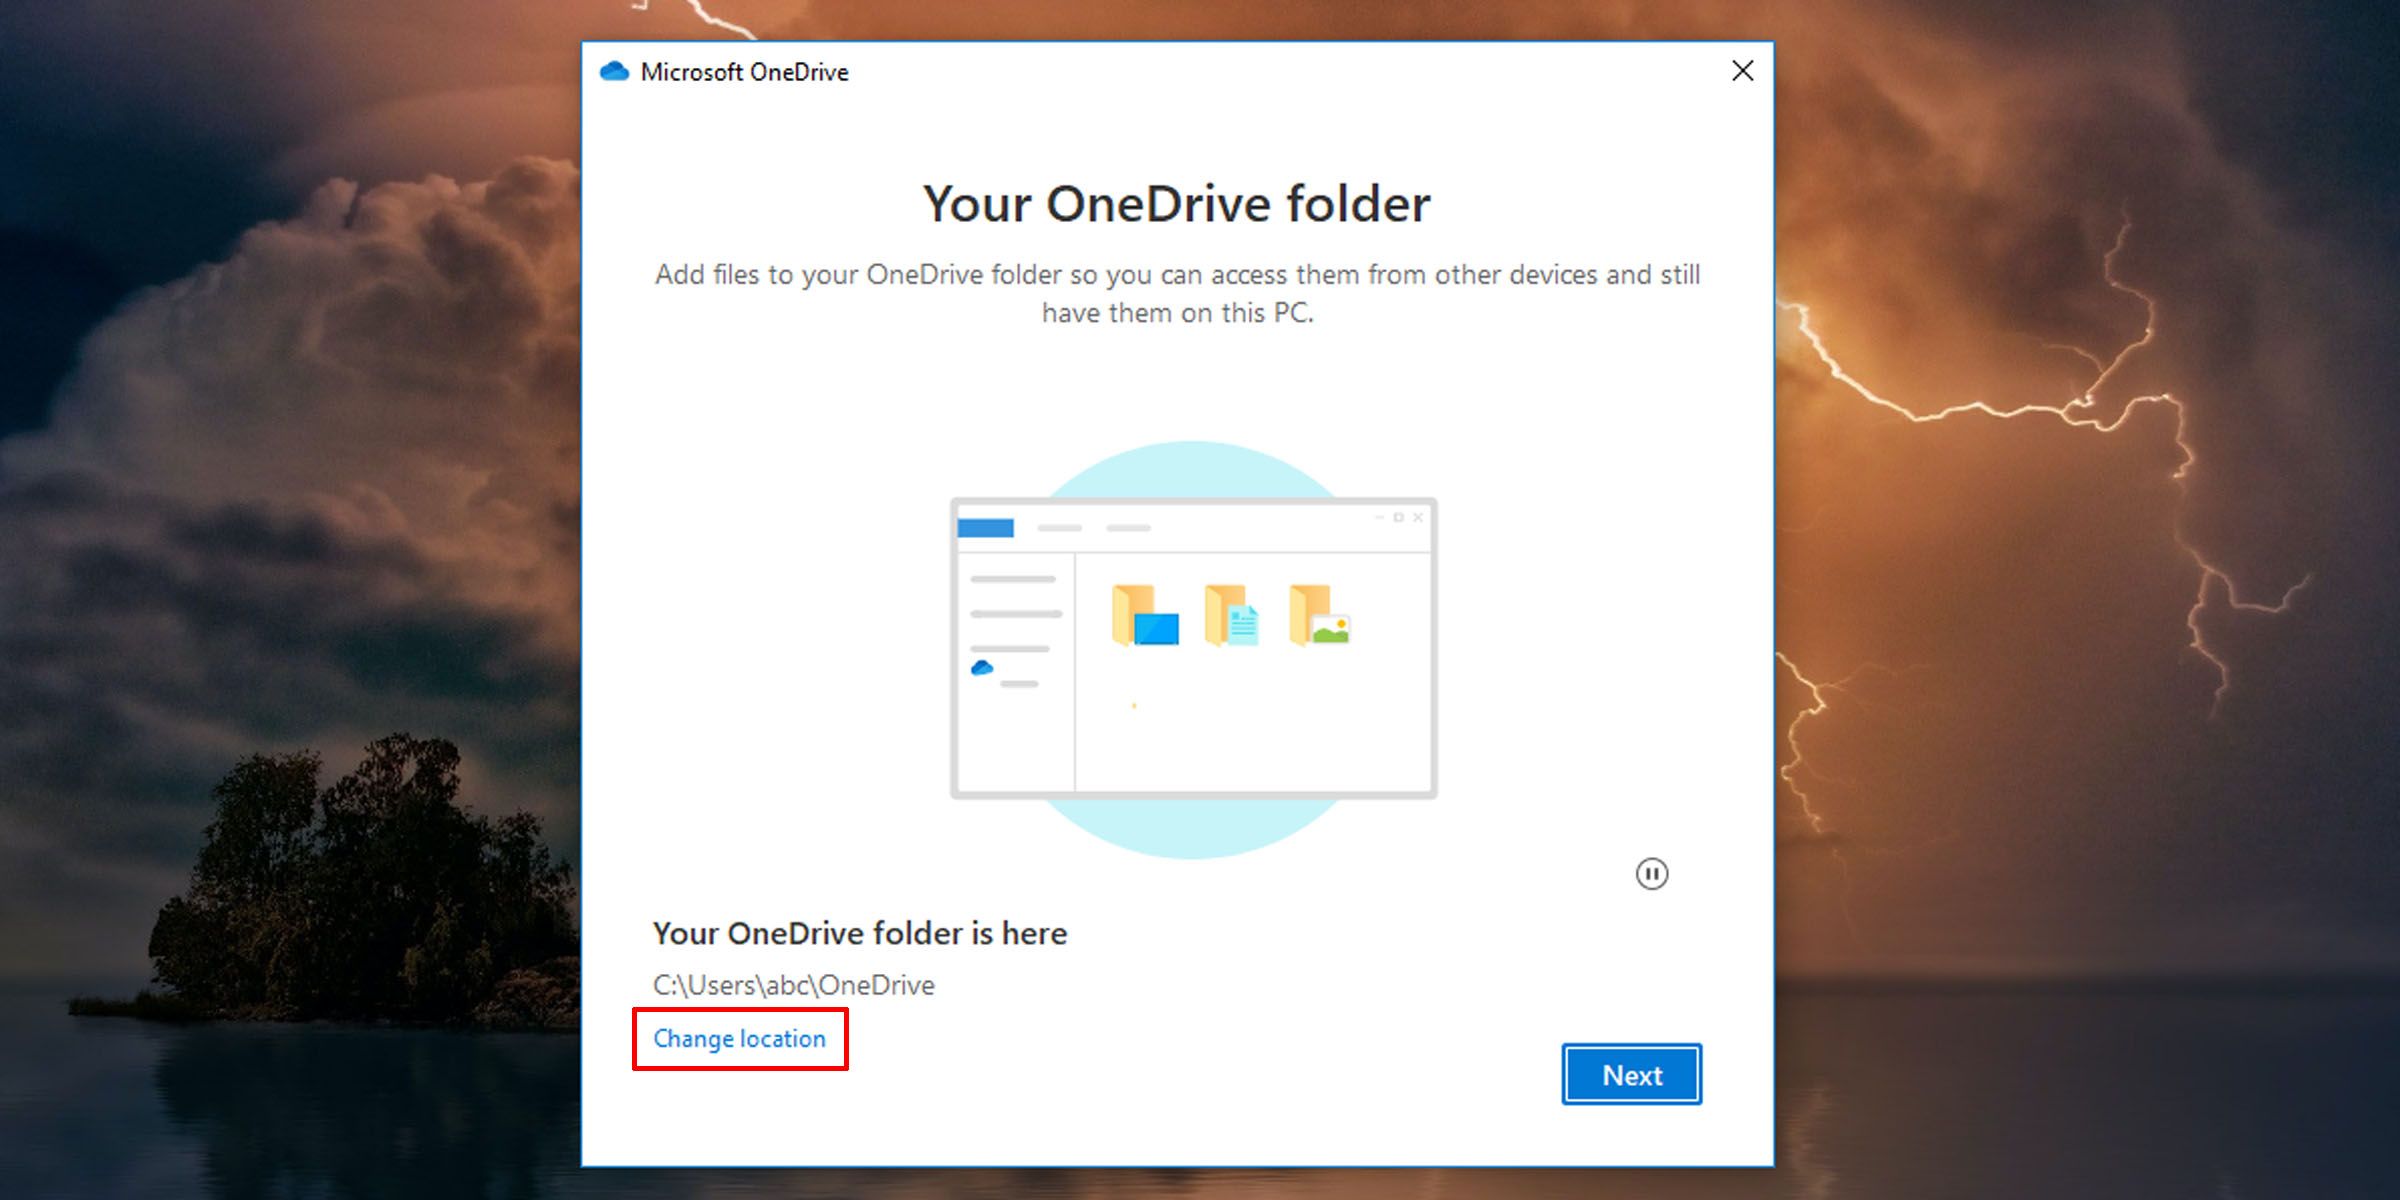
Once you’re signed in, you are presented with a screen that shows where Windows will set up your OneDrive folder. (By default, the system selects your user folder.)
Click on theChange location link.

Then browse to the new location where you moved your OneDrive folder on your PC, and click on theSelect Folder button.
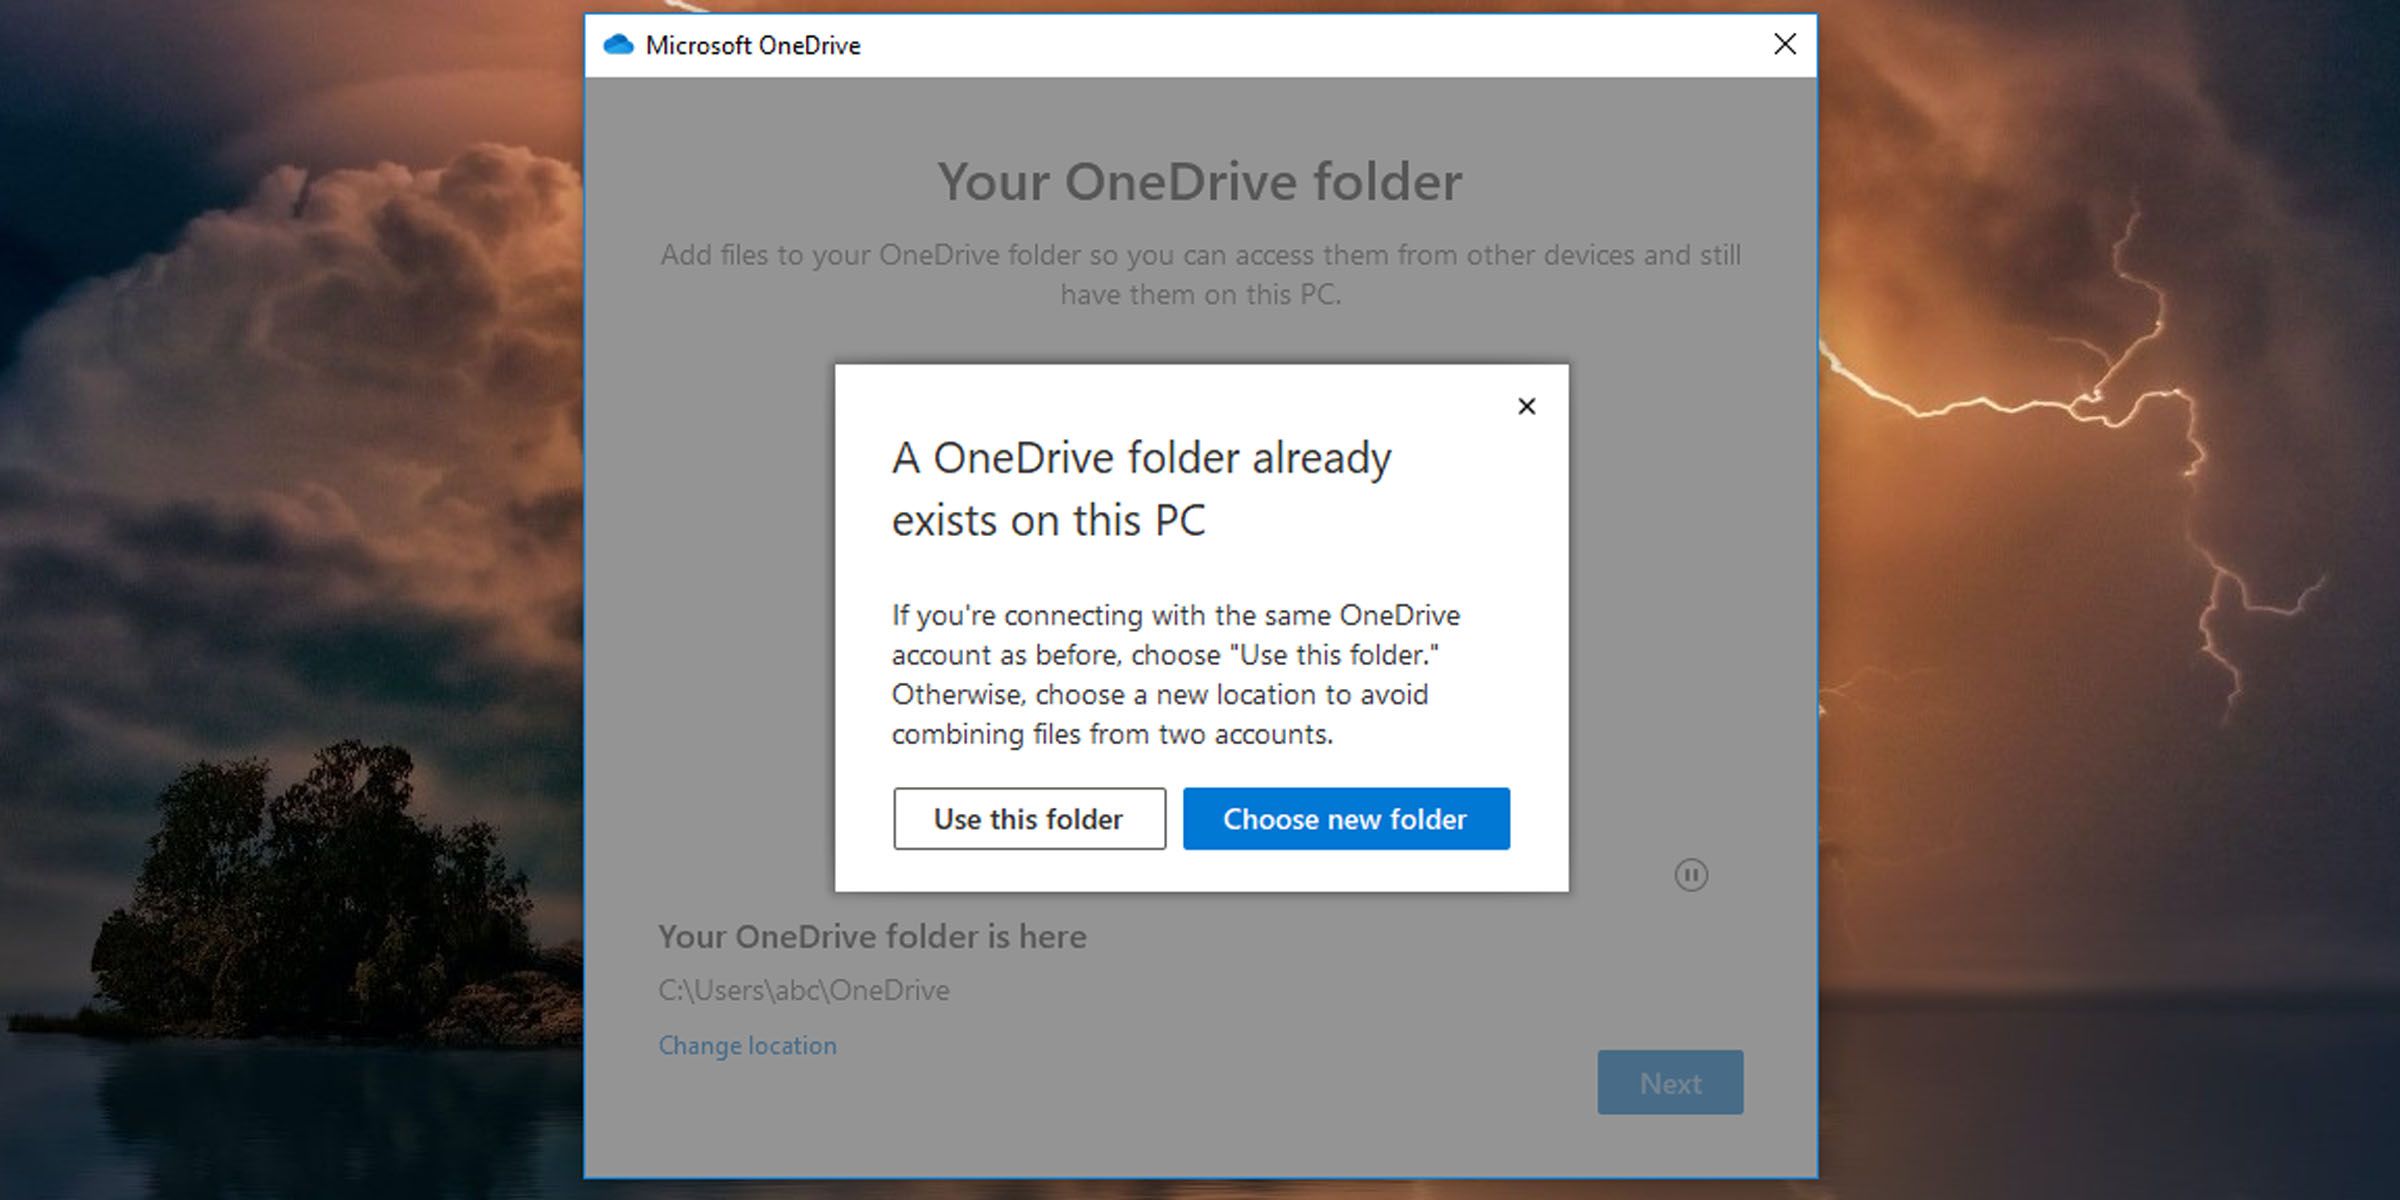
You’ll be presented with a warning screen, telling you that files already exist in this folder. Click on theUse this folder button.

Verify that the location you’ve selected is the correct one, and click onNext .
- You’ll be presented with a welcome screen. Scroll through it and close the setup window.
Your OneDrive folder has been moved, and any files you add, or existing ones you modify, will be synced to the cloud from this new OneDrive location on your PC.
Additionally, there are manyways to control how OneDrive syncs files on your PC , from pausing automatic sync on metered networks to stopping specific folders from syncing.
Free Up PC Storage by Moving Your OneDrive Folder
Files on your OneDrive can take up a lot of disk space. You don’t have to settle for your OneDrive folder’s default location. You can free up space on your root drive by moving it to a different location, perhaps even on a different drive.
Also read:
- [New] Advanced Rendering with Srgb Technology for 2024
- [Updated] In 2024, Elevate Your Profile Picture Game with These High-End Online Services
- [Updated] Unveiling Best Free, User-Friendly SRT Translators Online
- Guaranteeing Smooth Audio Transmission in Steam
- In 2024, Here are Some of the Best Pokemon Discord Servers to Join On Motorola Moto G84 5G | Dr.fone
- In 2024, How to Simulate GPS Movement in AR games On Infinix Smart 8 Pro? | Dr.fone
- Increase Windows Storage Securely
- Navigating the Best Video Formats for Your YouTube Channel for 2024
- Structure Your Thoughts: Visual Notes in Obsidian
- The Underrated Tools: Comparing Windows' Monitoring Systems
- Title: Navigate and Rearrange OneDrive on Windows 11
- Author: David
- Created at : 2024-10-21 06:35:02
- Updated at : 2024-10-27 04:25:32
- Link: https://win11.techidaily.com/navigate-and-rearrange-onedrive-on-windows-11/
- License: This work is licensed under CC BY-NC-SA 4.0.
