
Mastery Over System Restore: A Windows 11 Perspective
Mastery Over System Restore: A Windows 11 Perspective
System Restore comes in handy when you land in trouble after installing an app or an update that wrecks your PC. Windows creates restore points and automatically deletes them to make way for new ones. System Restore prevents you from straight away resorting to other recovery methods like reset or Windows reinstallation that can affect your data and apps. Here are eleven ways to launch this reliable tool on Windows 11.
1. Using Start
The Start menu is the most frequent means to access apps and Windows tools. The improved search integration and app launch tracking displays the apps and settings that you access most of the time. Repeat the following steps:
- Press the Win key to open the Start menu.
- Type System Restore and press the Enter key. Then click on the Open System Restore button.

- Click on the Next button to view and choose from the list of available options.
2. Using Control Panel
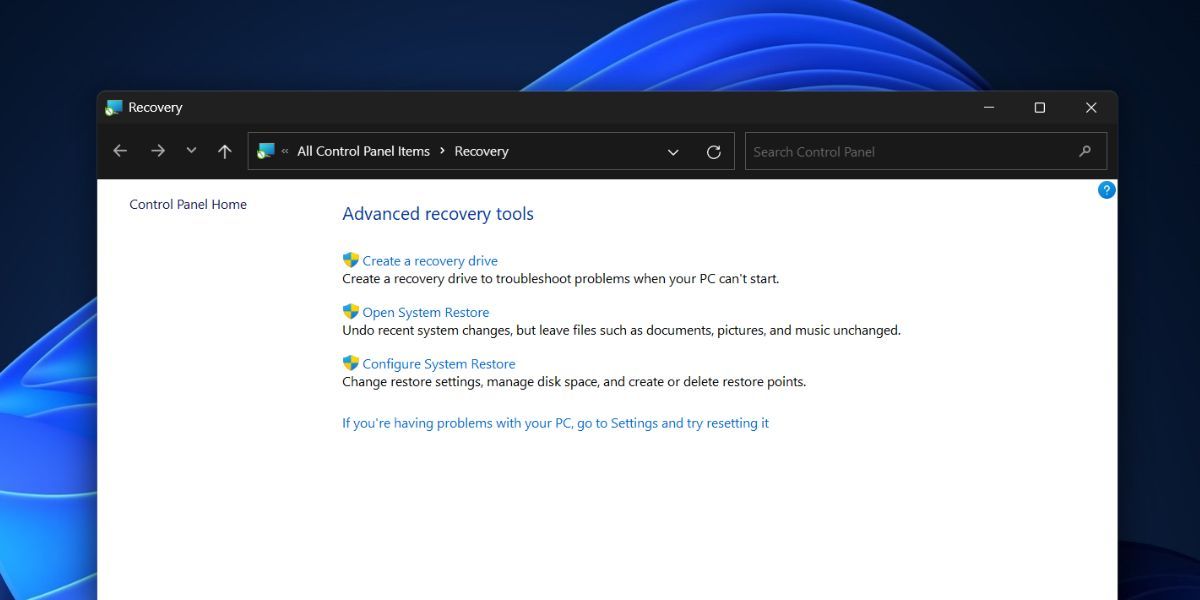
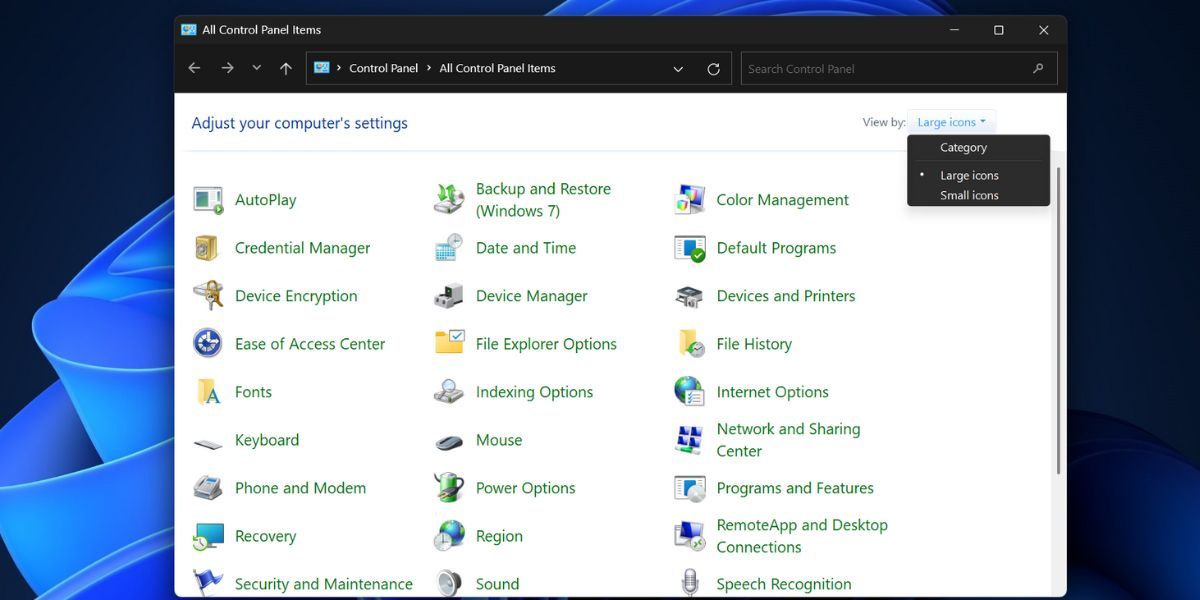
Control Panel contains all Windows tools and settings, which makes it easy to find them. Even the Windows search points to the Control Panel window of Recovery options. Here’s how to do it:
- Press the Win key, type Control Panel, and then press the Enter key.
- Click on the View by: drop-down list and select the large icons option.
- Now, click on the Recovery option.
- Lastly, click on the Open System Restore button.
3. Using Advanced System Properties Window
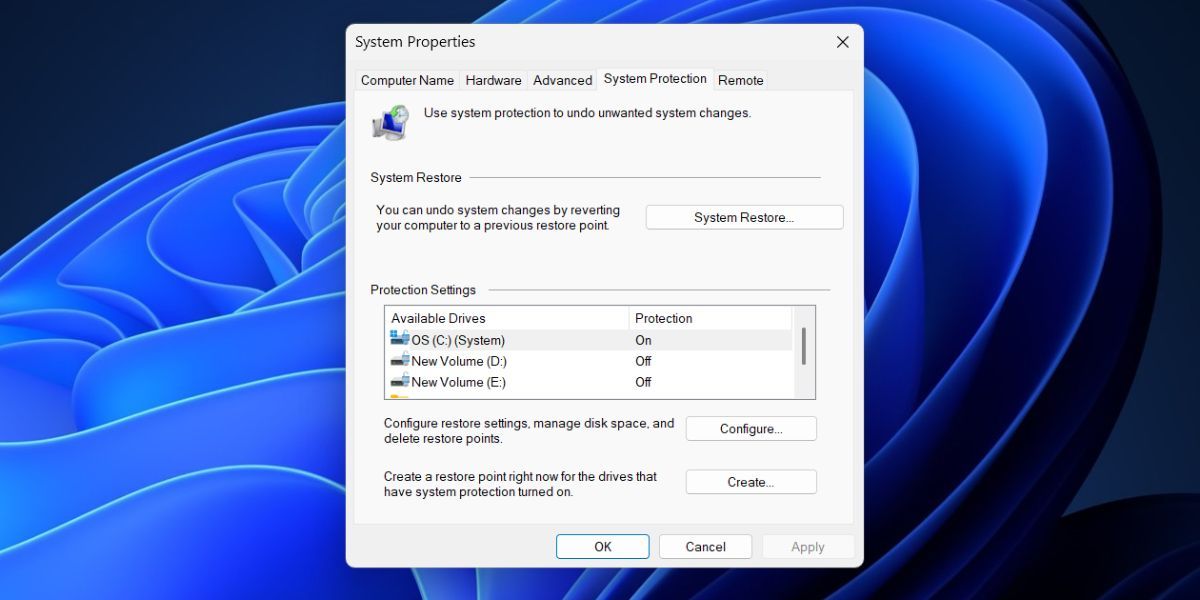
You can quickly access System Restore using the Advanced System Properties window. Repeat the following steps:
- Press the Win key, type sysdm.cpl, and press the Enter key.
- Now, switch to the System Protection tab.
- Click on the System Restore button to launch the tool.
 The BootIt Collection covers multi-booting, partitioning, and disk imaging on traditional PC’s using the standard BIOS and newer PC’s using UEFI. The collection includes BootIt Bare Metal (BIBM) for standard BIOS systems and BootIt UEFI (BIU) for UEFI system.
4. Using Settings App
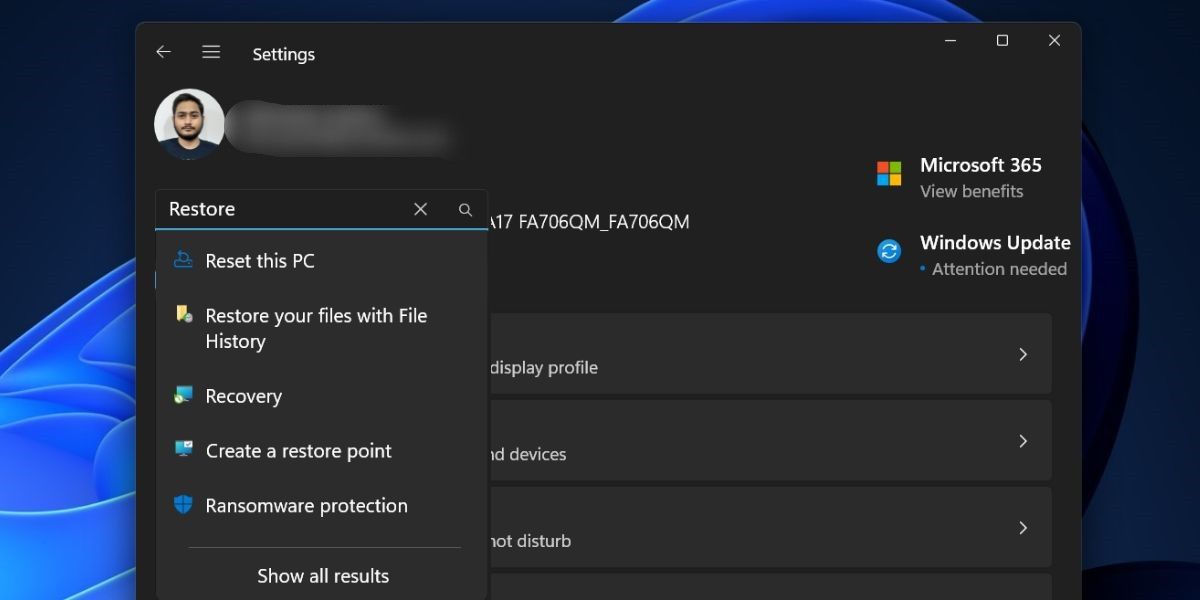
Microsoft is still trying to offload everything from the Control Panel to the Settings app. Even a search for System Restore in Control Panel points to the settings app, but you won’t find the tool there. Instead, you have to search for System Restore inside the Settings app. Here’s how to do it:
- Right-click on the Start button to open the Power User menu. Click on the Settings option.
- Go to the search bar on the top left side and click on it.
- Type Restore and click on the Recovery search result. It will take you to the Control Panel’s list of available recovery options.
- Now, click on the Open System Restore button.
 CalendarBudget - Monthly subscription membership to CalendarBudget via web browser or mobile app. Support included.
 5. Using the Run Dialog Box
The Run dialog box supports shortcodes which allow you to access an application faster (provided you know the correct ones). You can even open file locations using this tool. Repeat the following steps:
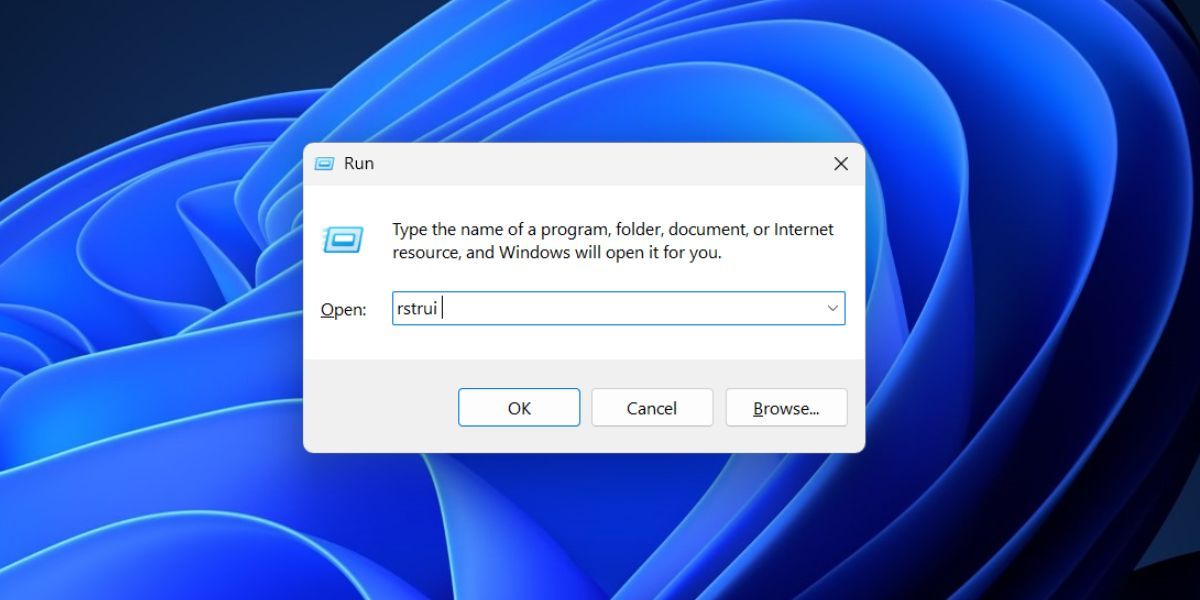
- Press Win + R to open the Run dialog box . Type rstrui in the text box.
- Click on the OK button to open the System Properties tool.

6. Using a Pinned Taskbar Shortcut
If you search for system restore in the Start menu, you won’t find an option in the right pane to pin the app to the Start menu or Taskbar. But you can pin the application file of the tool to the Taskbar by visiting its folder location. Here’s how to do it:
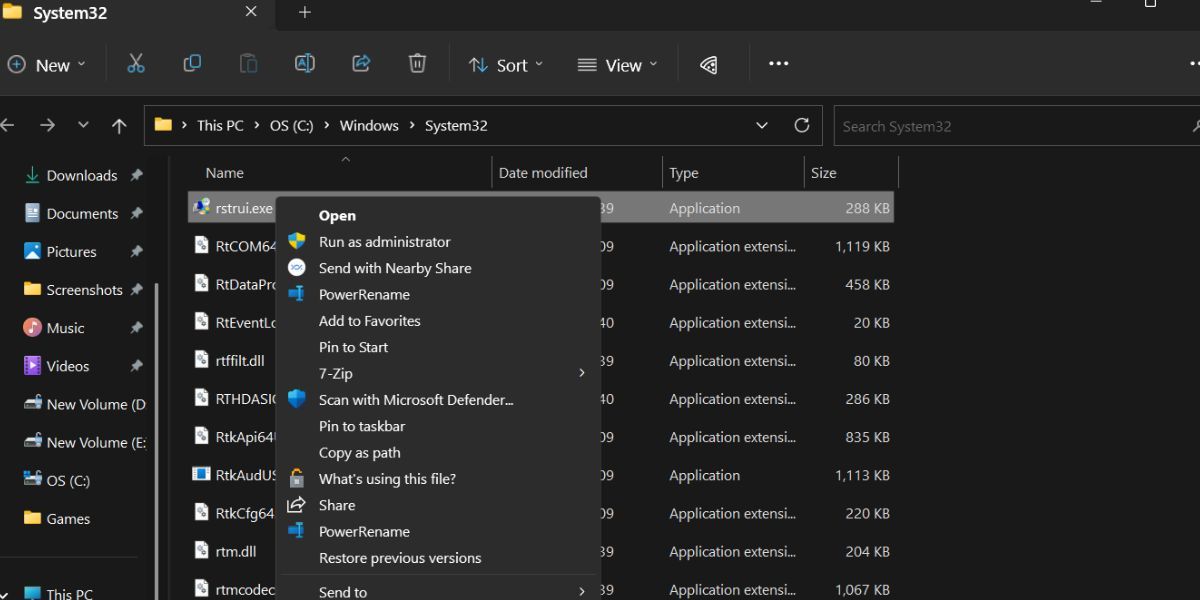
- Press the Win key, type rstrui, and click on the Open file location option in the right pane.
- Find the rstrui.exe app in the folder and right-click on it. Select the Show more options from the context menu.
- Click on the Pin to taskbar option.
- A System Restore icon will appear on the Taskbar. You can alter its position on the Taskbar by clicking and dragging it in either direction.
 SwifDoo PDF Perpetual (2-PC) Free upgrade. No monthly fees ever.
7. Using the Task Manager
If the Control Panel app won’t open on your Windows PC , you can use the Task Manager to launch the System Restore utility. Here’s how:
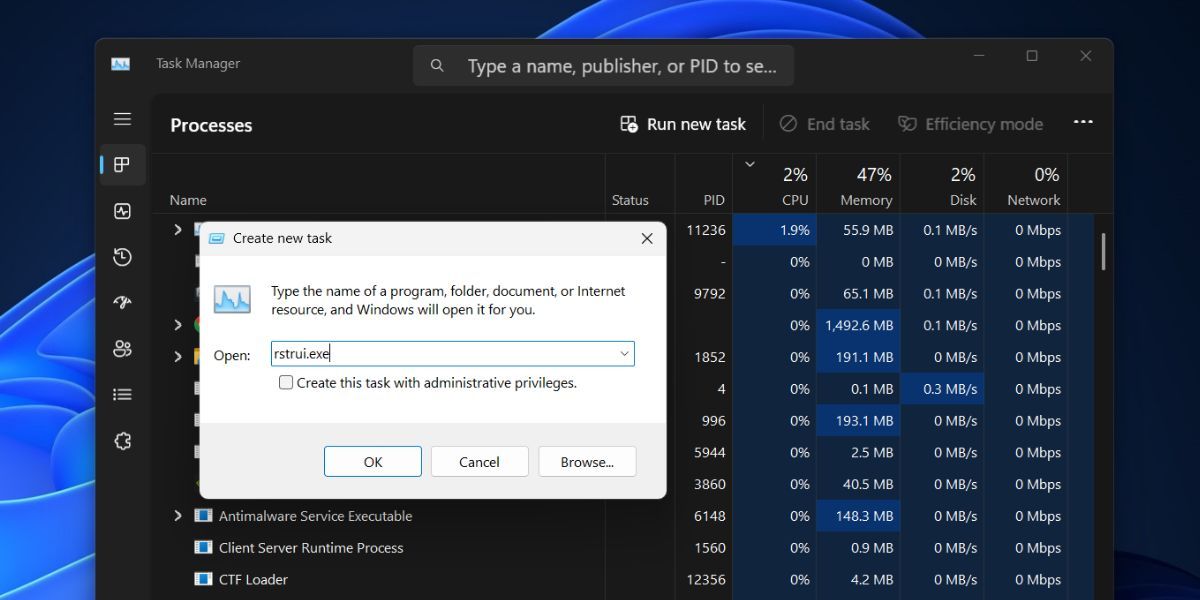
- Press the Ctrl + Shift + Esc keys at once to open the Task Manager .
- Click on the Run new task button.
- Type rstrui.exe and click on the OK button to launch the System Restore tool.
- Close the Task Manager window.

8. Using the File Explorer
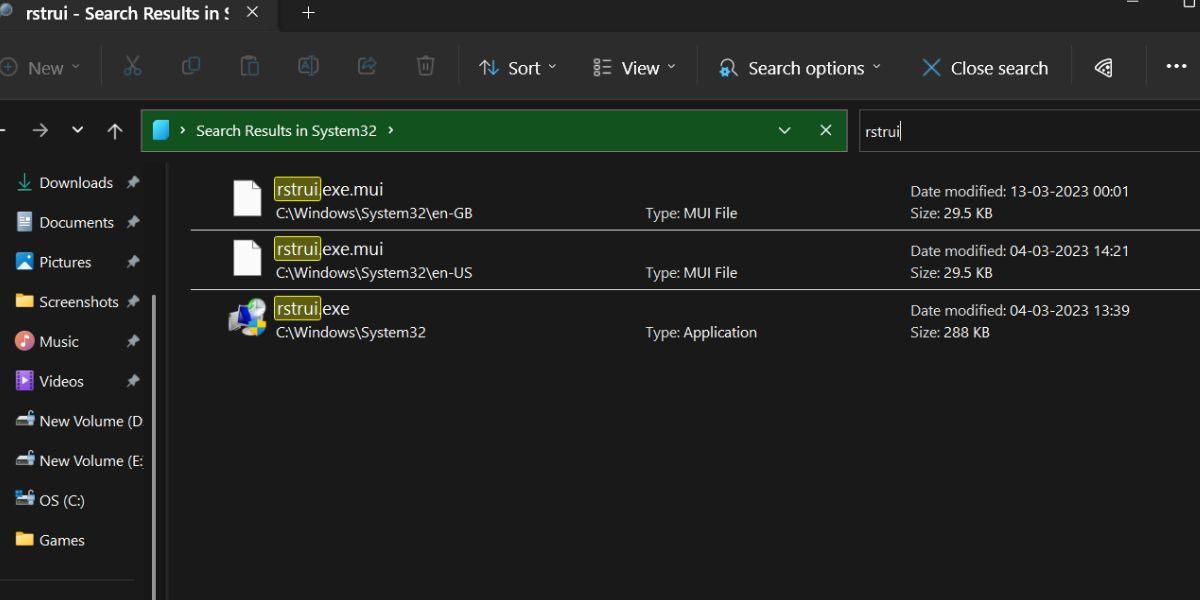
System Restore, like all other Windows tools and Control Panel applets, resides in the System32 folder. So, you can use the File Explorer to access the tool. Repeat the following steps:
- Press Win + E to open the File Explorer .
- Go to the top area and click on the address bar. Paste the following path and press the Enter key: C:\Windows\System32
- Click on the search bar and type rstrui and press the Enter key to search.
- Double-click on the rstrui.exe file to open the tool.

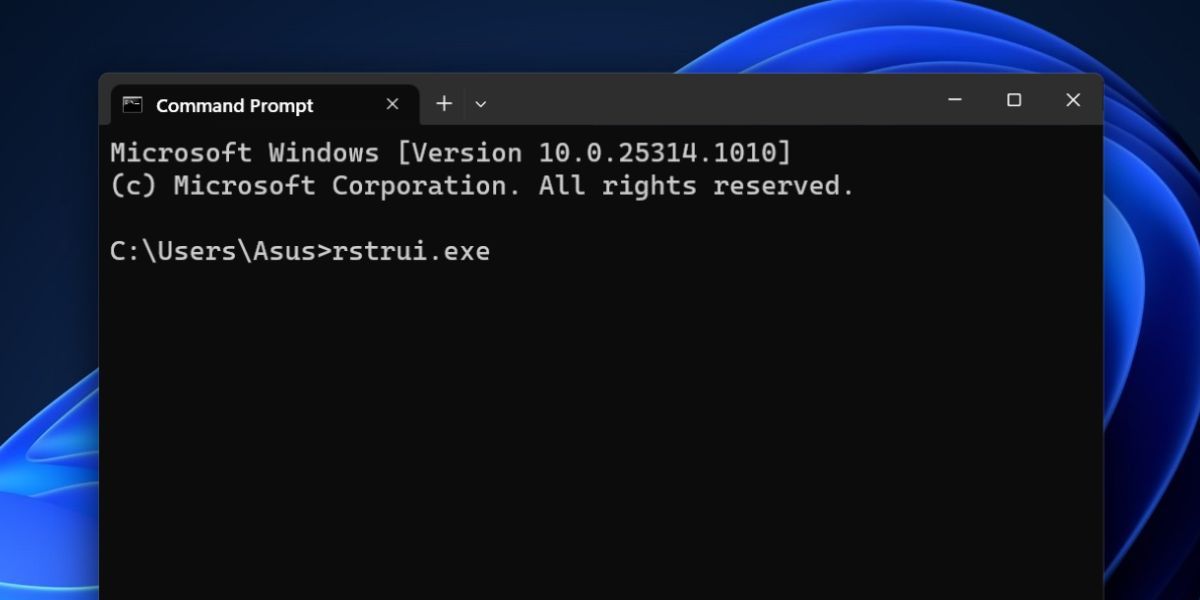
9. Using CMD or PowerShell
Terminal lovers don’t like the idea of jumping through menus to open a program. If you are one of them, here’s how you can open the System Restore utility in Windows 11 using Command Prompt or PowerShell:
- Press Win + R to open the Run dialog box. Type cmd or Powershell in the text box and press the Enter key.
- Now type the following command in the terminal and press the Enter key: rstrui.exe
- Alternatively, you can use the start-process cmdlet in PowerShell to launch the tool: start-process rstrui
- Close the Command Prompt or PowerShell window.
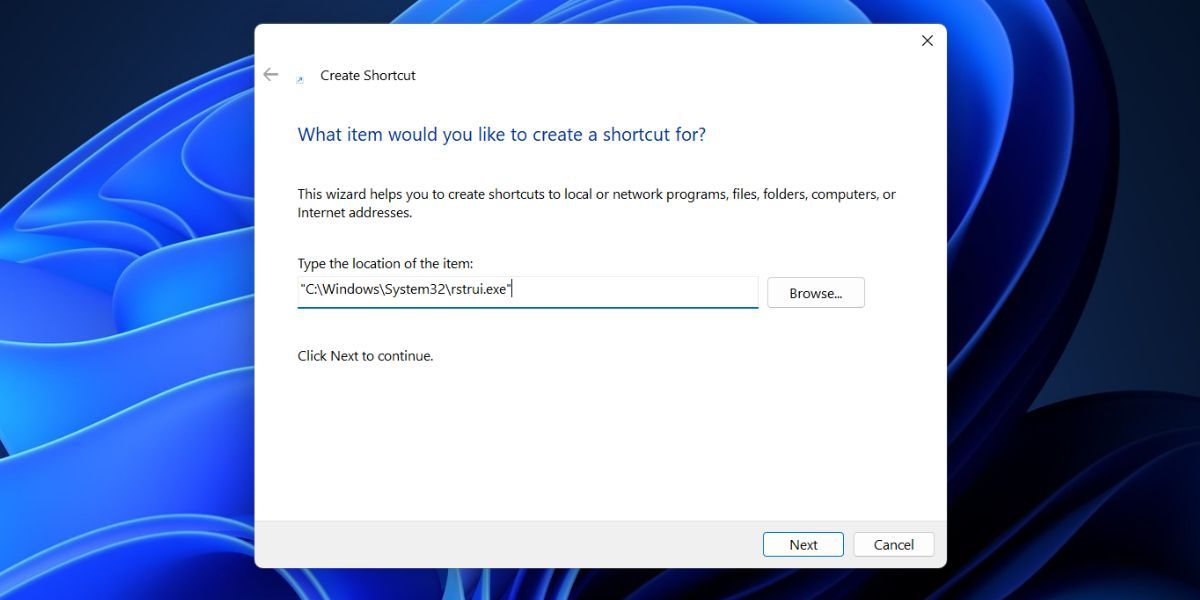
10. Using a Desktop Shortcut
A desktop shortcut is among the easiest methods to open frequently used apps and programs. You can create a manual Windows shortcut of the System Restore utility and then launch it whenever you like. Repeat the following steps:
- Press Win + D to switch to the desktop.
- Right-click on the empty area on the desktop with no icons.
- Select the New > Shortcut option from the context menu.
- Windows will create a shortcut and open its customization window.
- Click on the text box and paste the following path: “C:\Windows\System32\rstrui.exe”
- Click on the Next button.
- Now, save the shortcut with the name System Restore and click on the Finish button.
- Double-click on the newly created shortcut to launch System Restore.
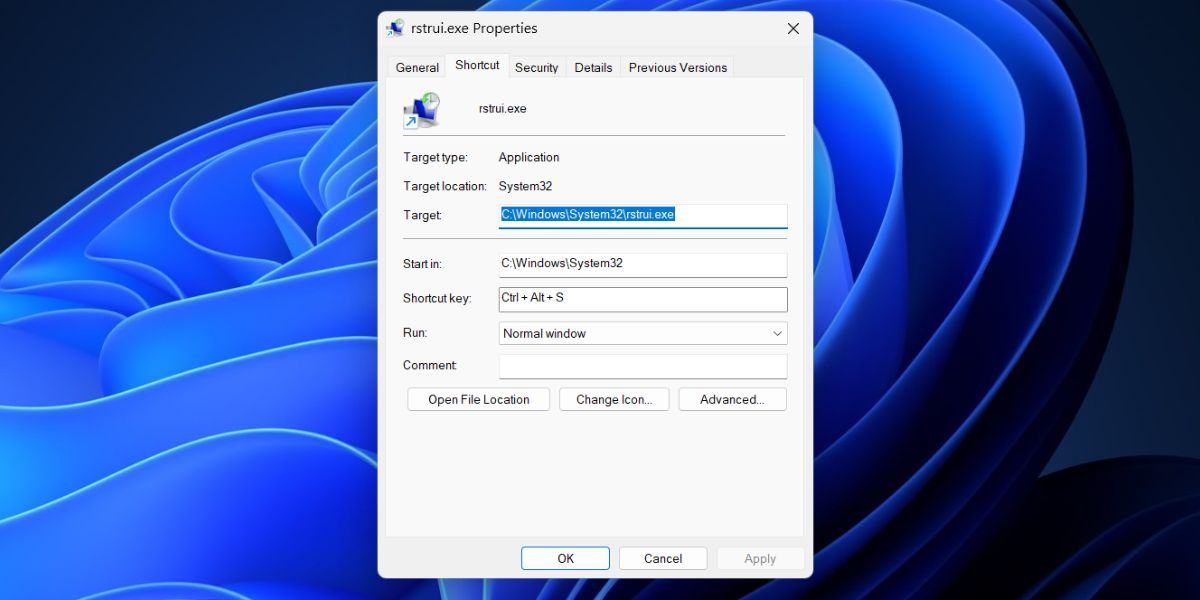
11. Using a Keyboard Shortcut
The last method on our list is mapping a keyboard key combination to the newly created shortcut. So, you can press the mapped keys and launch the tool whenever you like. Repeat the following steps;
- Press Win + D to switch to the desktop.
- Find the newly created system restore shortcut and right-click on it. Select the Properties option from the context menu.
- Go to the Shortcut key field. You can map a combination beginning with Ctrl + Alt + keys. Others are reserved for system shortcuts and you cannot use them.
- Press the Ctrl + Alt + S keys at once to assign the combination. You can use any other key in place of the “S” key.
- Click on the Apply button and then click on the OK button.
- Switch to the desktop or any other window and press the assigned key combination. System Restore utility will pop up.
Access System Restore Quickly
System Restore is an essential aspect that is a lifesaver when you install apps and modify system settings and want to go back. Now, you know multiple methods to launch the tool. The keyboard shortcut key combination is our favorite because you don’t need to interact with anything on the screen.
- Title: Mastery Over System Restore: A Windows 11 Perspective
- Author: David
- Created at : 2024-08-15 23:53:44
- Updated at : 2024-08-16 23:53:44
- Link: https://win11.techidaily.com/mastery-over-system-restore-a-windows-11-perspective/
- License: This work is licensed under CC BY-NC-SA 4.0.