
How to Tackle Windows 'Admin-Imposed' Setup Barriers
How to Tackle Windows ‘Admin-Imposed’ Setup Barriers
Installing software is usually a smooth process on Windows 10 and 11 PCs. However, sometimes installation hiccups can arise. For instance, some users have reported this error message appears when they try to install Windows software packages, “The system administrator has set policies to prevent this installation.”
Users cannot install whatever programs for which that system administrator error arises. The error message suggests this issue is due to some kind of enforced admin settings. You can fix the “system administrator has set policies” error by applying the resolutions below.
1. Run the Software’s Setup File as An Administrator
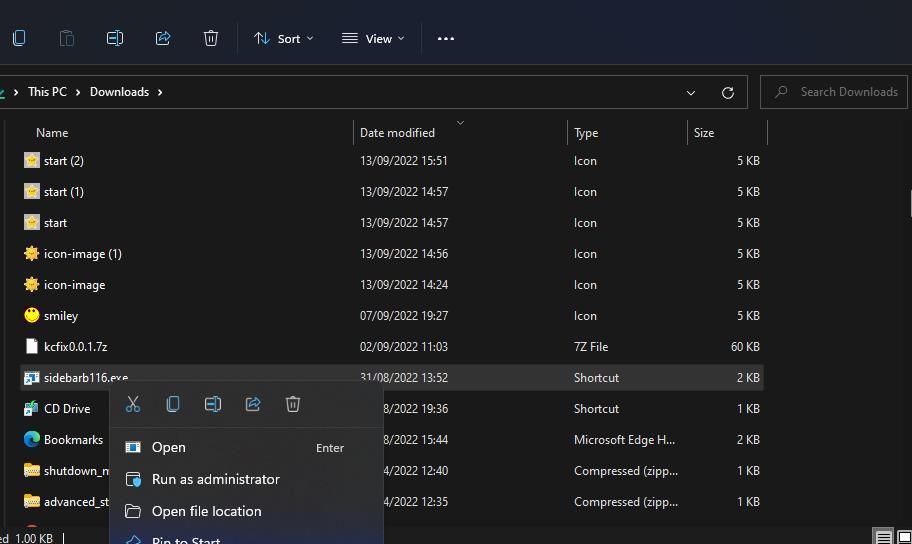
First, start with the easiest of potential solutions. They don’t get much simpler than running the affected software’s installation file with administrative rights. Right-click the setup file for the software you can’t install and select Run as administrator on its context menu.
2. Enable the Built-in Windows Admin Account
It has been confirmed by some users that activating and logging into the built-in (hidden) Windows admin account can fix the “system administrator has set policies” error. It’s recommended to try that even if your current user account is an administrative one. You can do that by following the instructions for the Command Prompt method in our guide to enabling the built-in Windows administrator account .
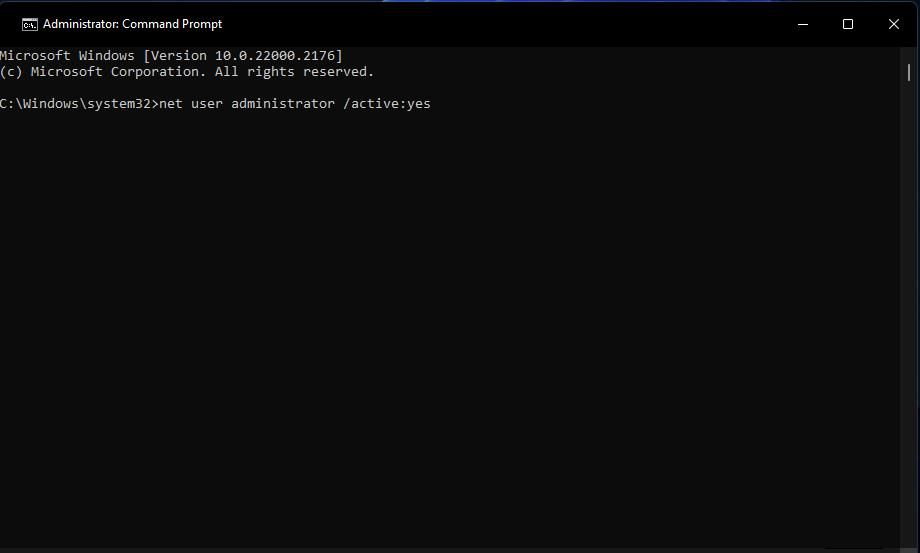

When you’ve activated the account, restart your Windows PC. Then sign in to the newly activated admin account and try installing the software you need from there. Disable the built-in administrator account when you’re done with it.

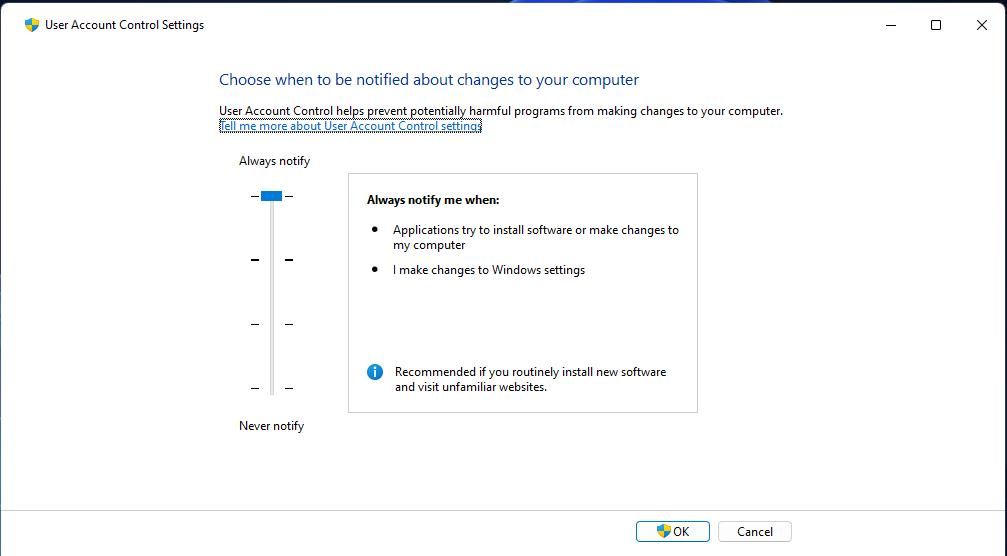
3. Turn Off UAC (User Account Control)
User Account Control is a security screen that can hinder the installation of programs when set at its highest setting. To ensure UAC isn’t causing any issues with installing software, temporarily turn off User Account Control by selecting its lowest Never notify option. You can apply this potential fix by disabling User Account Control with one of the methods in our guide to turning off UAC .
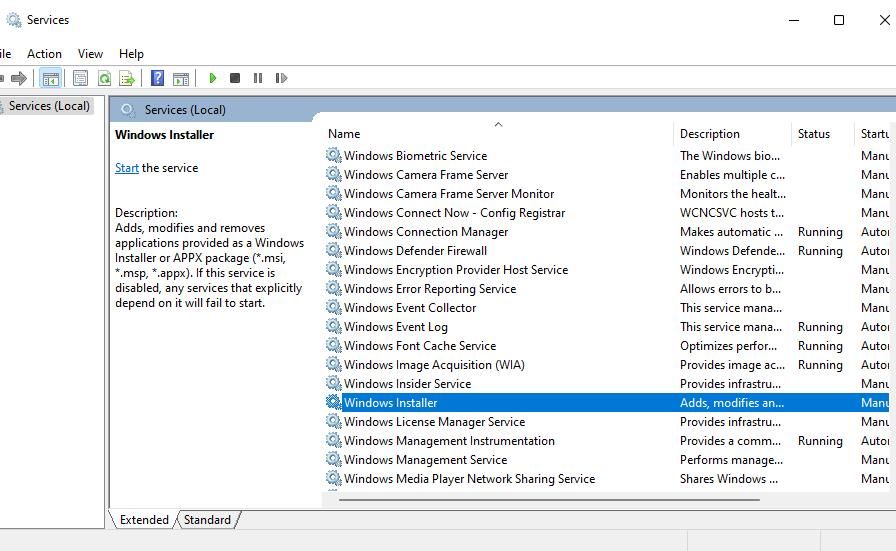
Windows Installer is a service that needs to be running for users to install software with MSI packages. So, check that service is enabled and running. Even if it is, restarting that service might also resolve the “system administrator has set policies” error. This is how you can run or restart Windows Installer:
- To access the file finder tool, right-click Start and select the Search shortcut.
- Next, input a services search phrase.
- Click the Services app found by the search tool.
- Double-click Windows Installer to see that service’s property settings.
- If the service is stopped, click its Start button. Or select Stop and Start to restart Windows Installer.
- Select Apply > OK to save the Windows Installer service settings.

5. Change Group Policy Settings
Lots of users have fixed the “system administrator has set policies” error by setting the Windows Installer policy to never disable Windows Installer. However, you will need to access Local Group Policy Editor, available in the Windows Pro and Enterprise editions, to apply this potential fix. If you can utilize that tool, change the Turn Off Windows Installer policy like this:
- Press Win + R, input the gpedit.msc command, and click OK to openLocal Group Policy Editor .
- Double-click on Computer Configuration and Administrative Templates inside Group Policy’s left sidebar.
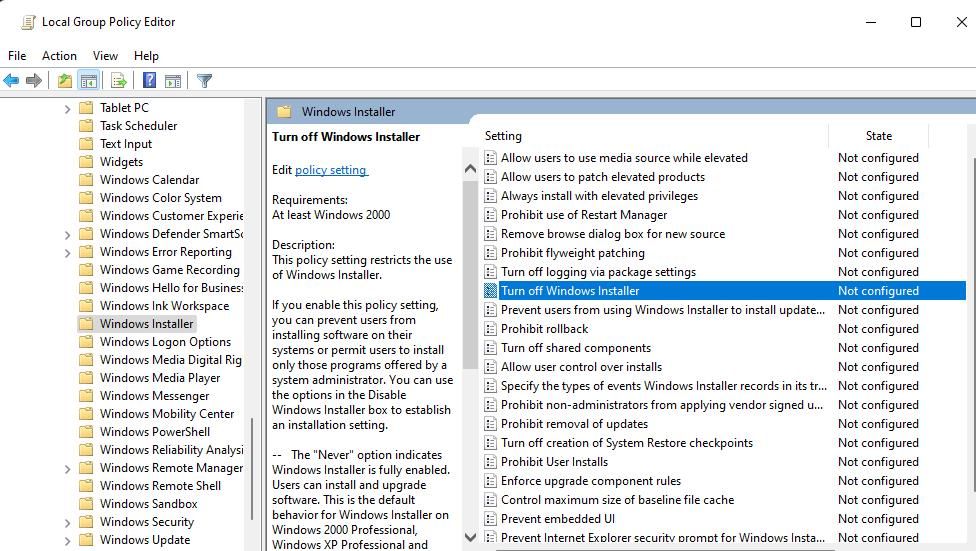
- Then go to Windows Components > Windows Installer to access policy settings.
- Double-click the Turn off Windows Installer policy setting.
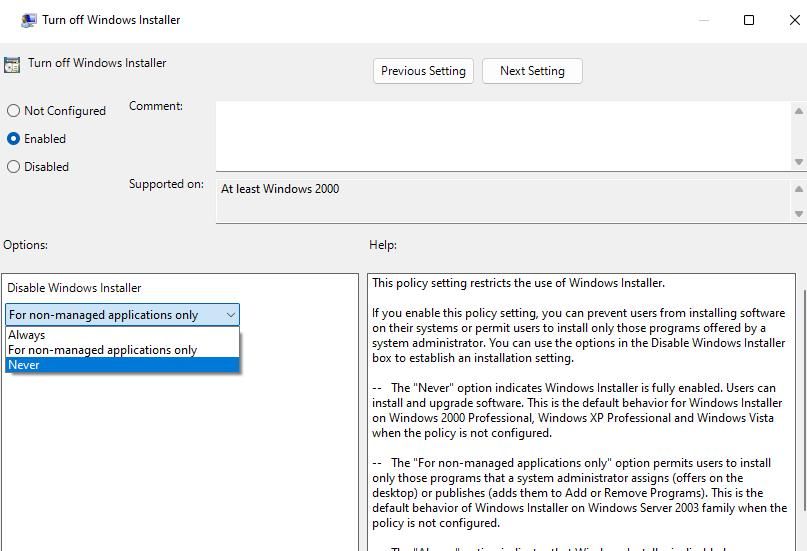
- Select Enabled if that option isn’t already set.
- Then click Never on the Disable Windows Installer drop-down menu.
- Select the policy window’s Apply and OK options.
On top of that, delete software restriction policies. These are the steps for deleting software restriction policies:
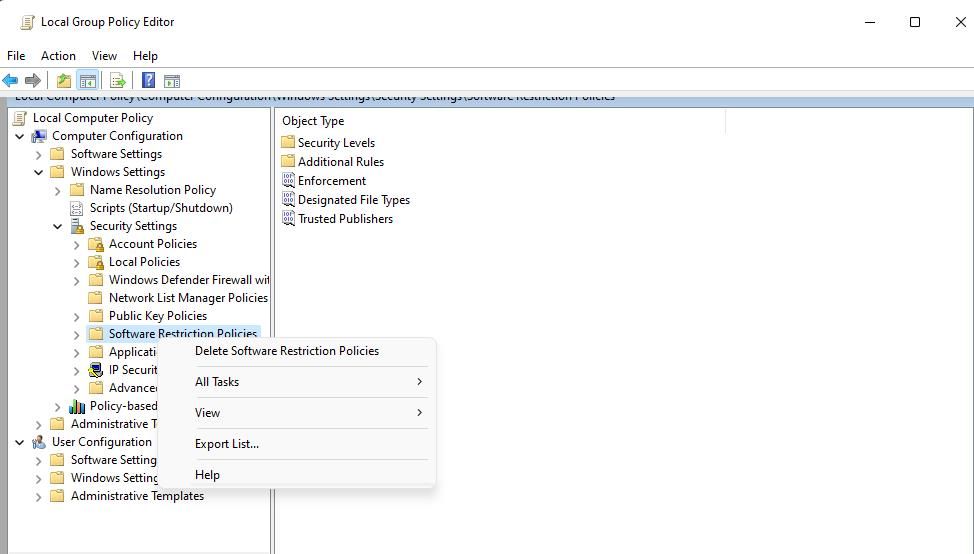
- Double-click Windows Settings > Security Settings in Group Policy’s sidebar.
- Right-click Software Restriction Policies and select Delete Software Restriction Policies if that option is available.
- Click Yes to confirm the deletion of software restriction policies.
Some users also say they went even further and created a new software restriction policy in Group Policy Editor to resolve the “system administrator has set policies” error. You can try doing that after selecting to delete software restriction policies. Create a new software restriction policy like this:
- Click Software Restriction Policies with the right mouse button to select New Software Restriction Policies.
WinUtilities Pro
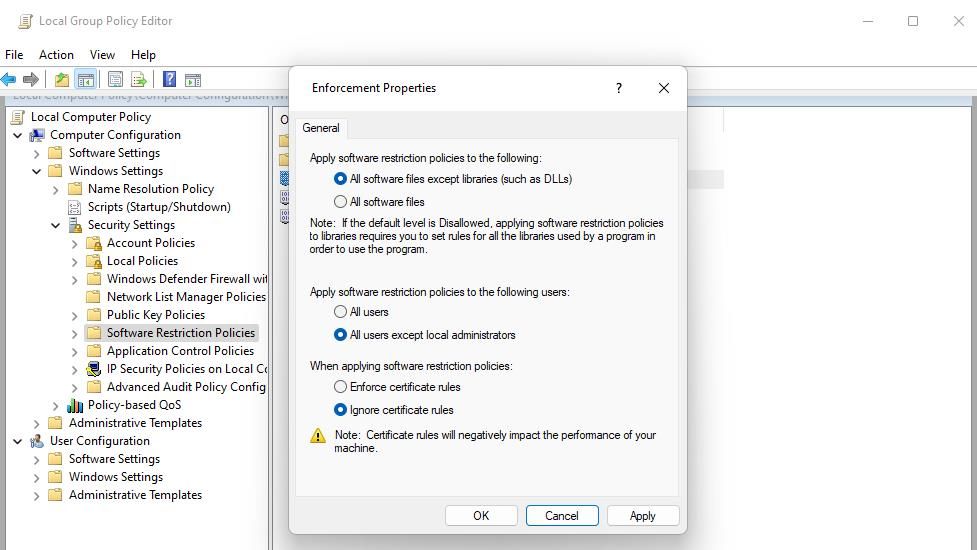
- Double-click on Enforcement.
- Select the All users except local administrators radio button.
- Click the Enforcement Properties window’s Apply and OK options.
- Run Command Prompt with admin rights via the search utility.
- Enter and execute this command for updating the policy:
gpupdate /force - Exit the Command Prompt app and restart Windows.

 WinUtilities Pro
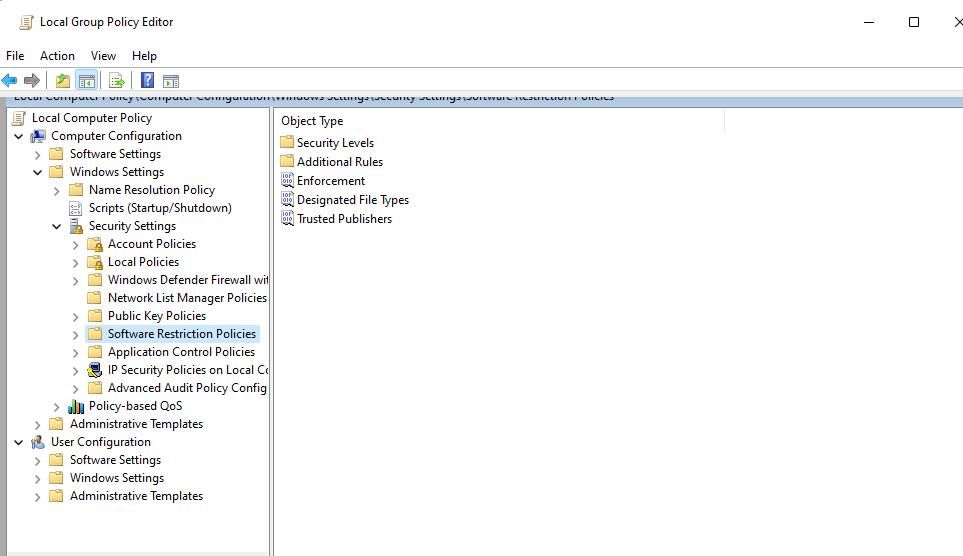

6. Edit the Installer Registry Key
Editing an Installer registry key is a widely confirmed fix for the “system administrator has set policies” error. This registry tweak involves setting a DisableMSI DWORD value. You may also need to create a new Installer key from scratch if it’s not already there. These are the steps for applying this registry solution:
Click on the taskbar magnifying glass or Search box.
Type in a regedit search term to locate the Registry Editor app.
Select Registry Editor to start that app.
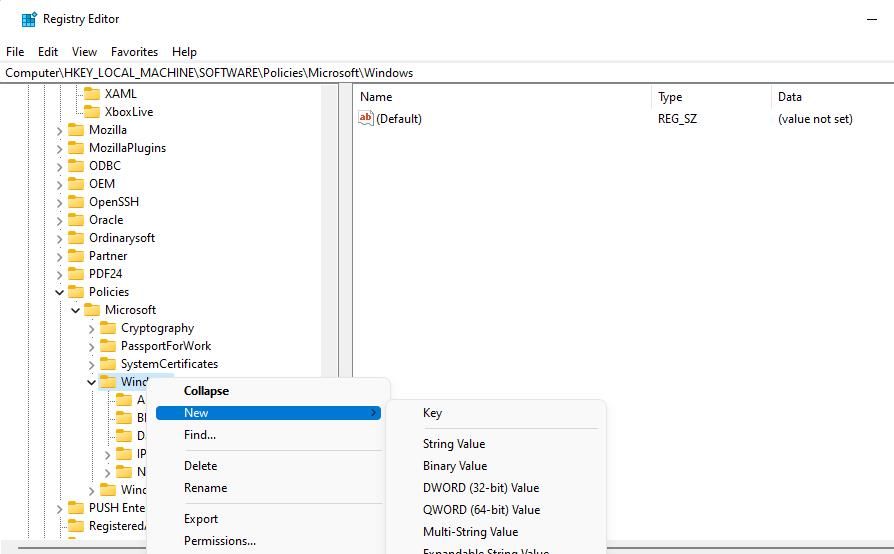
Input this path inside the Registry Editor address bar:
HKEY_LOCAL_MACHINE\Software\Policies\Microsoft\Windows\If you can’t see an Installer subkey, right-click the Windows key and select New > Key. Users who can select an existing Installer subkey within the Windows key can skip through to step seven.
Enter Installer for the new key’s name.
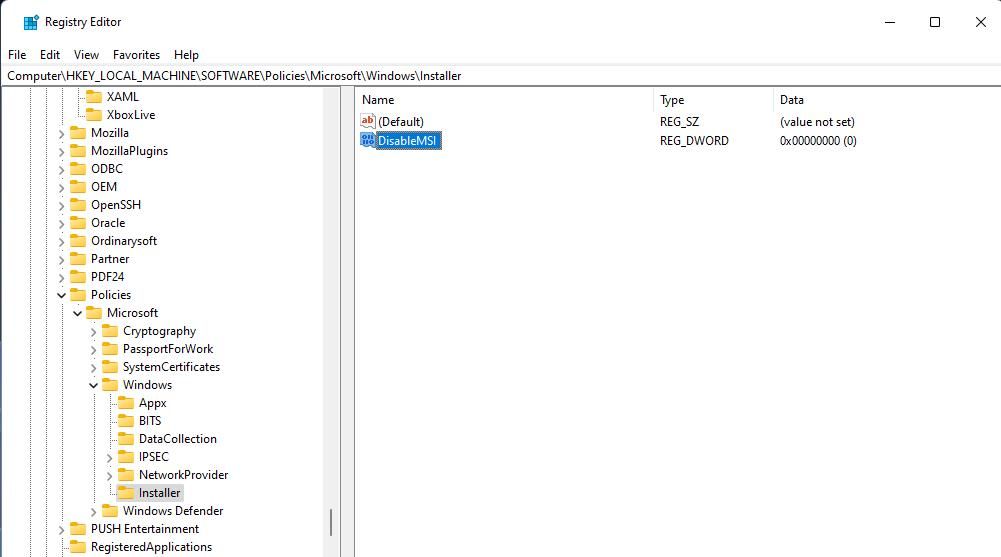
Right-click the Installer key and select New > DWORD (32-bit) Value.
Enter DisableMSI to be the title of the new DWORD.
Double-click DisableMSI inside the Installer key.
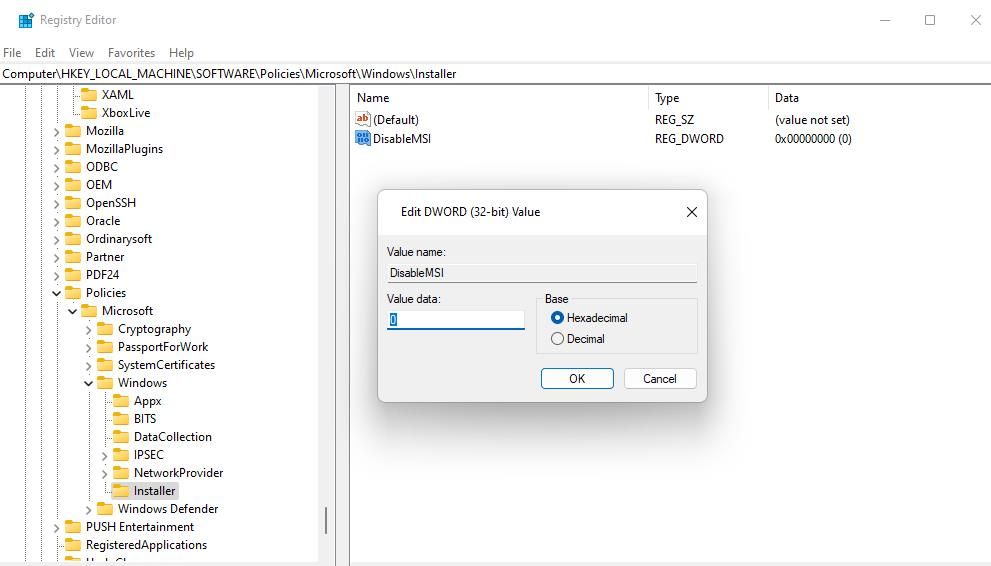
Make sure the DisableMSI value is set to 0.
Select OK to set the DisableMSI value.
Close Registry Editor and restart your PC.


Get Your Windows Software Installed
The “system administrator has set policies” error is an old Windows issue many users have fixed with the troubleshooting methods covered in this guide. So, those are tried and tested resolutions that will likely fix the “system administrator has set policies” error on your PC. Then you can get all the Windows 10 and 11 software you need installed.
Users cannot install whatever programs for which that system administrator error arises. The error message suggests this issue is due to some kind of enforced admin settings. You can fix the “system administrator has set policies” error by applying the resolutions below.
- Title: How to Tackle Windows 'Admin-Imposed' Setup Barriers
- Author: David
- Created at : 2024-08-16 00:26:14
- Updated at : 2024-08-17 00:26:14
- Link: https://win11.techidaily.com/how-to-tackle-windows-admin-imposed-setup-barriers/
- License: This work is licensed under CC BY-NC-SA 4.0.