How to Fix Windows Update Error 0xCA00A009

How to Fix Windows Update Error 0xCA00A009
The Windows Update Service is a built-in application responsible for managing the installation of Windows updates. Microsoft uses this service to release Windows updates and security patches. However, in some cases, Windows Updates may not work as they should and instead return an error message with a code, and one such error code is 0xCA00A009.
You may encounter this problem if you have upgraded Windows to the latest version. This article will guide you through some troubleshooting steps for getting Windows updates working again.
Disclaimer: This post includes affiliate links
If you click on a link and make a purchase, I may receive a commission at no extra cost to you.
What Causes Windows Update Error 0xCA00A009
There are many factors that cause Windows Update errors, but the most common are corrupted or faulty system files. This problem can also occur if you upgrade from an older version of Windows 11.
Other possible causes that may result in this error code are listed below.
- Corrupted system files or data in the SoftwareDistribution folder could result in this problem.
- If you upgrade your OS from an older Windows version to Windows 11.
- A startup program or service that conflicts with Windows Update may also cause it.
Let’s now move on to solutions.
1. Restart Your Computer
If you’re having problems updating Windows, and you’re getting the error 0xCA00A009, it’s likely that there is a file that is damaged or missing that Windows Update requires to function.
In this case, all you have to do is restart your computer and then update Windows again. It may sound simple, but sometimes it’s all you need.
Here are the steps to take:
- Click theStart button, then click the power icon.
- Then clickRestart .
Your computer will restart and hopefully fix the 0xCA00A009 error.
2. Run Windows Update Troubleshooter
The next most basic solution is to run the Windows Update Troubleshooter. This is an excellent tool that you can use to fix some simple issues with Windows Update. These steps will show you how to use it.
- PressWin + X to open the Quick Access Menu.
- SelectSettings from the menu list.
- ClickSystem from the left pane of the Settings menu.
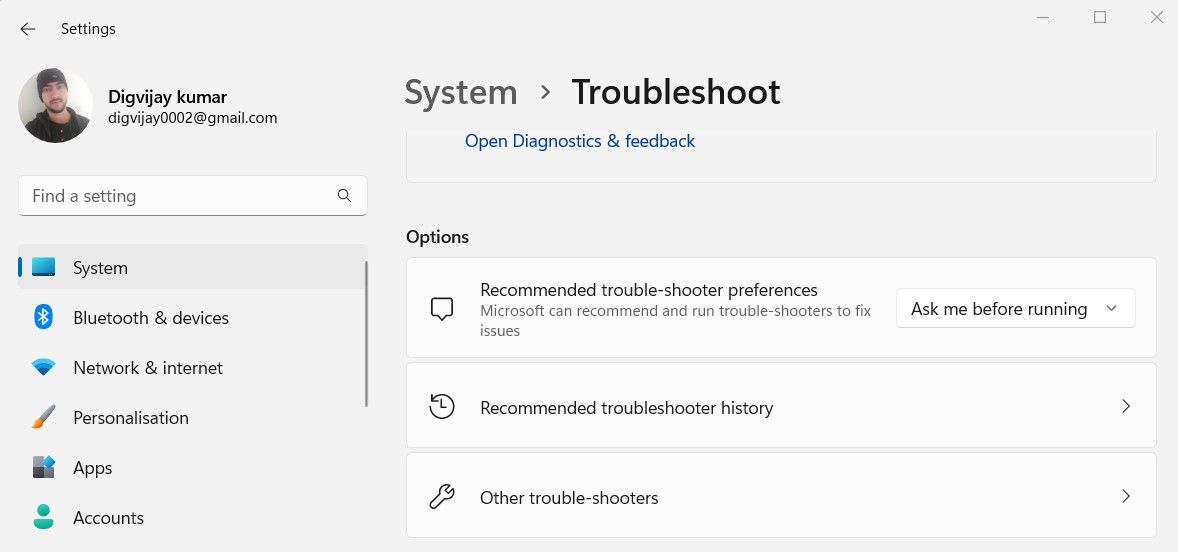
- Next, clickTroubleshoot >Other troubleshooters .

- Click theRun button next toWindows Update .
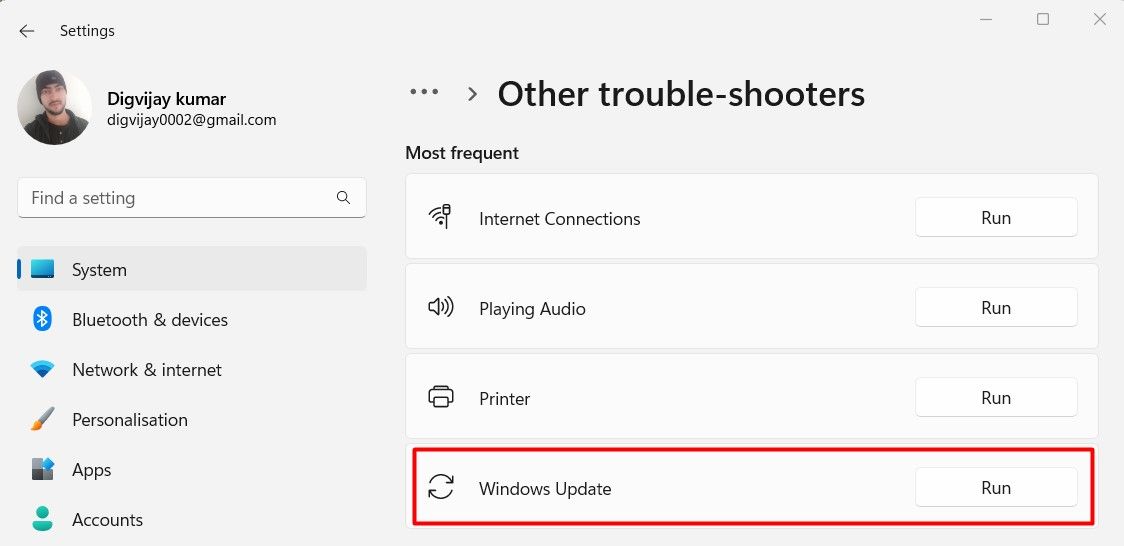
If the process detects any problems, it will try to fix them automatically. Once you have completed the steps above, restart your computer, then update Windows again to see if it fixes the problem.
3. Run SFC and DISM Scan
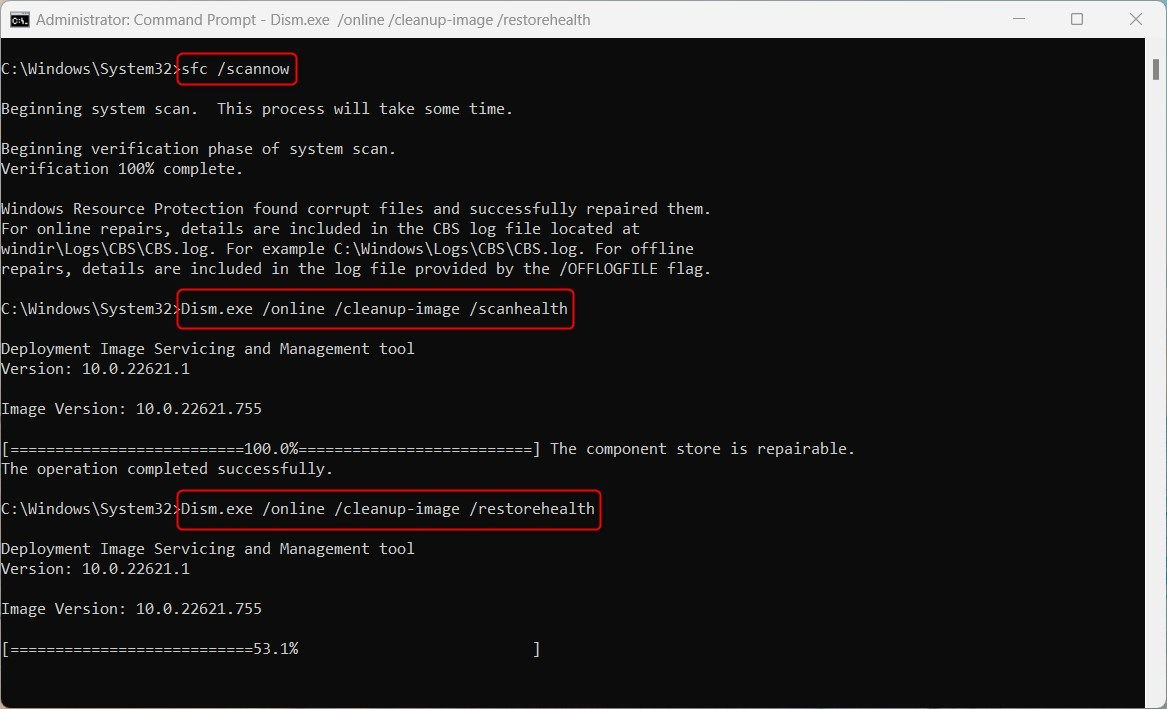
If you’re still seeing the error, it might be because of a corrupt system file. Try running the System File Checker tool to fix the problem. Here is a quick guide on how to do it:
- Run Command Prompt as an administrator. To do this, search for “Command Prompt” and selectRun as administrator .
- Type the below command line and press Enter:
sfc /scannow - The process will take a while to complete. Once it has completed the process, restart your computer and try updating Windows again.

If it still fails to update, run DISM to restore the system files and repair any corrupted images. Here’s how:
- Open the Command Prompt.
- Copy and paste the following command and press Enter:
Dism.exe /online /cleanup-image /scanhealth Dism.exe /online /cleanup-image /restorehealth
You may need to wait for a while for the process to be completed. Restart your computer after running the DISM command and check if the error has been fixed.
4. Update Group Policy
In case you have upgraded to Windows 11 from an older version of Windows, you may need to update your group policy. Here are the steps to follow:
- PressWin + X and selectRun from the menu list.
- Type “cmd” inside the text field and pressCtrl + Shift + Enter .
- When UAC appears on the screen, clickYes to continue.

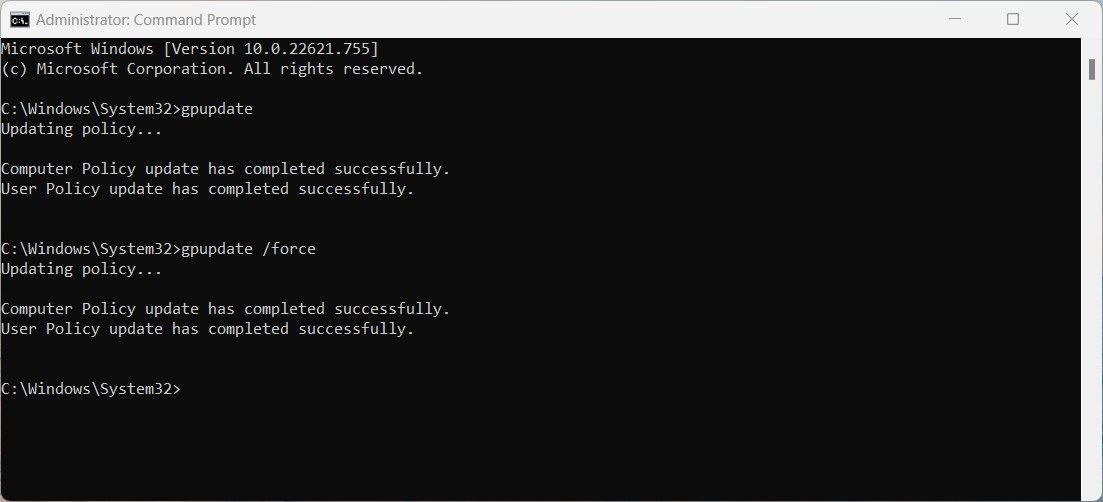
- Now execute each of the following commands one by one:
gpupdate gpupdate /force
When you are done with the above commands, close the Command Prompt window and update Windows again to see if the problem has been resolved.
5. Clear the SoftwareDistribution Folder
Software Distribution stores temporary files that may be required to run Windows Updates. And when these files become corrupted, these types of errors may occur. In this case, you can clear the contents of the folder and see if it works.
To clear the SoftwareDistribution folder, follow these steps:
- Open Command Prompt with Administrative Privileges.
- Type the following commands in the Command Prompt and hit Enter after each one:
net stop wuauserv net stop bits net stop cryptSvc net stop msiserver - After executing the above commands,open Windows File Explorer and browse to “C:\Windows\SoftwareDistribution\.”
- Inside the SoftwareDistribution folder, pressCtrl + A to select all the contents and tap Delete on your keyboard.
- If you are asked to grant permission via a pop-up menu, click onContinue to proceed.
- When you have deleted the contents of the SoftwareDistribution folder, you will need to restart any services that were stopped earlier. To accomplish this, open the elevated command prompt again and run the following command:
net start wuauserv net start bits net start cryptSvc net start msiserver - Now type exit and press Enter to close the Command Prompt window.
When you have completed all of the above steps, restart your computer and try updating Windows again after you’ve completed all the steps.
6. Perform a Clean Boot
This problem may also occur when a startup program or service conflicts with Windows Update. In this case, you should perform a clean boot as explained below:
- Open the Run dialog box.
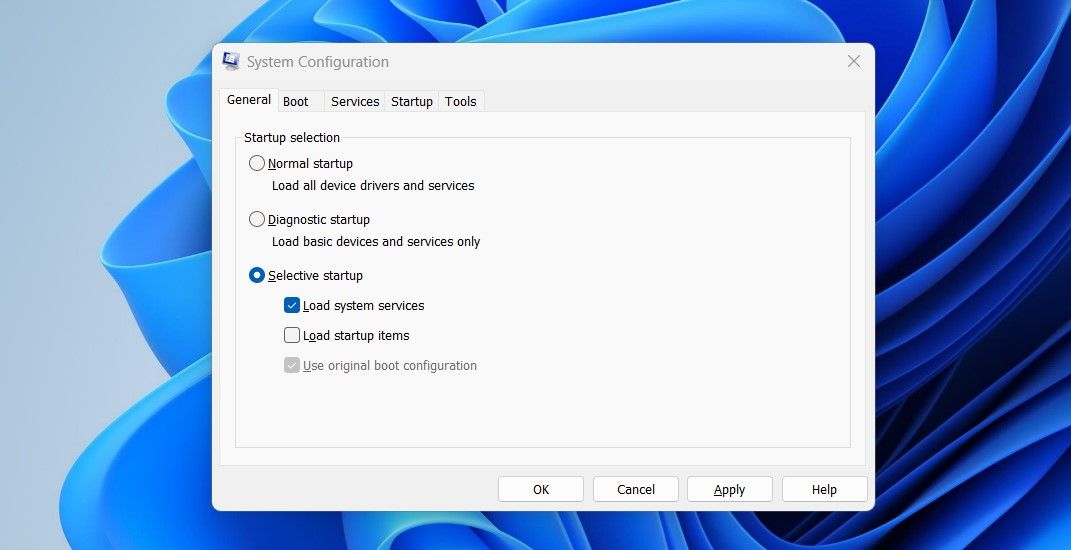
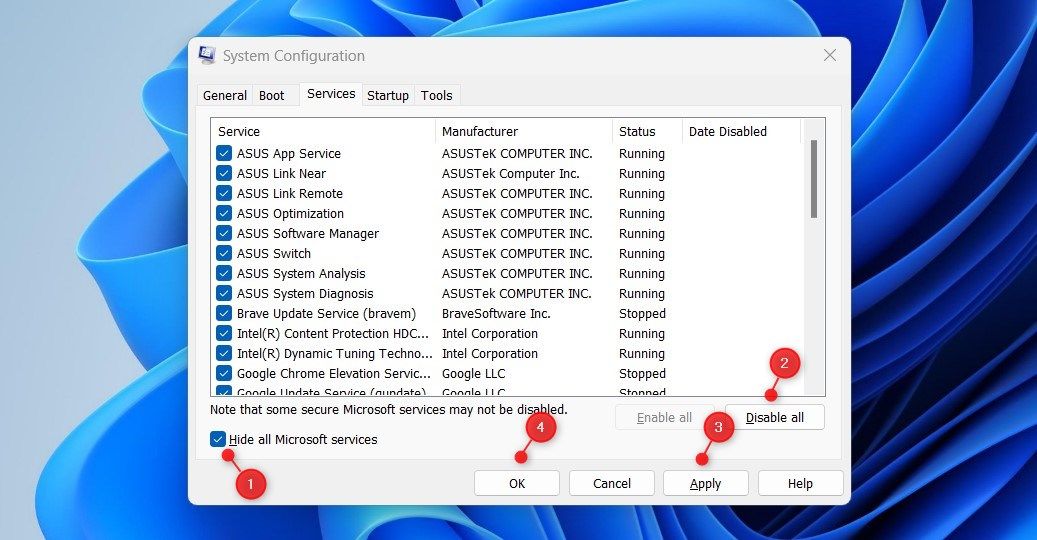
- Type “msconfig” in the text field and clickOK to open the System Configuration window.
- In the System Configuration window, select theGeneral tab.
- Check the box next toSelective startup .
- Uncheck theLoad startup items box.

- Switch to theServices tab now.
SelectHide all Microsoft services , then clickDisable all .

ClickApply to save the changes.
Go to theStartup tab and selectOpen Task Manager . This will take you to the Startup tab in Task Manager.
Right-click each service on theStartup tab, and disable them.
ClickOK when you’re done editing System Configuration.
Be sure to restart your computer after completing the above steps and follow up with updating Windows. If you find that this method solves your problem, you must have disabled the wrong service. To figure out which service is causing the error, enable them one by one.
It’s Now Easy to Fix Windows Update’s Error 0x80070057
Hopefully, this guide will help you fix Windows Update Error 0xCA00A009. In case none of these solutions work for you, you may need to reset your Windows computer.
Also read:
- [New] 2024 Approved From Amateur Vlogs to Professional GoPro Cinematography Excellence
- [New] In 2024, How to Post YouTube Videos as Instagram Stories
- [New] Utilizing Speech Recognition for Efficient Documentation and Transcription in MS Word for 2024
- [Updated] How to Post a Video From YouTube on Instagram
- 2024 Approved Achieving Accuracy and Artistry in Altered Image Tones
- Breaking Through Torrent Lag on Your PC with qBittorrent
- Brightening Up Your Cursor: Windows Tips & Tricks
- Bypass Chrome’s Glitch: Enabling Flawless Filesync on Windows
- Bypassing Blurriness: 9 Ways to Fine-Tune Your Windows Display
- Cautionary Tales: The Perils of Affordable Windows Activation Codes
- Ceasing Edge Symbols' Regular Occurrence
- Clear and Concise Views: Mastering Compact Explorer Layout
- Clearing Obstacles to the Microsoft Store on Windows 11
- Clearing Up Windows Bluetooth Connectivity Issues
- Efficiënt Online Konvertor: Hoe Je FLAC-Strips Vanaf Naar MP3's Voort Te Zetten
- EmEditor Text Editor Toolbar Features: Enhancing Your Editing Experience
- Get the Newest Brother HL-L2350DW Driver for Your Printer - Free Download Now!
- In 2024, Master the Art of Professional Webcam Filming
- Mastering Conversion: Effective Ways to Transform RM RMVB Videos When HandBrake Falls Short
- Title: How to Fix Windows Update Error 0xCA00A009
- Author: David
- Created at : 2024-11-26 22:37:57
- Updated at : 2024-11-28 03:54:23
- Link: https://win11.techidaily.com/how-to-fix-windows-update-error-0xca00a009/
- License: This work is licensed under CC BY-NC-SA 4.0.
