How to Disable the Lock Screen on Windows 11

How to Disable the Lock Screen on Windows 11
Windows 11 has a gorgeous lock screen that serves as a gateway to the system. After that, you encounter the logon screen, which requires a password/PIN/fingerprint. But not everyone needs a lock screen and beautiful wallpaper every time they boot up their system.
Call it a personal observation, but the lock screen adds an extra step to the login process. So, if you want to remove the lock screen and go directly to the logon screen in Windows 11, this post will offer many methods to do it.
Disclaimer: This post includes affiliate links
If you click on a link and make a purchase, I may receive a commission at no extra cost to you.
Why Consider Disabling Your Lock Screen?
The Windows lock screen is the first barrier to getting to the desktop. It displays a background image, date and time, and app notifications. But if you don’t want to see any of those things, then disabling it makes sense. After removing the lock screen, you can go straight to the desktop after entering your PIN/Password. You can also set up a lock screen-free computer for a public computer.
Disabling the lock screen doesn’t remove the logon screen. You still have to input the PIN/Password to enter the system. You can also remove the PIN/Password requirement on the logon screen to go to the desktop faster (and if privacy isn’t a concern).
Now, you are aware of the pros and cons of disabling the lock screen. Here are the four easy methods to disable the lock screen on Windows 11.
1. Use the Group Policy Editor
The Group Policy Editor is an essential Windows administration tool. You can adjust password requirements, startup programs, and other features. Note that GPE is only available for the Professional, Ultimate, and Enterprise Windows versions. You can refer to our completeGroup Policy Editor guide .
Here’s how to disable the lock screen using Group Policy:
- PressWin + R to launch theRun command box on your system.
- Now, typegpedit.msc and hit theEnter key to open theGroup Policy Editor .
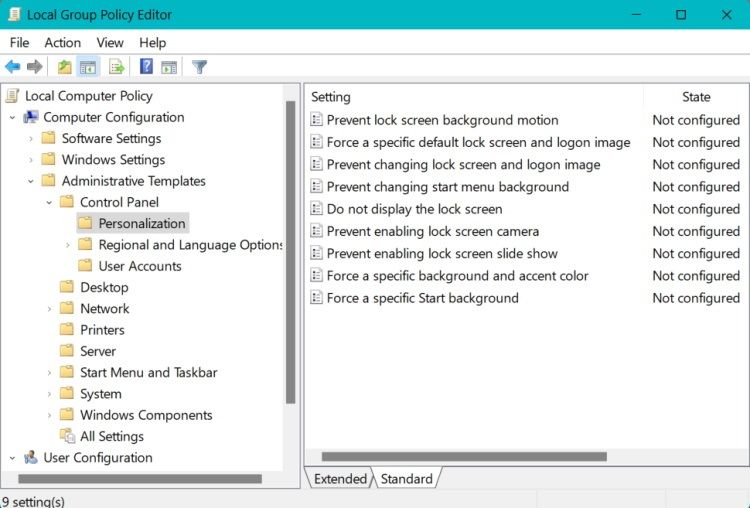
- Then go to the left-hand side panel. Navigate to Computer Configuration > Administrative Templates > Control Panel > Personalization .
- Double-click on theDo not display the lock screen option in the Personalization options.

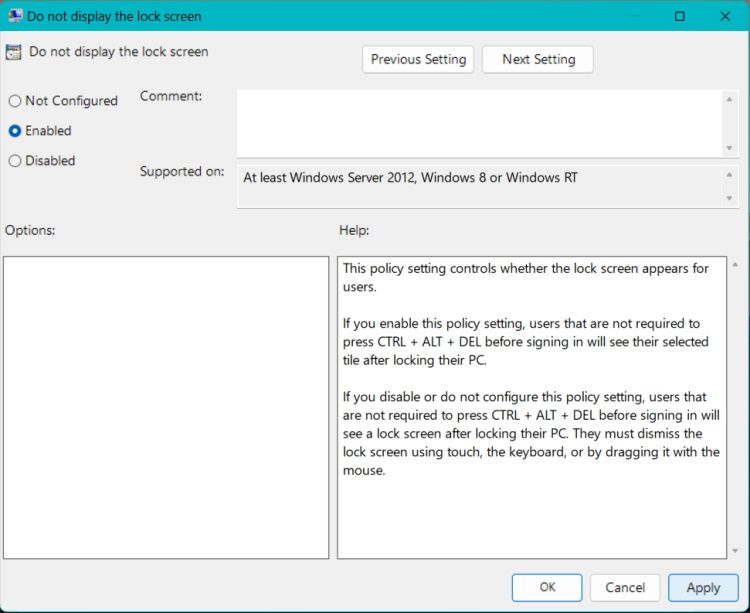
- A new window with detailed settings for the option will open. Theenabled option will be active by default which means that the lock screen is active.
- Click on theDisabled Radio button to disable the lock screen on your system.

- Now, click on theApply button and click theOK button to finalize the changes.
- You need to restart your system. You will notice that there is no lock screen, and you enter the login screen straight away.
2. Use the Registry Editor
You can also disable the lock screen on Windows by tweaking the registry settings. But make sure to export a copy of your registry for safety purposes. It will help you revert to the previous registry settings in case of corruption. Check our detailed guide onhow to perform a registry backup for more info.
Here’s how to remove the lock screen through the registry:
- Press theWin key + R to launch theRun command box. Now, typeregedit in the text input box and hit theEnter key to launch Registry Editor.
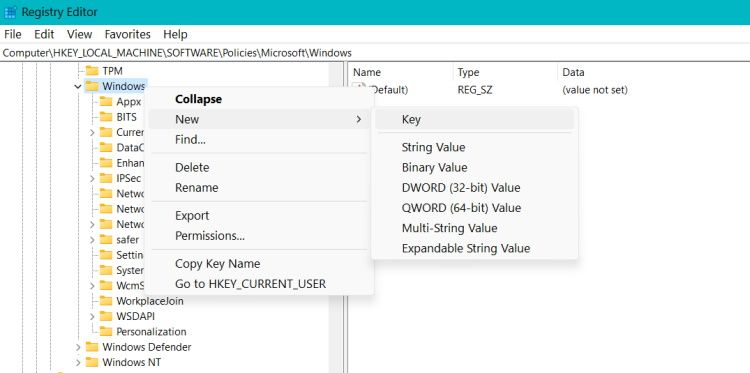
- Now, paste the following path in the text input area and then hit the enter key: Computer\HKEY_LOCAL_MACHINE\SOFTWARE\Policies\Microsoft\Windows
- Navigate to the left-hand panel and right-click on theWindows key. Then selectNew > Key and name itPersonalization .

- Right-click on Personalization and selectNew > DWORD (32-bit) Value . Name it asNoLockScreen .
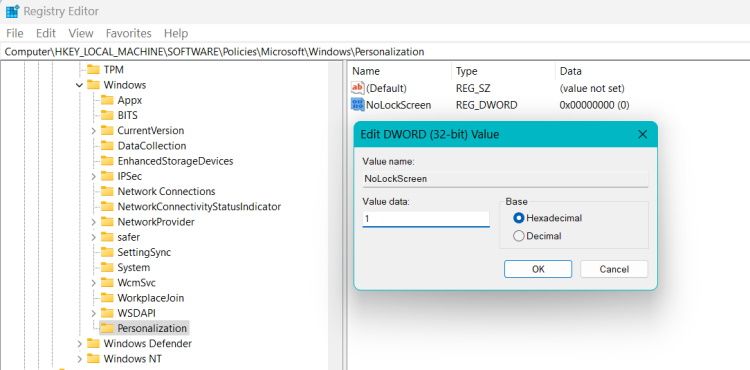
- Double-click on theNoLockScreen value and set theValue Data to1 . Keep the base hexadecimal.
- Click onOK to apply changes andRestart your system. You won’t see the lock screen when your computer boots up.

- To bring back the lock screen, revert theNoLockScreen key value to0 .
3. Use Winaero Tweaker
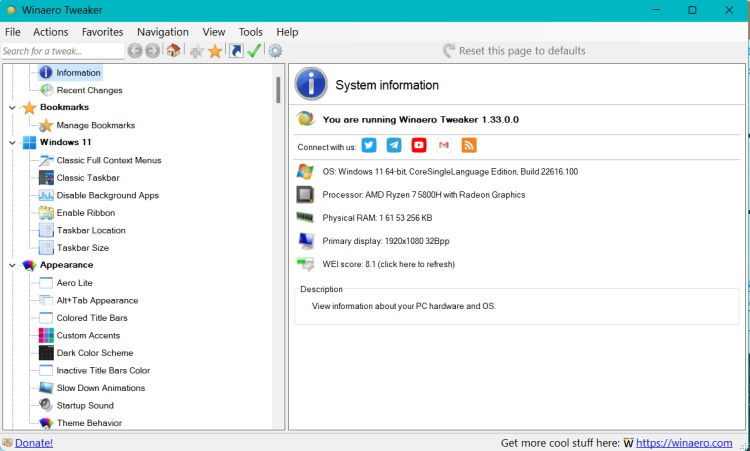
You can try the Winaero Tweaker app if you find registry tweaking cumbersome. It is a free app that allows you to customize Windows beyond the basic options. The app offers a GUI interface with detailed information about what each option does.
Follow these steps to remove the lock screen with this tool:
- Go to theWinaero website and download the app.Install the app and launch it.

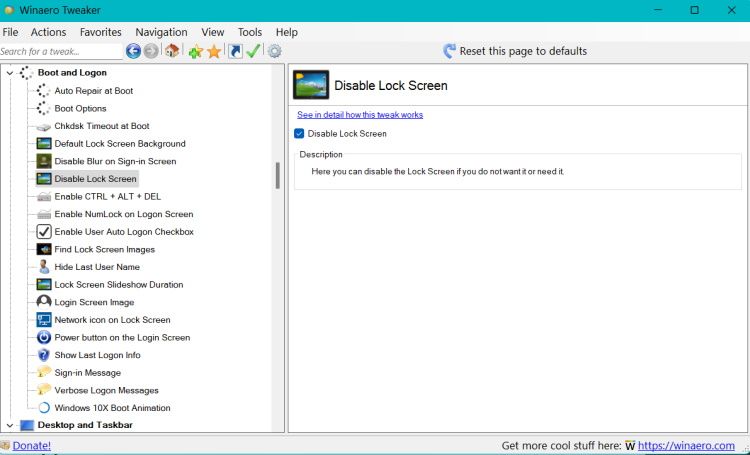
- Now, go to theBoot and Logon option on the left-hand side menu.
- Find theDisable Lock Screen option under theBoot and Logon section. Click on theDisable Lock Screen checkbox.

- Now,Restart your system to apply the changes. You will notice that the lock screen doesn’t appear anymore.
4. Use Ultimate Windows Tweaker
Like Winaero Tweaker, Ultimate Windows Tweaker is a Windows customization app with a GUI interface. You can disable Windows 11 lock screen with this app with just one click. However, make sure to create a system restore point to avoid breaking an operating system feature.
Here’s how to disable the lock screen on Windows 11 using Ultimate Windows Tweaker:
- Visit theUltimate Windows Tweaker website and download the app.
- Extract the Ultimate Windows Tweaker archive to a new folder.
- Now, right-click on theUltimateWindowsTweaker.exe file, and select theRun as administrator option.
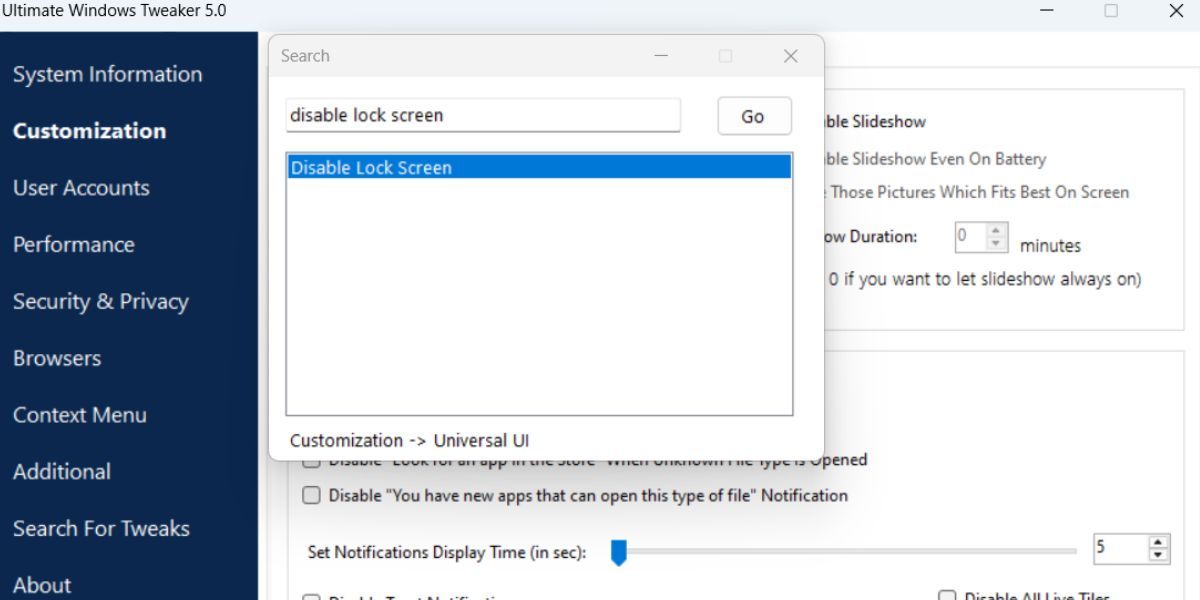
- Click on theSearch for Tweaks option. Typedisable lock screen and press theEnter key.

- Double-click on the search result and the corresponding setting will appear in the app. Close the search window.
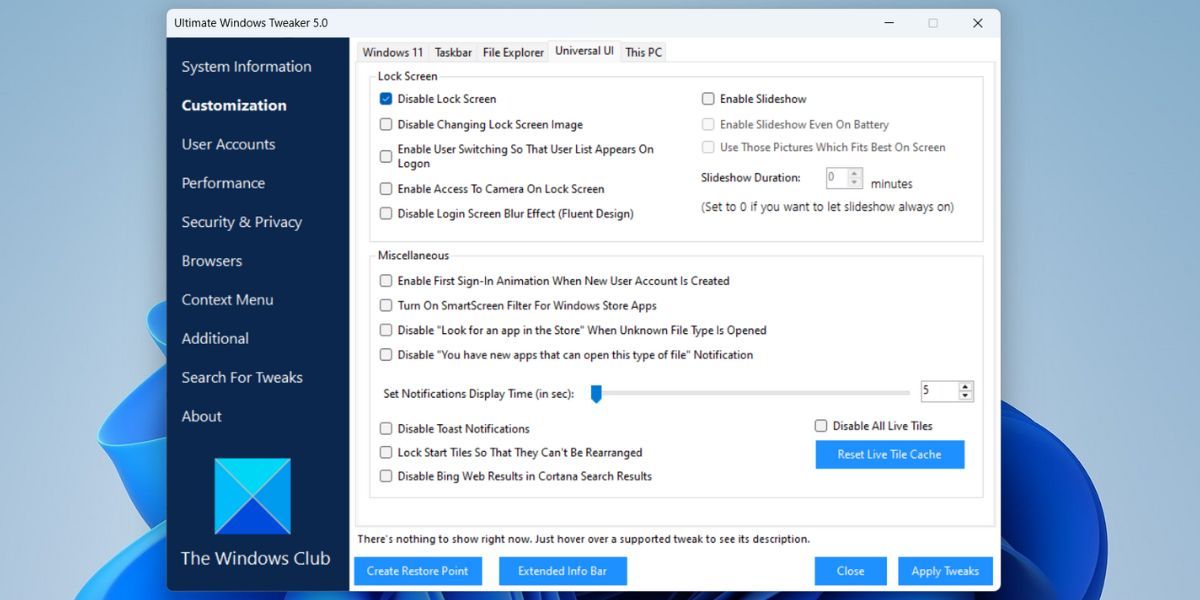
- Click on theDisable Lock Screen checkbox. Then, click on theApply Tweaks button and close the program.

- PressWin + L to log off. The Windows logon screen will appear instead of the usual lock screen.
Disable the Lock Screen and Log In Faster
Using the Group Policy Editor is a bit of a learning curve. Moreover, Windows Home users do not have access to it. So, you can try out the registry tweak to disable the lock screen on Windows 11. But if you want a GUI tool that helps you customize Windows, then Winaero Tweaker and Ultimate Windows Tweaker are both useful free app alternatives.
Also read:
- [Updated] In 2024, 6+ Software Choices Download YouTube Music as MP3 for iPhone Users
- AOMEI Backupperによる効果的なバックアップコメントの作成手順
- Becoming a OneStream Pro Tips and Tricks From the Pros
- Discover the Best DVD Downloading Strategies of 2023 for Flawless ISO Creation
- Eliminating Audio Error XC00D36B4 in Win10 & 11
- Expert Tips for Efficiently Undoing Changes with System Restore
- How to Remove Forgotten PIN Of Your Oppo A59 5G
- How to Repair Broken video files of Nokia on Mac?
- Mastering Fixes for IOMap64.sys Blue Screen in Win10/8
- Navigating the Maze of Graphics Driver Updates for AMD, Windows 11
- Overcome Elden Ring's Start-Up Black Screen Problem - A Guide
- Screen Recorder Showdown Apowersoft vs Others
- Troubleshoot Your Message Send Failures: Fast Solutions for Persistent Issues
- Unlocking Windows 11'S Web Control Panel
- Title: How to Disable the Lock Screen on Windows 11
- Author: David
- Created at : 2024-11-24 23:47:14
- Updated at : 2024-11-27 19:45:40
- Link: https://win11.techidaily.com/how-to-disable-the-lock-screen-on-windows-11/
- License: This work is licensed under CC BY-NC-SA 4.0.
