
High-Res Quests: Ultimate Guide to Playing Adventures in HD Using ScummVM
High-Res Quests: Ultimate Guide to Playing Adventures in HD Using ScummVM
If there’s one thing that “they don’t make it like they used to”, it’s adventure games. The golden age for the trusty point-and-click is long behind us, but we can at least enjoy the classics thanks to ScummVM.
Even better, ScummVM can also improve those practically ancient titles, rendering them more presentable on our modern screens. Let’s see how.
What Is ScummVM?
Created by Ron Gilbert at Lucasfilm Games, SCUMM was a combination of a scripting language and a game engine that assisted in creating adventure games.
Our computers’ evolution led to incompatibilities and instability for the titles that used SCUMM. That’s why Ludvig Strigeus created ScummVM, an updated re-implementation of the classic SCUMM for modern PCs.
Lucasfilm Games’ adventures were some of the best but far from the only ones. Ludvig expanded ScummVM to support more “adventure game engines”, practically turning it from “a modern SCUMM alternative” to “a single multi-engine solution for playing hundreds of classic adventures on modern PCs”.
Although we’ll see how to import games to ScummVM in this article, too, it’s best if you check our article on what is ScummVM and how to use it to play classic adventure games for more information on SCUMM and ScummVM.
In this guide, we’ll see how to configure ScummVM to make classic adventures look good on modern PCs with flat-panel Full HD displays.

How to Download and Install ScummVM
Start by visiting ScummVM’s official site and downloading and installing the app. For this article, we will be using ScummVM on Windows 11.
The app works the same way on all platforms (more or less). Still, some differences are to be expected, like the availability of renderers and shaders and the necessary steps for the app’s installation and importing of games.
Thus, you can follow along even if you are not on Windows, but you might also need to adjust some of the actions that follow based on your platform of choice.
How to Add Your Games to ScummVM
ScummVM comes with some freeware titles. However, most games it supports are still commercially available or fall within the legally gray borders of “abandonware”. Thus, you will have to import them manually.
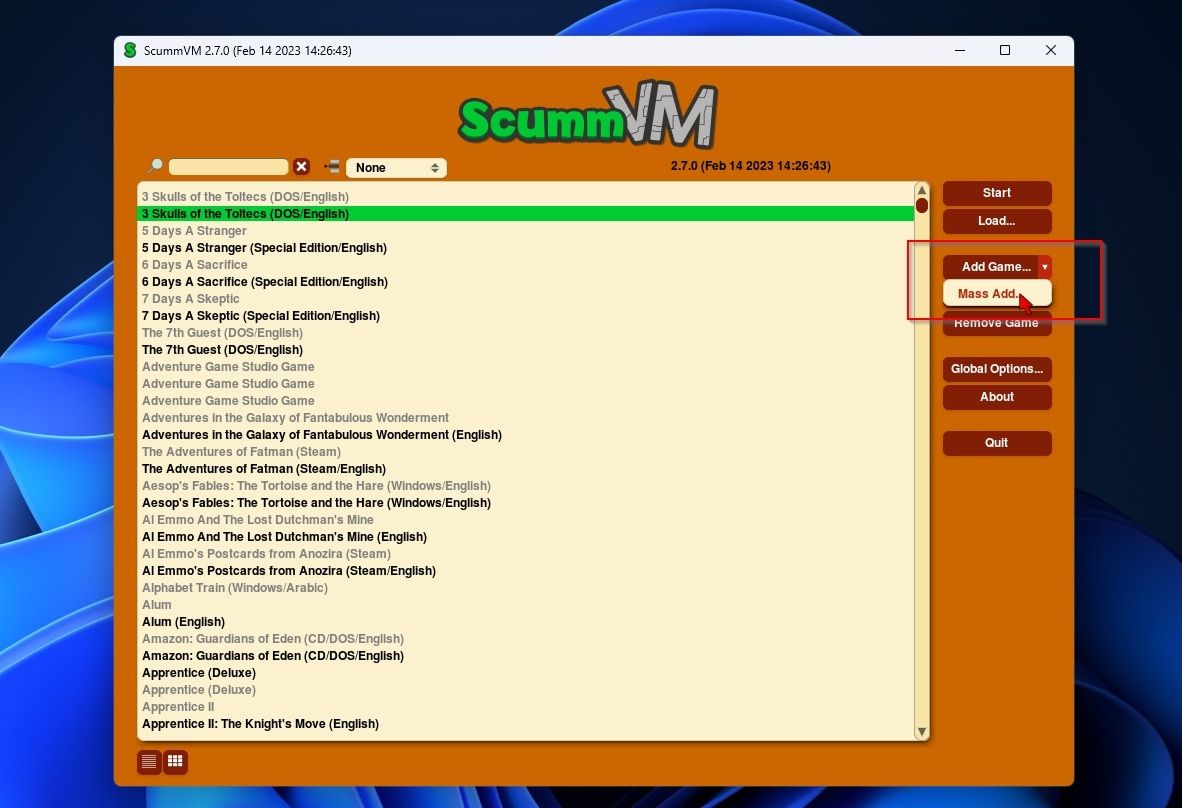
- To import a single title, click onAdd Game on the right of the window and select the game’s folder from the requester that pops up. Importing multiple titles in one go is just as easy by clicking theMass Add button right underneath. Then, select the parent folder within which you have all your old retro adventures stored in individual subfolders.
 Epubor Audible Converter for Mac: Download and convert Audible AAXC/AA/AAX to MP3 with 100% original quality preserved.
 - ScummVM will analyze the folder you selected, scan its contents, and prompt you to import any compatible games it finds.
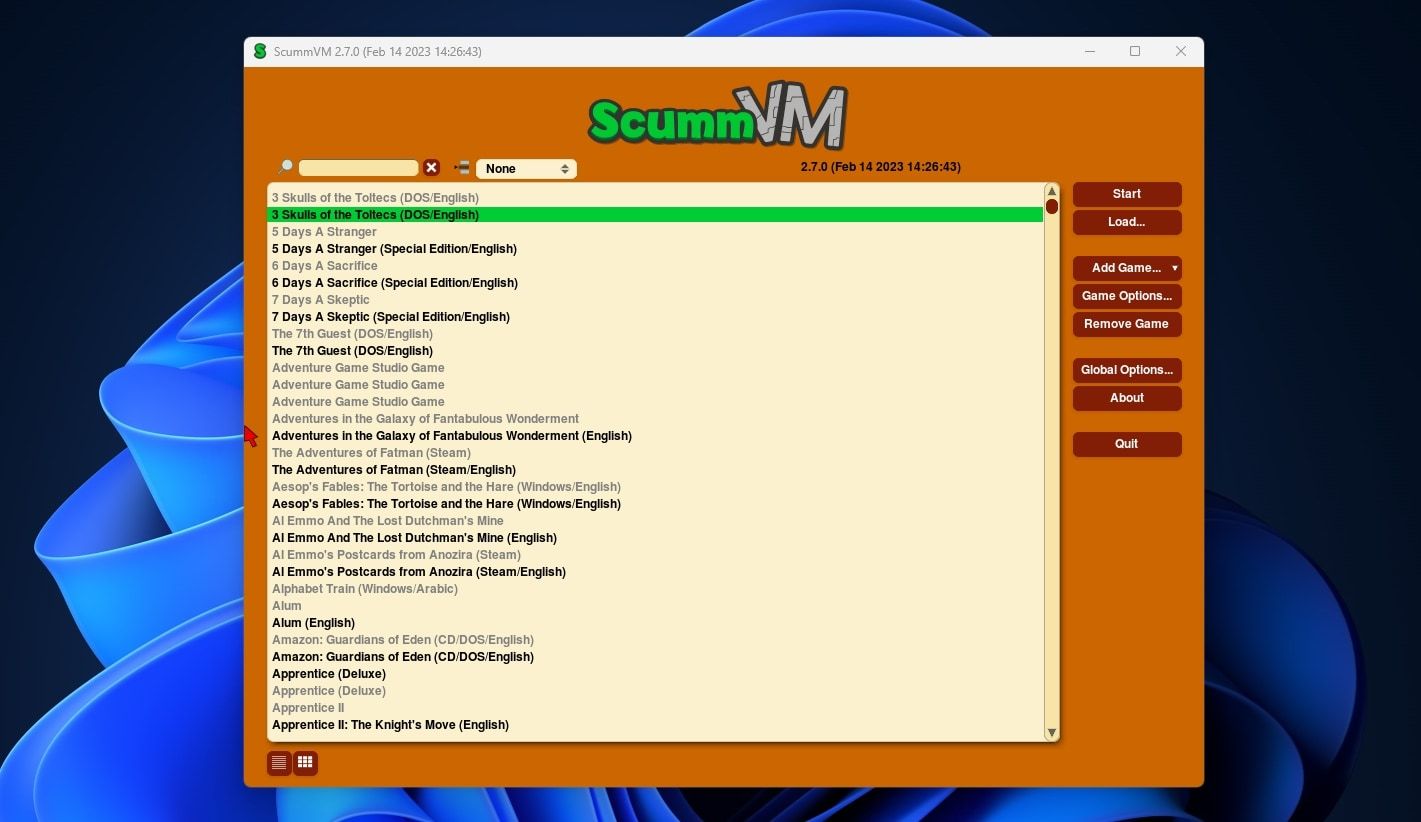
- All imported and playable games appear in ScummVM’s game list with bold text. You can launch them by double-clicking on their title or selecting them and clicking the start button on the right of the window. Supported titles that weren’t found (and thus aren’t playable) have a grey color.
vMix HD - Software based live production. vMix HD includes everything in vMix Basic HD plus 1000 inputs, Video List, 4 Overlay Channels, and 1 vMix Call
This bundle includes Studio 200 for vMix from Virtualsetworks, HTTP Matrix 1.0 automation scheduler, and 4 introductory training videos from the Udemy vMix Basic to Amazing course.
 Epubor Audible Converter for Mac: Download and convert Audible AAXC/AA/AAX to MP3 with 100% original quality preserved.
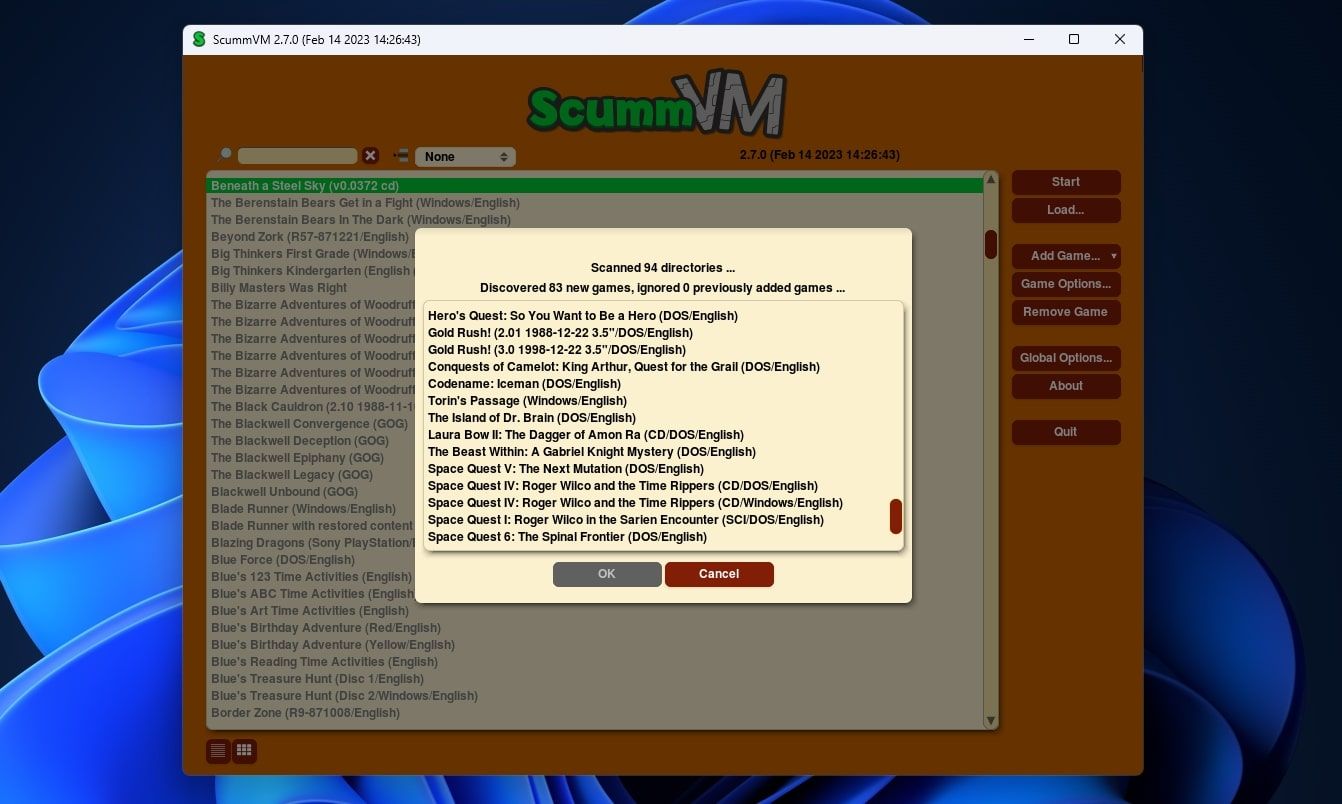
 vMix HD - Software based live production. vMix HD includes everything in vMix Basic HD plus 1000 inputs, Video List, 4 Overlay Channels, and 1 vMix Call
How to Configure ScummVM’s Global Settings
ScummVM offers two types of configuration: you can customize its options globally for all games and create individual game configurations that only affect a single title.
For this article, we will use both to create a baseline for all titles and then tweak one individually for optimal results.
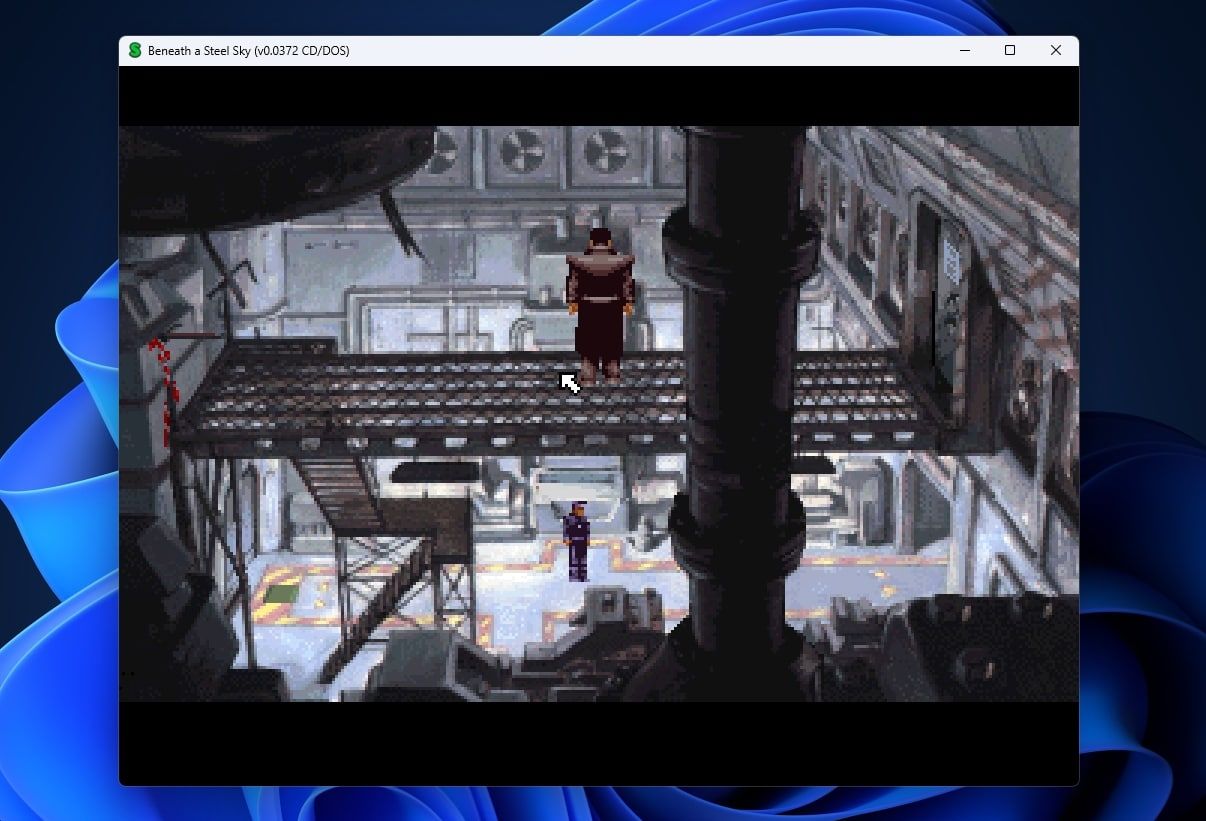
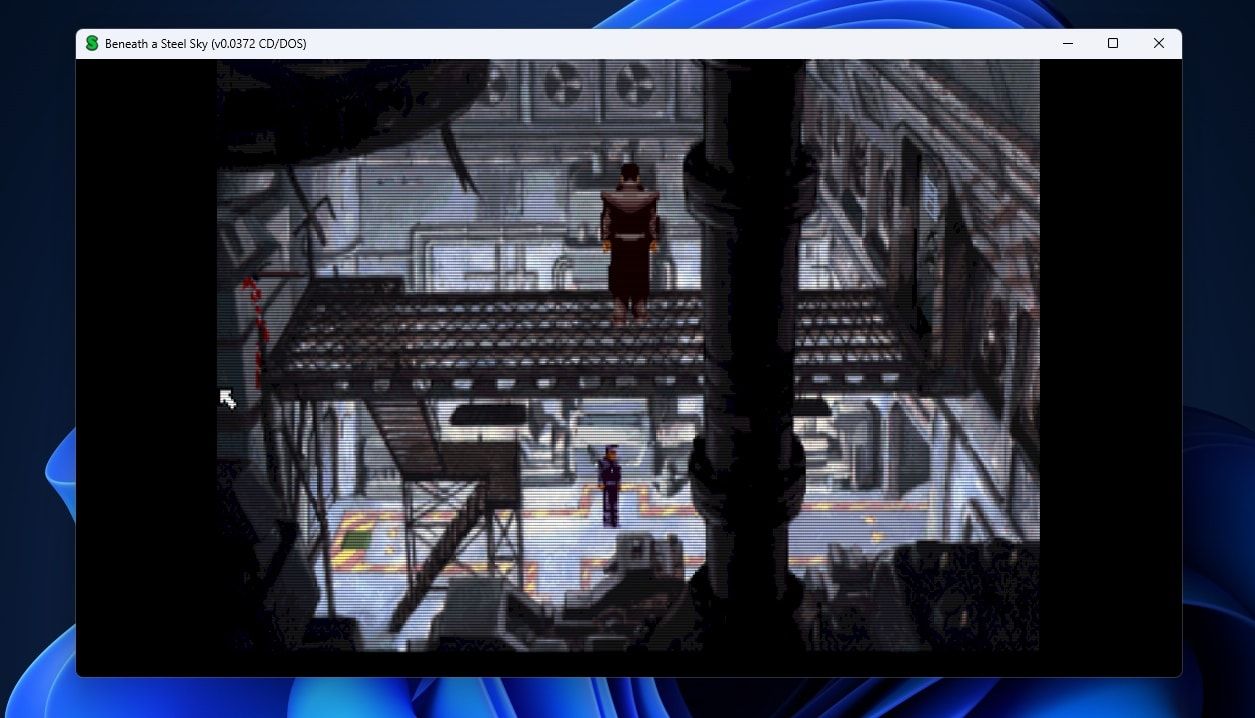
- You will need a point of reference to know how games played with ScummVM will look on your monitor. So, launch one of them and pay attention to its visuals. For this article, we will be using the freely available Beneath a Steel Sky by Revolution Software as our primary point of reference.
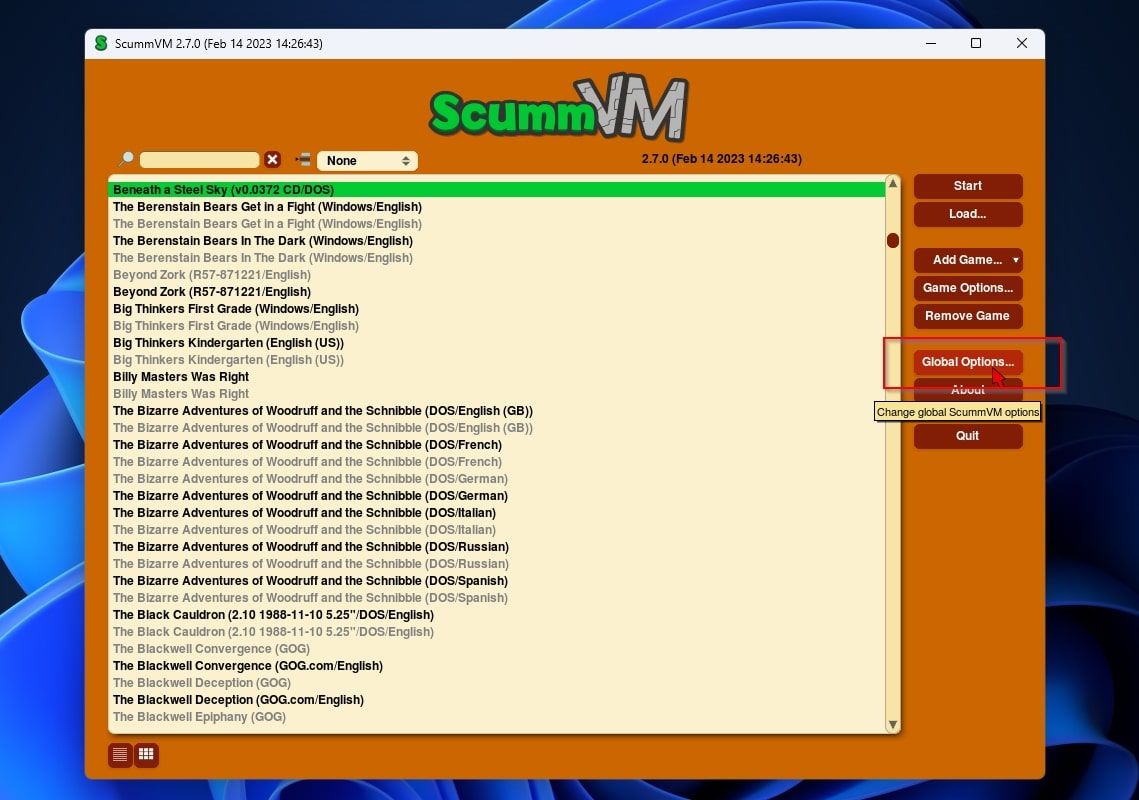
- Click onGlobal Options on the right of the window.
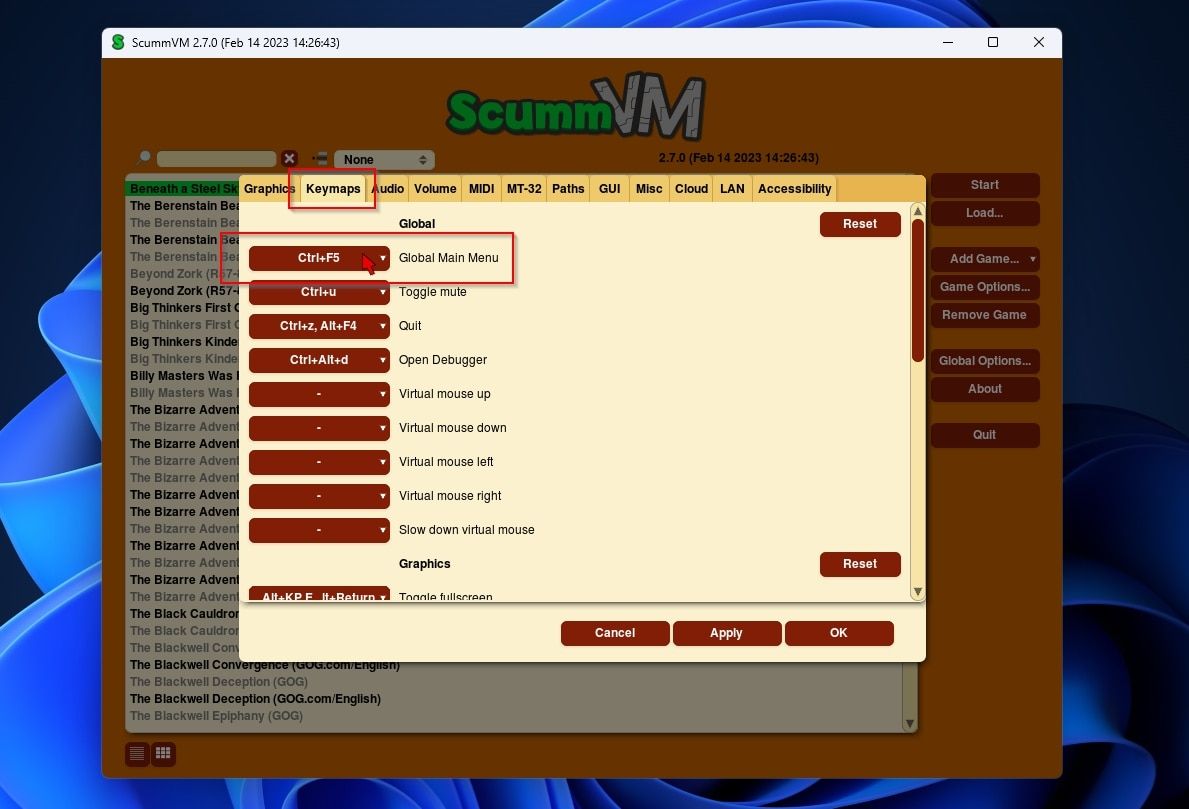
- Move to theKeymaps tab and take note of the key combination for accessing ScummVM’s global main menu. If you don’t like the default shortcut, click on it and bind it to another key combination.
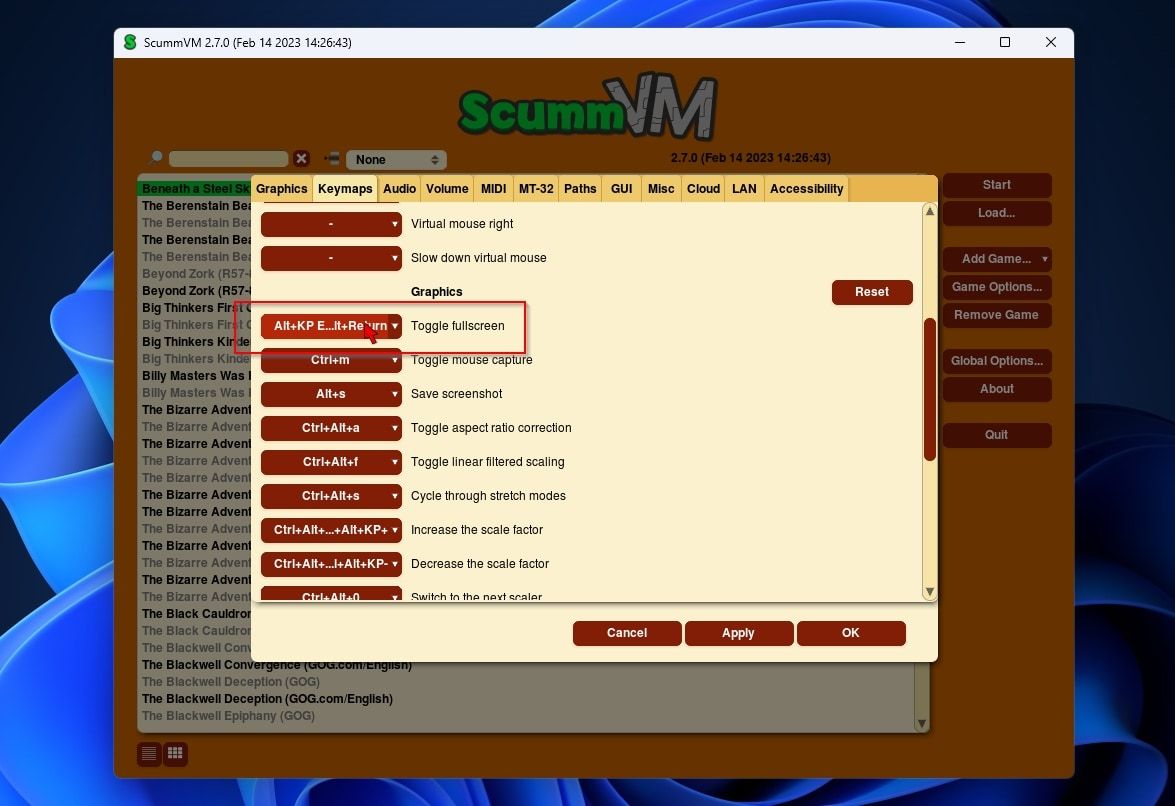
- Scroll down and do the same for theToggle Fullscreen shortcut.
- Move to theAudio tab, and from theText and speech options, select if you’d preferSpeech ,Subtitles , orBoth for your games.
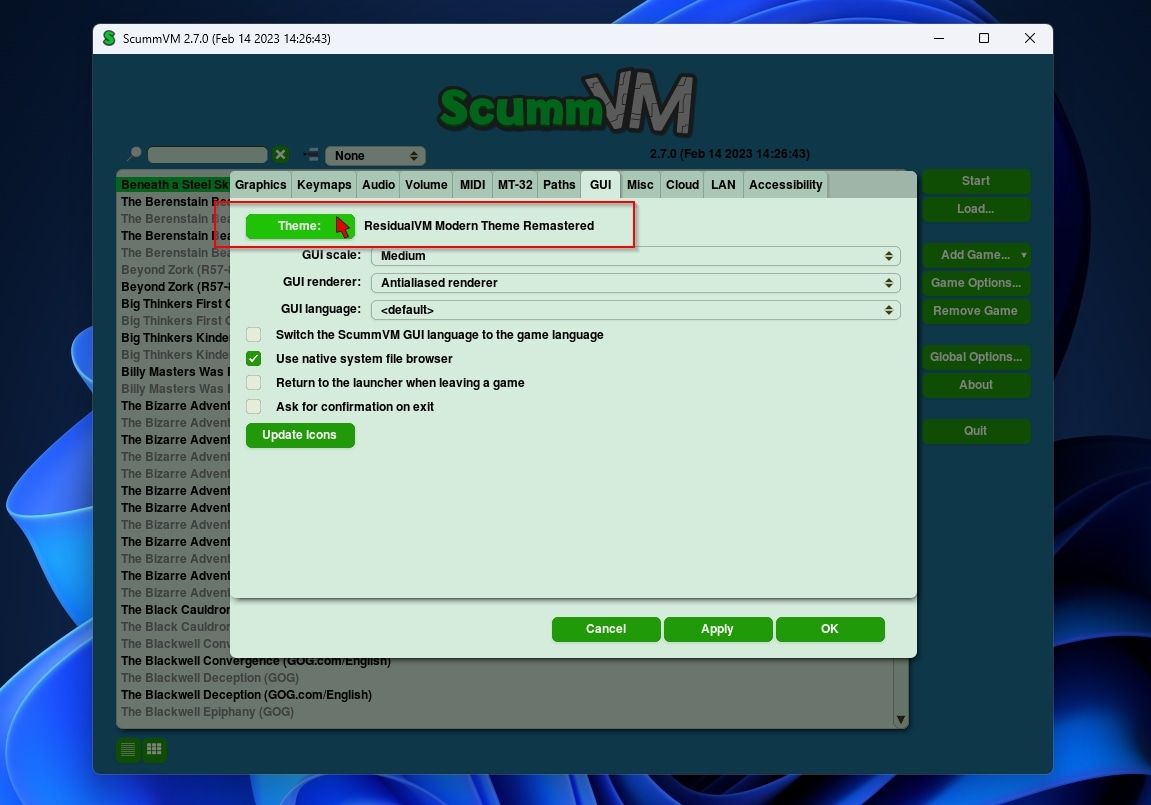
- Although it’s not a crucial option for playing games, you can change how ScummVM looks by switching between various themes. Those are accessible from theTheme option on theGUI tab.
vMix Pro - Software based live production. vMix Pro includes everything in vMix 4K plus 8 channels of Replay and 8 vMix Call
This bundle includes Studio 200 for vMix from Virtualsetworks, HTTP Matrix 1.0 automation scheduler, and 4 introductory training videos from the Udemy vMix Basic to Amazing course. - On the same page, you will find another option that you may find helpful if you like jumping from game to game: to avoid having to relaunch ScummVM after exiting a title, place a checkmark beforeReturn to the launcher when leaving a game .


 vMix Pro - Software based live production. vMix Pro includes everything in vMix 4K plus 8 channels of Replay and 8 vMix Call
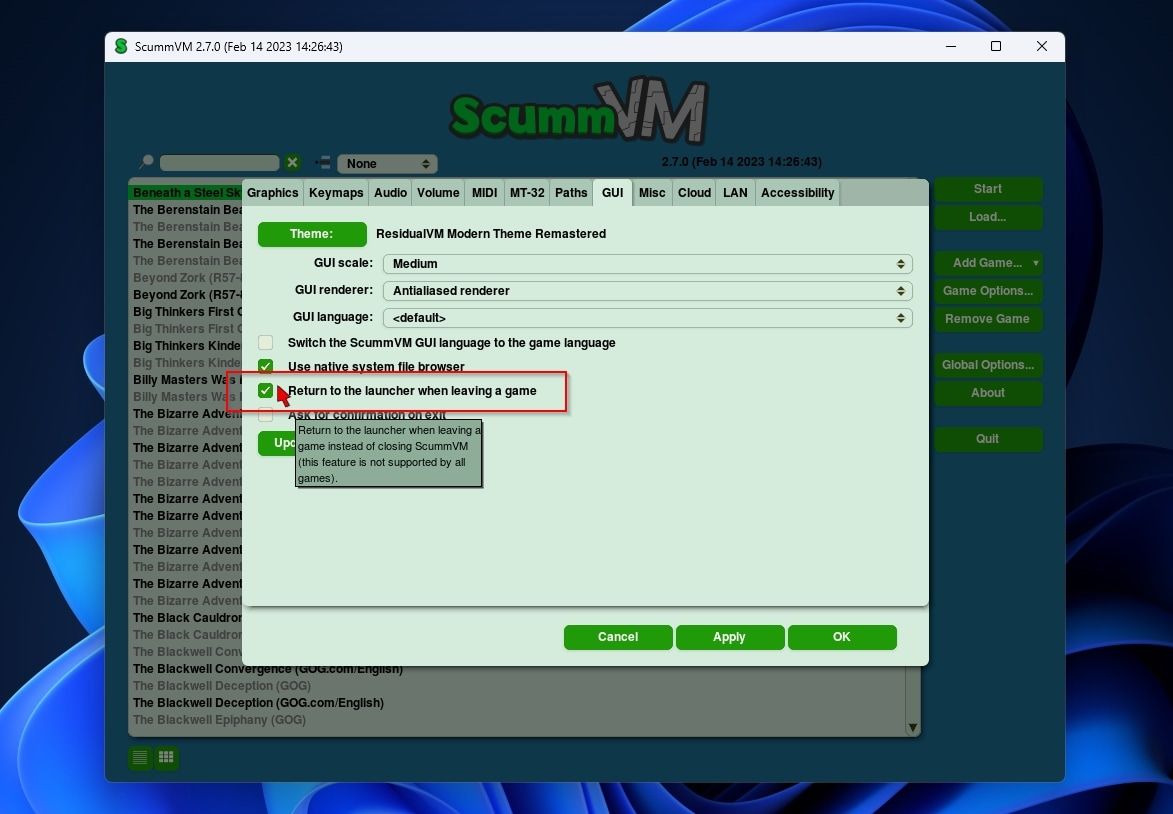
How to Configure Game-Specific ScummVM Options
Although most options we will see are also available globally, it’s best to tweak them separately for each game.
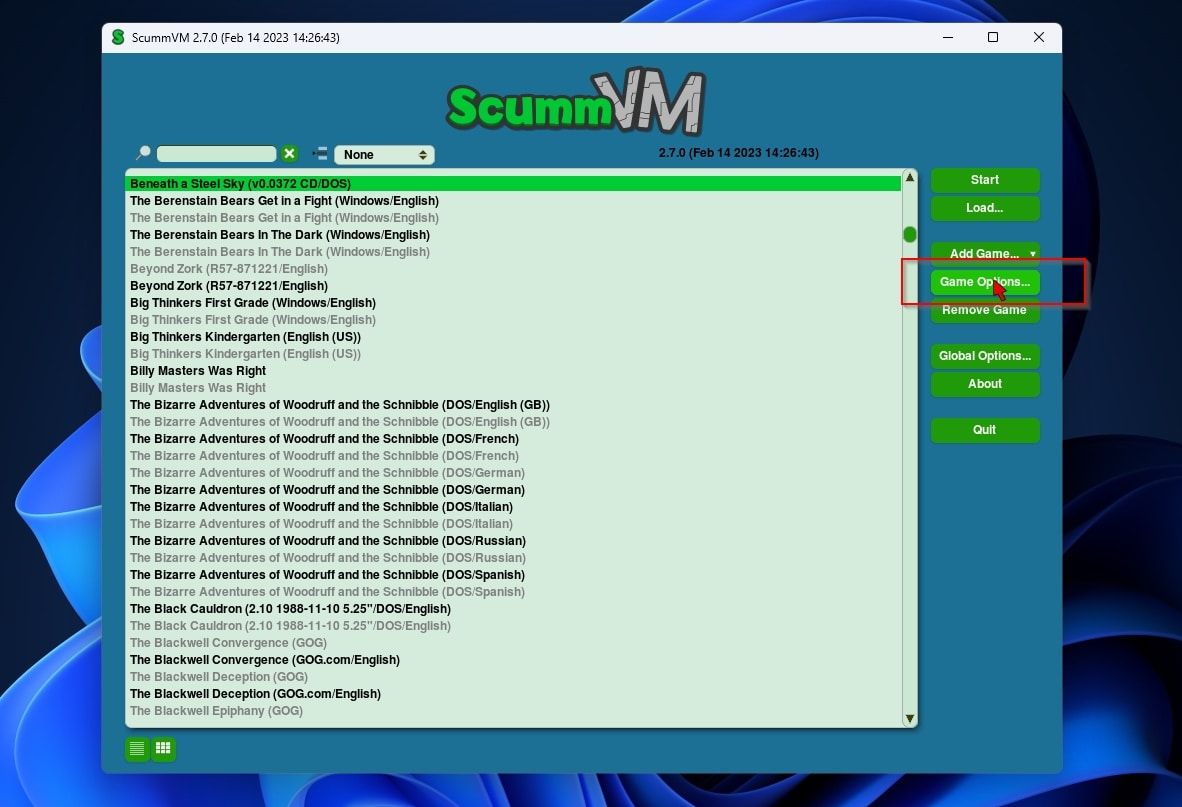
To tweak a particular game’s options in ScummVM, select it on the list and click onGame Options on the right.
Upscaling Through Stretching and Aspect Ratios
If played in their original resolution, old adventures will appear too blocky, too blurred, or cover less than 1/4th of the screen.
Thankfully, you can upscale a game’s graphics through ScummVM, even if the way it refers to the process, “stretching”, might sound a bit crude.
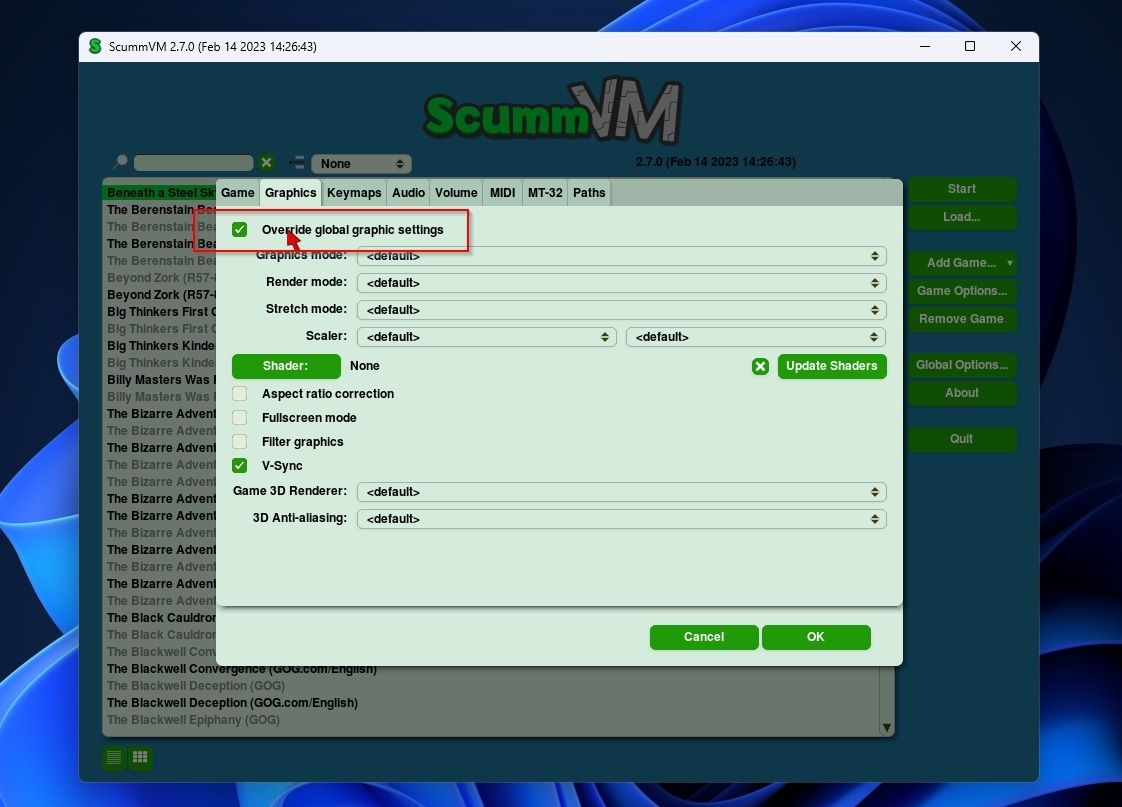
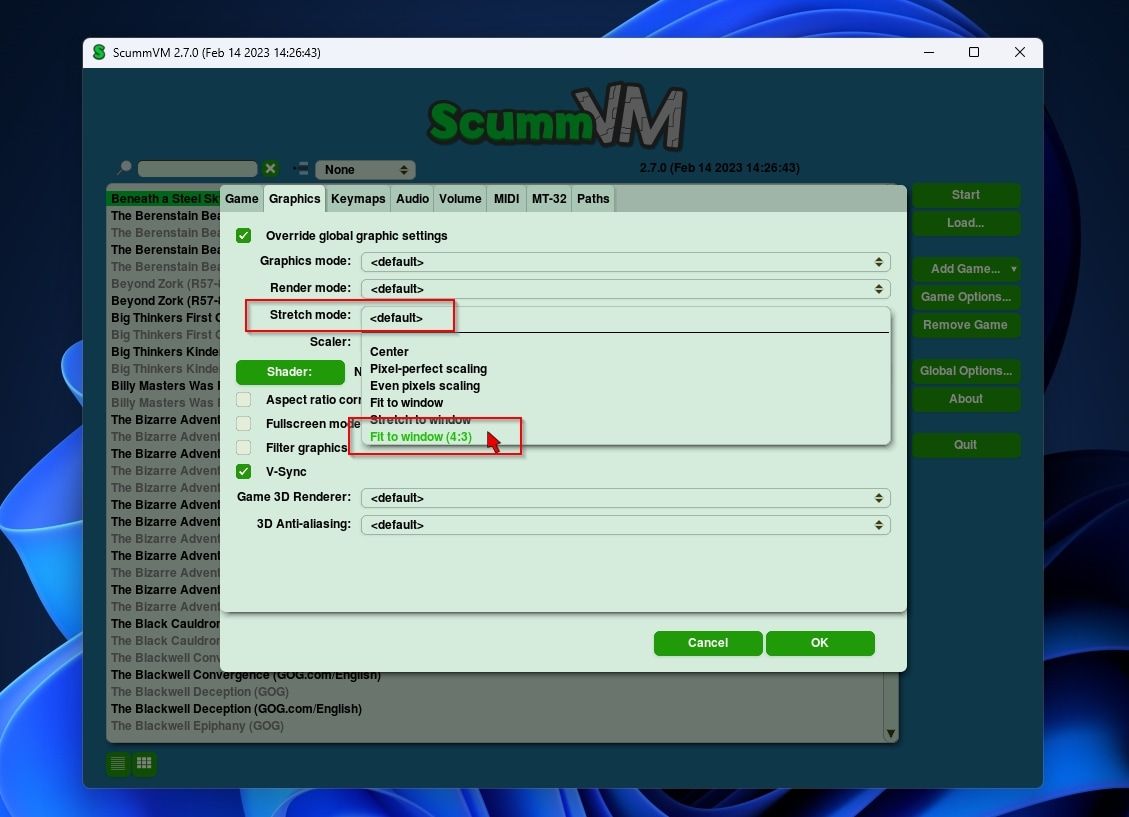
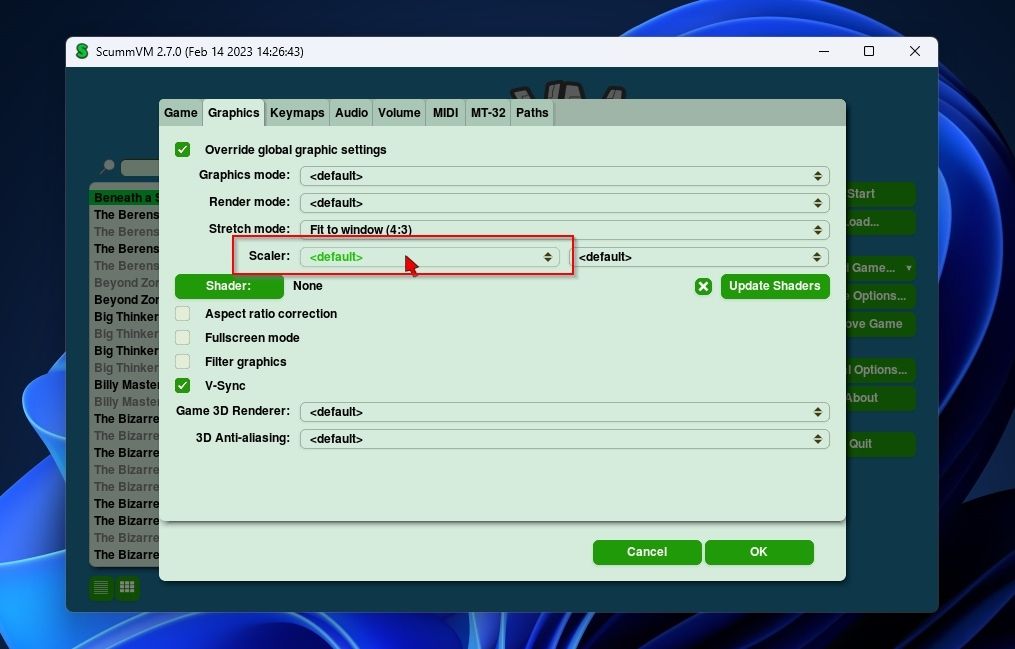
- To control a game’s graphics settings individually, move to theGraphics tab and enableOverride global graphic settings .
- Since most games supported by ScummVM were created for old CRT monitors with a 4-by-3 aspect ratio, to have their graphics cover most of your monitor without appearing deformed, we suggest you first try the select theFit to window (4:3) Stretch mode. This way, no matter the size of ScummVM’s window on your screen, and even when in full-screen mode, a game’s horizontal and vertical aspect ratio will remain locked, with black space appearing around its visuals.
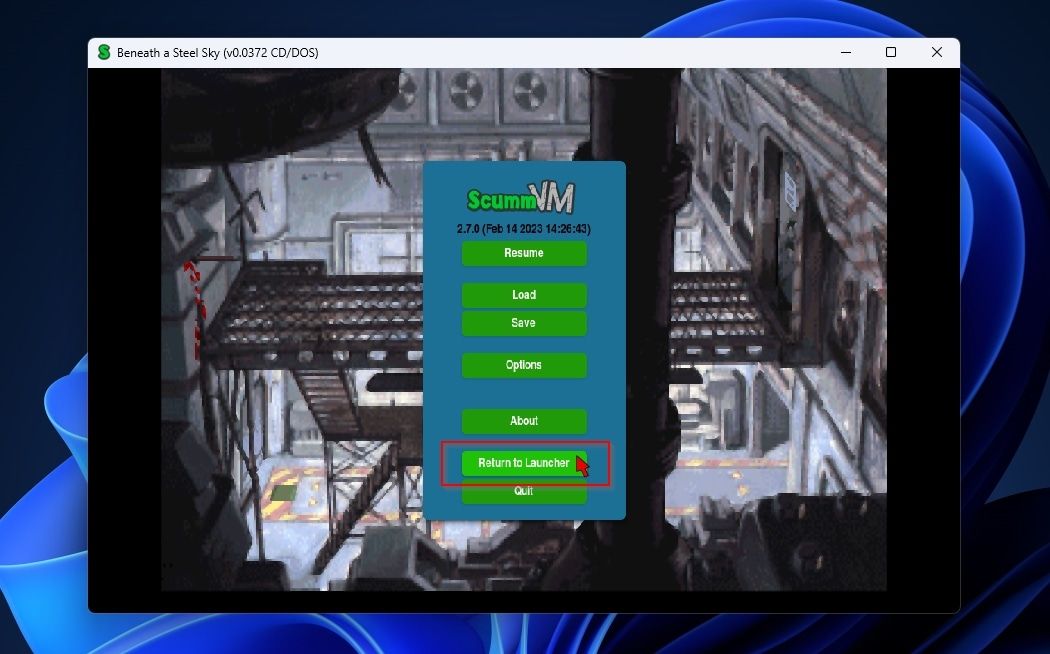
- Are you checking how a game looks after tweaking some options? You can use the combination we saw earlier to access ScummVM’s game menu. By default, it’s CTRL + F5. From there, you can a) return to your game by clicking onResume , b)Load or c)Save your progress, d) access game-specificOptions , e) read moreAbout ScummVM, f)Return to Launcher , or g)Quit the running game.
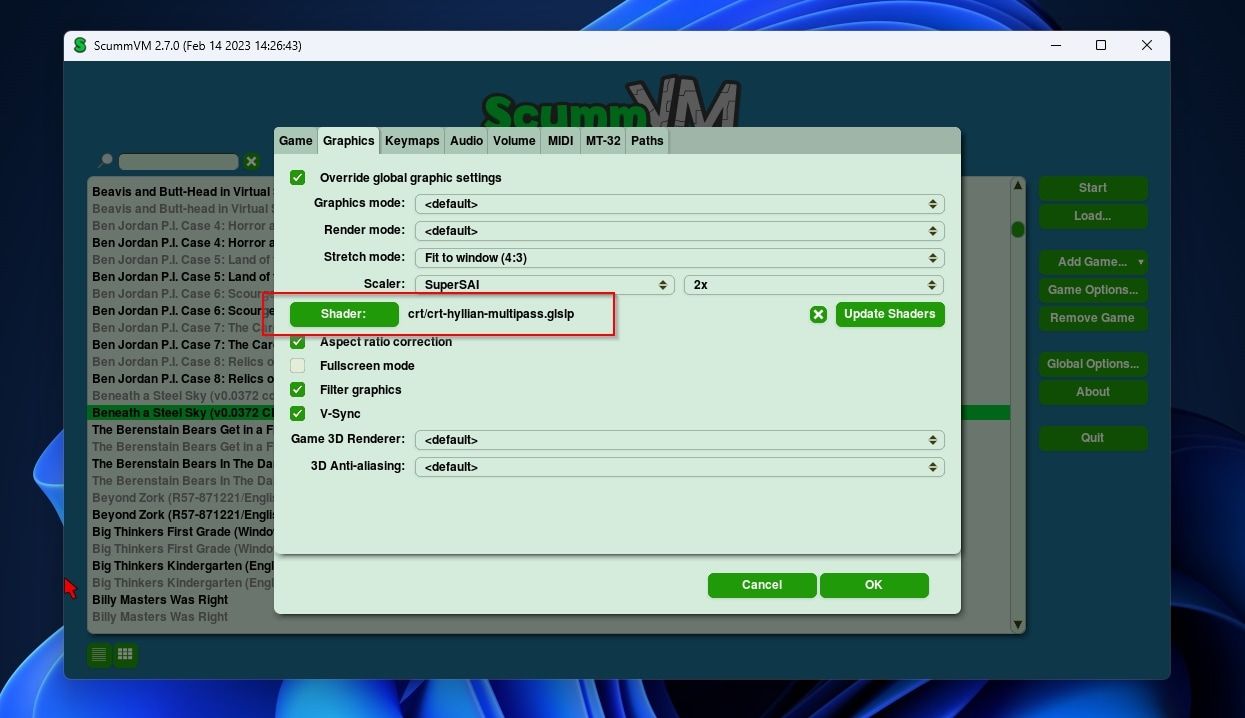
- Return to the launcher and revisit the selected game’s options, moving to theGraphics tab. From there, you can change theScaler used for stretching the game’s graphics. ScummVM offers various ways of scaling a game’s graphics. Some try to preserve a game’s original blocky, pixelated appearance, while others may smoothen the graphics, leading to a more “cartoony” appearance. We choseSuperSAI .

Getting Better Visuals With Shaders
The blurring, color bleeding, and glow of old CRT screens also made the graphics look less pixelated and richer in color. Thankfully, you can partially replicate those looks on a flat-panel monitor through the magic of shaders.
- To apply a shader to your game’s visuals, on a game’s options’Graphics tab, clickShader and select one from the list.
- Although a shader might add artificial imperfections to a game’s visuals, almost counter-intuitively, the final result can look better.
Are you not a fan of adventures (on which ScummVM specializes) but would appreciate a facelift for your old emulated games? RetroArch supports scaling and shaders, too. For more info on that, check our guide on how to make your retro games look like they used to with RetroArch’s shaders .
 PCDJ Karaoki is the complete professional karaoke software designed for KJs and karaoke venues. Karaoki includes an advanced automatic singer rotation list with singer history, key control, news ticker, next singers screen, a song book exporter and printer, a jukebox background music player and many other features designed so you can host karaoke shows faster and easier!
How to Apply Anti-Aliasing to LucasArts 3D Adventures
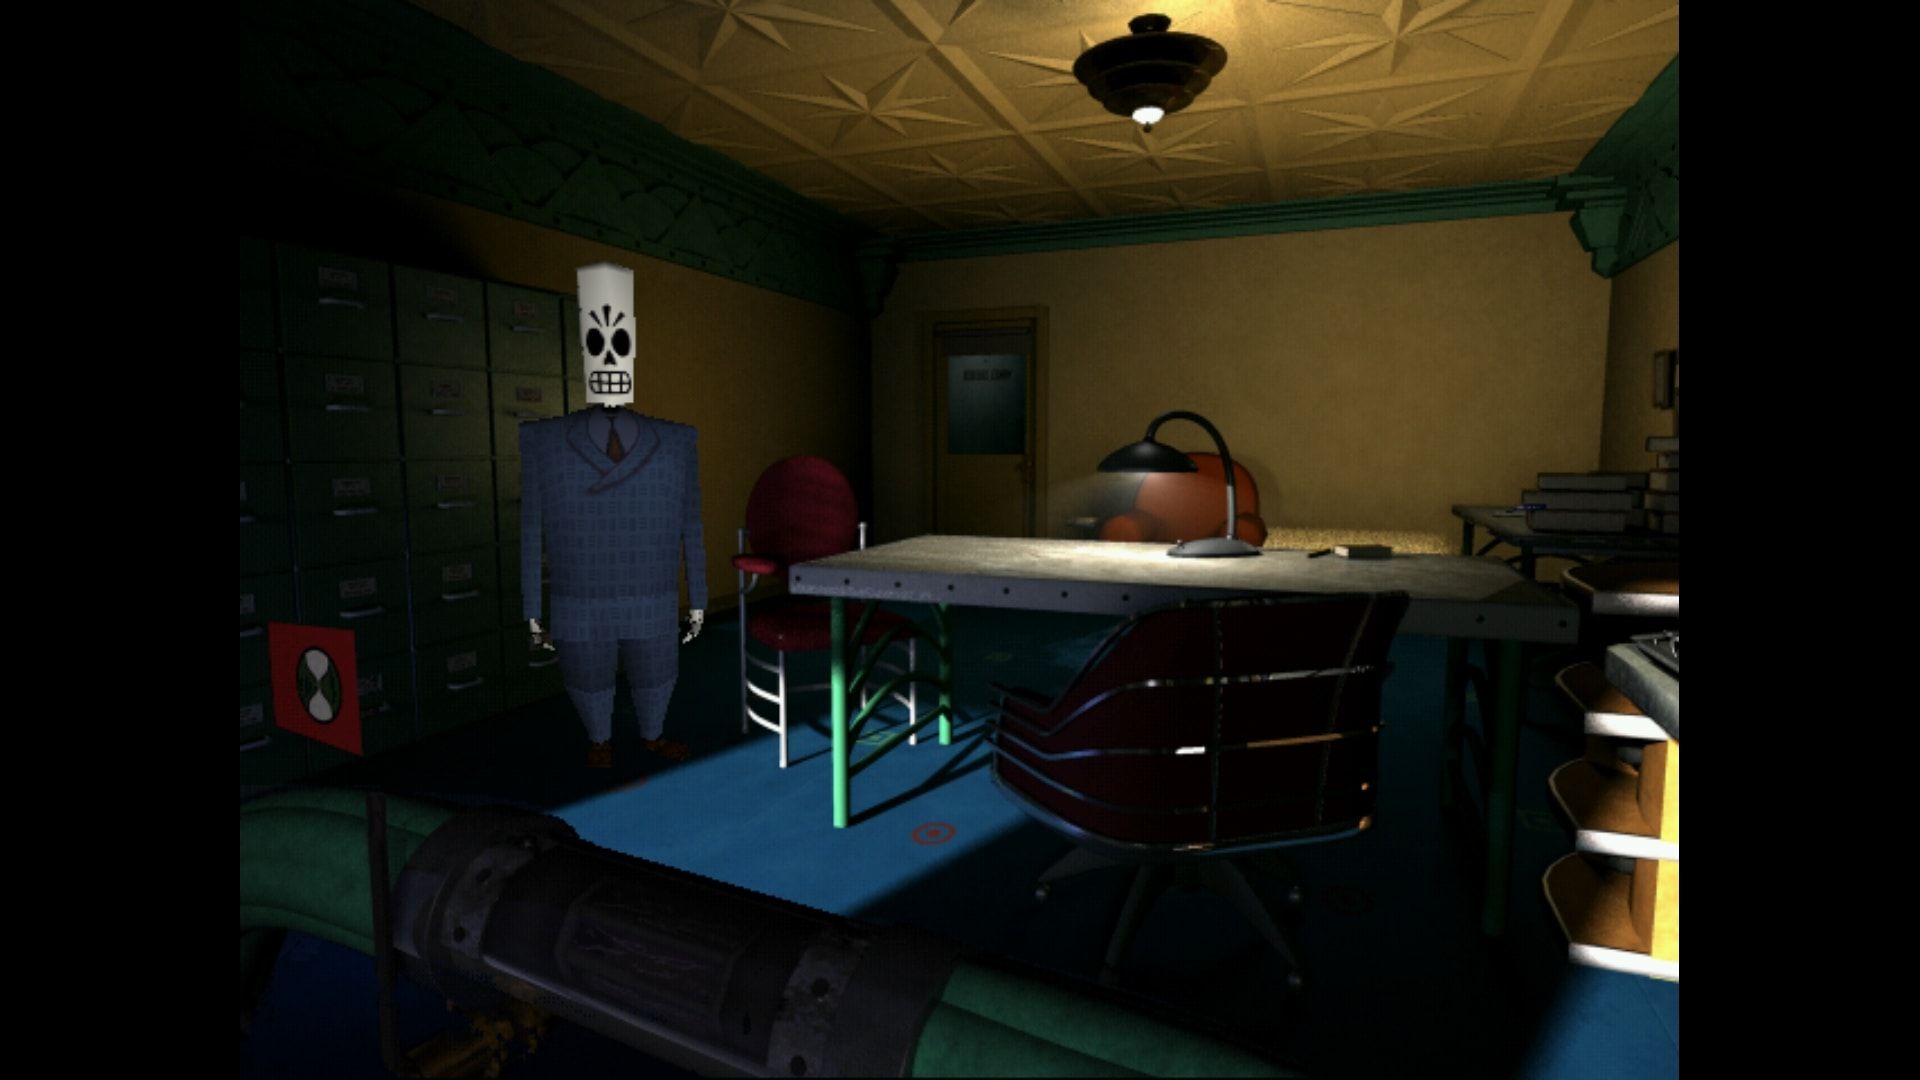
Not all classic adventures were two-dimensional. Some presented 3D graphics or a mix of 2D and 3D, like the beloved classic Grim Fandango by LucasFilm Games. The options we saw also affect such titles. However, their 3D graphics might still appear pixelated where lines aren’t fully horizontal or vertical. To fix that, you need anti-aliasing.
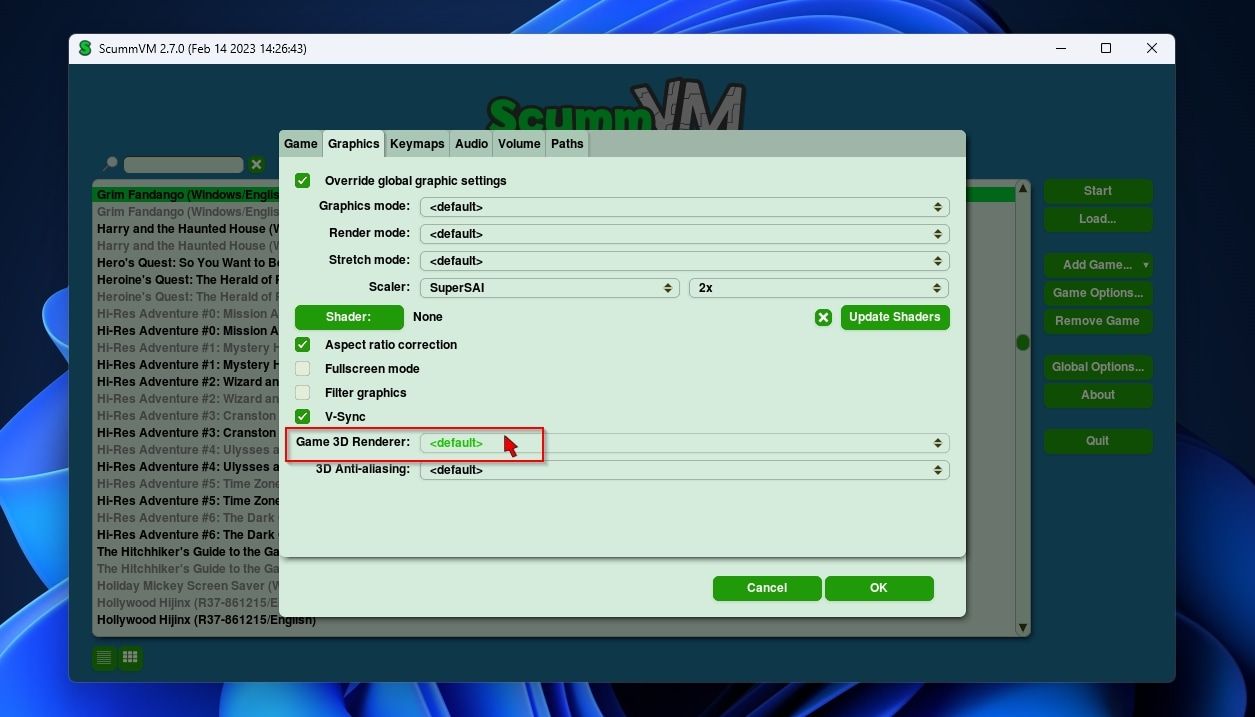
- Select a title with 3D graphics and move to its game options.
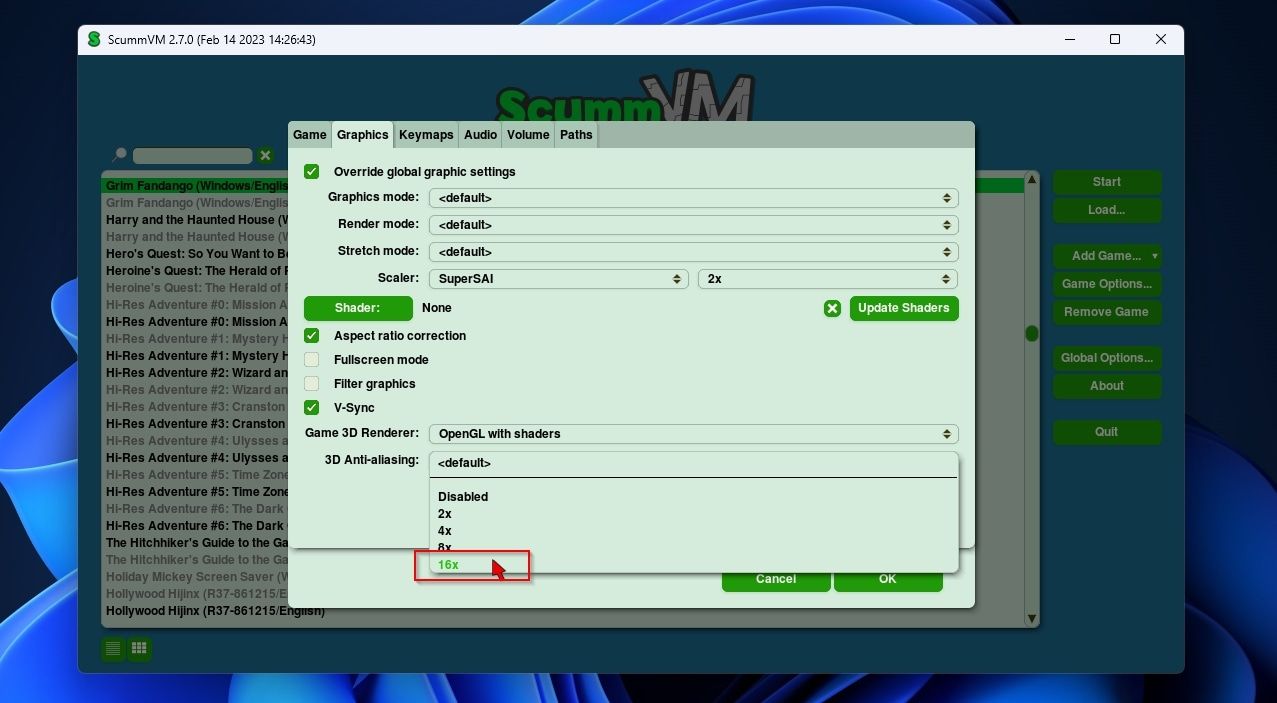
- Move to theGraphics tab and examine the last two options. Change the first one toOpenGL with shaders to ensure ScummVM will use your GPU for improved visuals.
- Change the last option,3D anti-aliasing , to its highest value, to eliminate “jaggies” from 3D graphics.
When you’re done going on adventures, why not try making your own adventure game? You can start small with our guide on how to create a text-based adventure game in Python and take it from there.
The Adventure of Playing Old Adventures With ScummVM
Despite not being as customizable as RetroArch, ScummVM enables you to play dozens of classic adventures that would otherwise have been lost in the clutches of time.
Even better, you can enjoy them with upgraded visuals. They might not make Beyond Zork look like the latest triple-A Unreal Engine title, but they’re the next best thing to a proper remaster.
- Title: High-Res Quests: Ultimate Guide to Playing Adventures in HD Using ScummVM
- Author: David
- Created at : 2024-08-15 23:49:30
- Updated at : 2024-08-16 23:49:30
- Link: https://win11.techidaily.com/high-res-quests-ultimate-guide-to-playing-adventures-in-hd-using-scummvm/
- License: This work is licensed under CC BY-NC-SA 4.0.