Hidden Panel Wizardry for Windows 11 Users

Hidden Panel Wizardry for Windows 11 Users
File Explorer has a Hidden items option you can select to reveal hidden files and folders. Those are mainly important system files and folders hidden for good reason. However, you can also select to hide user files as well.
Explorer’s View menu and tab (in Windows 10) include the Hidden items option. However, you can make that option a little more accessible by adding it to the context menu. Then you can toggle hidden files on/off from the right-click menu. This is how you can add a Hidden items option to the context menu in Windows 10 and 11.
Disclaimer: This post includes affiliate links
If you click on a link and make a purchase, I may receive a commission at no extra cost to you.
How to Add a Hidden Items Option to the Context Menu With a Registry Script
To add any new option to a Windows context menu, we must modify the registry. Adding a Hidden items option to the context menu involves a slightly more complicated registry tweak. So, it’s best to add such an option to the right-click menu with a more automated registry script method like this:
Open this Winaero download page in web-browsing software.
Then select Click here to download the file option for the registry script archive.
Press both the Windows logo and E keyboard keys at the same time to access File Explorer .
Navigate to whatever folder the hidden_files_context_menu ZIP downloaded in.
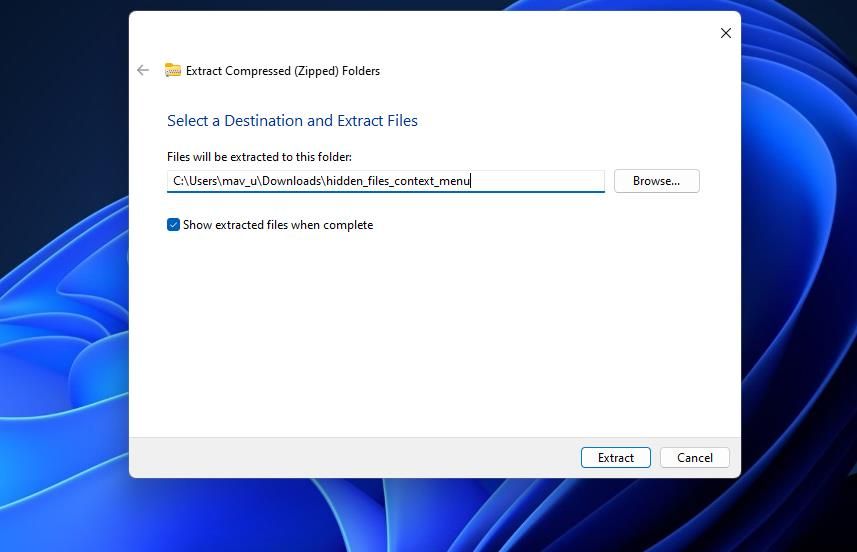
Unzip (extract) the hidden_files_context_menu ZIP file. We have a guide that includes instructions for unzipping ZIP archives in Windows .

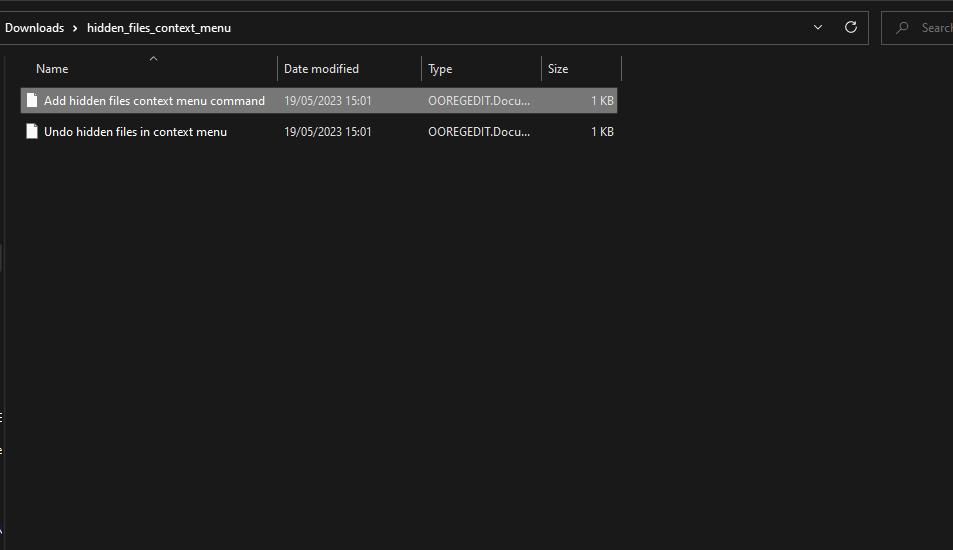
Open the extracted hidden_files_context_menu folder.
Double-click the Add hidden files context menu command registry script file.

Select Yes if a User Account Control prompt pops up.
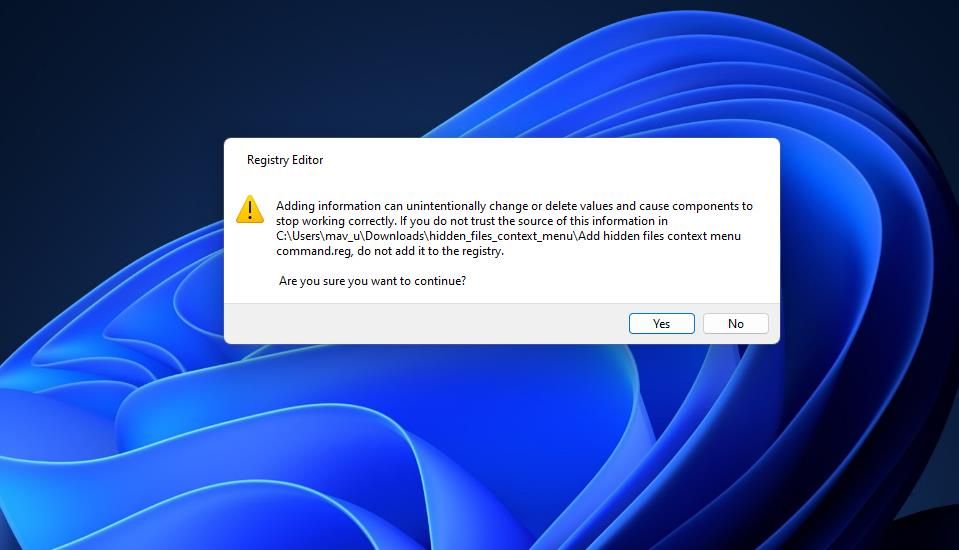
- Click Yes within the Registry Editor dialog box that asks if you’re sure about continuing.

- Select OK on the second dialog box that appears.
Now bring up the root C: directory in File Explorer to try out the new Hidden items context menu option. Right-click anywhere inside that folder to select Show more options on Windows 11’s context menu and Hidden items. Selecting that option will reveal a few hidden folders in the root directory if that setting isn’t enabled already. Click the same option again to hide the folder and files again.
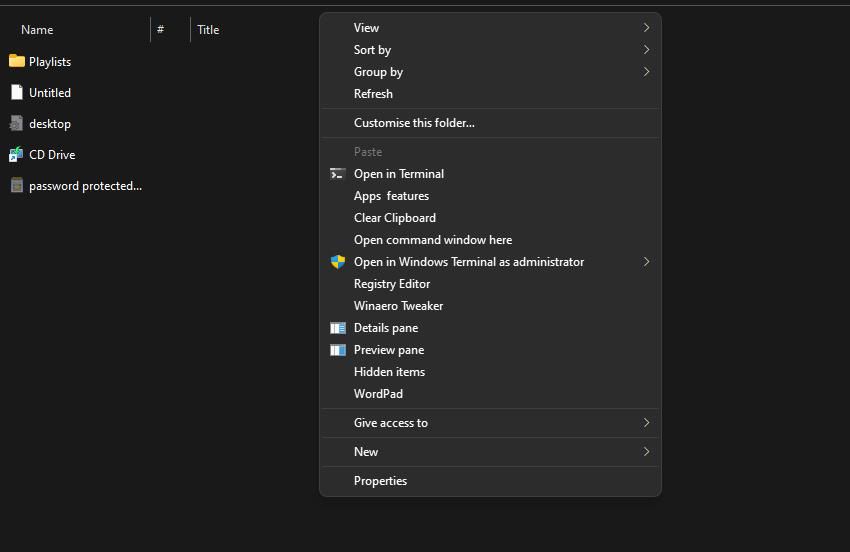
The hidden_files_context_menu ZIP archive also includes another registry script for removing the context menu. So, you don’t need to manually edit the registry to remove the Hidden items context menu. Running the Undo hidden files in context menu script will do the job for you.
How to Add a Hidden Items Option to the Context Menu With Right-Click Extender
Or you can add options for toggling file visibility to the context menu with Right-Click Extender. Right-Click Extender is a freely available app that includes numerous customization settings for adding new options to the context menus in Windows 11/10. This is how to add context menu options for showing/hiding hidden files and folders with Right-Click Extender:
- Go to this Right-Click Extender Softpedia download page.
- Press the Download button there to view location options.
- Click on Secure Download (US), which is the best option for users in North America.
- Open the folder where your browser downloads the Right-Click Extender ZIP file to within File Explorer.
- Unzip the Right-Click Extender ZIP archive.
- Open Right-Click Extender’s extracted directory and double-click on the Right-Click Extender v2 subfolder.
- Double-click the Right-Click Extender file to open that app’s window.
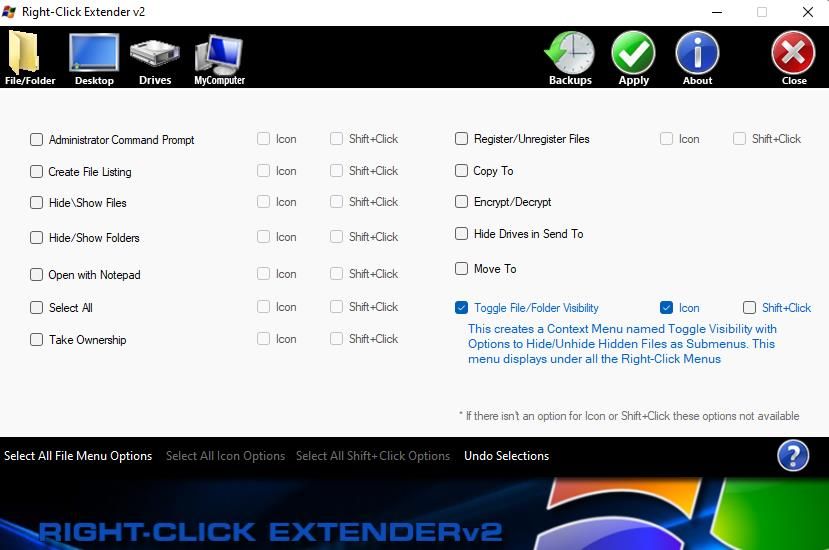
- Click the File/Folder tab in Right-Click Extender.

- Select the Toggle File/Folder Visibility option along with its Icon checkbox.
- Click on the Apply button.
Now bring up the classic context menu within a folder in File Explorer by pressing Shift + F10. There you’ll see a new Toggle File Visibility submenu. Move your cursor over the Toggle File Visibility submenu to select a Show Hidden Files option. You can conceal the items again by selecting the opposite Hide Hidden Files option.
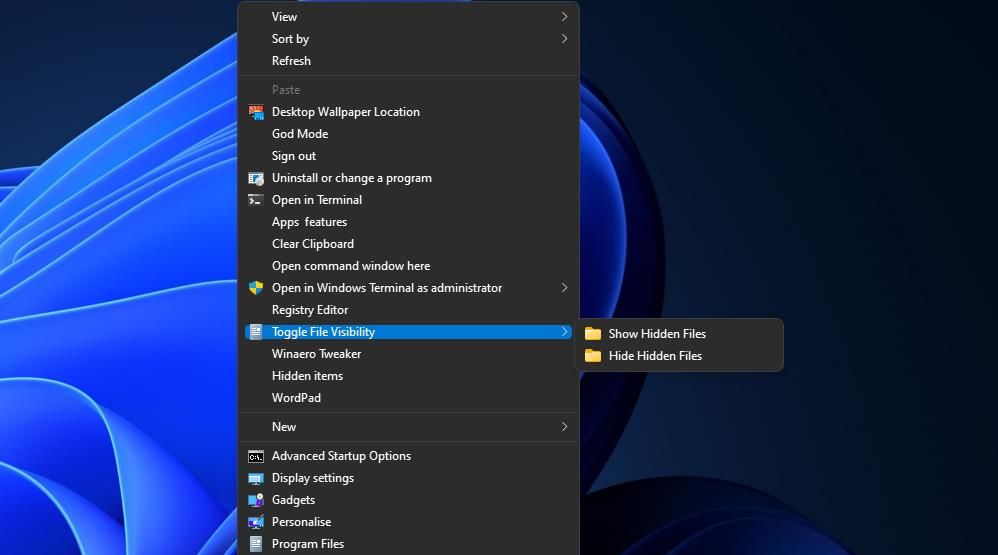
Toggle Hidden Items On and Off From File Explorer’s Context Menu
So, now you can select to show or hide files and folders from your context menu. If you select to show hidden items, you can see and access more folders and files in Windows. A context menu option for enabling/disabling hidden items can be especially useful for users who select to hide things with the attribute settings for files and folders.
Explorer’s View menu and tab (in Windows 10) include the Hidden items option. However, you can make that option a little more accessible by adding it to the context menu. Then you can toggle hidden files on/off from the right-click menu. This is how you can add a Hidden items option to the context menu in Windows 10 and 11.
Also read:
- [New] In 2024, Adding Depth with Customized Facebook Slideshows
- [New] In 2024, Creating Seamless Split-Screen Visuals on Sierra Systems
- [Updated] Soundscapes in Action Capturing Music Videos iPhone Style
- [Updated] The Ultimate Guide of How to Use Animoji on iPhone X
- 2024 Approved 8 Best Metaverse Headsets and Glasses to Dive Into Metaverse
- 2024 Approved Easy Instagram Posting for GIF Lovers 4 Essential Tips
- DJI Flying Series Fundamentals, Advanced Features, High-Res Vision for 2024
- Elevate Android Studio Speed and Productivity on Windows
- Eradicating LSA Offline Security Alarm in Windows
- How to Transfer Contacts from Realme GT 3 to Other Android Devices Devices? | Dr.fone
- Make Windows 11 Edge-Less
- Mastering Data Security: Adopt Daily Windows Backup Habits
- Mouse Mystery: Solve Non-Waking Windows 10/11 Devices
- Navigating Windows 11 Install on No Wi-Fi
- Quench the High Contrast Flame in Windows Display
- Remedying Common Office Crash on Windows XP/Vista
- Resolved: Fall Guys Performance Issues Causing PC Game Crashes Fixed
- The Foundation of Victory in the World of Diablo
- Tom's Guide to Building and Optimizing PC Systems
- Title: Hidden Panel Wizardry for Windows 11 Users
- Author: David
- Created at : 2024-12-01 01:36:49
- Updated at : 2024-12-06 19:18:53
- Link: https://win11.techidaily.com/hidden-panel-wizardry-for-windows-11-users/
- License: This work is licensed under CC BY-NC-SA 4.0.
