Hear You Now? Troubleshooting Microphone Noise in Google Meet (Windows)

Hear You Now? Troubleshooting Microphone Noise in Google Meet (Windows)
Is your microphone not working in Google Meet? Did you join a meeting, but nobody heard you? It seems like a technical problem, but don’t give up hope yet. This guide explains how to troubleshoot and fix the issue of not using your Google Meet microphone on Windows.
Disclaimer: This post includes affiliate links
If you click on a link and make a purchase, I may receive a commission at no extra cost to you.
Why Is Google Meet Not Working With Your Microphone?
Google Meet facilitates remote collaboration and communication. If you’re having trouble hearing others during a Google Meet, it could be due to microphone issues. Some of the possible causes are:
- A slow or unstable Internet connection often leads to microphone issues in Google Meet.
- An outdated version of Google Meet causes this error, so make sure it’s up-to-date.
- If your microphone is plugged in correctly and the settings are correct, but you still can’t hear your voice, it may be a hardware issue. You should check the physical connections and make sure all parts work correctly.
- If there is background noise, Google Meet can’t isolate your voice. This may result in poor audio quality and microphone issues.
Now you understand the causes of the microphone issue, let’s look at how to troubleshoot and solve it.
Before you begin troubleshooting, check if you’re in Companion Mode on Google Meet . If so, leave and rejoin the meeting as the microphone and speaker are unavailable in this mode. Once you’ve verified that, try these fixes.
1. Unmute the Microphone
If you’re unable to use your Google Meet microphone, check if it is muted. If so, other people can’t hear you. To unmute it, click the Microphone icon in the lower-left corner of the Google Meet window.

If you don’t see this icon, press Ctrl + D on your keyboard. This will unmute the Microphone and allow others to hear you in the meeting.
2. Test Google Meet Microphone
If you unmute the microphone and still can’t get it to work, try testing the microphone. This is how you do it.
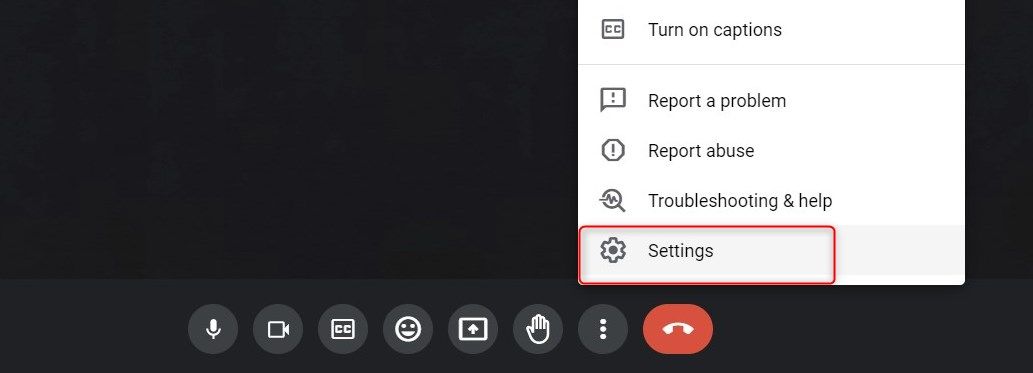
- Click the three dots (More options) in the lower-right corner of the Google Meet window.

- Select Settings from the menu.
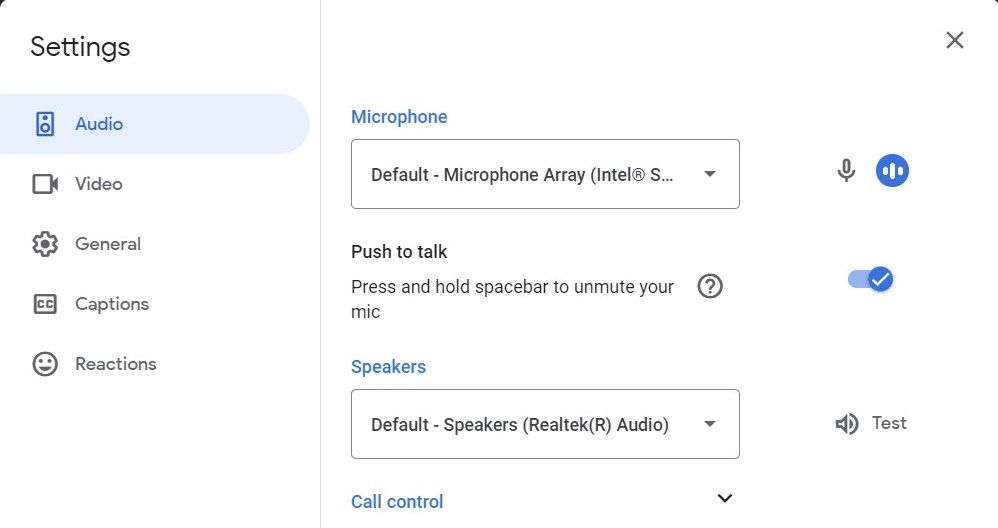
- In the pop-up window, click Audio from the left sidebar.

- Click the Microphone drop-down menu and go with the default.
- Now speak out loud and check whether the meter next to the microphone icon moves.
If it does, your microphone is working correctly, otherwise, select a different microphone and repeat the steps.
3. Check the Microphone in System Settings
If the microphone test doesn’t work, it’s possible that your computer’s settings prevent Google Meet from using the microphone. To verify this, do the following.
Press the Win + I on your keyboard to open Settings.
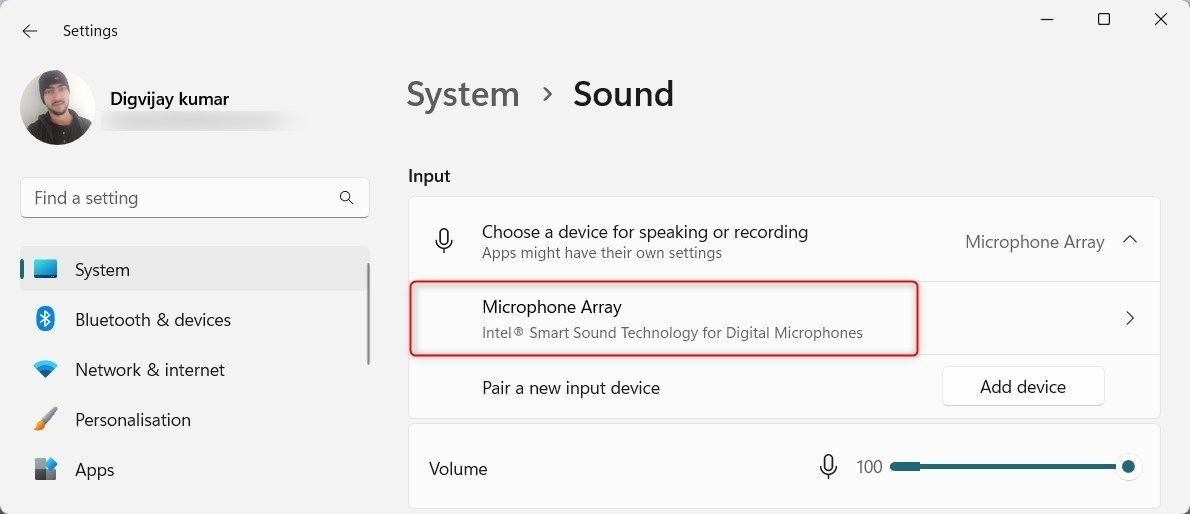
From the left pane, click System > Sound.

Scroll down to the Input section and click on Microphone Array.
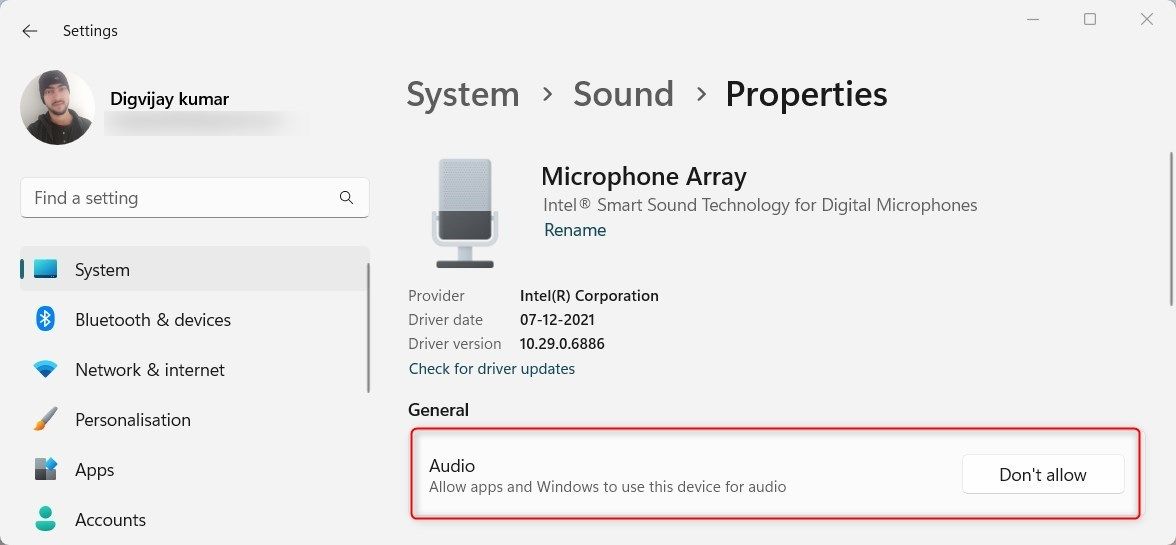
Under General, make sure Windows and apps can use this device for audio.

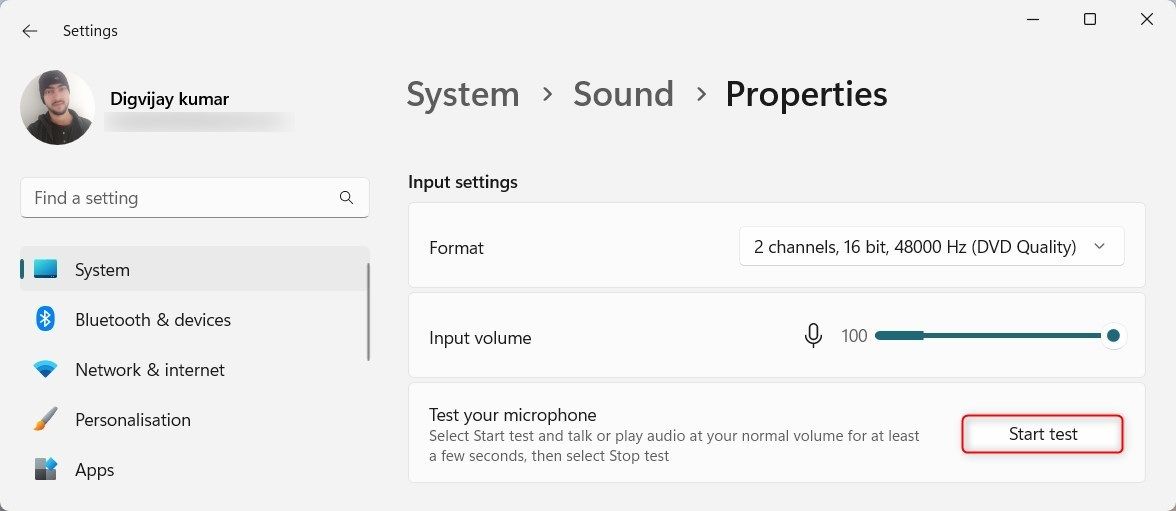
Next, in the Input settings, set the microphone volume to an optimal level.
- Now click the Start test button and talk or play audio out loud for a few seconds.

- Then click Stop test to end the test. You should see a percentage display telling you how loud your microphone is.
- If the volume is not accurate, adjust it accordingly.
Now that everything is set up right and the microphone test works, try starting a Google Meet call to test the sound.
5. Troubleshoot Microphone Problems
If you don’t find Microphone Array as an option in your system settings, or the microphone test doesn’t work, troubleshoot the input devices.
To troubleshoot sound input devices, follow these steps:
- Right-click on Start and select Settings.
- Select System > Sound from the Settings menu.
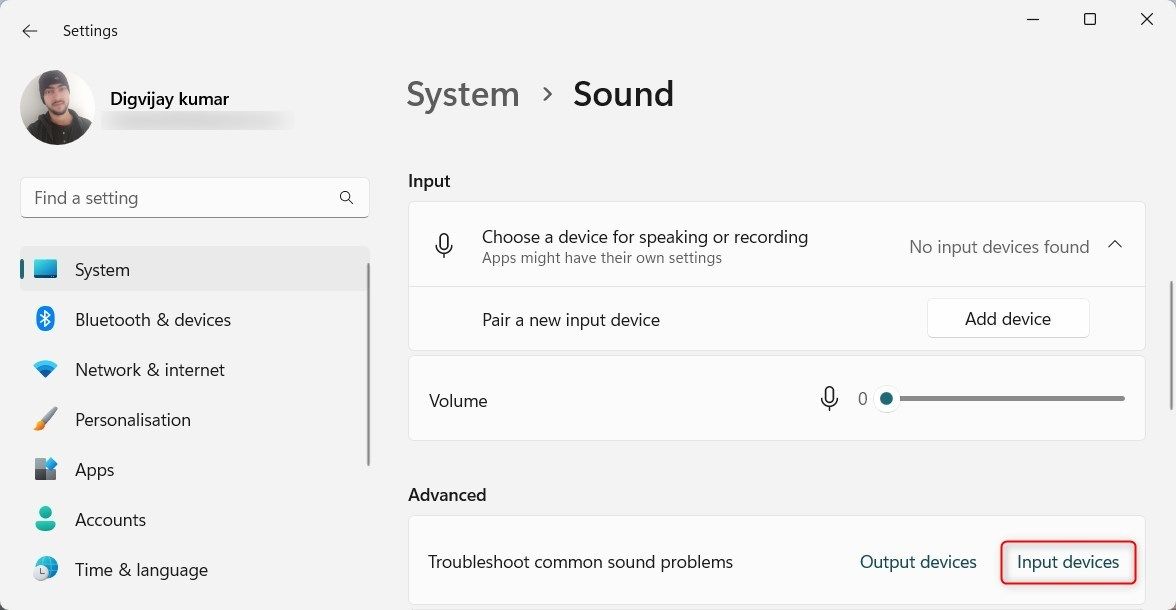
- Now scroll down to the Advanced section.
- Click Input devices next to Troubleshoot common sound problems.

- If a pop-up window asks which input device you want to troubleshoot, choose the Microphone Array and click Next.
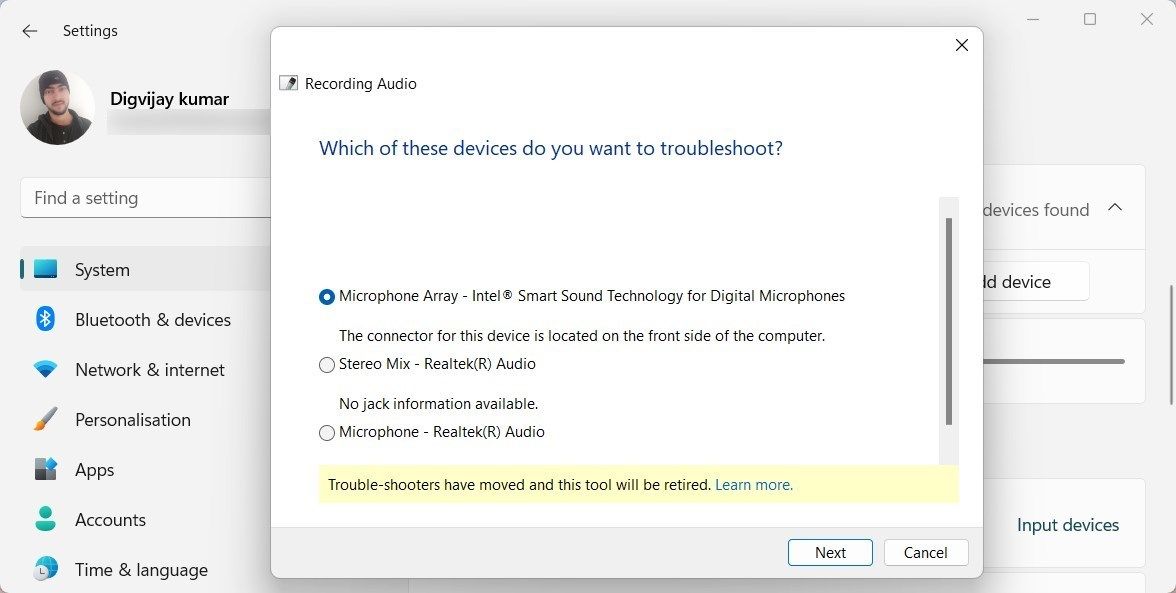
6. Let the troubleshooter finish and apply the changes.
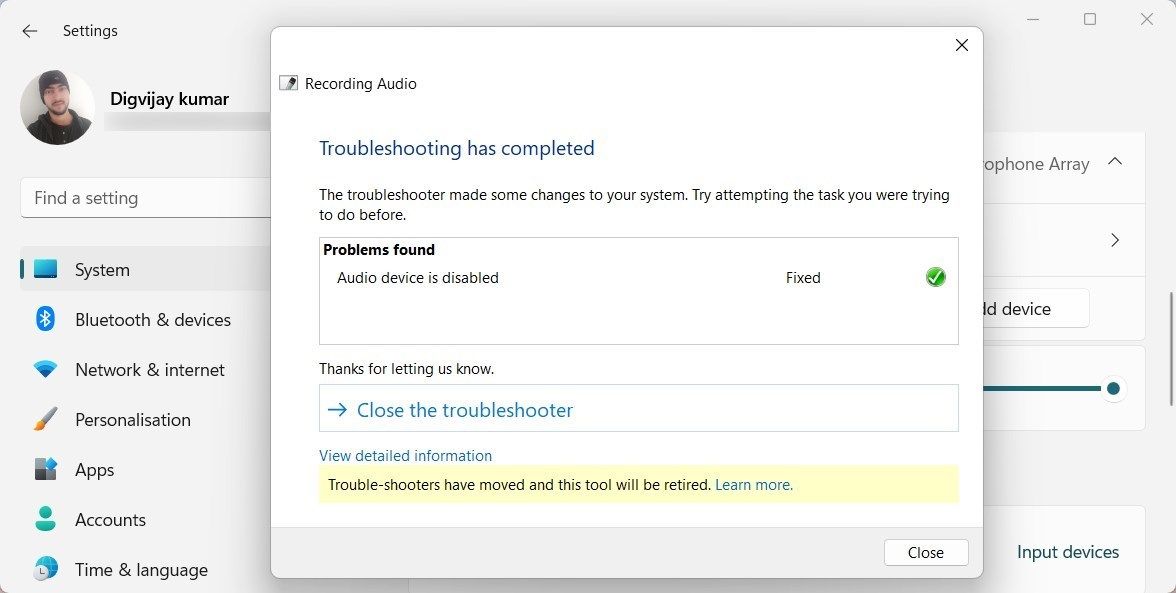
Once finished, close the troubleshooter window and find the microphone array option in your settings. Now follow the steps described in the previous section to check your microphone. After that, try a Google Meet call again.
4. Let Desktop Apps Access Your Microphone
Your microphone may not work if desktop apps don’t have access to it. To give permission, follow these steps:
- Open System Settings .
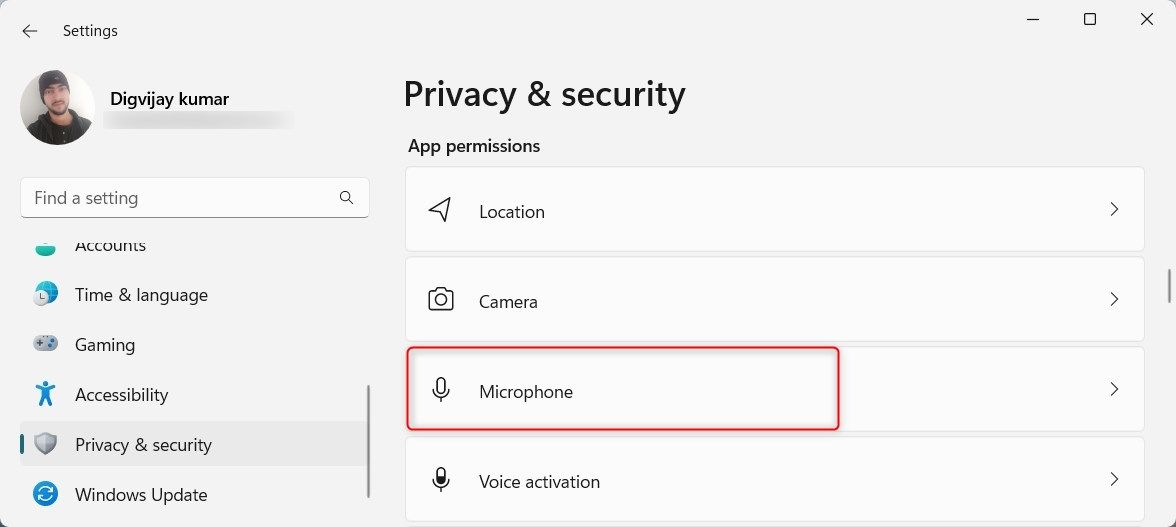
- In the Settings menu, click on the Privacy & security tab.
- Under App permissions, click on Microphone.

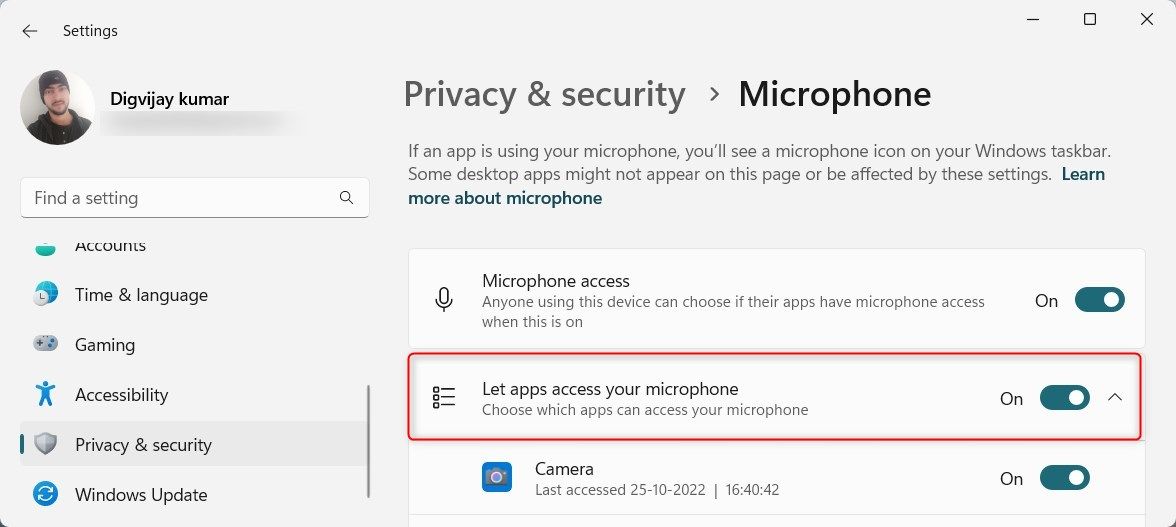
- Turn on the Microphone access switch.
- Now ensure Let apps access your microphone is toggled on.

- Scroll down and make sure the apps you want to use have permission to access your microphone.
Once all settings are correct, try starting a Google Meet call and see if the microphone works.
5. Check Browser Permissions
Using the wrong browser settings prevents Google Meet from accessing your microphone. It seems simple but is often overlooked.
To check your browser permissions, follow these steps:
- Open Google Chrome or any other browser you’re using.
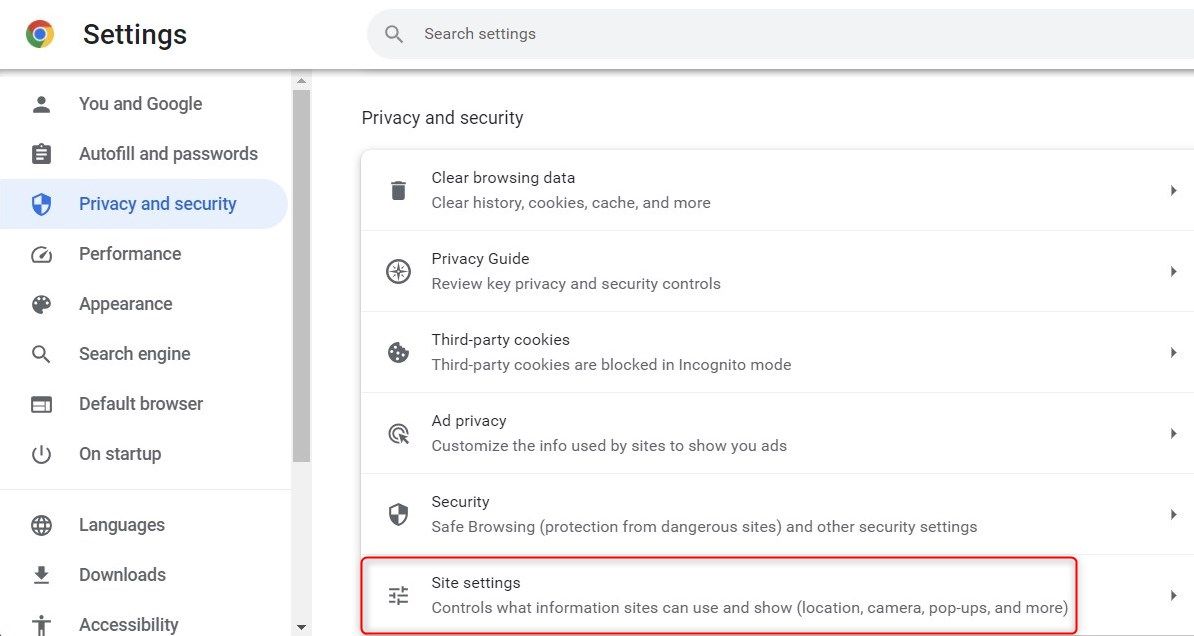
- Click three dots in the top-right corner and select Settings.
- Click Privacy and security in the left panel.
- At the bottom, click Site settings.

Screenshot by Digvijay Kumar - No attribution
- Under Permissions, select Microphone.
- Make sure the browser can access your microphone.
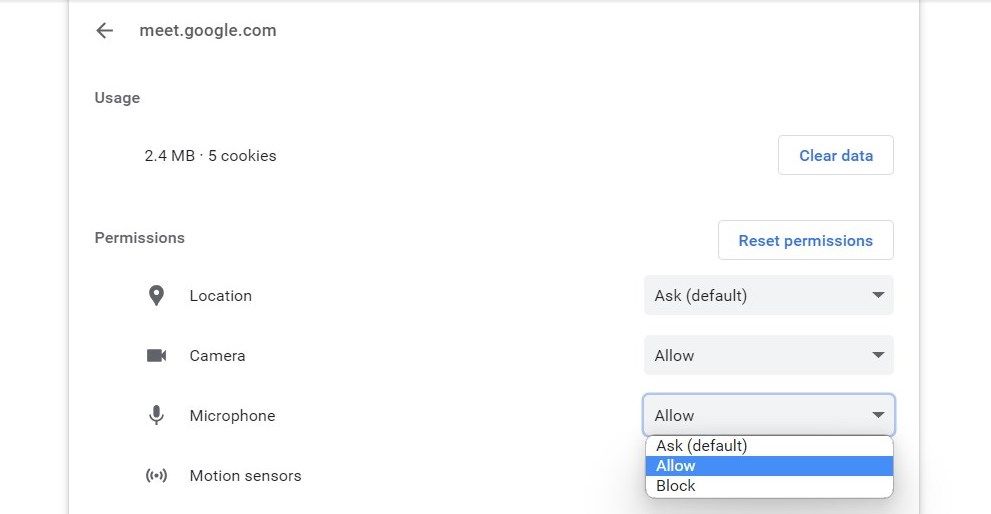
- Look for Allow sites to access your microphone and click meet.google.com to expand it.
- Under the Permission section, click the Microphone drop-down menu and select Allow.

Once you’ve checked the permissions are correct, try joining a Google Meet call using your microphone.
6. Clear Browser Cache and Cookies
When you visit a website, your computer stores information in its cache to load the page faster. If this data becomes outdated or corrupted, it can cause microphone issues in Google Meet. To clear the cache and cookies, follow these steps:
- Open your browser and press the Ctrl + Shift + Del shortcut keys. This will open the Clear browsing data window.
- Select All time from the Time range drop-down menu.
- Make sure Cookies and other site data and Cached images and files are checked.

- Click Clear data at the bottom of the window.
Once you clear the browser data, restart the browser and join the Google Meet call again. Your microphone should work now.
Fixing Google Meet Microphone Issues on Windows
When your microphone doesn’t work during Google Meet meetings, it can be frustrating. However, allowing Google Meet to access your microphone usually solves the issue. If the problem persists, there are other options like Zoom and Microsoft Teams you can try. This means you don’t have to stick to unstable web conferencing services.
Also read:
- [New] 2024 Approved Apple Music for Dynamic Video Enhancement
- [New] In 2024, Detailed Analysis and Overview of Du Recorder’s Capabilities
- 2024 Approved Instagram Filter Techniques for a Stunning Feed
- Discover 16 Complimentary Tools and Materials for Sign Language Education
- Eradicating WoW's Crash Code #132: Essential Steps for Win11
- Fixing the Disabled Remove Feature on Windows 11 System
- In 2024, Looking For A Location Changer On Lava Storm 5G? Look No Further | Dr.fone
- Leading Mobile Hotspot Enabler Applications: A Comprehensive Guide
- Lenovo BT Driver Glitch, W11 Solved Guide
- Troubleshooting Windows 11: Restarting Your Failed Mobile Hotspot
- Unlocking Productivity: Introducing Microsoft Copilot
- Updated In 2024, Free Audio Magic at Your Fingertips The Essential Top 10 Sound Blending Software
- Upgrade for Agility: Dynamic Tiling Desktop on Windows
- Title: Hear You Now? Troubleshooting Microphone Noise in Google Meet (Windows)
- Author: David
- Created at : 2024-12-08 07:26:46
- Updated at : 2024-12-13 07:43:23
- Link: https://win11.techidaily.com/hear-you-now-troubleshooting-microphone-noise-in-google-meet-windows/
- License: This work is licensed under CC BY-NC-SA 4.0.
