
Fix Static Speakers After Disabling Default Sounds
Fix Static Speakers After Disabling Default Sounds
So you’ve tested your sound drivers and found that the test tone isn’t playing on Windows. This problem occurs with an error message such as “Failed to play test tone” or something similar.
Dealing with audio problems on Windows is sometimes frustrating, but there are simple solutions available. This guide shows you how to troubleshoot the issue and get your speakers working again.
1. Restart Your Computer
If the test tone isn’t playing, restart your computer first. This often refreshes the system and solves small glitches that may have developed. It’s a simple workaround but sometimes effective.
To restart your computer, close any running applications. After that, press Alt + F4, or right-click the Start menu and select Shut down or sign out > Shut down.

2. Run the Audio Troubleshooter
Windows comes with a built-in troubleshooter for minor audio problems. It diagnoses and fixes issues related to audio hardware, settings, and driver configuration. Here’s how to use this tool.
- Press Win + I on your keyboard to open the Settings app.
- In the Settings menu, navigate to System > Troubleshoot.
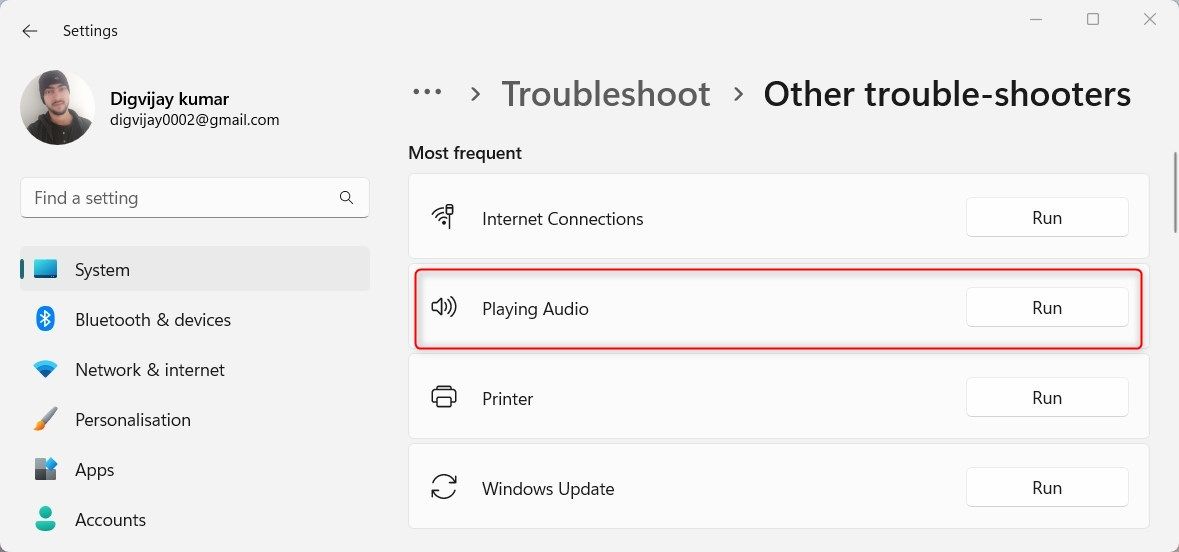
- Click Other troubleshooters on the next page.
- Next to the Playing Audio troubleshooter, click the Run button.
Software Update Pro - Check and update software installed on your computer.
 Software Update Pro - Check and update software installed on your computer.
 Wait for a while until Windows scans and fixes the issue. After this, see if the test tone is working.
3. Restart the Windows Audio Service
The Windows Audio service is responsible for controlling the sound on your computer. It’s possible that this service stopped running and caused the test tone to fail. In this case, you must restart the Windows Audio service to get your sound back. Here’s how.
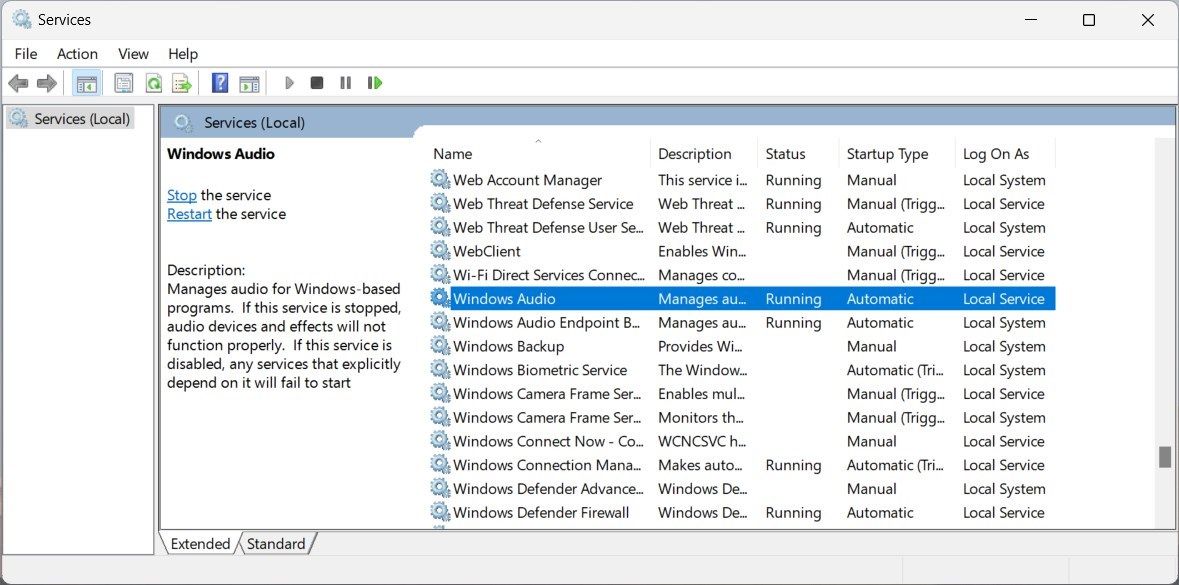
- Click on Start, type services.msc, and press Enter.
- In the Services window, scroll down to find the Windows Audio service.
- Once found, double-click it to open its Properties window.
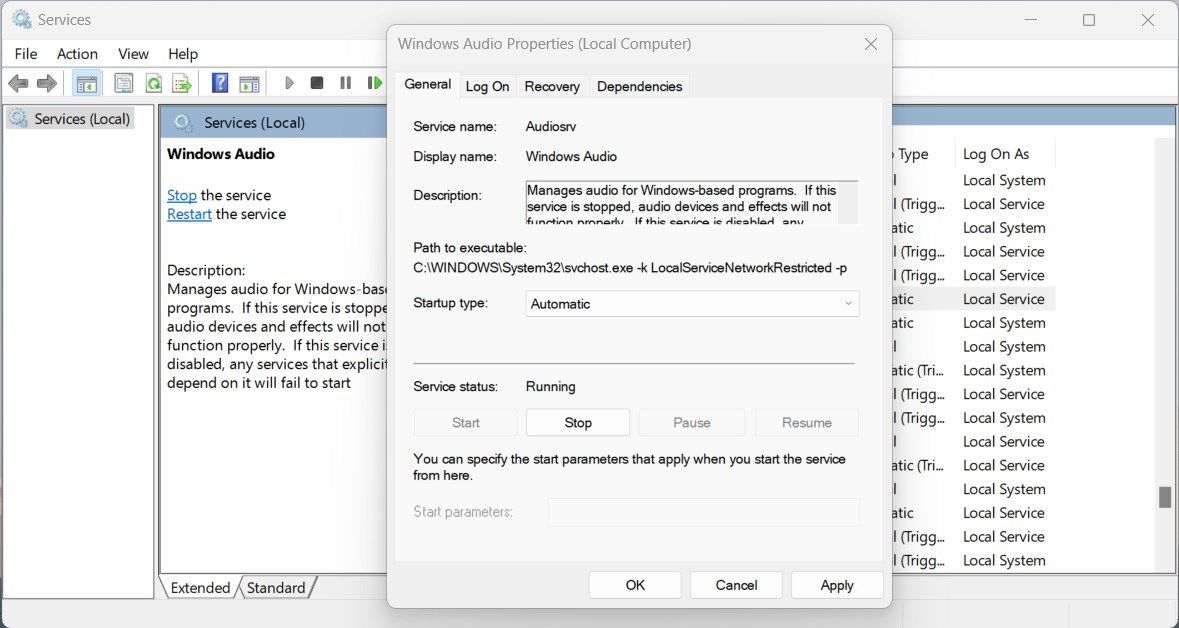
- In the General tab, click on the Start type drop down menu and select Automatic.
- Now go to the Service status section and click on Stop.
- Wait for a few moments, then press Start to restart the service.
- Click Apply > OK to save the changes.

After doing this, close the Services window and open any audio application to check if the test tone is playing.
4. Turn Off Audio Enhancements
The audio enhancement feature on Windows enhances audio quality and adds additional effects to audio playback. However, it sometimes leads to audio problems and glitches. Disabling this feature may fix any sound issues you have.
To disable audio enhancement, do the following:
- Press Win + X on your keyboard and select Run from the menu list.
- Type “Control Panel” in the search field and hit Enter.
- Click Hardware and Sound in the Control Panel.
- On the right side of the window, click Sound.
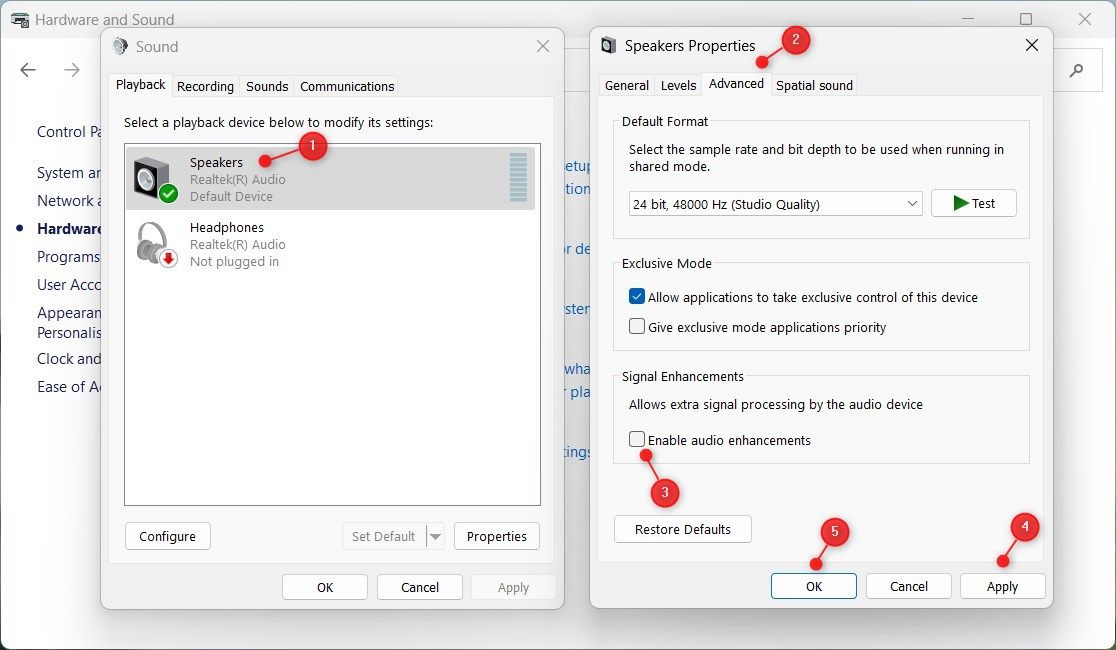
- In the Sound window, select the Playback tab.
- Right-click any device with a green check mark and select Properties.
- On the Advanced tab, uncheck the box for Enable audio enhancements.
- Now click Apply > OK to save the changes.
Audio enhancements should now be disabled, and you may find your sound issues resolved. If you have multiple audio devices, repeat the process for each device. Once you have completed these steps, restart your computer and check if your audio issues have been resolved.
5. Update the Audio Driver
Outdated or corrupted audio drivers may lead to the test tone not working. You will need to update them to get your sound back on Windows.
To update the audio driver:
- Press Win + R on your keyboard to open the Run command .
- Type devmgmt.msc in the dialog box and press Enter.
- In the Device Manager window, expand the Audio inputs and outputs section.
- Find your audio device. Note the manufacturer and model name.
- Search online for drivers for your device. Usually, these will be on the manufacturer’s website.
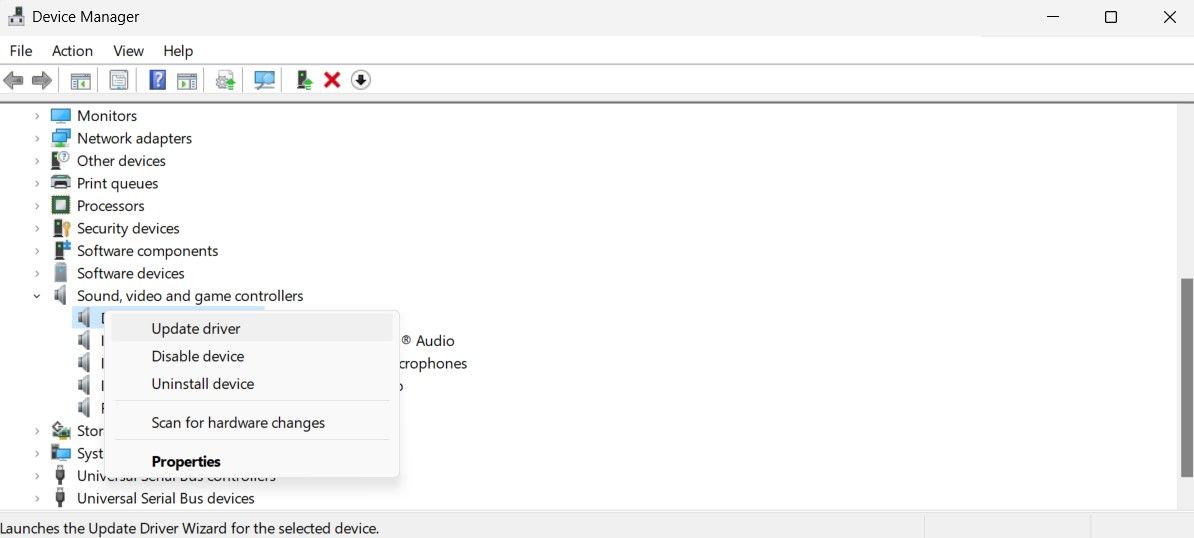
These drivers usually install with a double-click, but if it doesn’t, go back to Device Manager and do this:
- Right-click your audio device and select Update driver.
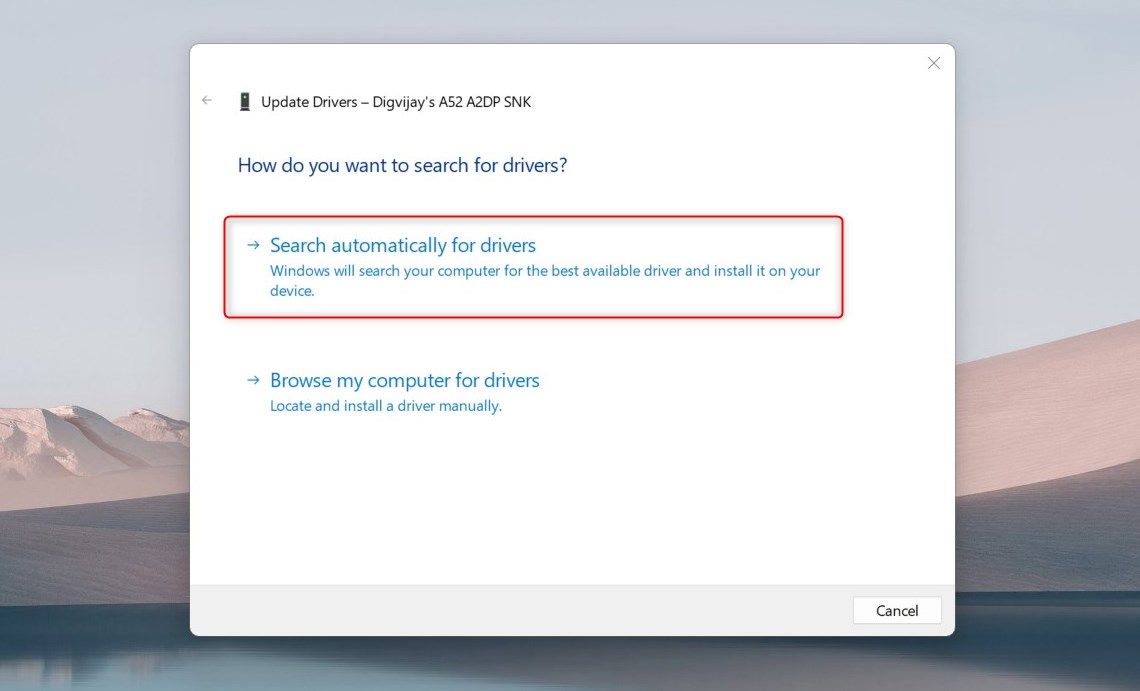
- On the next page, select Search automatically for drivers. If it doesn’t find anything, select Browse my computer for drivers and select it manually.
OtsAV TV Webcaster
 OtsAV TV Webcaster
Wait until Windows downloads and installs the latest driver version. Once done, restart your device and check if the test tone is now playing.
6. Reinstall the Audio Drivers
If you’re still having the same issue, then your audio drivers might be corrupted. So uninstall and reinstall them and check if it works. This process completely removes and reinstalls the driver package on your computer.
It’s a bit more time-consuming but worth trying if the above solutions fail. Here’s how to do it:
- Right-click on the Start menu and select Device Manager.
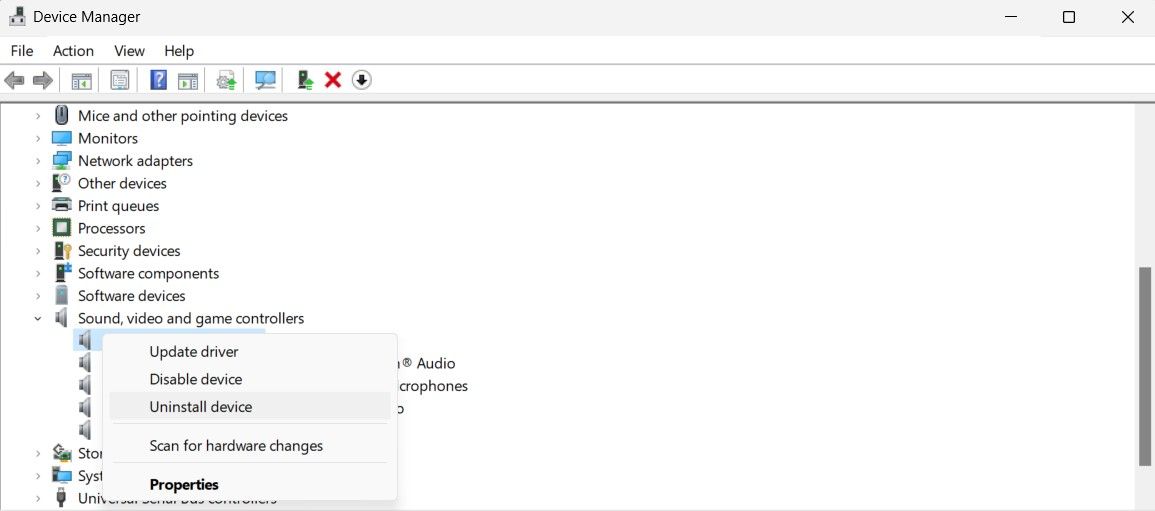
- Expand the Audio inputs and outputs section.
- Right-click your audio device and select Uninstall device.
- If a warning pops up, click Uninstall to continue.
- Now follow the on-screen instructions to uninstall the audio driver.
After this, close the window and restart your computer. Once your system is up, Windows will automatically detect the audio device and install its driver. This will fix the issue if the driver was corrupted.

7. Try Different Audio Formats
Sample rate and a bit depth are two important settings that affect the sound quality on your computer. If these settings are not configured correctly, audio glitches may occur, causing the test tone to fail. Based on your device specs, you can change the sample rate and see if it helps.
To change these settings, do the following:
- Open the Control Panel and view it as the Category.
- Click Hardware and Sound in the Control Panel, then select Sound.
- On the Playback tab, right-click on your audio device and select Properties.
- Next switch to the Advanced tab and check the box next to Allow applications to take exclusive control of this device.
- Under Default format, select your desired sample rate from the drop-down menu.
- Now try playing a test tone and see if it works.


If this solution works, you should leave the settings at their current values. If it doesn’t work, go back and select a different sample rate. Once you find the correct settings, click Apply > OK to save the changes.
8. Perform a Few General Fixes
Besides the methods mentioned above, you can try a few general fixes that may help you get the test tone working.
- Disconnecting & reconnecting the audio device. Sometimes, this is all you need to do to fix it.
- Updating Windows to the latest version .
- You can also perform a clean boot . It disables unnecessary third-party software running in the background, which may cause the issue. I
- If the problem persists, use the System File Checker tool . This utility scans all protected system files and replaces them if they are corrupted.
Playing the Test Tone Again on Windows
It appears that you are having problems with your sound card and the Windows test tone is not playing. Hopefully, one of these tips worked for you, and your speakers are now working.
Dealing with audio problems on Windows is sometimes frustrating, but there are simple solutions available. This guide shows you how to troubleshoot the issue and get your speakers working again.
- Title: Fix Static Speakers After Disabling Default Sounds
- Author: David
- Created at : 2024-08-16 00:00:28
- Updated at : 2024-08-17 00:00:28
- Link: https://win11.techidaily.com/fix-static-speakers-after-disabling-default-sounds/
- License: This work is licensed under CC BY-NC-SA 4.0.