
Expanding Windows Hard Drive Sustainably
Expanding Windows Hard Drive Sustainably
If one of the volumes on your Windows computer is full, you always have the option to extend it to give it more storage space. However, this can be impossible if the option to extend said volume is grayed out in Disk Management.
Here’s how you can fix that issue and bring back the grayed-out “Extend Volume” option without erasing your precious data.
Why Is the Extend Volume Option Grayed Out?
There are many reasons why the “Extend Volume” option in Disk Management is grayed out, but the common ones include:
- There is no unallocated space, which is free disk space on your computer that doesn’t belong to any partition or volume, on any of your drives.
- You have unallocated space, but there’s not enough free space on it for the volume you’re trying to extend.
- The volume you’re trying to extend is not using the correct file system.
- You’re trying to extend a volume that cannot be extended, such as the system or recovery partition.
As we covered in our guide on how to fix a grayed-out “extend volume” button on Windows , reformatting the drive to a supported file system and deleting partitions are good ways to fix this issue. However, both of these methods involve erasing data on the drive, which is unideal if all of your partitions contain valuable data.
In some instances, you’re forced to erase data to extend a volume again. For instance, if the partition uses an unsupported file system type, you’ll need to reformat it into a different file system (usually NTFS) to unlock it again. In this case, your best bet is to perform a data backup and then format the partition.
However, if your partition uses a supported file system, let’s discuss how you can bring back the option to extend volumes on Windows without erasing your data.

1. Shrink a Volume to Create Unallocated Space
If you don’t have unallocated space on any of your drives to extend a volume, you can simply shrink one of the existing volumes to create it. This can also help if the unallocated space on one drive is not large enough for volume extension since it will shrink the other volumes to create more unallocated space.
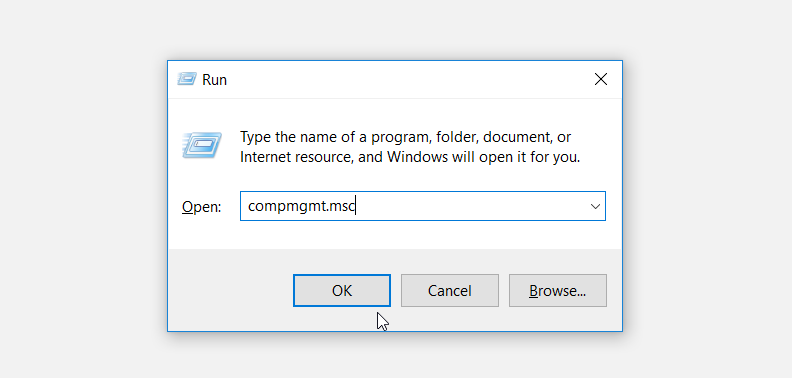
To shrink a volume on Windows, start by pressing Win + R to open Windows Run. Then, enter compmgmt.msc in the Run text box and press Enter to open Computer Management.

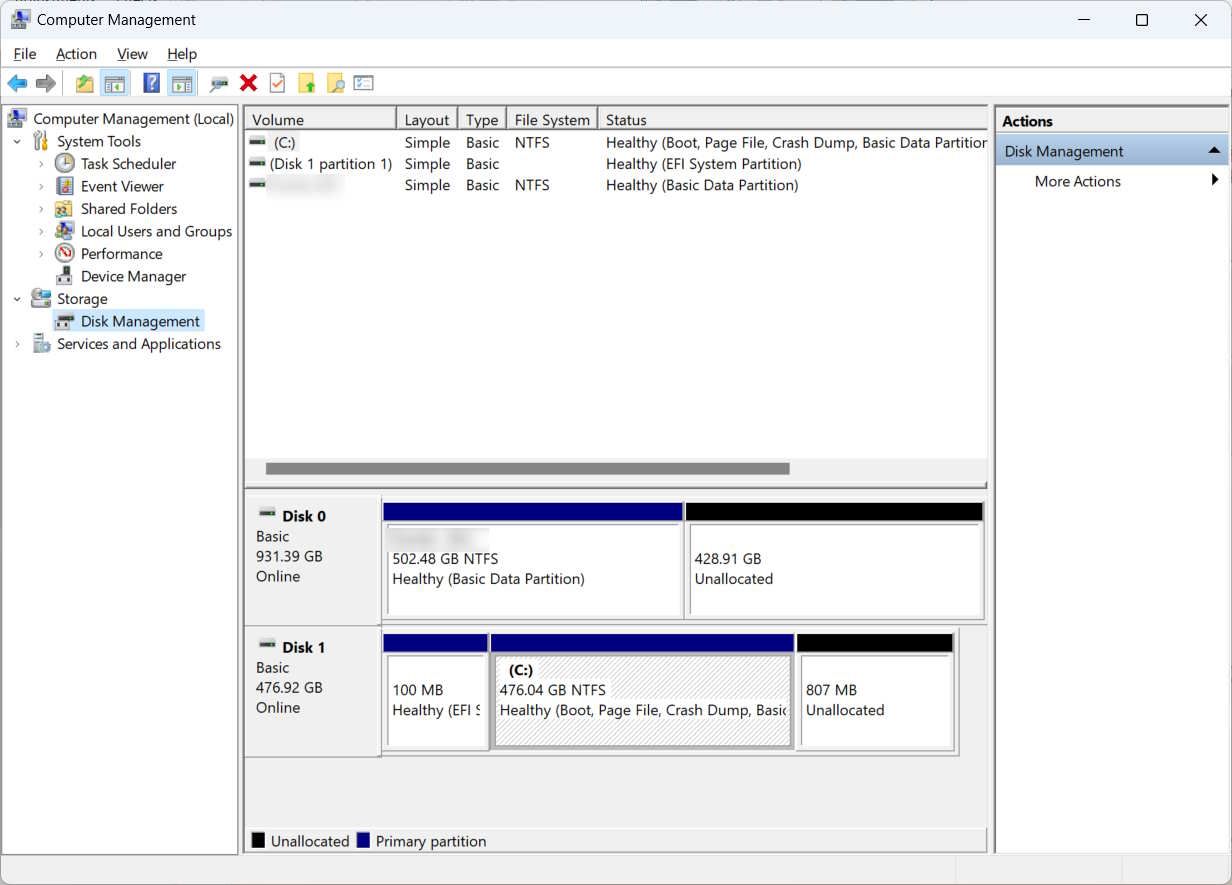
In the Storage section of the left panel, select Disk Management.

In the right panel, right-click the volume you want to shrink and select Shrink Volume.
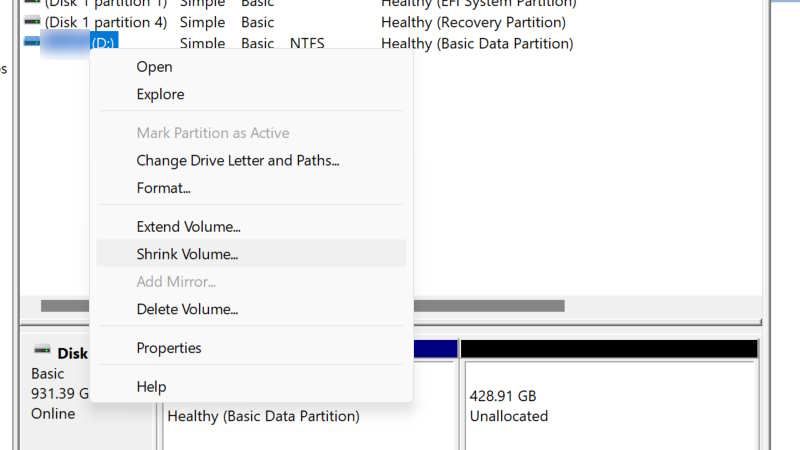
Enter the amount of space you want to shrink (keeping in mind that you cannot exceed the amount that is available to shrink) and then click on Shrink.


company, user or members of the same household. Action! - screen and game recorder</a>
It will take a few seconds to shrink the volume, but when it’s done, you should have some unallocated space. Now, check to see if the option is available when you right-click the volume you want to extend.

2. Delete the Recovery Partition
If the unallocated space you need is small, you can also try deleting the recovery partition. This will free up some room and allow you to extend your current partition without losing any of your personal data.
Unfortunately, the recovery partition is not just free space waiting to be reallocated. This special partition contains essential files and tools that help you with system recovery and repair in the event something goes wrong. As such, we usually recommend against deleting it.
However, if you’re confident you won’t need the recovery partition in the future, you can delete it without harming your PC. By default, Windows doesn’t allow you to delete the partition via Disk Management, but you can get around this limitation using the Command Prompt. From there, you have to select the recovery partition you want to erase and then delete it.
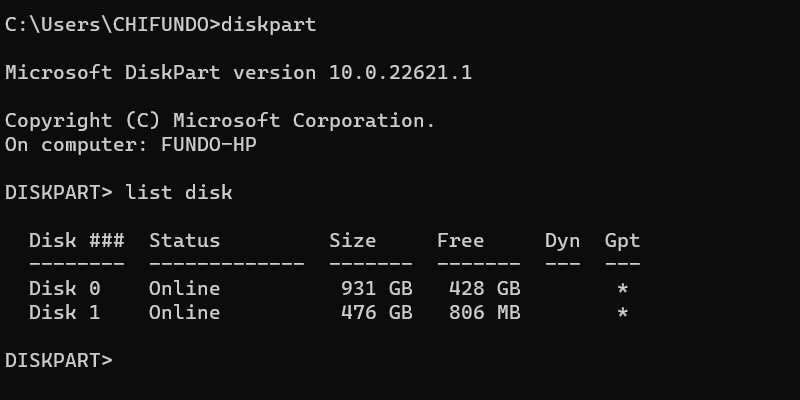
Start by opening Command Prompt as an administrator . Then, begin entering the below command in the Command Prompt to gain access to the disk partitions:
Diskpart
Next list all the disk partitions on your computer with the following command:
list disk
From here, you can select the disk you want using the numbers in the Disk ### column.
So, if you want to select disk drive #1, you’d run the below command:
select disk 1
You would also need to know what number the partition you’re trying to delete is on the disk, and to do that, enter the below command:
list partition
You will find the number for the partition you want in the Partition ### column. For us, the recovery partition is the 4th partition, and to select it, we would run the below command:
select partition 4
To delete it, run the command below:
delete partition override
Once the command completes running, the Recovery partition will be gone and there should be some unallocated space you can use to extend the volume.
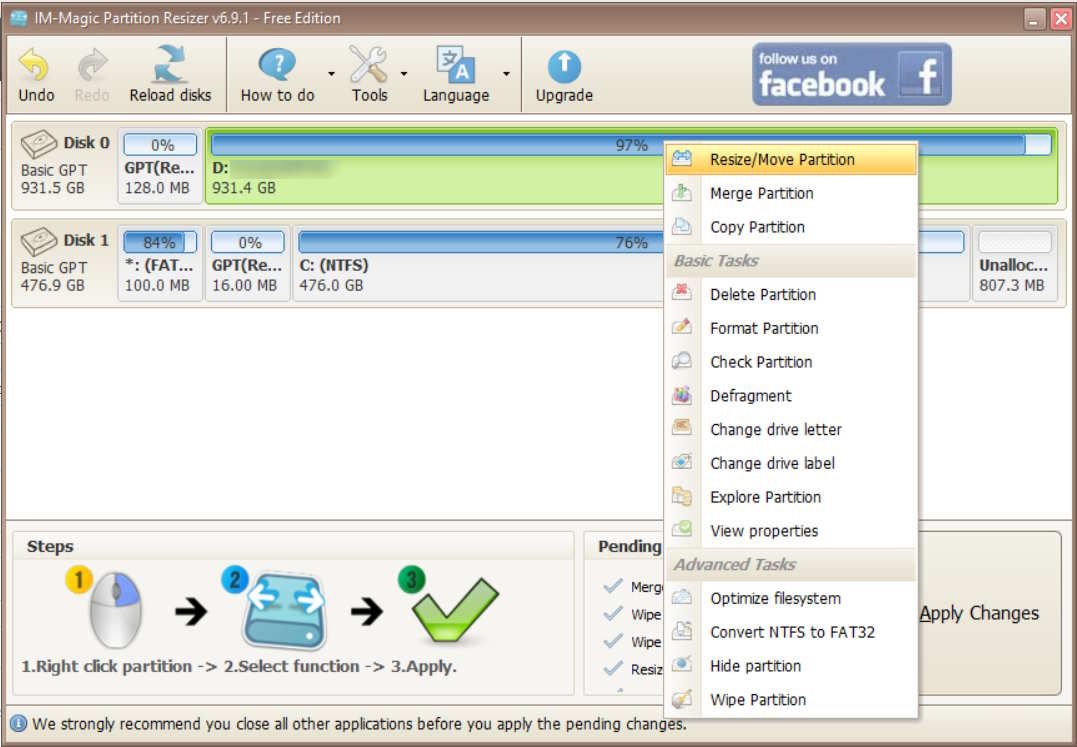
3. Use Third-Party Software to Extend the Drive
You can use other tools besides Disk Management to shrink and delete volumes on Windows. To use one of these third-party disk management programs, start by downloading IM-Magic Partition Resizer Free , extract the ZIP file in the download location, and install it.
Next, launch the app, right-click the volume you want to shrink, and then select Resize/Move Partition.
In the Volume size text box, enter how much you want to shrink the volume by and then click on OK.
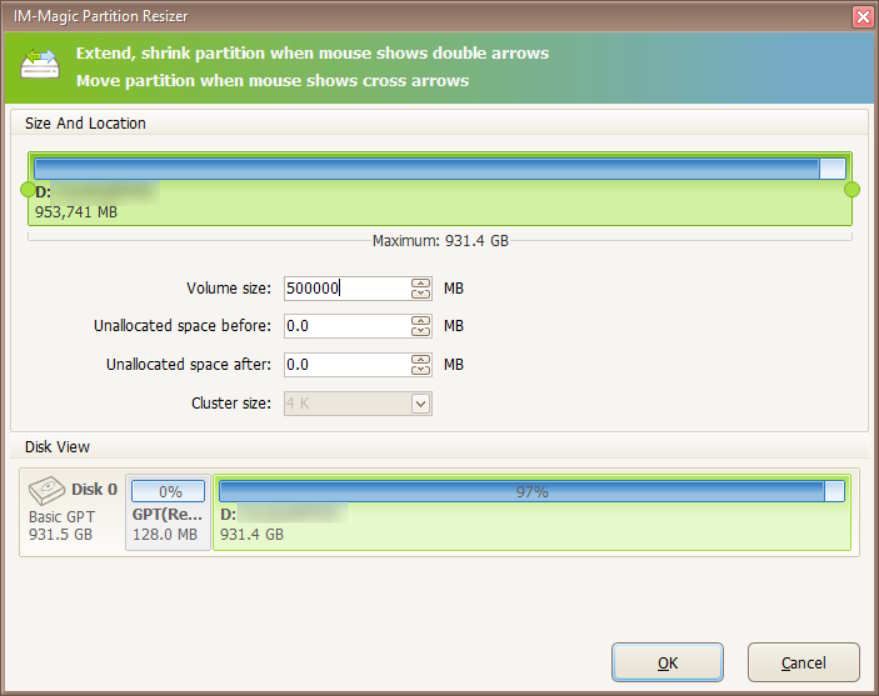
It should take a few seconds to resize the volume, and when it finishes, you should be able to see some unallocated space, allowing you to extend the volume you want to in the first place.
Regain Your Ability to Extend Volumes on Windows
Extending a volume is a great way to give it more space to store items. However, the option to extend that volume might not always be available. Luckily, you can bring back the option by shrinking a volume, deleting the recovery portion, making sure the volume is using a file system that is extendable, and using third-party software to resize existing volumes.
Here’s how you can fix that issue and bring back the grayed-out “Extend Volume” option without erasing your precious data.
- Title: Expanding Windows Hard Drive Sustainably
- Author: David
- Created at : 2024-08-16 00:18:00
- Updated at : 2024-08-17 00:18:00
- Link: https://win11.techidaily.com/expanding-windows-hard-drive-sustainably/
- License: This work is licensed under CC BY-NC-SA 4.0.