
Excel Tips: Leveraging the Power of Scenario Analysis with Microsoft Excel’s Tools

Excel Tips: Leveraging the Power of Scenario Analysis with Microsoft Excel’s Tools
Quick Links
If you’ve ever had to decide between two or more financial situations, you may have done some spreadsheet manipulation. You might have entered different numbers to see the varying outcomes. But did you know you can use Excel’s Scenario Manager for just that?
You may be deciding between jobs, projects, products, or something similar where the difference between them is financial, or basically, numeric. With the Scenario Manager in Microsoft Excel, you can enter values for each different situation, save them, and then switch between them with a click.
This can help you forecast finances or make a decision based on the results of the Scenario Manager. For the best way to show how useful the tool can be, let’s walk through an example.
Use the Scenario Manager in Excel
For our example, we must decide between two different jobs. Job 1 has a lower salary but is closer to home which makes our fuel cost lower. Job 2 pays more but is further from home making our fuel cost higher. We want to see which job leaves us with more money at the end of the month.
Related: How to Change the Cell Reference Style in Excel
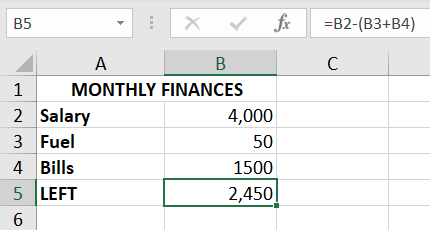
Add your first scenario’s data into your sheet. Here, we have the salary for Job 1 in cell B2, minus our fuel cost in cell B3 and monthly bills and cell B4. We enter a simple formula into cell B5 that shows us the amount of money left over.
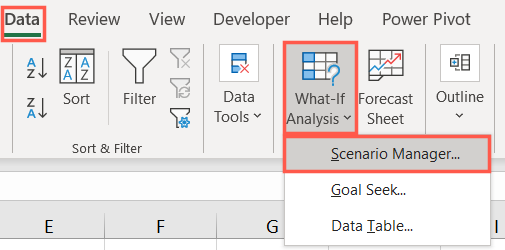
Go to the Data tab, click the What-If Analysis drop-down arrow, and pick “Scenario Manager.”
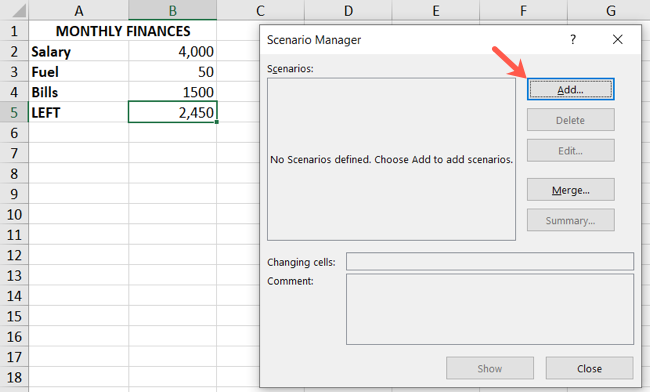
In the Scenario Manager window, click “Add” to include this first scenario.
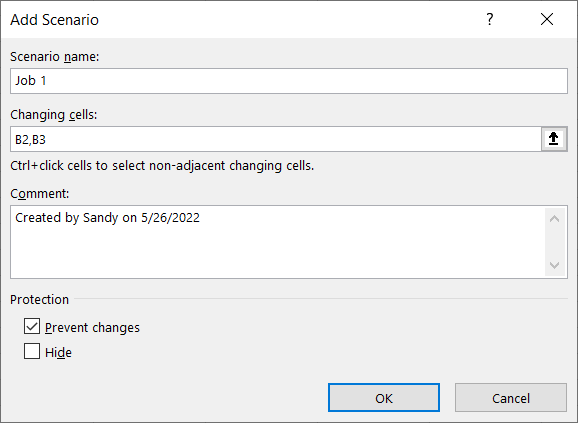
Give your scenario a name; we’ll use Job 1.
Then, select the Changing Cells input box. You’ll enter or select the cell references for all cells you plan to change for the scenario. You can either enter the cell references separated by commas or hold Ctrl (Windows) or Command (Mac) as you click each one.
Related: All the Best Microsoft Excel Keyboard Shortcuts
For our example, our changing cells are B2 for the salary and B3 for the fuel cost. Click “OK.”
In the subsequent pop-up box, enter the values. Since this is the first scenario and you’ve already entered the amounts in the sheet, you should see those values in the corresponding boxes. Confirm and click “OK.”

You’ll then see the Scenario Manager window display your first scenario. Select “Add” to set up the second scenario.
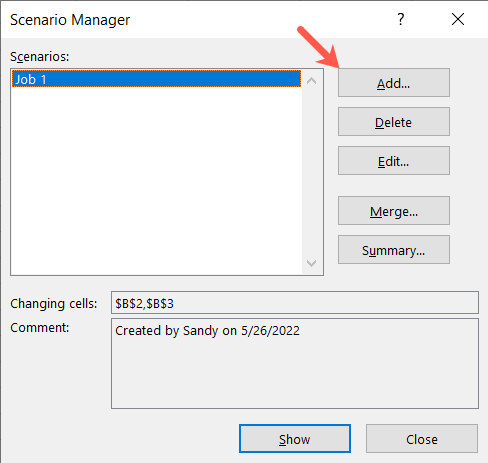
Follow the same steps to give the scenario a name and enter the Changing Cells. The changing cells will likely be the same cell references since you are comparing situations. However, you may use different or additional cells than those shown if necessary. Click “OK.”
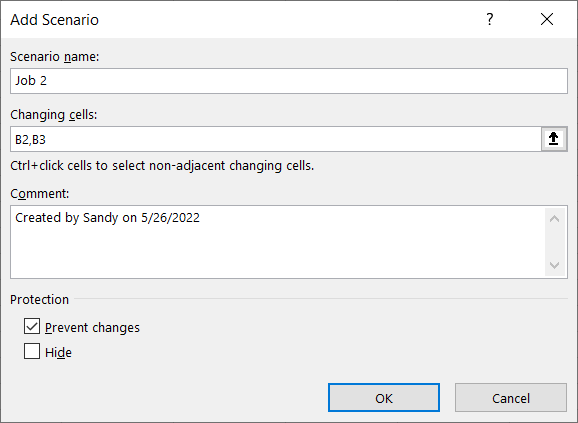
Now, enter the values for the second scenario in the box (not in the sheet). For our example, we enter the salary (B2) and fuel cost (B3) for Job 2. Remember, these are the two variables that change and that we are comparing. Click “OK.”

Now you have both scenarios set up and should see them in the Scenario Manager window.
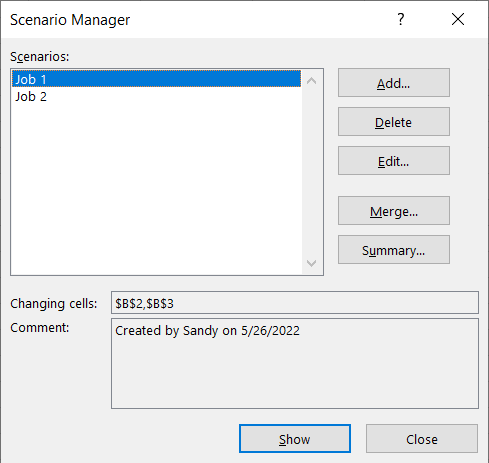
You already see the first scenario for Job 1 in the sheet since you initially entered those details. To see the second scenario, select it in the window and click “Show.”
You’ll see your spreadsheet update to display the values and calculation for the second scenario.
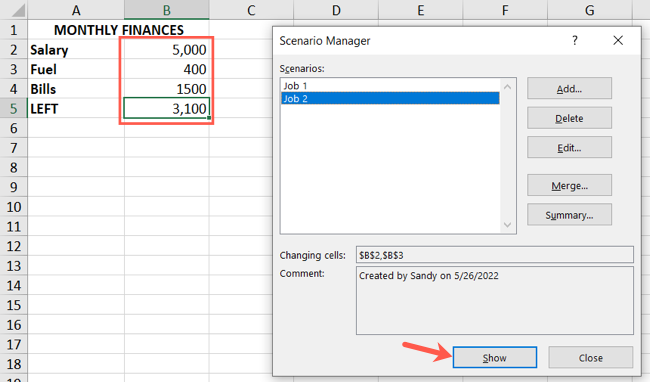
To display the first one again, select it in the Scenario Manager window and click “Show.”
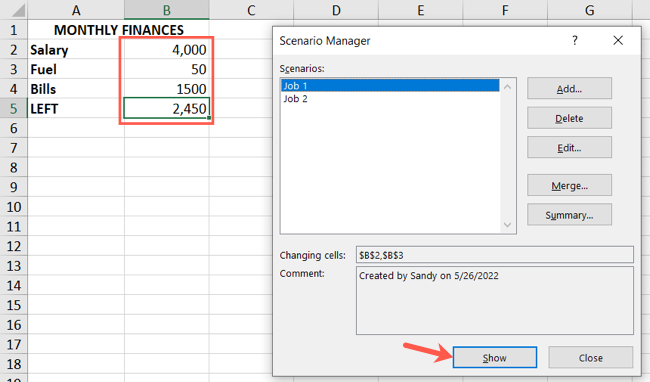
This lets you quickly and easily flip back and forth between the scenarios.
When you land on the one you want to keep in your sheet, make sure it’s displayed there and click “Close” in the Scenario Manager window.
Notes on the Scenario Manager
You can set up as many scenarios as you like and switch between them the same way. This is handy for comparing 3, 5, or 10 different numeric or financial situations .
Related: How to Use Microsoft’s “Money in Excel” to Manage Your Finances
You can use up to 32 changing cells for your scenario. We only used two in our example, but you can go much further and perform many different comparisons.
To change or remove a scenario, open the Scenario Manager, select the scenario and click “Edit” to make changes or “Delete” to remove it.
To show a comparison in one spot, open the Scenario Manager, click “Summary,” and mark Scenario Summary. You’ll see a new tab open with a nice visual of your comparison that you can save or share.
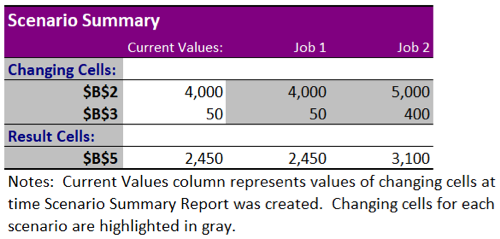
You can select a Scenario PivotTable Report instead of a Summary Report if you like.
Before you spend time swapping out values manually to find the best solution to your situation, be sure to check out the Scenario Manager in Excel. It truly makes comparisons a breeze!
Related: How to Use Logical Functions in Excel: IF, AND, OR, XOR, NOT
Also read:
- [New] The Scripted Shutdown of Stories
- [Updated] From Speech to Text A Complete, FREE Workshop on YouTube Transcription for 2024
- [Updated] In 2024, 8 Sites to Download Free Green Screen Backgrounds and Footage
- 2024 Approved Manipulating Photography Captions
- Best 10 Mock Location Apps Worth Trying On Apple iPhone 7 Plus | Dr.fone
- Effortless Setup for Your Safety-First Workspace (Win 11)
- Fixing Windows 11'S SystemSettings Issues
- Guide to Activate Microsoft Paint, Windows 11 Edition
- In 2024, Clash for Dominance Leading Royale Games
- In 2024, Lock Your Motorola Moto G 5G (2023) Phone in Style The Top 5 Gesture Lock Screen Apps
- Steps for Dealing with 'Your License Is About to End' In Win11
- The Ultimate Pathway to Stunning Window Display Quality
- Tournez Facilement Votre Fichier MP4 en AAC Gratuitement Sur Internet via Le Site De Movavi – Expérience Utilisateur Optimisée!
- Unlocking a Path to Resolve Windows Mail Error (0X800713F) Quickly
- Title: Excel Tips: Leveraging the Power of Scenario Analysis with Microsoft Excel’s Tools
- Author: David
- Created at : 2025-01-04 18:28:49
- Updated at : 2025-01-06 16:01:46
- Link: https://win11.techidaily.com/excel-tips-leveraging-the-power-of-scenario-analysis-with-microsoft-excels-tools/
- License: This work is licensed under CC BY-NC-SA 4.0.