Essential Knowledge: Setting Windows Filter Keys

Essential Knowledge: Setting Windows Filter Keys
Filter Keys is an accessibility feature in Windows that is designed to ignore brief or repeated keystrokes. With this feature enabled, users who struggle with fast or repeated keystrokes can enjoy a more seamless typing experience on Windows.
On Windows, you can enable or disable Filter Keys in a few different ways. This guide shall walk you through all of them in detail.
1. How to Enable or Disable Filter Keys With a Keyboard Shortcut
The quickest way to enable or disable Filter Keys on Windows is with your keyboard. So, let’s start with that.
To turn Filter Keys on or off using a keyboard shortcut, use these steps:
- Press and hold theright Shift key on your keyboard for eight seconds and release it when the Filter Keys dialog box appears.
- ClickYes to enable the Filter Keys.


On the other hand, if you want to disable Filter Keys, click on Disable this keyboard shortcut in Ease of Access keyboard settings . Then, disable the toggle next to Filter keys.
Like using keyboard shortcuts on Windows? Why not check our ultimate guide to Windows keyboard shortcuts ?
 TubeDigger - online video downloader from mostly any site
2. How to Enable or Disable Filter Keys via the Settings App
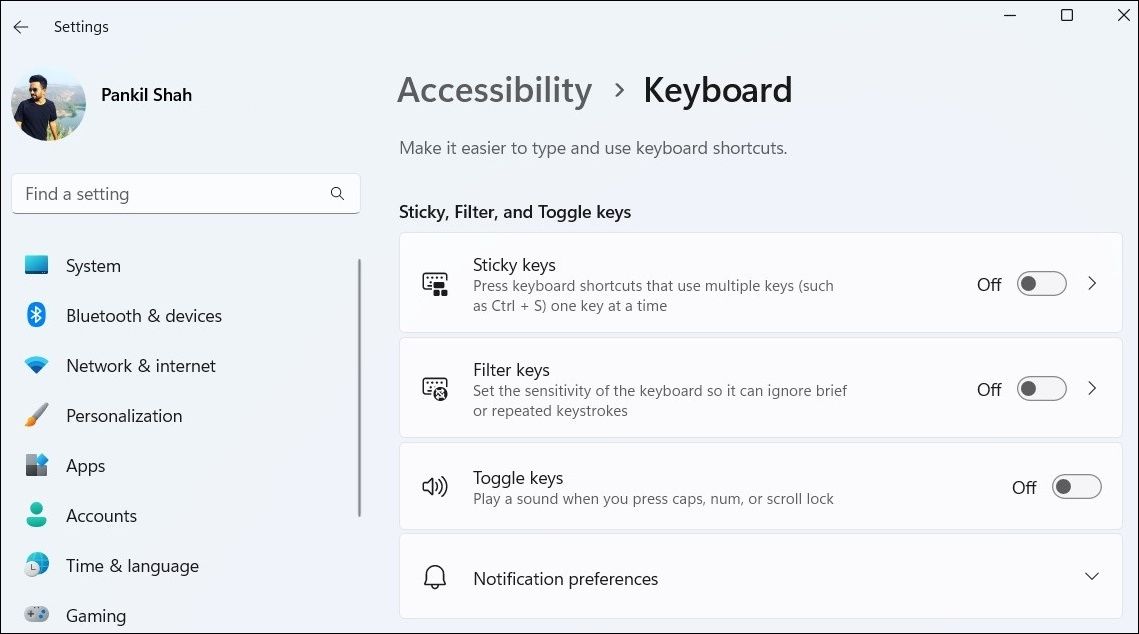
Another quick way to turn Filter Keys on or off on Windows is via the Settings app. For that, you will need to visit the Accessibility tab in the Settings app. Here are the steps you can follow.
- Open theStart menu and click thegear-shaped icon or useWin + I keyboard shortcut to launch the Settings app.
- SelectAccessibility from the left sidebar.
- Under theInteraction section, click onKeyboard .
- Use the toggle next to theFilter keys to enable or disable it. You can click on Filter keys to further customize the feature to your liking.

3. How to Enable or Disable Filter Keys Using the Control Panel
Although Microsoft plans to retire Control Panel at some point in the future, you can use it to configure most of the settings on your Windows computer for now.
Here’s how you can use Control Panel to enable or disable Filter Keys on Windows.
- PressWin + X or right-click on theStart icon to open the Power User menu .
- SelectRun from the list.
- TypeControl in the box and pressEnter .
- Use the drop-down menu in the top right corner to change the view type toSmall icons orLarge icons .
- Click onEase of Access Center .
- Select theMake computer easier to use option.
- Use the checkbox next toTurn on Filter Keys to enable or disable the feature.
- ClickApply followed byOK to save the changes.

4. How to Enable or Disable Filter Keys From the Sign-In Screen
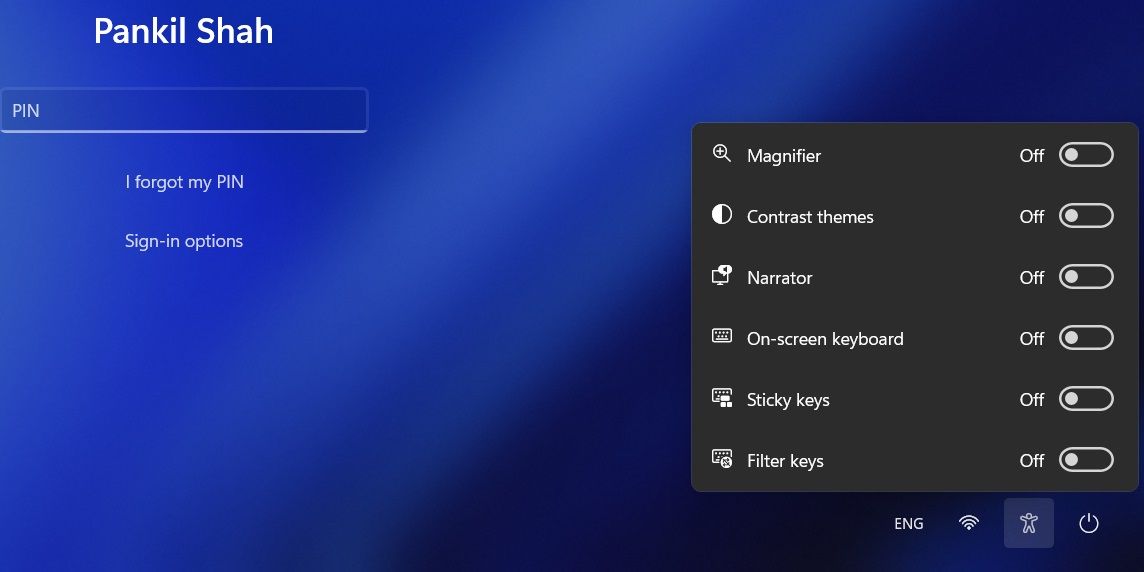
Both Windows 10 and 11 offer the convenience of managing accessibility settings from the sign-in screen. If you are looking to enable or disable Filter Keys from the sign-in screen, use these steps:
- On the sign-in screen, click theAccessibility icon in the bottom right corner of the screen.
- Use the toggle next toFilter keys to enable or disable it.


Similarly, you can also enable or disable Sticky Keys from the sign-in screen. For more information on this, check our guide on different ways to turn Sticky Keys on or off on Windows 11 .
Enabling or Disabling Filter Keys on Windows Is Easy
As we just saw, enabling or disabling Filter Keys on your Windows 10 or 11 computer should be a quick process, regardless of the method you use.
Filter Keys isn’t the only accessibility feature available in Windows. If you need some extra help using your computer, there are plenty of useful accessibility options on Windows.
- Title: Essential Knowledge: Setting Windows Filter Keys
- Author: David
- Created at : 2024-07-29 15:47:49
- Updated at : 2024-07-30 15:47:49
- Link: https://win11.techidaily.com/essential-knowledge-setting-windows-filter-keys/
- License: This work is licensed under CC BY-NC-SA 4.0.


