
ESD Files Demystified: Creating ISO Versions for Windows Systems
ESD Files Demystified: Creating ISO Versions for Windows Systems
Have you ever wondered how Windows Update files get to your computer? Or how Microsoft sends new features and security fixes? This happens through a special file type called ESD. Don’t worry; you don’t need to be a tech guru to understand what they are.
In this article, we’ll take a look at what ESD and ISO files are, and we’ll show you how to convert an ESD file into an ISO on Windows.
What Are ESD and ISO Files on Windows?
ESD (Electronic Software Download) file format is primarily used to deliver Windows updates and new OS versions. When you receive a Windows update, your system fetches this ESD file from Microsoft’s server.
Once downloaded, your system unpacks it (just like you unpack a ZIP file) and overwrites the updated files on your computer.
On the other hand, an ISO (International Organization for Standardization) file is a commonly used file format for disc images. ISO files are often preferred when creating Windows backup disks or flashing new Windows on a computer.
Suppose you haven’t received the latest Windows update yet. In this case, you can easily download the respective ESD file, convert it to an ISO, and flash it on your computer. So, now that you understand the terms let’s walk through the methods of converting an ESD file into an ISO file.
 Screensaver Factory, Create stunning professional screensavers within minutes. Create screensavers for yourself, for marketing or unlimited royalty-free commercial distribution. Make screensavers from images, video and swf flash, add background music and smooth sprite and transition effects. Screensaver Factory is very easy to use, and it enables you to make self-installing screensaver files and CDs for easy setup and distribution. Screensaver Factory is the most advanced software of its kind.
1. Dism++
Dism++ is a powerful free tool that comes packed with a variety of utilities for your Windows system. It provides tools to manage, clean, and optimize your computer. One thing we liked about Dism++ is its image conversion feature. You can convert different images like WIM, ESD, and ISO easily with it.
Here’s how you can use Dism++ to convert your ESD file to ISO:
- Download the latest version from the Dism++ GitHub releases page .
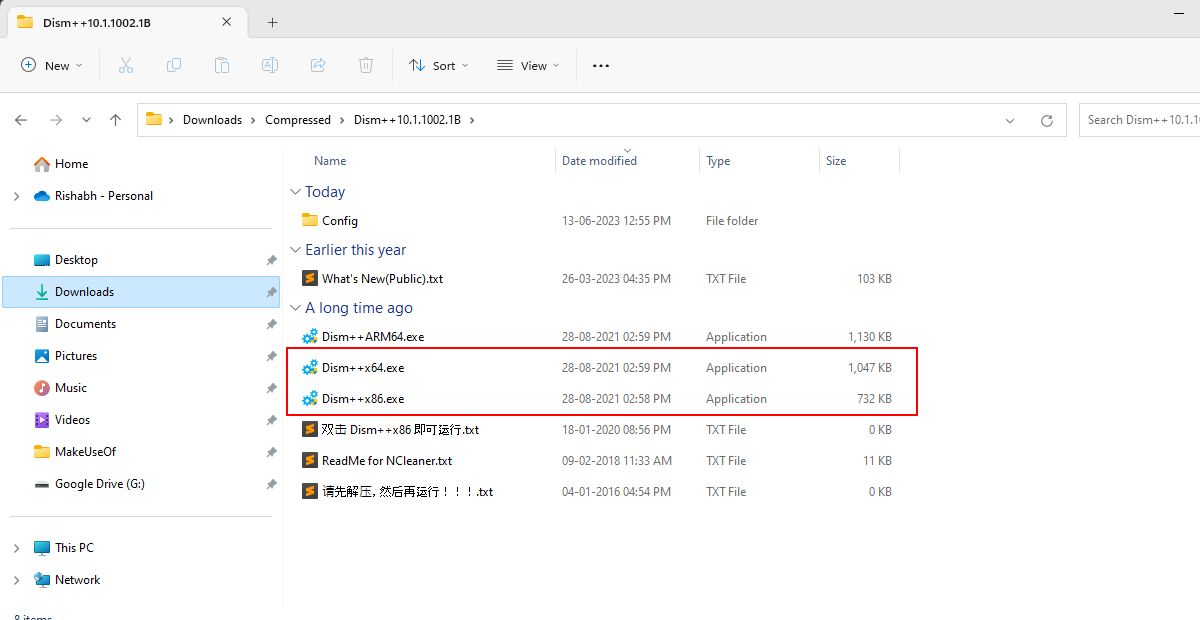
- Run the appropriate Dism++.exe file and click Accept on the installer setup window.

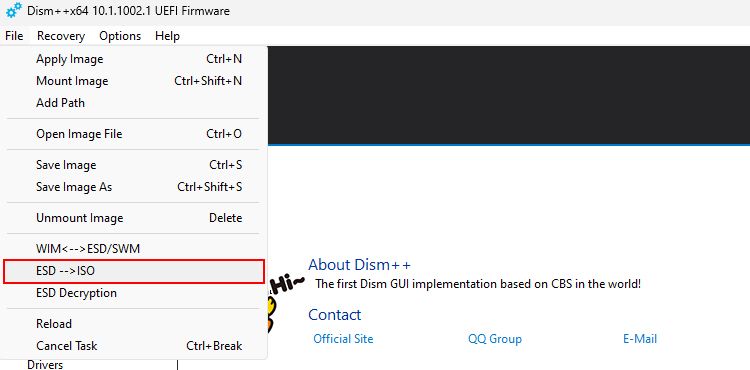
- Click the File menu at the top and choose the ESD –> ISO option. Alternatively, you can navigate to Toolkit > ESD To ISO.
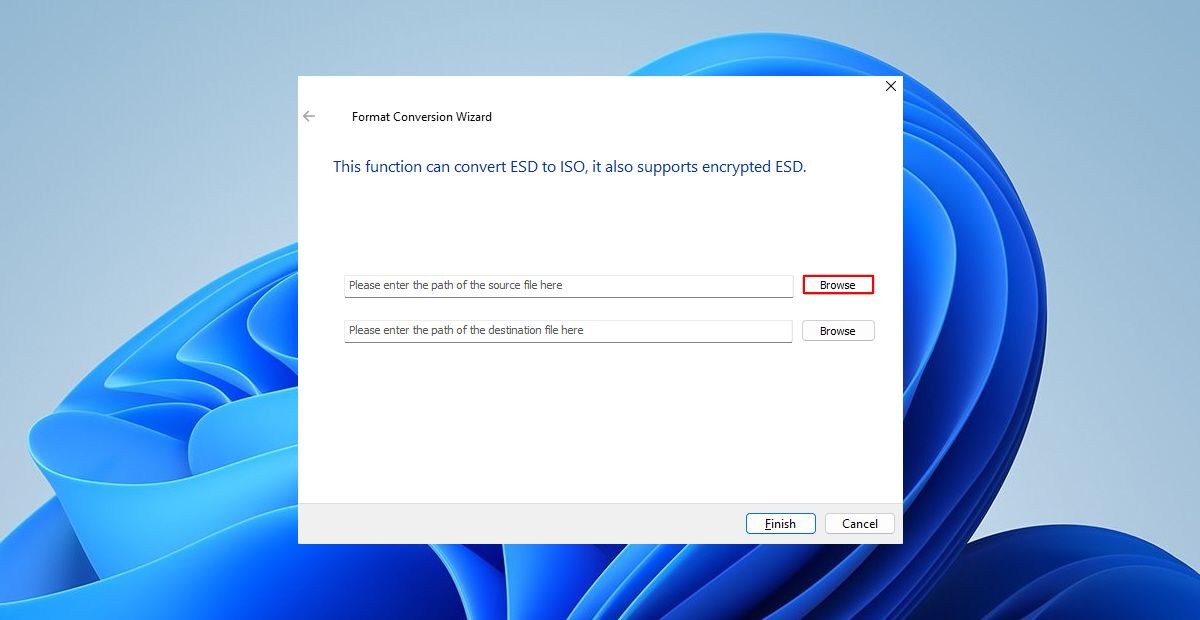
- Click the first Browse button on the Format Conversion Wizard and select your ESD file.
Jutoh is an ebook creator for Epub, Kindle and more. It’s fast, runs on Windows, Mac, and Linux, comes with a cover design editor, and allows book variations to be created with alternate text, style sheets and cover designs.
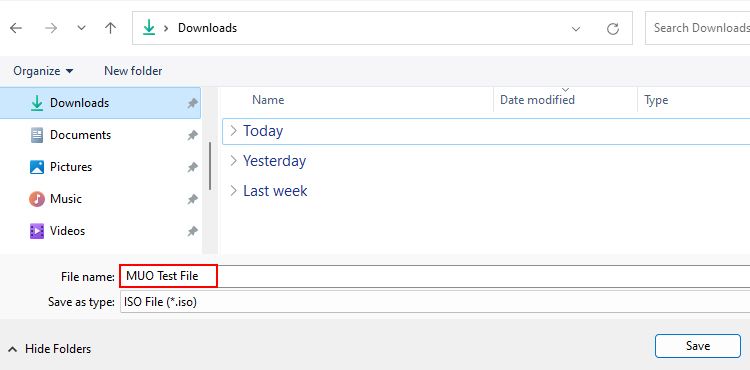
- Click the second Browse button and select a location for your ISO file. Then, type a name for your ISO file. Once done, click the Save button.
- At last, click Finish to start the conversion process. Be patient, as exporting the converted ISO file take around 15 minutes.
Once the conversion is over, open the location or path you selected earlier to check the exported ISO file. Now that you’ve your ISO file ready with you check how to flash the ISO file onto a USB drive .
If the DISM++ utility crashes automatically or hangs in between, it means the ESD file you selected is corrupt. In this case, re-download the ESD file and repeat all the steps.

2. ESD ToolKit
ESD ToolKit is another handy utility that you can use to convert ESD files to ISO. But, unlike DISM++, which offers a GUI (visual interface), ESD ToolKit works on the Command Prompt.
Follow the steps below to convert ESD to an ISO file using ESD Toolkit:
- Download the ESD ToolKit zip file from MajorGeeks.com .
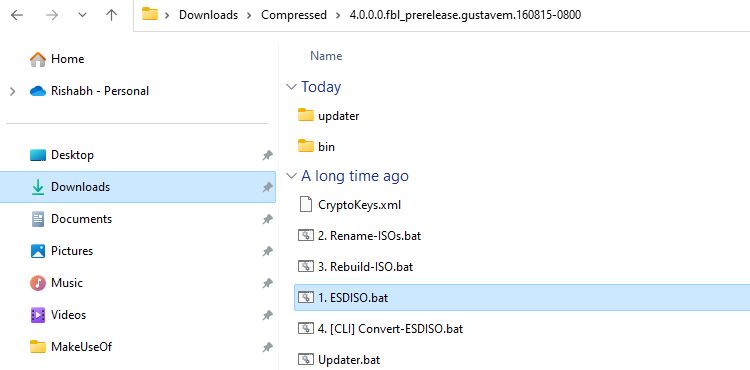
- Navigate to your Downloads folder. Extract the ZIP file and double-click on the ESDISO.bat file.
- A Command Prompt will pop up on your screen. Press the Enter key two times now.
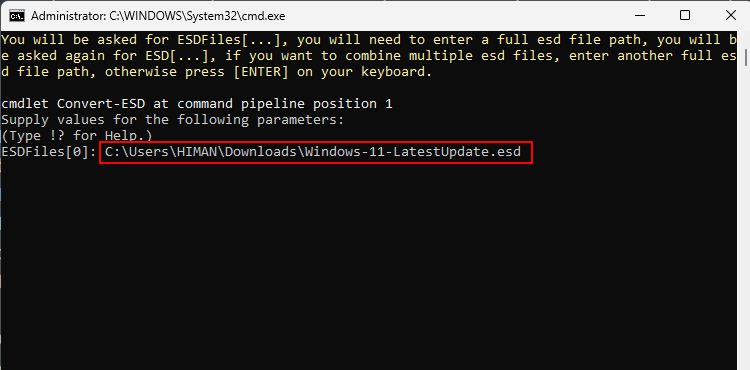
- Copy the full path of your ESD file. For example, our ESD file is in the Downloads folder, so the path will be “C:\Users\UserName\Downloads\FileName.esd”.
- Paste the copied path next to ESDFiles [0]. Ensure that the copied path ends with your ESD file’s name, or the conversion will not run.
- Press the Enter key two times again. This will execute your command, and the toolkit will generate your ISO file.
Once the process ends, reopen the folder where you’ve extracted ESD ToolKit. You’ll find the extracted ISO file in that folder only. Now, you may want to know how to edit ISO files on Windows for better control of the exported ISO file.
While the ESD ToolKit should do the job for you, in some cases, it may get stuck in the middle of the conversion. Don’t worry; there’s another tool called NTLite with some additional functionalities.
3. NTLite
NTLite is the most feature-rich tool out of all the previous utilities mentioned above. It offers you many options to modify any Windows image as you like. Simply put, you can modify, remove, and add different components and features to a custom ISO file and then flash it on any computer.
Besides customizing Windows images, it lets you generate an ISO image from your ESD file.
Unfortunately, NTLite cannot help you convert an encrypted ESD file. So, if you have one, you must first convert it to WIM format and then to ISO.
Below are the steps to convert an ESD file into an ISO file using NTLite:
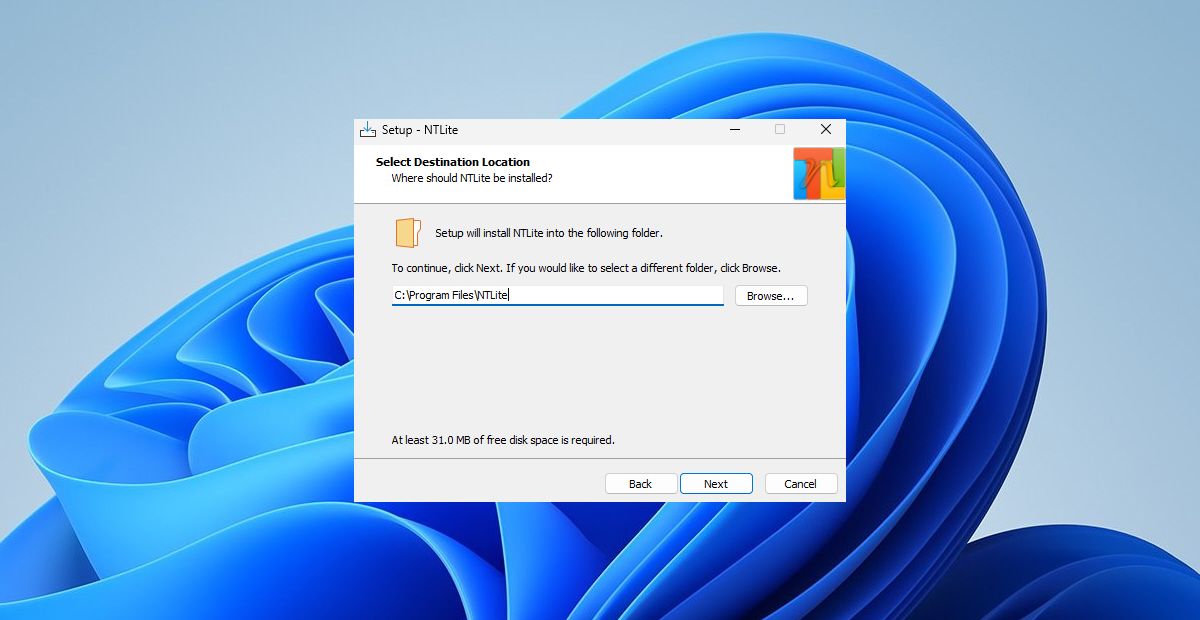
- Download the free version from NTLite.com first and run the installer file.
- Launch NTLite and close the License popup once the installation is over.
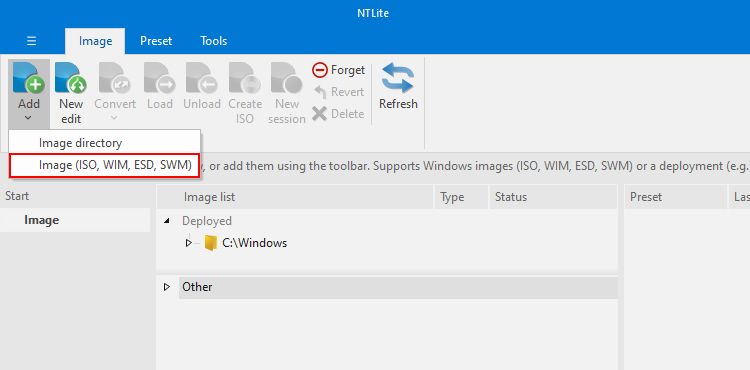
- Click the Add button and select Image (ISO, WIM, ESD, SWM).
- Double-click the ESD file you wish to convert on the selection window.
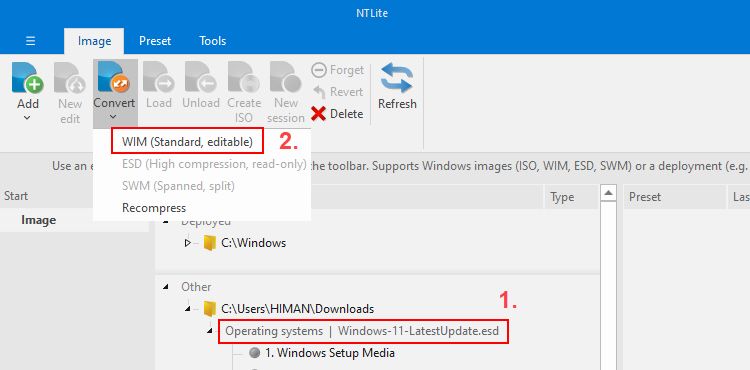
- Under the path of your selected ESD file, click on the name of your ESD file. Go to Convert > WIM (Standard, editable) to decrypt your ESD file.
- After decryption, select the install.wim file and click Create ISO to allow NTLite to generate your ISO file.
- Select a path for your ISO file and click the Save button.
- Finally, click OK and wait while NTLite handles the conversion process.


After the conversion, confirm that the ISO file works as expected.
If you’re interested in using the full functionality of NTLite, check how to customize Windows using NTLite for help. You will learn more about all the NTLite features and how they can help you tailor the ISO file to your liking.
 dotConnect for Oracle is an ADO.NET data provider for Oracle with Entity Framework Support.
What to Do if an ESD File Fails to Convert to an ISO
If you follow all the steps correctly, ESD to ISO conversion should not fail. But, no need to worry if you still encounter error messages during the process. Below are some troubleshooting measures to take:
- Check the ESD file for corruption: A corrupted file can cause the conversion process to fail or generate a non-working ISO file. It’s important to recheck the size of the ESD file from its source and, if possible, re-download it.
- Try ESD Decryptor: It’s a command line utility that does the same job as other tools in our guide. But, it follows a different way to handle the conversion. To use it, download it first from Winaero.com and enter the path of your ESD file for conversion. Then, it should provide you with the ISO file in your selected location.
- Check the file permissions: Windows sometimes prevents apps from accessing specific files on your computer. In other words, your system blocks such files on your computer. To fix this, right-click on your ESD file, select Properties, and ensure that the Unblock option is checked.


Convert ESD Into ISO in No Time
Dealing with ESD files and converting them to ISO is complex, especially with the Command Prompt. However, it’s a one-time process once you get the hang of using these third-party tools.
Besides, you can do so many things with an ISO file. For example, you can create a bootable pen drive, develop your Windows version, flash Windows Insider builds, and more.
In this article, we’ll take a look at what ESD and ISO files are, and we’ll show you how to convert an ESD file into an ISO on Windows.
- Title: ESD Files Demystified: Creating ISO Versions for Windows Systems
- Author: David
- Created at : 2024-07-29 15:47:48
- Updated at : 2024-07-30 15:47:48
- Link: https://win11.techidaily.com/esd-files-demystified-creating-iso-versions-for-windows-systems/
- License: This work is licensed under CC BY-NC-SA 4.0.