Eradicating Hidden Login Screens in Windows 11
Eradicating Hidden Login Screens in Windows 11
The sign-in screen is where you can enter your Windows account PIN or password to log in to your computer. On a default setup, you can press the Space key to view the sign-in screen. But what if you see no login screen at all?
A sign-in screen may fail to appear, or you may see a black screen due to several reasons on Windows. Incorrectly configured sign-in option, bad Windows updates, issues with fast startup and system file corruption are some common contributing factors to this problem.
Here are a few troubleshooting steps you can try to restore the missing or stuck sign-in screen on Windows 11.
What Causes the Stuck or Missing Login Screen on Windows 11?
If you are running Windows 11 build 22000.4 or newer, the stuck login screen could be due to a known bug. In this case, the issue is triggered when the PC wakes up from Sleep or Hibernation. Installing a pending Windows update may resolve this issue.
Alternatively, temporary glitches, system file corruption, and malfunctioning lock screen behavior can trigger this issue as well. To fix the issue, follow all the steps below in the given order.
1. Use the Ctrl + Alt + Delete Combo
You can restore your login screen in Windows 11 using theCtrl + Alt + Delete combo. It is a temporary workaround but should help you sign in and perform additional troubleshooting steps if necessary. To do this, make sure your PC is turned on. Next, press theCtrl + Alt + Delete combo on your keyboard. This should force the sign-in screen to appear.
Ctrl + Alt + Delete is a Windows keyboard shortcut initially used to terminate unresponsive applications. However, the combo is now used differently on Windows 11. By default, it now shows a hidden menu with multiple critical options such as Password Change, Restart, Task Manager and more. You can also easily add or remove options from the Ctrl + Alt + Delete combo on Windows.
2. Boot Into Safe Mode
In safe mode, the Windows OS starts with only essential services. All the third-party services are disabled, so the admin can determine if a third-party app conflicts with the system functionality.
This may also allow you to access your lock screen and sign in to perform additional troubleshooting. First, refer to our guide to boot into safe mode in Windows 11 and then apply the troubleshooting steps below.
3. Install Pending Windows Updates
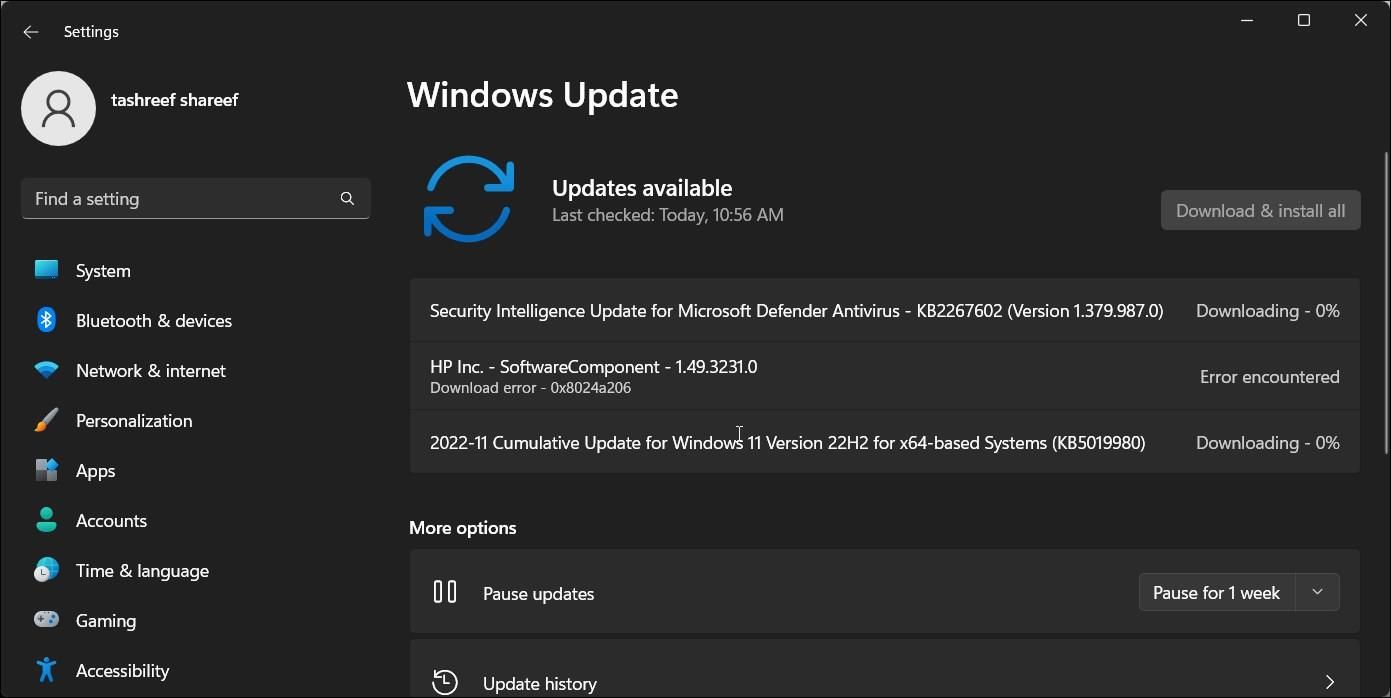

Check and install all the Windows updates available on your computer. Widespread issues likely get a hotfix on a priority basis. So, check if you have any pending updates and install them to see if that fixes the issue.
To check and update Windows 11:
- PressWin + I to openSettings .
- Open theWindows Update tab in the left pane.
- Click onCheck for updates in the top right corner. Windows will scan for available updates and list them accordingly.
- Click onDownload and install. Wait for the updates to install and restart your PC to apply the changes.
4. Check and Disable Ctrl + Alt + Delete Secure Sign-In
Windows lets you add an extra layer of security to your computer with its interactive Secure sign-in option. When enabled, the user must press the defaultCtrl + Alt + Delete key on the lock screen to view the sign-in screen. This helps prevent malicious tools from mimicking the sign-in screen to steal user credentials.
While a handy feature, it may prevent you from accessing the sign-in screen without the keyboard combo. Check if you or other users on the computer have enabled the feature. If you find it annoying, you can easily disable Secure sign-in with Ctrl + Alt + Delete in Windows 11 .
5. Perform a System Restore
Windows automatically creates new restore points on configured systems before a Windows, unsigned driver or a new program is installed. So if a bad update or driver causes the system to malfunction, you can use a restore point to undo the changes and restore your PC.
If you can log in to your PC using the workaround above, explore our guide to create and use a restore point on Windows 11 . If not, you can perform a system restore using Windows Recovery Environment. Here’s how to do it.
First, you need to boot into the Windows Recovery Environment , and there are many ways to do it. Assuming you cannot get past the lock screen, follow these steps to open the system recovery menu and perform a system restore.
- Power off your PC. Press and hold thePower button to force a shutdown if necessary.
- Next, press thePower button to restart and start pressing theF11 key until you see the recovery menu. Depending on the computer manufacturer, you may have to use the F2, F9, orF12 keys to boot intoWinRE .
- Next, underChoose an option , click onTroubleshoot .
/a>
- Next, click onAdvanced options .
Easy GIF Animator is a powerful animated GIF editor and the top tool for creating animated pictures, banners, buttons and GIF videos. You get extensive animation editing features, animation effects, unmatched image quality and optimization for the web. No other GIF animation software matches our features and ease of use, that’s why Easy GIF Animator is so popular.
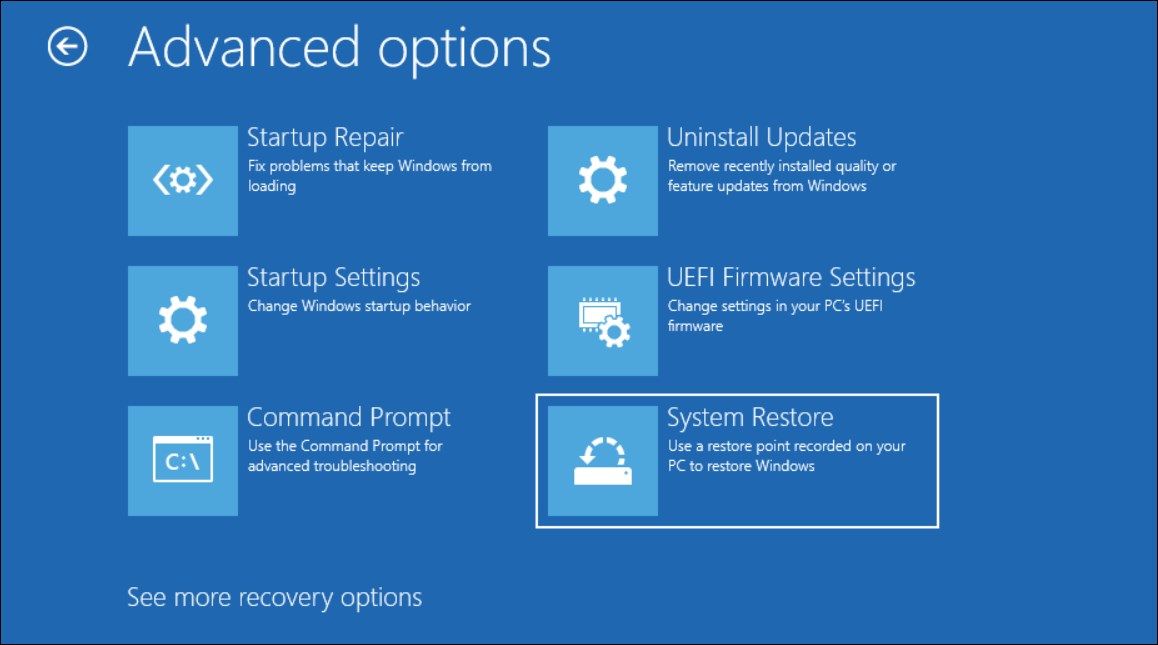
- Click onSystem Restore .
- Select the most recent restore point in theSystem Restore wizard and clickNext .
- Follow on-screen instructions to complete the system restore process.

 /a>
/a>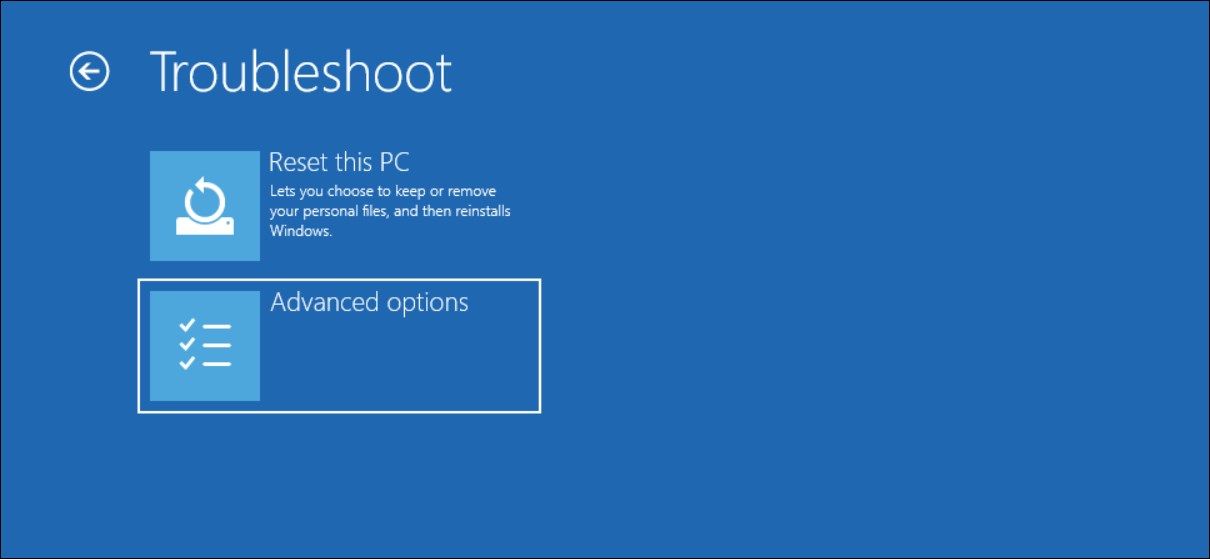
 Easy GIF Animator is a powerful animated GIF editor and the top tool for creating animated pictures, banners, buttons and GIF videos. You get extensive animation editing features, animation effects, unmatched image quality and optimization for the web. No other GIF animation software matches our features and ease of use, that’s why Easy GIF Animator is so popular.
Once done, your PC will restart. If successful, you should be able to view your sign-in screen. If not, you can try again with a different restore point.
6. Run Startup Repair
The Startup Repair is a Windows recovery tool that can scan the system for issues interrupting the normal start-up of your computer and try to fix them automatically. It is part of the Windows Recovery Environment, so you’ll need to boot into WinRE to use the option. Follow these steps to run Startup Repair in Windows 11.
- Boot IntoWindows Recovery Environment.
- Next, underChoose an option , click onTroubleshoot .
- Next, click onAdvanced options.
- Click onStartup Repair. Now it will start to diagnose your PC to find issues with the start-up.
- Next, select a user account and enter the password.
- ClickContinue to begin Startup repair. This process may take some time, so wait till it is complete.

7. Disable the Lock Screen
If the issue occurs after waking your computer from sleep or hibernation, it is likely a Windows glitch that needs fixing. As a temporary measure, you can disable your lock screen completely to prevent the glitch from occurring.
Leaving your computer without a lock screen will make it vulnerable to spoofing and data theft. However, if you are a single user, you can disable the lock screen temporarily until a permanent fix is found. You can disable the lock screen on Windows 11 using Registry Editor, Group Policy Editor, and a third-party system tweaker.
Fixing the No Login Screen Issue on Windows 11
Most often, the missing lock screen problem on Windows 11 is due to a temporary glitch. First, use the Ctrl + Alt + Delete combo to see if that shows the lock screen. If not, press and hold the power button to perform a forced shutdown and then restart your PC to see if the issue is resolved.
Alternatively, perform a system restore if the problem is triggered after a bad Windows update or driver installation. Finally, as a last resort, performing a factory reset may be required to get your computer up and running again.
- Title: Eradicating Hidden Login Screens in Windows 11
- Author: David
- Created at : 2024-08-15 23:59:30
- Updated at : 2024-08-16 23:59:30
- Link: https://win11.techidaily.com/eradicating-hidden-login-screens-in-windows-11/
- License: This work is licensed under CC BY-NC-SA 4.0.