Eliminating Steam Crashes: A Guide for Windows 11 Users

Eliminating Steam Crashes: A Guide for Windows 11 Users
Are you encountering an error box titled “Steam service error” when attempting to launch the Steam client on your computer? There could be various reasons behind this issue, ranging from insufficient permissions to Windows firewall settings.
If you’ve already restarted the Steam client and eliminated internet-related problems without success, it’s time to explore more advanced solutions. Here are some ways to effectively troubleshoot the Steam service error.
Disclaimer: This post includes affiliate links
If you click on a link and make a purchase, I may receive a commission at no extra cost to you.
1. Check the Steam Client Service Status

Before trying any advanced solutions, be sure to verify the status of the Steam client service. Doing this will help you confirm whether the error message is a result of a server outage.
To check the status of Steam servers, navigate to the Steam entry on the Downdetector website . If the results indicate that the Steam servers are currently undergoing maintenance or experiencing downtime, it’s recommended to wait until they become operational again before using Steam.
2. Launch the Steam Client With Administrative Permissions
Often, the Steam client might fail to function correctly and display a service error due to insufficient administrative permissions. In this case, you can resolve the problem by launching the Steam client with administrative privileges.
To do that, right-click the Steam app and choose Run as administrator. If the User Account Control prompt appears, click Yes to confirm your selection.
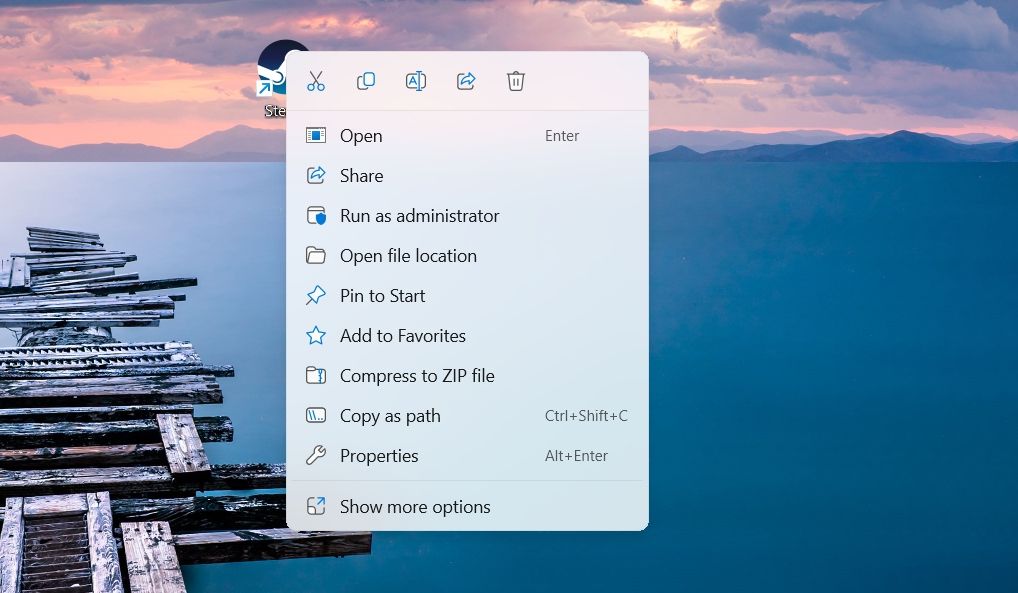
Subsequently, Steam will run with elevated privileges. Check if you still encounter the error message.
3. Allow Steam to Run Through the Windows Firewall
Steam must be able to access the internet to function correctly on your system. However, if the Steam client is blocked under the Windows firewall settings, it will fail to access the internet, leading to a service error.
In this case, you will have to allow the Steam client to run through the Windows firewall. Here’s how to do it.
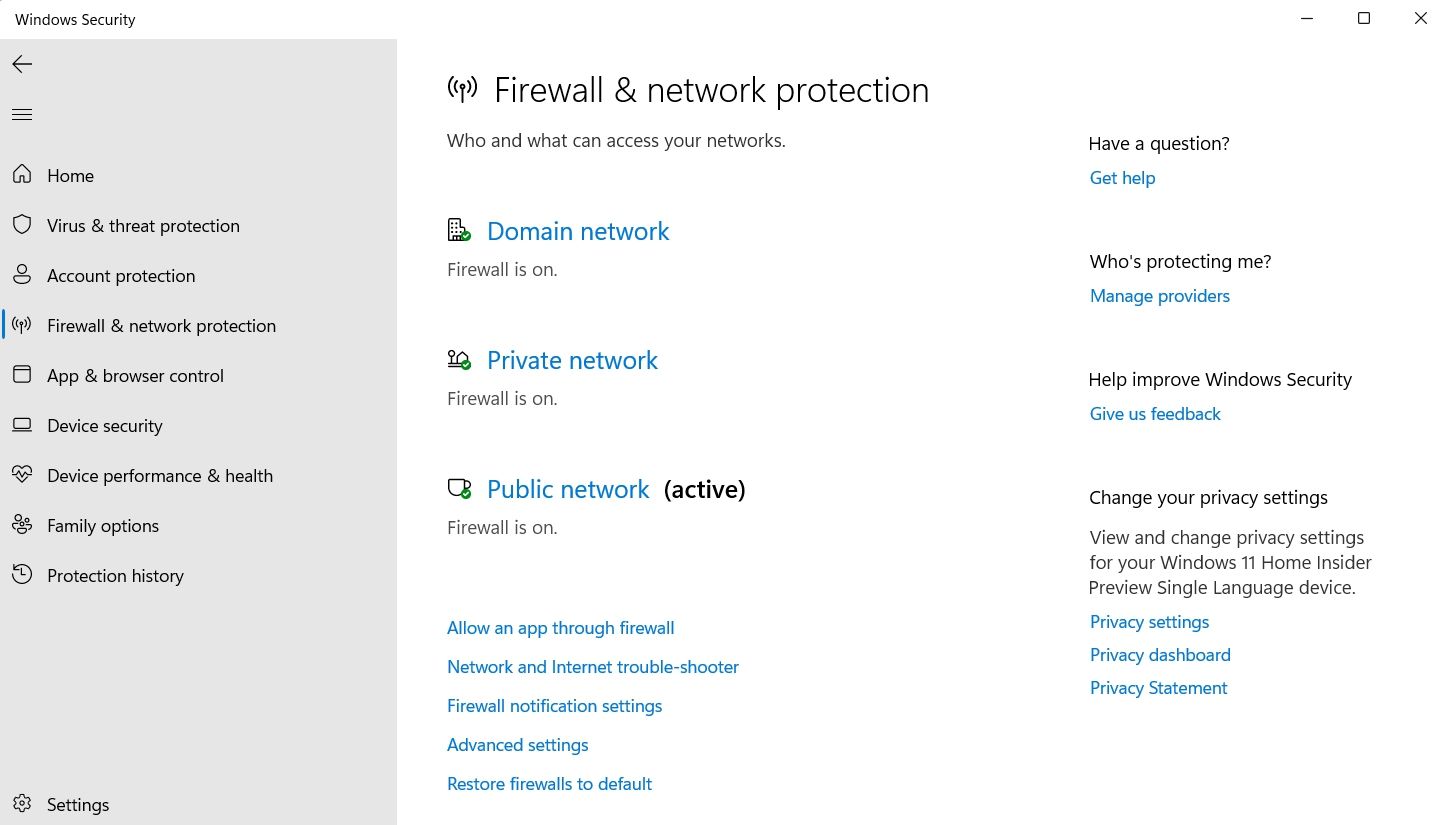
- Press the Win key to open the Start Menu, type Windows Security in the search bar, and press Enter.
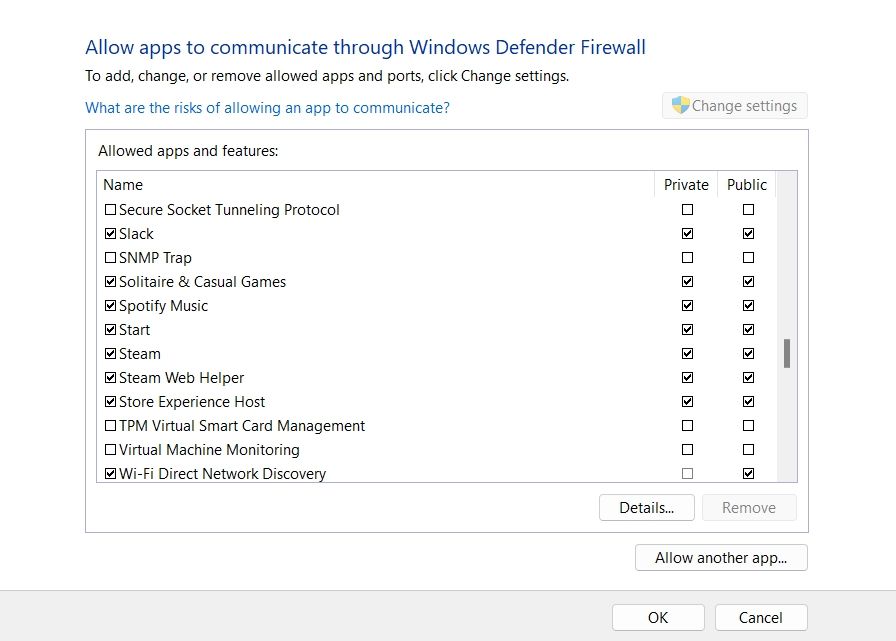
- Choose Windows Security from the left sidebar and Allow an app through firewall in the right pane.

- Click Change settings.
- Check Private and Public boxes for Steam. Then, click OK.

Following these steps, launch the Steam client and check if the issue persists.
4. Change Steam Client Service Status
The Steam client service ensures that the Steam client loads properly on your computer. Usually, this service initiates whenever you launch the Steam client. However, if it fails to do so, it results in a Steam service error.
In this case, the solution is to set the startup type status of the Steam client service to automatic, ensuring that the service launches automatically whenever you open the Steam client. You can change the service status by following these instructions:
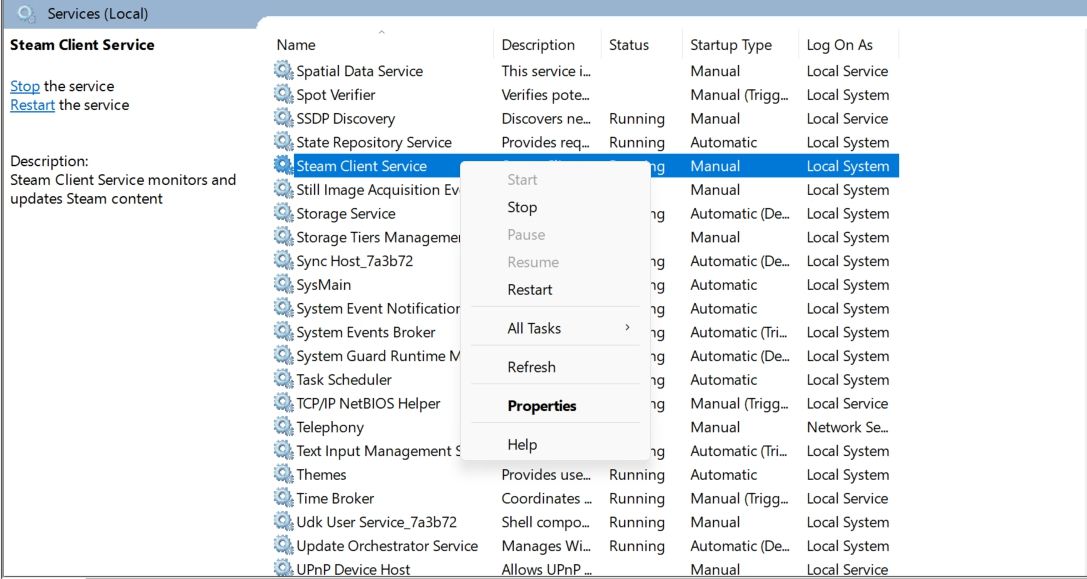
- Press Win + R keys together to open the Run dialog box.
- Type services.msc in the search bar and press Enter.
- Right-click on Steam Client Service and choose Properties.

- Choose Automatic from the Startup type drop-down menu.
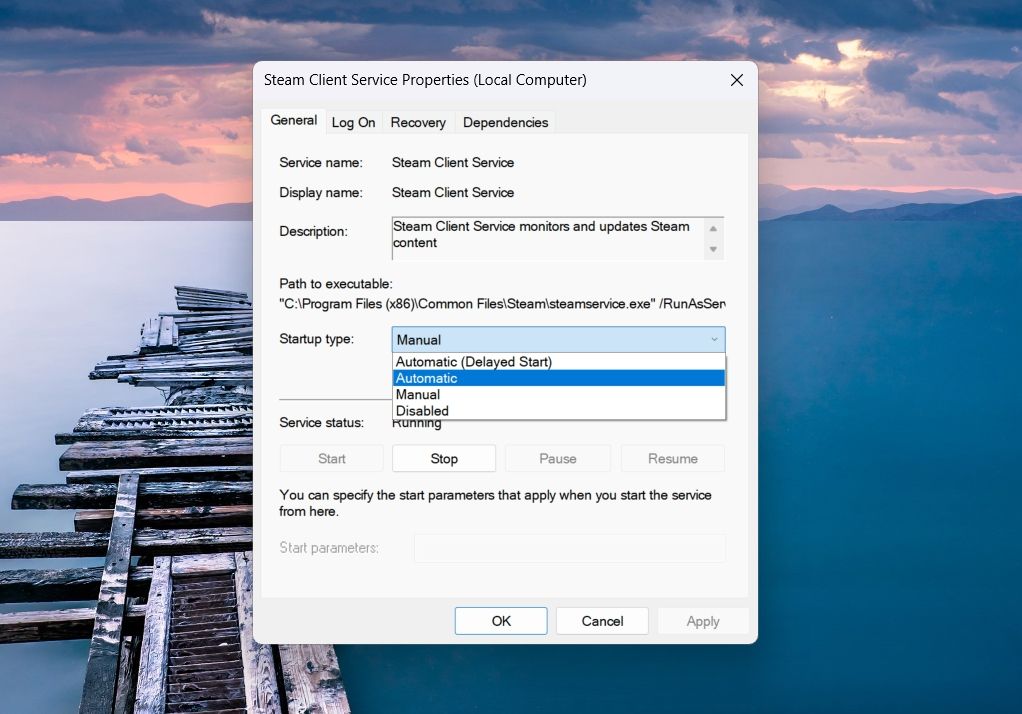
5. Click Apply > OK to save the changes.
Next, restart your computer, and check for the issue.
5. Repair Steam Service Client
If changing the startup type of the Steam service client wasn’t helpful, the issue likely resides within the service itself. In this case, you’ll have to use the built-in repair option to repair the Steam service client.
To do that, open Command Prompt with administrative privileges (see how to launch Command Prompt as an administrator ), type the following command, and press Enter.
C:\Program Files (x86)\Steam\bin\SteamService.exe /repair
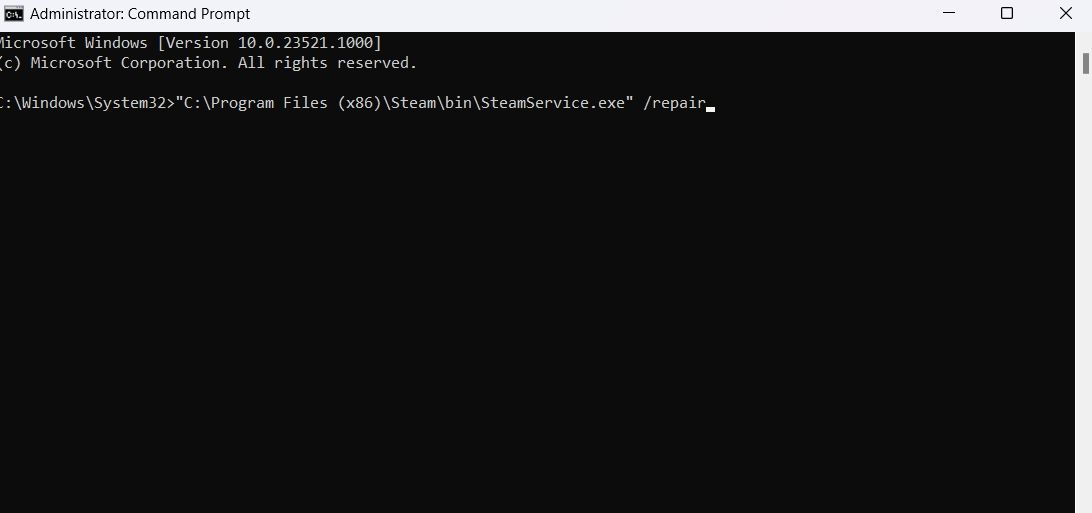
Wait till the repair process is complete. Once done, close Command Prompt and launch Steam to check for the issue.
6. Reinstall the Steam Client
If none of the above solutions was helpful, resort to the final remedy – reinstalling the Steam client. Start by uninstalling Steam from your computer (check out ways to uninstall apps on Windows 11 ).
After that, restart your device and then visit the Steam website to download its installer.
Fixing the Steam Service Error on Windows
Despite its popularity, it’s common to face issues with Steam now and then. Occasionally, issues like the Steam service error can stop you from accessing the Steam client on your device. Fortunately, you can quickly troubleshoot the problem using the above solutions.
Once you have restored access to Steam, you can optimize its performance to get a faster download speed on your computer.
If you’ve already restarted the Steam client and eliminated internet-related problems without success, it’s time to explore more advanced solutions. Here are some ways to effectively troubleshoot the Steam service error.
Also read:
- [Updated] 2024 Approved Short Form Content Breakdown Now
- [Updated] Photo Perfection Top 6 iPhone Utilities to Exclude Unwanted Elements for 2024
- Elevate Your Content The Essential Video Tutorial for YouTube Photos for 2024
- Essential Tips for Epic & GOG Steam Deck Players
- From Yesterday's Tech to Today's Trendsetter - Implementing Windows 11 on Legacy PCs
- How to Fix the “File or Directory Is Corrupted” Error 0X80070570 on Windows 11 & 11
- How to Fix the Microsoft Teams Error 80080300 in Windows 11
- How to Reactivate the Frozen Windows Start Button
- How To Transfer Data From iPhone 7 Plus To Other iPhone devices? | Dr.fone
- Remedies for Unstartable Speech-to-Text on Windows Platform
- Step-by-Step Solution for Unresponsive Mic Connections on Windows 11
- Streamlining Media Edits StoryRemix & Windows 11 Photos Integration
- Struggling with Your iPhone's Contacts App? Tackle This Common Issue in Just 3 Steps!
- The Ultimate Fix List for Defective Mail Alerts in OS Windows
- Windows Shortcuts: Gaining Infinite Capabilities
- Title: Eliminating Steam Crashes: A Guide for Windows 11 Users
- Author: David
- Created at : 2024-12-06 01:24:11
- Updated at : 2024-12-06 23:38:21
- Link: https://win11.techidaily.com/eliminating-steam-crashes-a-guide-for-windows-11-users/
- License: This work is licensed under CC BY-NC-SA 4.0.
