Elevate Desktop Experience with Program Size Control on Win11

Elevate Desktop Experience with Program Size Control on Win11
Software usually opens at the sizes they were closed at. Windows 11 doesn’t include any options to configure software windows to open at custom preset sizes. That’s a pity since such settings would enable you to set more ideal default dimensions for software windows to open with.
However, you can set custom opening sizes for programs on Windows 11 with the AutoSizer and Winsize 2 third-party apps. So, let’s check them out.
Disclaimer: This post includes affiliate links
If you click on a link and make a purchase, I may receive a commission at no extra cost to you.
How to Set Sizes for Software Windows With AutoSizer
AutoSizer is a lightweight freeware app you can utilize on most Windows platforms. That software enables you to set program windows to open at specified width and height values with itsResize action option. Or you can select alternativeMaximize ,Minimize , orRestore action options in that app. This is how you can set preset sizes for software windows with AutoSizer:
Open theAutoSizer webpage.
Click theDownload AutoSizer link on that page and download the file.
Double-clickassetup.exe to open it.
Go through the AutoSizer setup wizard to install the software.
Then clickFinish andYes to bring up the AutoSizer window.
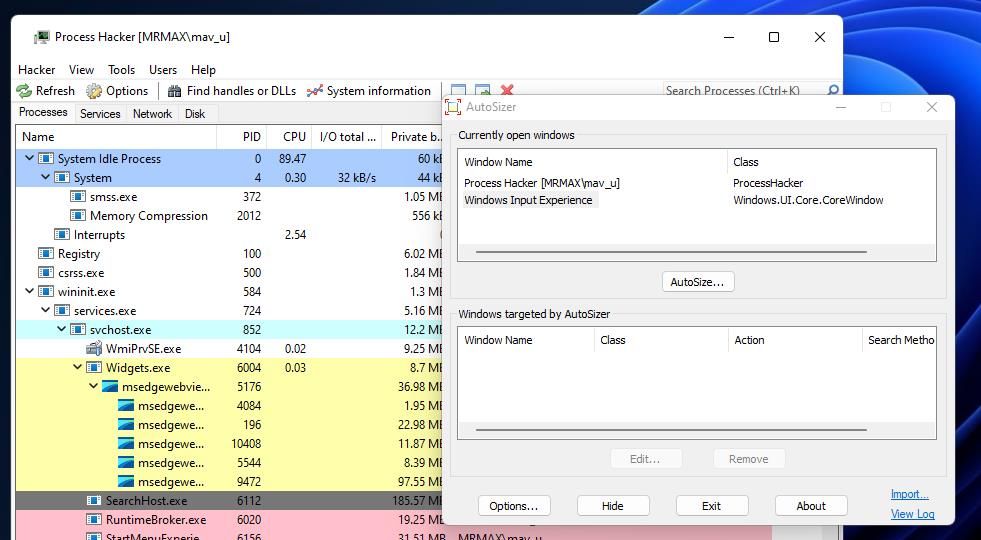
Next, open the software you want to set the preset window size for. You should then see that software listed in theCurrently open windows box.

Select the software in theCurrently open windows box and click theAutoSize button to bring up the window shown directly below.
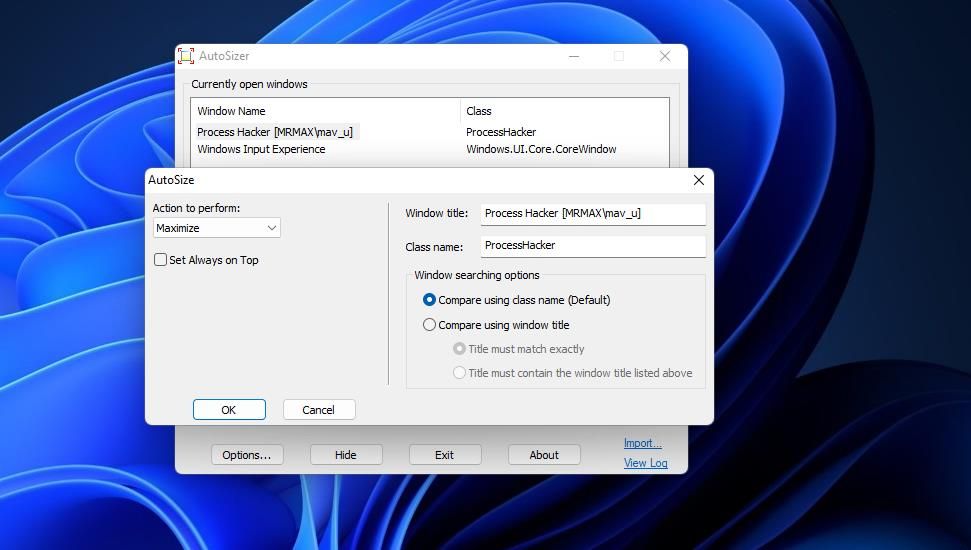
3. Then select theResize /Position option on theAction to perform drop-down menu.
- Click theSet size checkbox.
- Input the window width and height values in the two text boxes. The left box sets the width and the right one is for height.
- Click theOK button. The software window you set a size for will then be resized to the values entered.
You’ll also see the software listed in the “Windows targeted by AutoSizer” box. Now close and reopen the program, and it will now reopen at the size you set for it. It will always reopen at that specified size as long as AutoSizer runs in the background.
You can also set windows to open at preset positions on the desktop with AutoSizer. To do that, click an active program in theCurrently open windows box, and press theAutoSize button; select theSet Position option for a program on the AutoSize window. Then input a couple of values in the position text boxes, and click theOK option.
AutoSizer has an Options window that includes some general settings for the program. Click theOptions button to view the app’s miscellaneous settings. You can enable or disable the app for the Windows startup by selecting or deselecting theLoad AutoSizer automatically option.
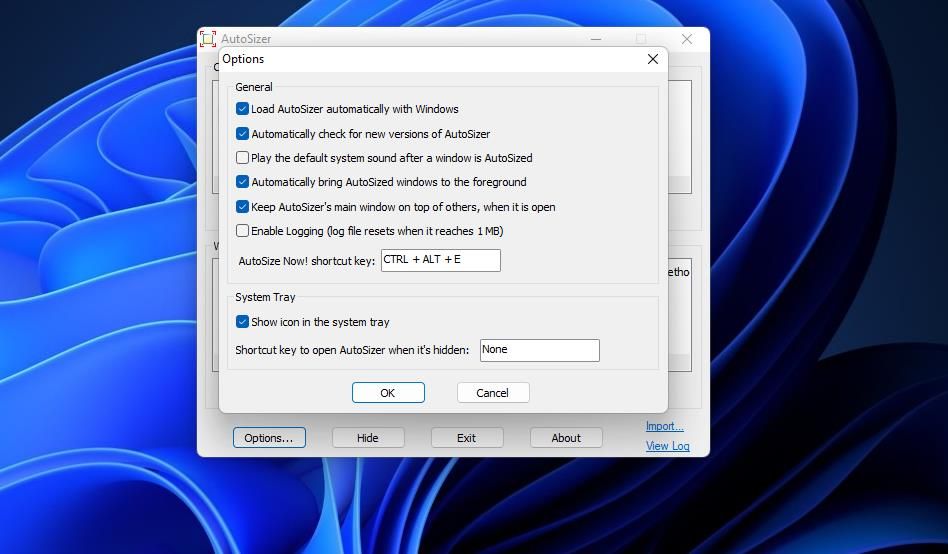
To set a hotkey to restore windows to their preset sizes, click inside theAutoSize Now! Shortcut key box. Press a keyboard hotkey to set it. Then you’ll be able to restore windows to their preset dimensions after resizing them by pressing that hotkey.
And if you’re a big fan of hotkeys, be sure to check outhow to set up your own keyboard shortcuts on Windows 11 .
How to Set Custom Sizes for Software With WinSize2
WinSize2 is another free tool for setting preset window sizes. This one is a portable app, which means it can run with no installation needed.
Portable apps are fantastic because you can put them on a USB drive and use them on any PC you like without installing anything. In fact, you can check outthe best portable apps that require no installation and quickly set up a USB drive that acts as a digital Swiss army knife for every tool you need.
WinSize2 enables you to save preset window sizes and positions by pressing a hotkey. Admittedly, WinSize2 isn’t especially user-friendly, but it’s a handy app when you get to grips with it. You can set preset sizes for windows with WinSize2 like this:
Bring up theWinSize2 website.
Click theDownload WinSize 2 link.
Then selectDownload on the Sourceforge page that opens.
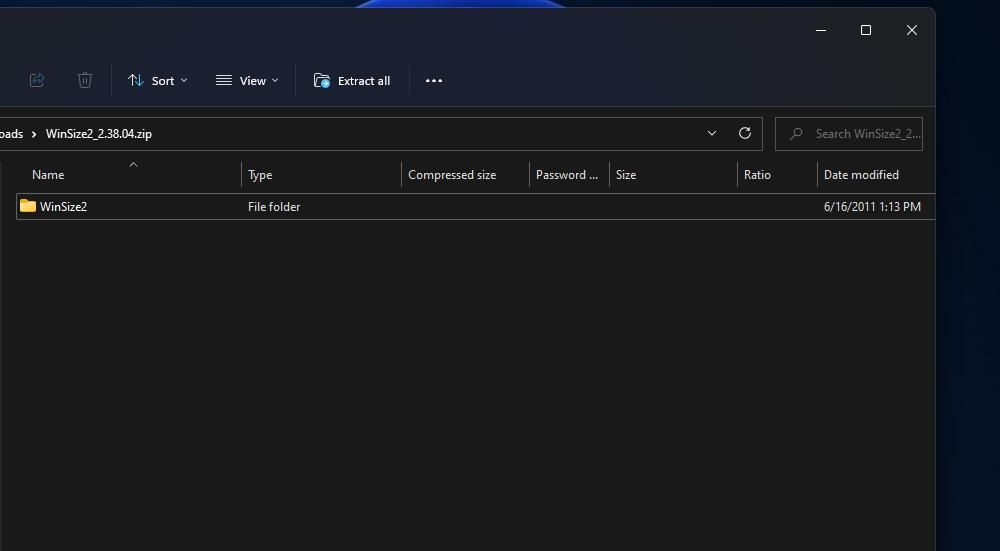
Double-click theWinSize2_2.38.04.zip archive, then select theExtract all option on Explorer’s command bar.

Make sureShow extracted files is selected within the extraction utility.
ClickExtract to bring up the WinSize2_2.38.04 folder.
Now it’s time to use WinSize2 to size our windows:
Double-click theWinSize2.exe file to launch WinSize2.

Then open the software window for which to set the size.
Make sure the software window you’ve opened is the selected (active) window.
Resize the window to a size you want to save.
Press theCtrl +Alt +Z hotkey to save the window’s size.
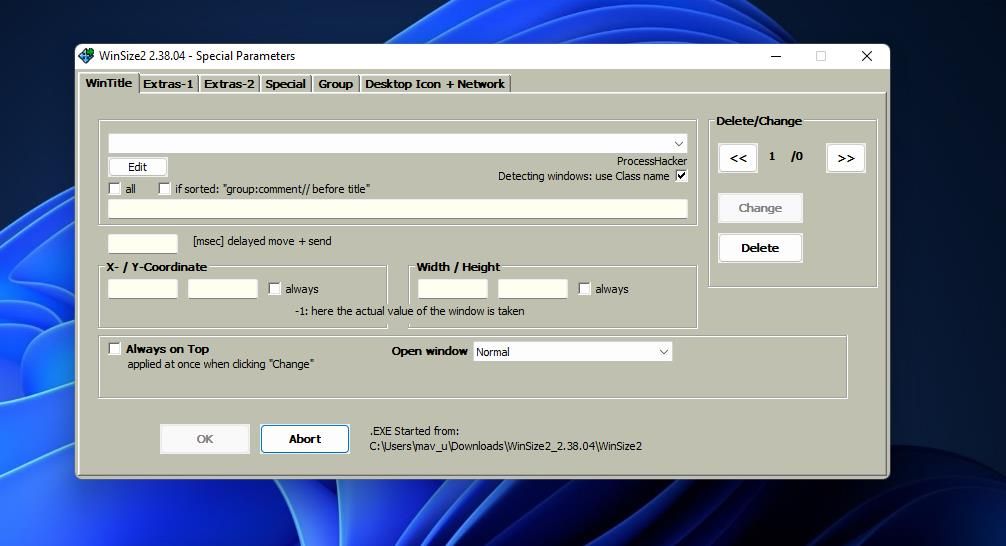
Close the WinSize2 window, and reopen it by clicking the program’s system tray icon. Then you’ll see the program you just saved a window size for in the drop-down menu.
Thealways checkbox for width and height will be selected by default, which locks the window’s size so you can’t resize it with the cursor. If you prefer that option to be disabled, deselect thealways box. Press theChange button, and clickOK to apply.
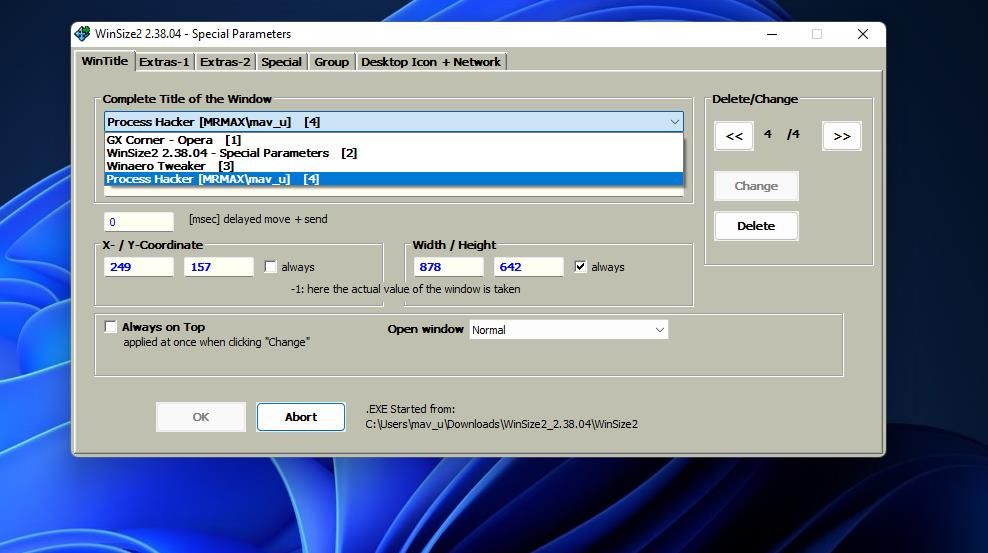
The window you set the preset size for will always open with its saved dimensions, so long as WinSize2 is running. Try it out by opening the software, resizing its window, and closing the program. The software’s window will still open at the size set when you launch it again.
You can change the saved width and height values for the window. To do so, click inside the width and height boxes to input different values there. SelectChange andOK to apply the new window size.
Aside from that, you can set the window to always open in the same desktop position captured with the WinSize2 hotkey. Select thealways checkbox for the X and Y position coordinates. Then click theChange andOK buttons.
When you’ve saved multiple software window sizes, you can flick through their profiles by clicking the**<** and> buttons in WinSize2. Alternatively, select a program in the drop-down menu. You can remove software window profiles by clickingDelete andOK .
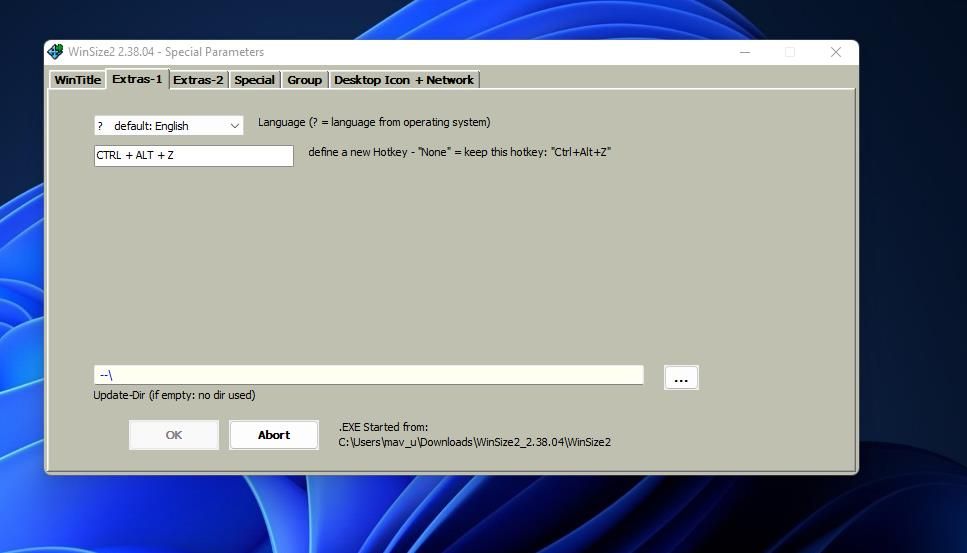
To customize WinSize2’s hotkey for saving windows, click theExtras-1 tab. Click inside the key box, and press the keyboard buttons for an alternative hotkey. Then select theOK option to apply.
Open Your Software at Your Preferred Window Sizes
Setting software packages to open with preset window sizes will save you from manually resizing them with the mouse. Both WinSize2 and AutoSize will automatically resize software windows for you when you’ve set some preset sizes with them. The additional settings they have for saving window positions will also come in handy for opening multiple programs.
Also read:
- [Updated] 2024 Approved Creative Starter Kit No-Cost AE Visual Aids
- [Updated] Exploring the Best Tools for Snapshots and Video Capture for 2024
- [Updated] Immersive Worlds VR's Impact on Entertainment for 2024
- [Updated] In 2024, Unlock the Power of Broadcasts How to Master YouTube & Twitch Using OBS
- Decoding Windows' Dark Display Hack: Fixes and Solutions
- Five Proven Techniques for Recovering Missing Microsoft Outlook Documents
- Fixing Erroneous System Calls on Windows
- Fixing Error Messages: OpenAL32.DLL Cannot Be Found on Your System
- Grave Doubts | Free Book
- In 2024, Top 5 Best Video Editing Apps for iPhone
- Mastering Windows Connectivity: A Step-by-Step Approach
- Overcoming Challenges with Windows Java Setup Process
- Overcoming Controller Non-Detecting Woes in Windows
- Returning to Academia? Maximize Your Budget with Samsung’s Exclusive Discounts for Students: Laptops, Tablets & Accessories - ZDNet
- Securely Erasing Email From User Credentials Window
- Winning at MCP: Free Old Championship Manager on Windows
- Title: Elevate Desktop Experience with Program Size Control on Win11
- Author: David
- Created at : 2025-03-01 18:39:18
- Updated at : 2025-03-04 18:10:37
- Link: https://win11.techidaily.com/elevate-desktop-experience-with-program-size-control-on-win11/
- License: This work is licensed under CC BY-NC-SA 4.0.
