
Designing a Secure Hardware Removal Window Tip
Designing a Secure Hardware Removal Window Tip
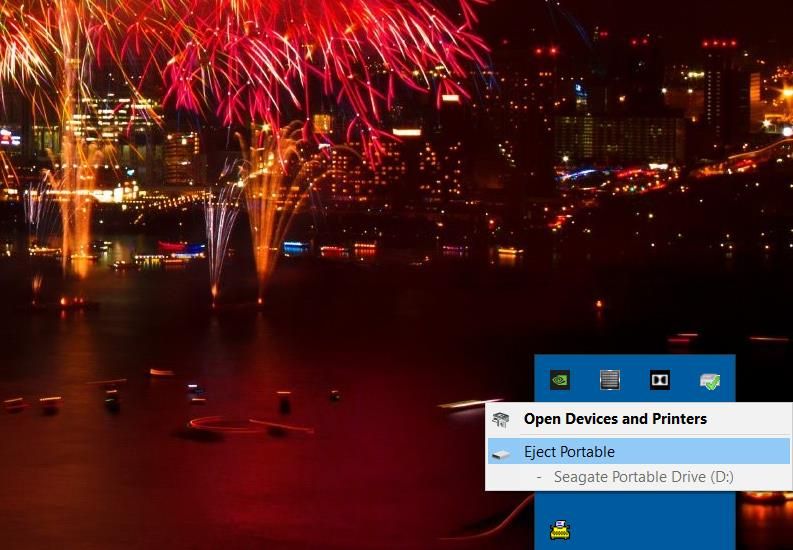
After inserting an external USB flash drive, you can select an option on Windows 11’s system tray to eject it. The eject option is available to enable users to remove external storage devices safely. Data can get corrupted if you remove a USB drive still in use.
The Safely Remove Hardware dialog is a window that displays all connected USB devices and enables you to stop them for safe ejection. That dialog is accessible with a Run command, but you can set up shortcuts for opening it with the methods below.
How to Set Up a “Safely Remove Hardware” Desktop Shortcut
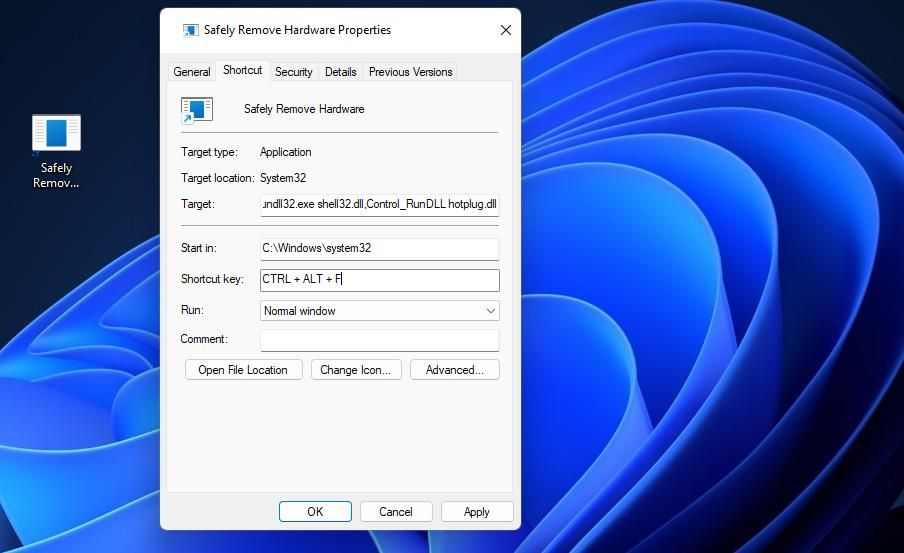
The Safely Remove Hardware dialog has a long Run command that’s not easy to remember. To make that feature more directly accessible, you can create a desktop shortcut based on its command. Then you can also turn that shortcut into a taskbar, Start menu, or keyboard one. This is how to set up a Safely Remove Hardware dialog desktop shortcut in Windows 11:
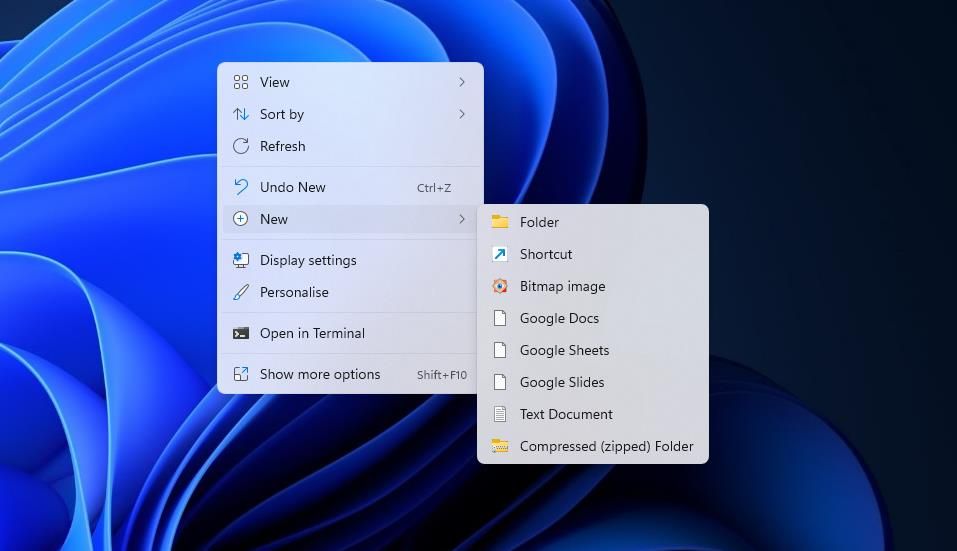
- Click anywhere on the desktop wallpaper with the mouse’s right button to selectNew andShortcut .

- Input this command within the location box:
rundll32.exe shell32.dll,Control_RunDLL hotplug.dll - SelectNext to view the shortcut name box.
- Delete the text in the box, and inputSafely Remove Hardware to replace it.
- ClickFinish to add the Safely Remove Hardware desktop shortcut.
Now try opening the Safely Remove Hardware window with the shortcut. Double-clicking theSafely Remove Hardware shortcut should open the window shown directly below. Select a listed USB device you want to remove there and clickStop . Clicking that button opens aStop hardware device window on which you can select to stop a device before removing it.
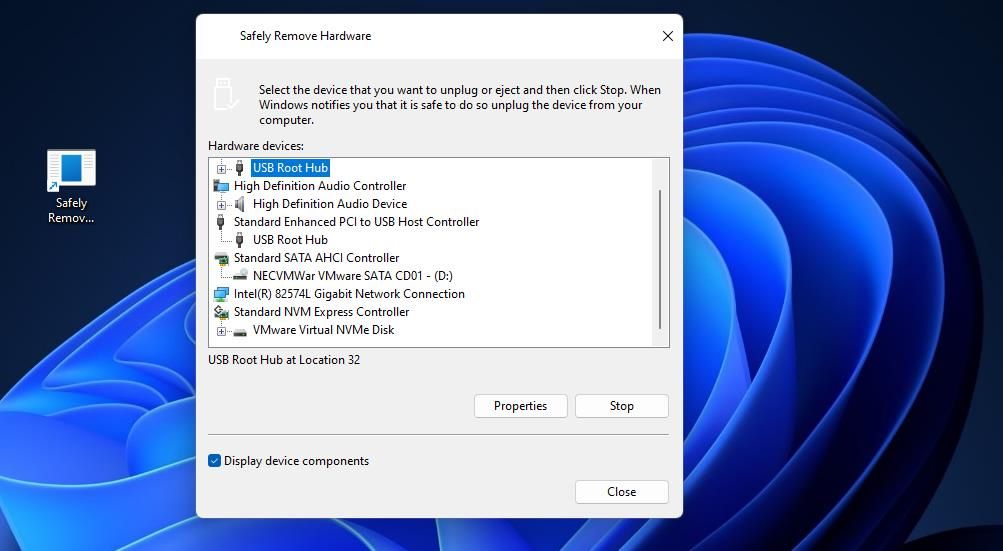
ThatStop option is not entirely the same as an ejection one. SelectingEject Portable in the system tray will merely tell you if the device is still in use or safe to remove. ClickingStop will stop what’s using the drive to make the device free for removal.
The Safely Remove Hardware window also enables you to view properties for listed devices. To do so, select a device and click theProperties button. That will bring up a window that includes general, event, and driver details for the device.
The Safely Remove Hardware desktop shortcut will be blank by default. However, you can add an icon to it by following the instructions in our guide for customizing Windows 11/10 icons .
How to Set Up “Safely Remove Hardware” Taskbar and Start Menu Shortcuts
Setting up a Safely Remove Hardware desktop shortcut will enable you to pin it to the taskbar or Start menu. To do so, right-click the Safely Remove Hardware icon on the desktop and selectShow more options . The classic context menu in Windows 11 includesPin to taskbar andPin to Start menu options. So, select one of those options to create an alternative Safely Remove Hardware taskbar or Start menu shortcut.
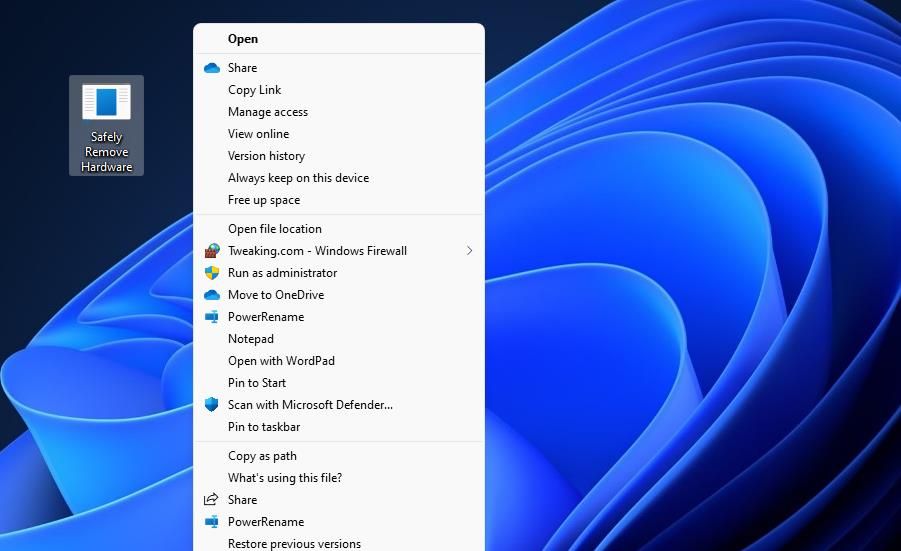

Adding Safely Remove Hardware to the taskbar or Start menu will make its desktop shortcut redundant. You can remove that desktop shortcut by right-clicking its icon and selectingDelete (the trash can icon).
How to Set Up a “Safely Remove Hardware” Hotkey
There’s no quicker way to open anything in Windows 11 than pressing a hotkey. A keyboard shortcut enables you to open anything without having to minimize windows to reach the desktop, bring up the Start menu, or move the mouse at all. You can set up a hotkey that opens the Safely Remove Hardware dialog as instructed for method one in our how to assign keyboard shortcuts to programs on Windows guide.
 Glarysoft File Recovery Pro - Helps to recover your lost file/data, even permanently deleted data.
Creating such a hotkey doesn’t make the Safely Remove Hardware desktop shortcut redundant. The hotkey activates the desktop shortcut you assigned it to. So, erasing the Safely Remove Hardware desktop shortcut will delete the shortcut key.
 EmEditor Professional (Lifetime License, non-store app)
How to a Set Up a “Safely Remove Hardware” Context Menu Shortcut
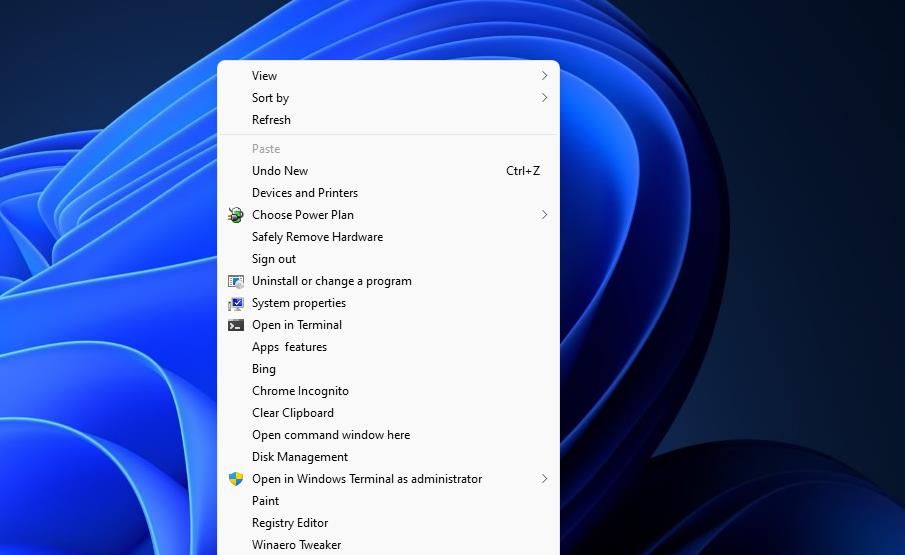
The context menu is an out-of-the-way place to stick shortcuts for opening things. Adding a Safely Remove Hardware option there will enable you to access that dialog by right-clicking the desktop area. Such a shortcut will probably be preferable for users who prefer to minimize desktop and taskbar clutter.
However, this final method for creating a Safely Remove Hardware shortcut involves editing the registry because Windows 11 doesn’t include any editing feature for customizing the context menu. The registry tweak is a relatively straightforward one to apply that adds a couple of new keys. Follow these steps exactly as specified to add aSafely Remove Hardware option to the context menu:
PressStart (the taskbar menu button) and click inside the search box.
EnterRegistry Editor inside the file search tool and select to open that app from the results.
Delete whatever text is in Registry Editor’s address bar, and input this key location there:
Computer\HKEY_CLASSES_ROOT\DesktopBackground\Shell\Then right-click the Shell key and selectNew to bring up a context menu submenu.
Select theKey option to add a new registry entry.
TypeSafely Remove Hardware inside the key’s text box.
Then right-click the newly addedSafely Remove Hardware registry entry and select theNew >Key options.
Inputcommand to be the second key’s title.
Select the newly addedcommand registry entry and double-click its**(Default)** string value.
Then input the following Safely Remove Hardware dialog location inside theData value box:
C:\\Windows\\System32\\control.exe hotplug.dllClickOK to confirm the new value.
Now you can have a look at what you’ve just added to Windows 11’s context menu. Right-click an empty part of your desktop area to select Show more options, which opens the secondary classic menu. Select theSafely Remove Hardware option on the classic context menu to bring up that window.
That option can be easily removed from the context menu if you decide not to keep it there. To remove it, return to the registry key specified in step three above; right-click theSafely Remove Hardware key you added and selectDelete . Then selectYes to delete the key.
Utilize the Safely Remove Hardware Dialog Faster on Windows
Creating a Safely Remove Hardware shortcut with any method above will make that dialog window more accessible whenever you need to remove a device. That dialog provides a handy alternative way for users to safely remove USB drives with additional options for viewing device details. You can use that dialog to view properties for connected drives and select to stop them so they can be removed without corrupting data.
- Title: Designing a Secure Hardware Removal Window Tip
- Author: David
- Created at : 2024-08-15 23:45:39
- Updated at : 2024-08-16 23:45:39
- Link: https://win11.techidaily.com/designing-a-secure-hardware-removal-window-tip/
- License: This work is licensed under CC BY-NC-SA 4.0.