
Deciphering CPU, GPU, & RAM Usage Figures on PCs
Deciphering CPU, GPU, & RAM Usage Figures on PCs
Key Takeaways
- Use Task Manager to monitor RAM, CPU, and GPU usage. End unnecessary processes to improve system performance quickly.
- Resource Monitor offers more detailed metrics than Task Manager. Windows 11 users can benefit from its real-time monitoring features.
- For advanced users, Performance Monitor is the most comprehensive tool to analyze system performance and resource usage on Windows 11.
Keeping an eye on system resources can be vital, especially when experiencing glitches or slowdowns. If you’re on Windows, there are tools baked into the operating system that let you quickly look up just how much of your RAM, CPU, and GPU are being used by a specific process.
How to Check Windows 11’s System Resource Usage With Task Manager
The Task Manager is one of Windows 11’s primary system resource monitoring utilities. The tool is the easiest way to see which programs and processes are running and how many resources each takes up.
Related: How to Access the Task Manager on Windows 11
Here’s how you can check your PC’s system resource usage with Task Manager.
- Press CTRL + Shift + Esc to open Task Manager.
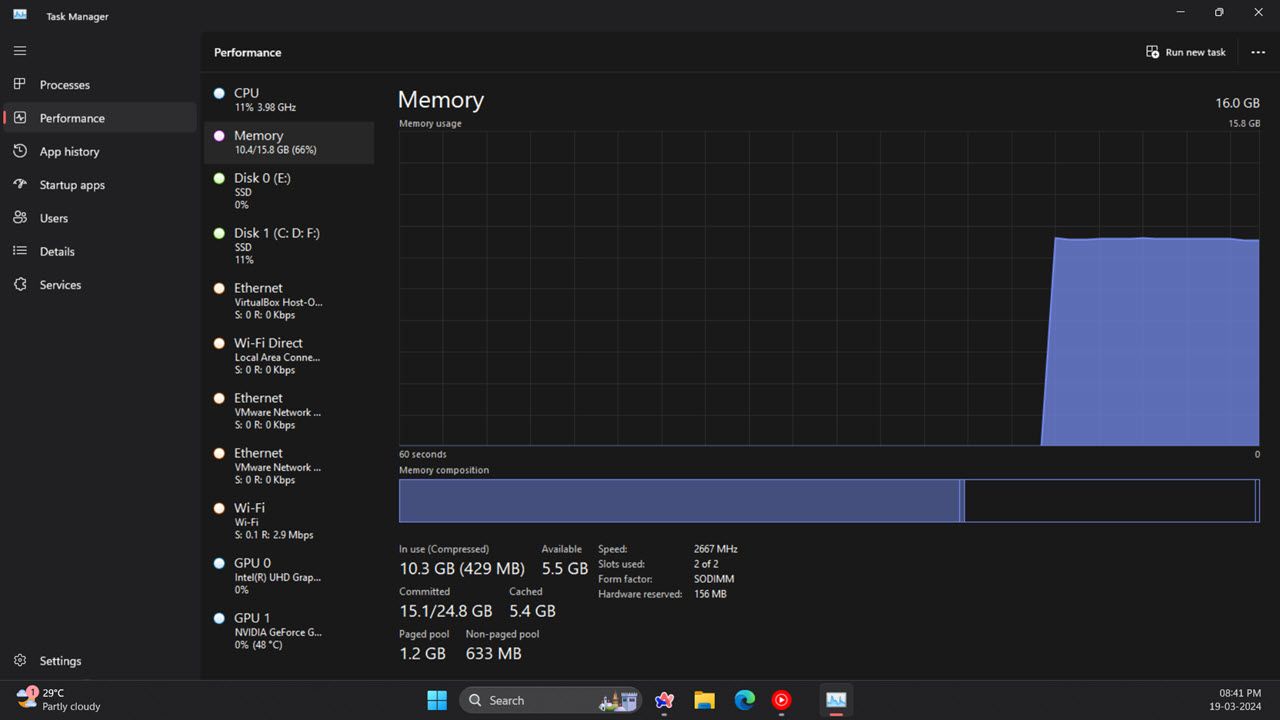
- Click the Performance tab. This tab displays your system’s RAM, CPU, GPU, and disk usage, along with network info.
- To view RAM usage, select the Memory section. This section will show you how much memory the system is currently using, how much memory you have, and its specifications among other things.
 CollageIt Pro
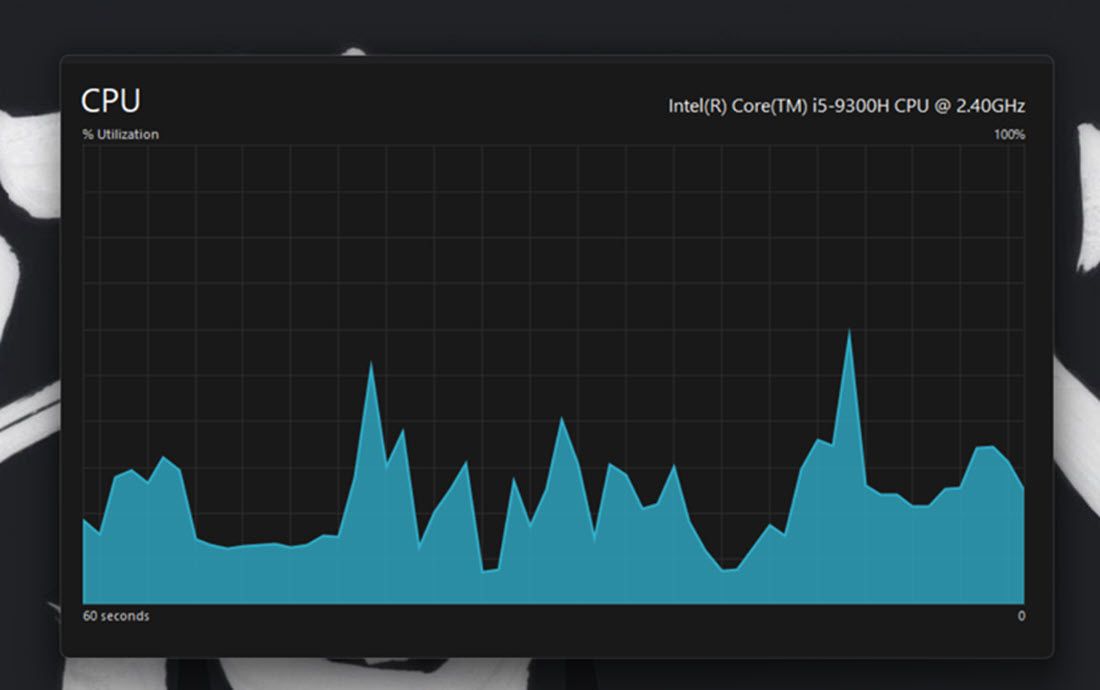
 - You can check your computer’s processor usage by clicking the CPU section. The processor box shows you a variable CPU percentage utilization figure, current clock speed, base clock speed, system uptime, and more.
- Click the GPU section to see how much GPU memory is in use. You can choose which one you want to see if your PC has two GPUs (as with laptops with one integrated and one dedicated GPU).
 CollageIt Pro
Task Manager also has a neat summary view that displays only the system resource usage boxes. To switch to that viewing mode, right-click within Task Manager and select Summary View. Then the Task Manager window will shrink as shown below.

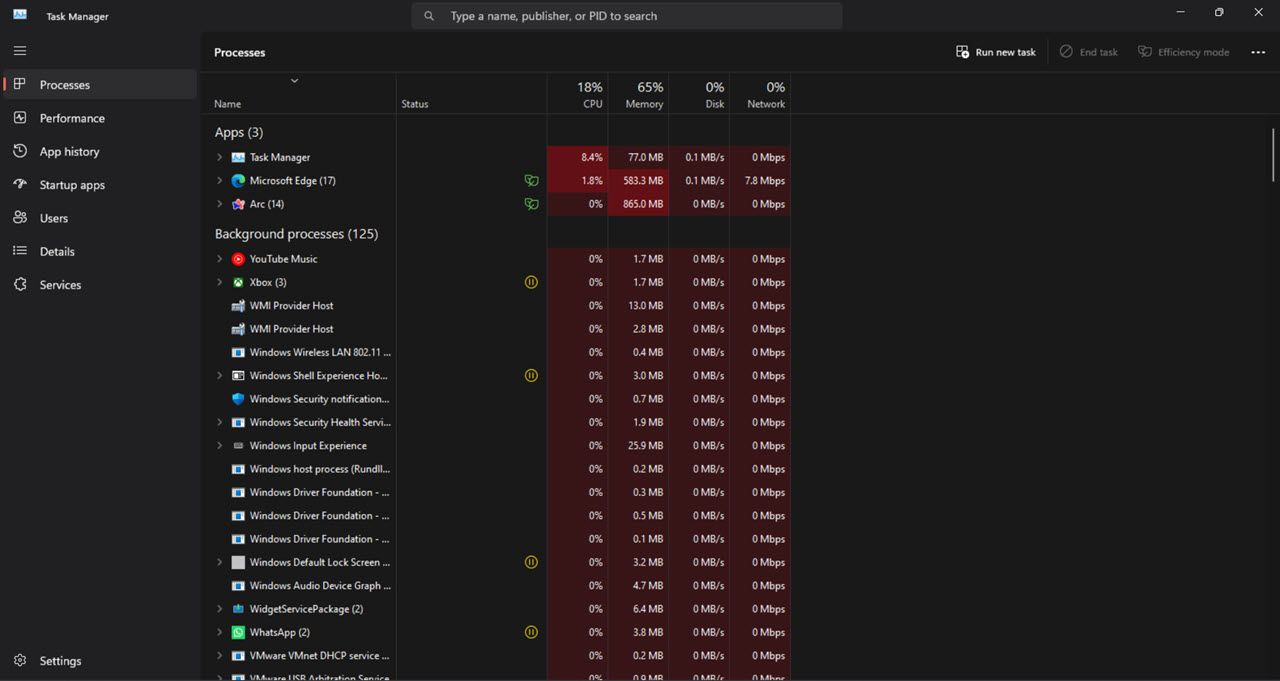
To check which programs consume the most resources, click the Processes tab. This tab displays all running apps and background processes, their memory, CPU, disk, network, and GPU usage. You can also free up system resources by selecting unnecessary third-party background programs (or processes and services) you don’t need and clicking the End task button.
Read also: How to Free Up RAM and Reduce RAM Usage on Windows

How to Check Windows 11’s System Resource Usage With the Resource Monitor
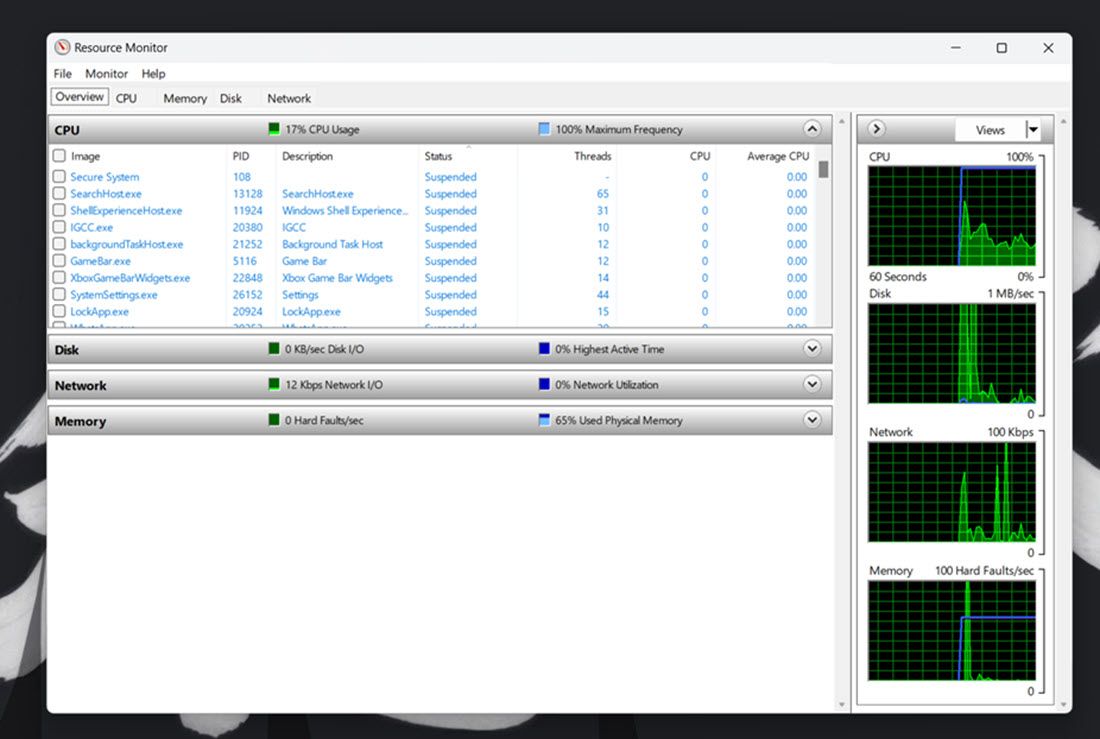
The Resource Monitor is a slightly more detailed monitoring utility than Task Manager in Windows 11. It first appeared in Windows Vista and has since been a part of every subsequent Windows release. In addition to CPU, network, disk, and memory usage, the resource monitor also shows real-time metrics such as response time, throughput, and active time among others.
Here’s how you can check system resource consumption with Resource Monitor.
- Open the Start menu by pressing the Windows key, type Resource Monitor, and hit enter.
- Select the Memory tab to view its resource usage graphs. That tab includes a physical memory graph that shows how much memory is currently in use, how much is available, and how much is on standby, along with percentage utilization details.
- Click the CPU tab to view its processor utilization percentage graphs.
- Select the Network tab to view processes with network (internet) activity.
- Click Overview to view memory, CPU, network, and disk usage details within a single tab.

How to Check Windows 11’s System Resource Usage With the Performance Monitor
The Performance Monitor is the most advanced monitoring tool available in Windows 11. It’s designed to help analyze system performance and resource usage while also providing system summaries, performance reports, and real-time performance graphs.
Here is how you can view performance and system resource details with Performance Monitor on Windows 11:
- Open the Start menu by pressing the Windows key, type Performance Monitor, and hit enter.
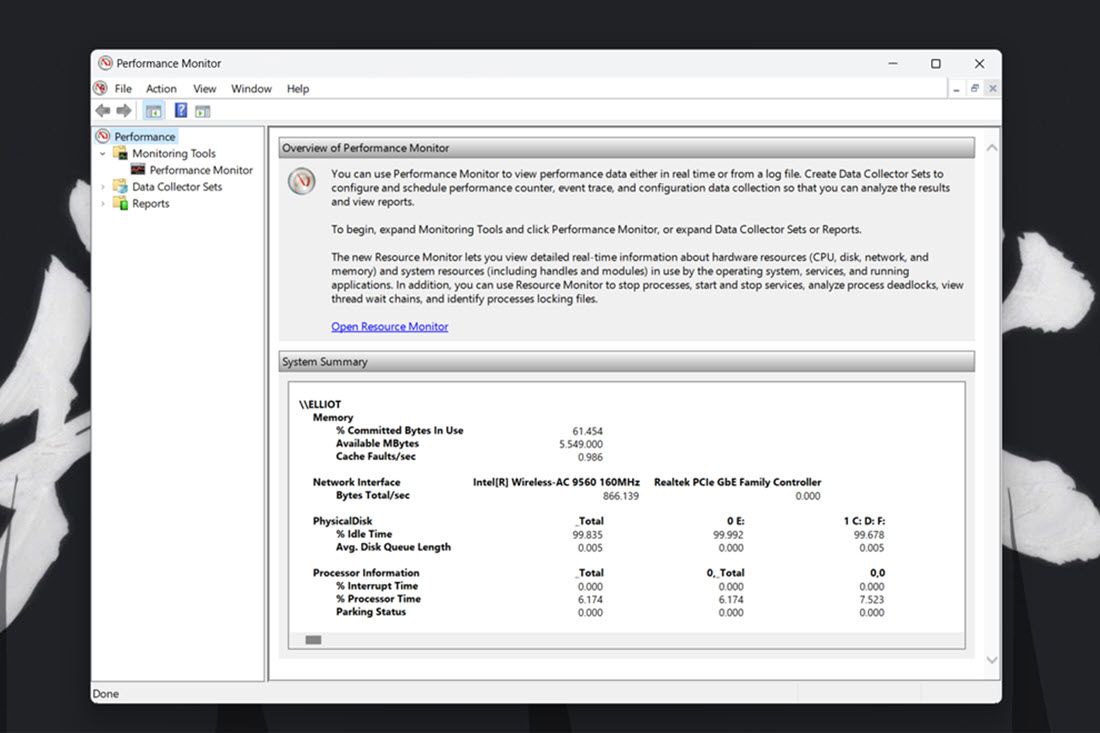
- Select Performance on the left side of the window to view the system summary resource usage data.
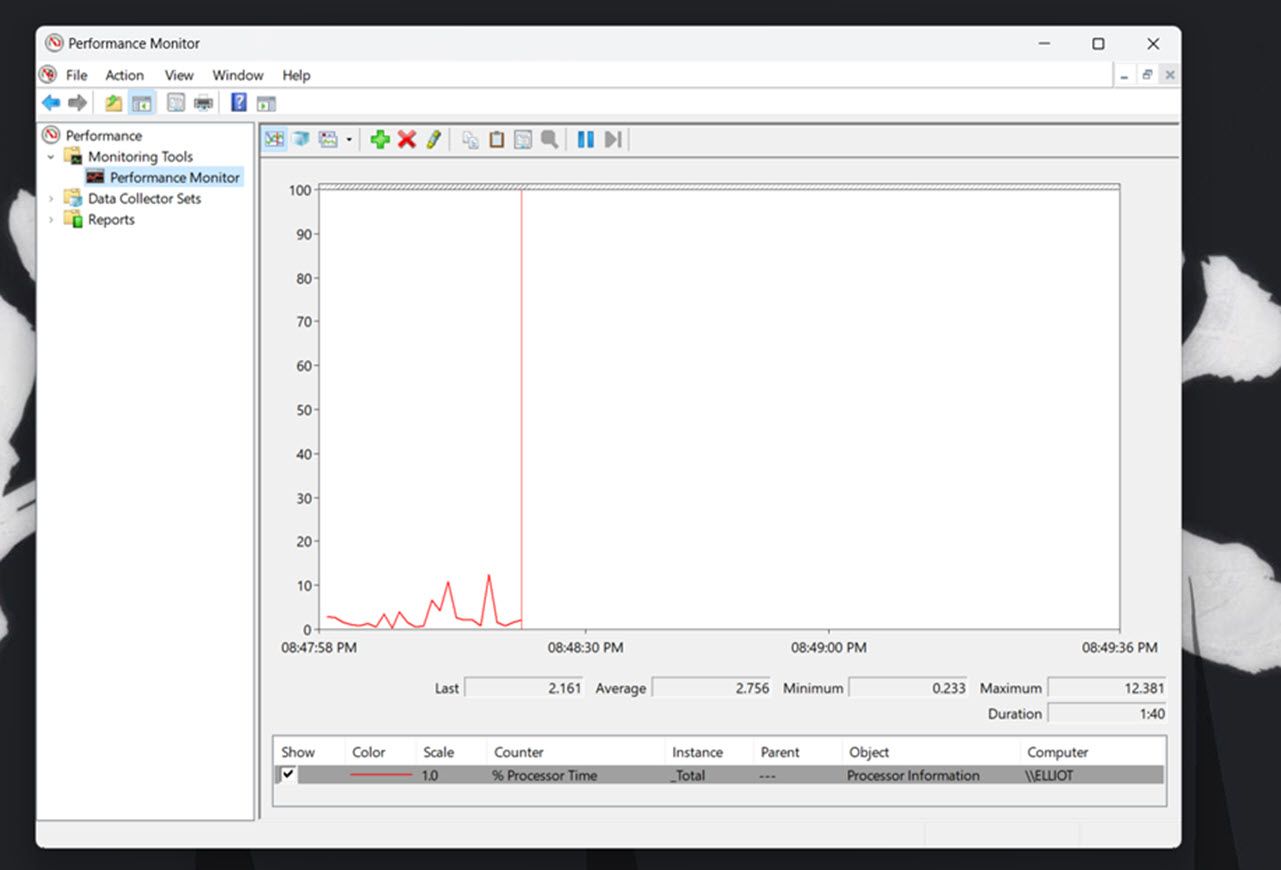
- Click Performance Monitor to view real-time performance data. By default, the graph shows the processor performance counter.
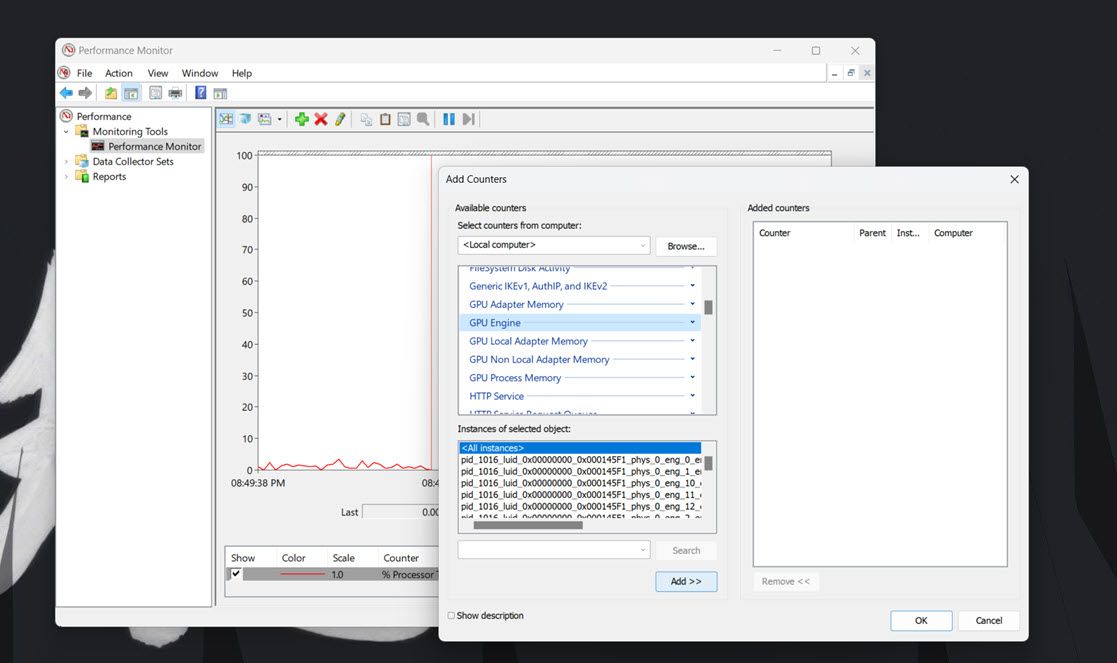
- To add other counters to the graph, click the + Add button.
- Then select a counter, such as Memory, on the window shown directly below. The committed bytes line for the Memory counter highlights the average RAM usage over time.
- Press the Add button.
- Click OK to view performance data for your selected counter on the graph.
You can better analyze this data by creating data collector sets. To do that, select Data Collector sets in Performance Monitor. Right-click User Defined and select New > Data Collector. Then you can set up the new data collector with the wizard that opens.
Information from data collection sets becomes available with reports. You can view information from data collector sets you’ve run by clicking Reports in Performance Manager. Then select User Defined to view your data reports.
Checking System Resources With Third-Party Tools
If the built-in tools in Windows aren’t to your liking, there’s a plethora of third-party tools that you can use to monitor system resources. You can try out something simple and lightweight such as OpenHardwareMonitor , a free and open-source tool, which shows you CPU, GPU, memory, and disk usage at a glance. It also lets you monitor minimum and maximum temperatures as well as fan speeds for various PC components.
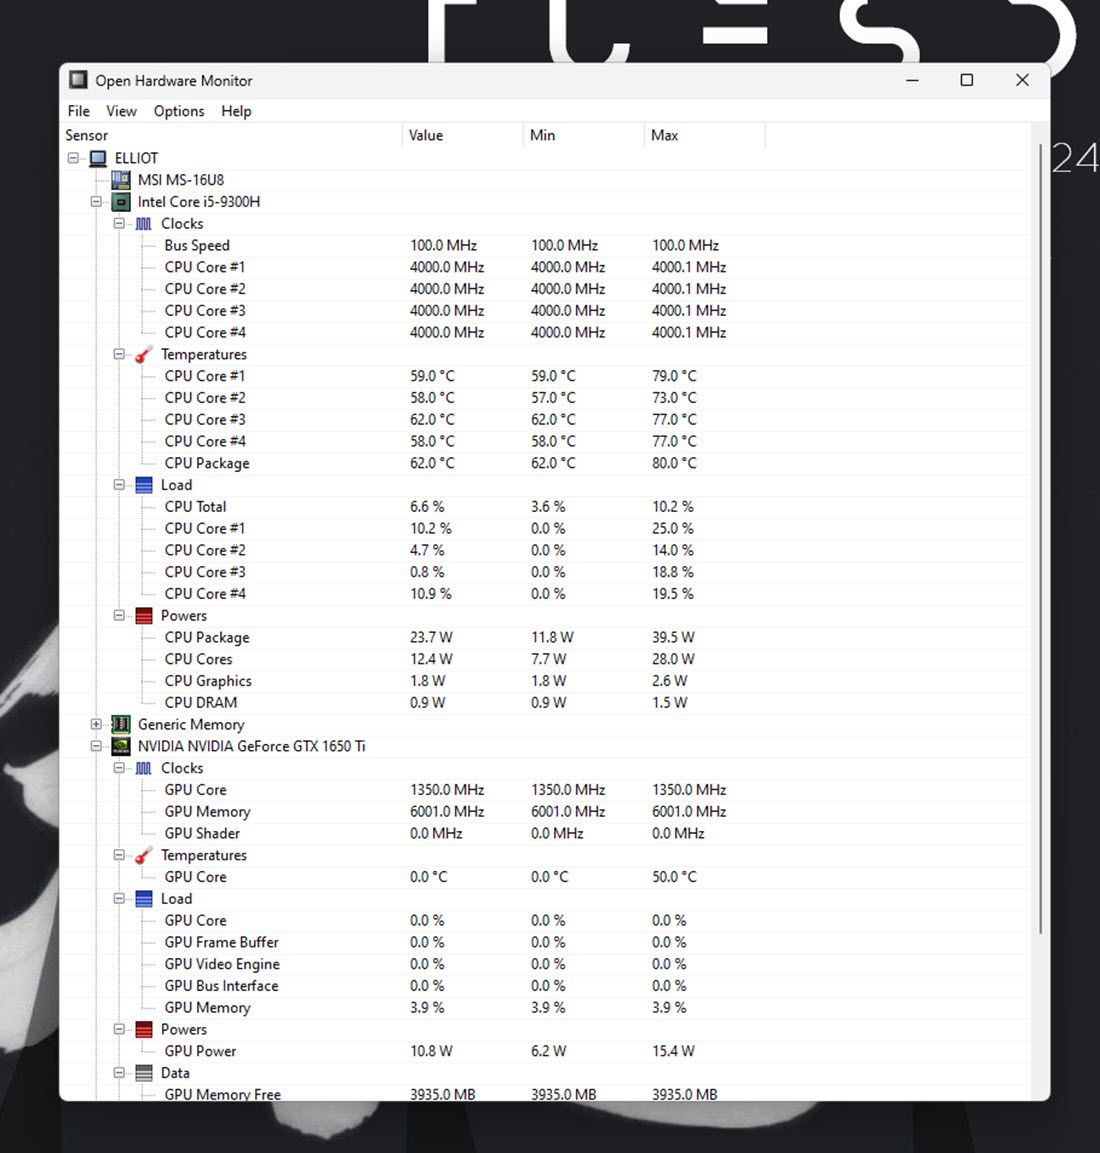
Using the tool is also quite simple, all you have to do is head over to the OpenHardwareMonitor website and download the tool. Once downloaded, simply double-click the executable file to run it and you’ll see all the metrics you need.
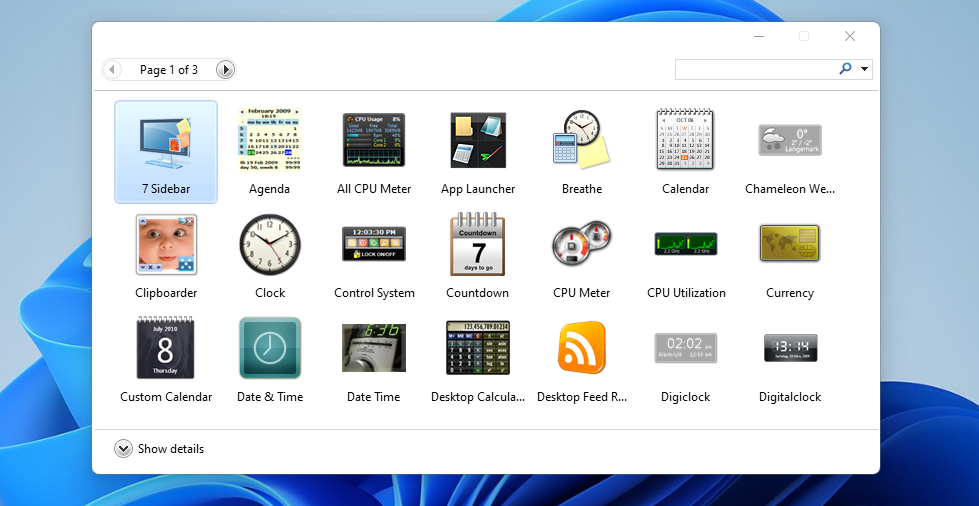
Alternatives to OpenHardwareMonitor include HWiNFO , Libre Hardware Monitor , and MSI Afterburner , which can also be used for overclocking . That said, while Windows has since discontinued desktop widgets, you can use 8GadgetPack to add system resource monitoring widgets to your desktop. Do keep in mind that the program hasn’t been updated in a while though, so there’s a chance it might not work as expected.
Windows 11 will become slower and less responsive to your actions when system resource utilization is high (especially for RAM and CPU). Whenever it feels like you need to speed up Windows, check your PC’s resource utilization with the tools and gadgets above
Once done, you can identify what programs or background processes are hogging the most resources and close them. And once they’re close, you’ll notice an improved system performance overall.
Keeping an eye on system resources can be vital, especially when experiencing glitches or slowdowns. If you’re on Windows, there are tools baked into the operating system that let you quickly look up just how much of your RAM, CPU, and GPU are being used by a specific process.
- Title: Deciphering CPU, GPU, & RAM Usage Figures on PCs
- Author: David
- Created at : 2024-08-16 00:38:22
- Updated at : 2024-08-17 00:38:22
- Link: https://win11.techidaily.com/deciphering-cpu-gpu-and-ram-usage-figures-on-pcs/
- License: This work is licensed under CC BY-NC-SA 4.0.