Convenient Windows 11 Tips: Easy RDC Entry

Convenient Windows 11 Tips: Easy RDC Entry
Remote Desktop Connection is Windows 11’s built-in app for connecting to remote computers. You can use it to remotely access another PC, which comes in handy for personal or support-related use. In Windows 11 Professional and Enterprise editions, you can also enable Remote Desktop to set up a host PC for remote computing.
To connect to a remote PC, you’ll need to open the Remote Desktop Connection tool. Once done, you can then enter the login credentials for the remote PC to connect to it through the Remote Desktop Connection window. As such, let’s explore how to enable the Remote Desktop Connection tool on Windows 11
How to Enable Remote Desktop Connection on Windows 11
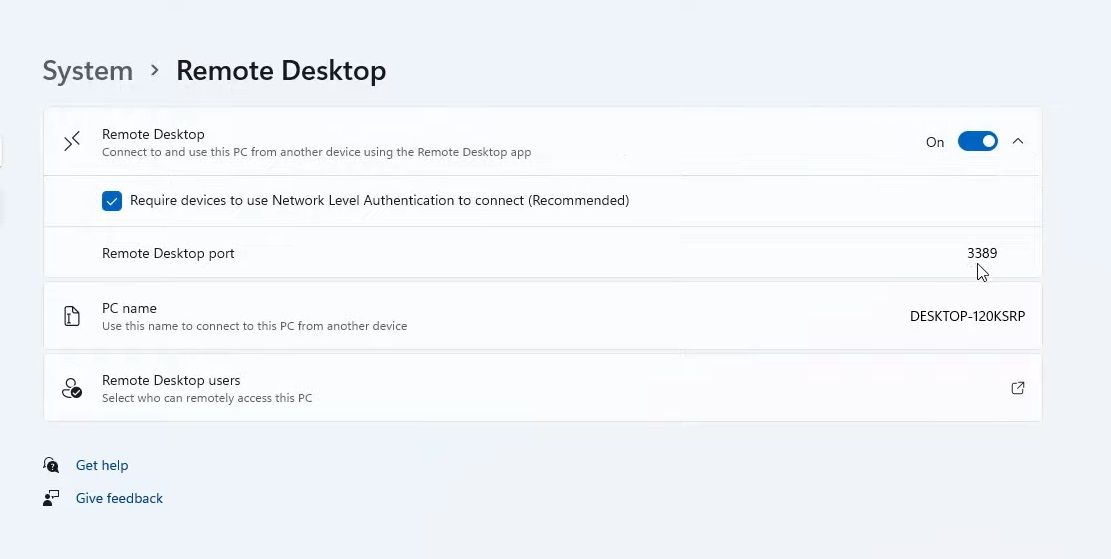
If you want your PC to be a host computer, you’ll need to enable Remote Desktop on that PC’s copy of Windows 11. Note that you can only activate that feature in Enterprise and Professional editions of Microsoft’s latest desktop platform, as is also the case for Windows 10. You can enable Remote Desktop as follows:
- Click the taskbar’s Start button.
- Open the Settings app that’s pinned to the Start menu.
- Select the Remote Desktop navigation option.
- Click the Remote Desktop option to turn it on.

- Select the Confirm option on the Remote Desktop Settings prompt.
- As an optional extra, click the small arrow beside the Remote Desktop toggle button. Then select the Require devices to use Network Level Authentication Connect (Recommended) option.
Thereafter, you can connect to your host PC remotely with other computers and mobile devices. To do so, you’ll need to enter the required login credentials for it and enter them into the remote access software. On Windows desktops and laptops, you can do that by opening the built-in Remote Desktop Connection accessory.
1. Open Remote Desktop Connection With the Windows 11 Search Tool
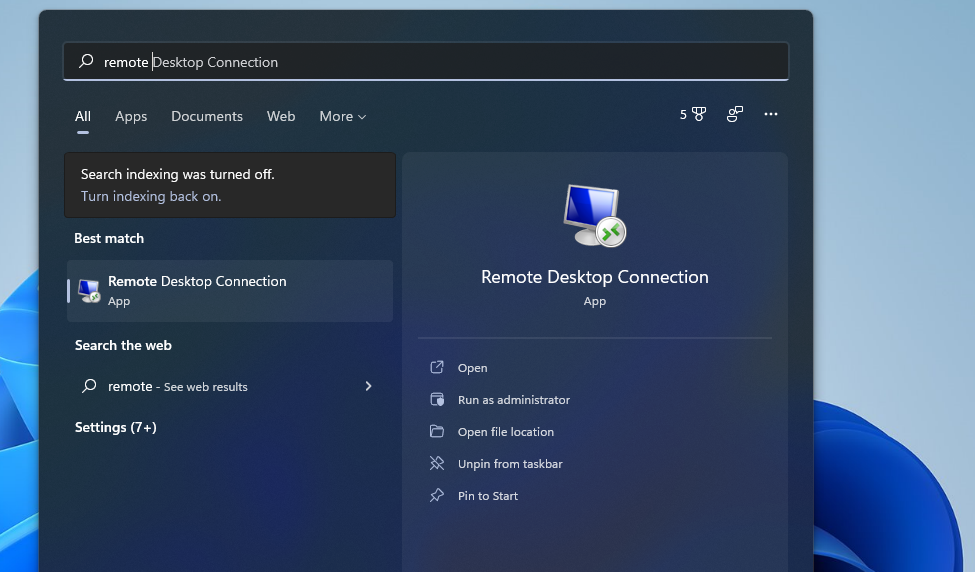
Windows 11’s search tool is a handy way to find software, files, and other accessories on your PC. As such, you can use it to find and open Remote Desktop Connection.
- To open the search tool, click the magnifying glass icon on Windows 11’s taskbar.
- Type Remote Desktop Connection within the search box.

- Then click Remote Desktop Connection to open that accessory.
- Alternatively, you can click its Run as administrator option within the search tool.
2. Open Remote Desktop Connection With the Run Tool
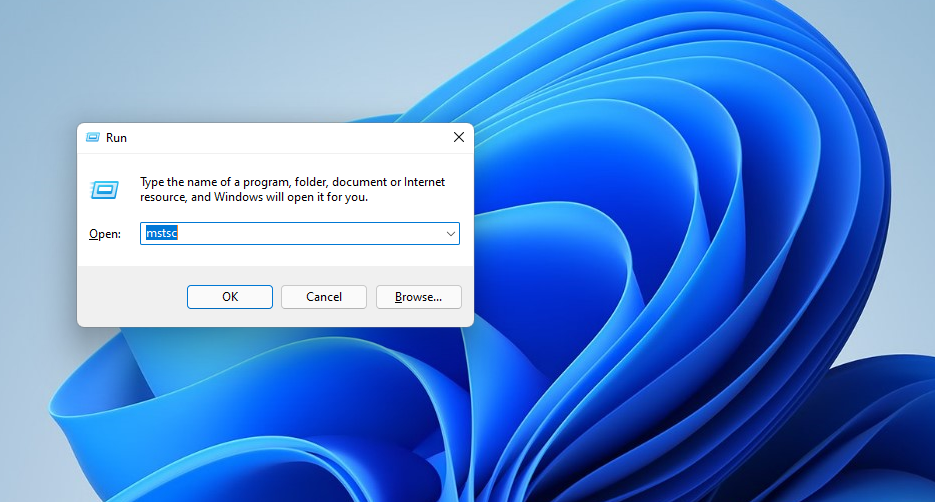
The Run tool is, as its title implies, a way to launch apps and programs. You can open Windows 11’s accessories and Control Panel applets just by entering Run commands. Here is how you can open Remote Desktop Connection with Run:
- Right-click Start or press Win + X to open the aptly-named WinX menu.
- Select Run on that menu.
- Type mstsc in the Open box.

- Click the OK button to open Remote Desktop Connection.
3. Open Remote Desktop Connection With the Windows Terminal
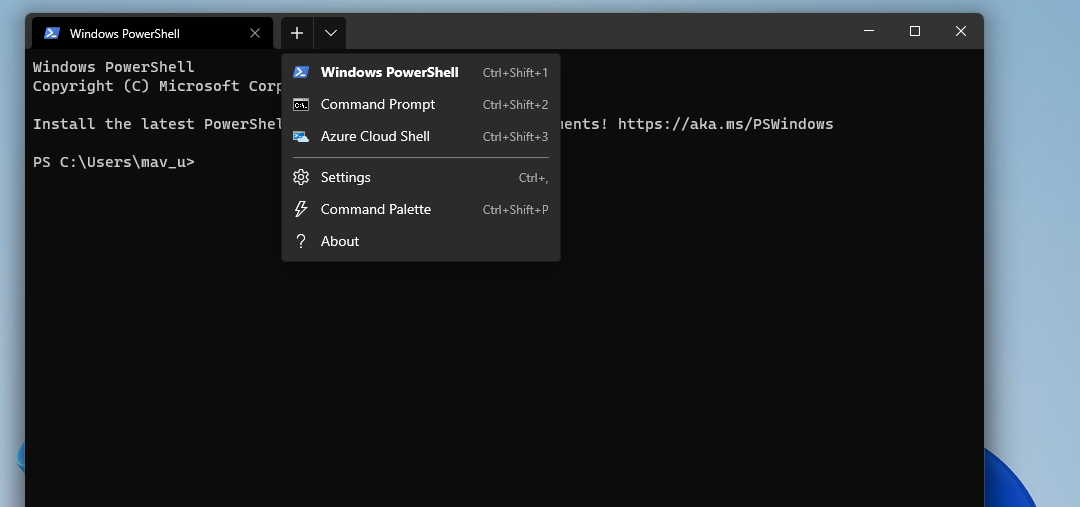
You can open Remote Desktop Connection with both the Command Prompt and PowerShell command-line tools. The Windows Terminal brings both those command-line tools together in Microsoft’s latest desktop platform. You can open RDC with the Windows Terminal as follows.
- Open the Start menu, and click All apps there.
- Select Windows Terminal on your Start menu.
- Click the Open a new tab option shown directly below to select either Command Prompt or Windows PowerShell.

- Input this command within your Command Prompt or PowerShell tab:
mtsc - Press Enter to open Remote Desktop Connection.
4. Open Remote Desktop Connection Within Its Folder
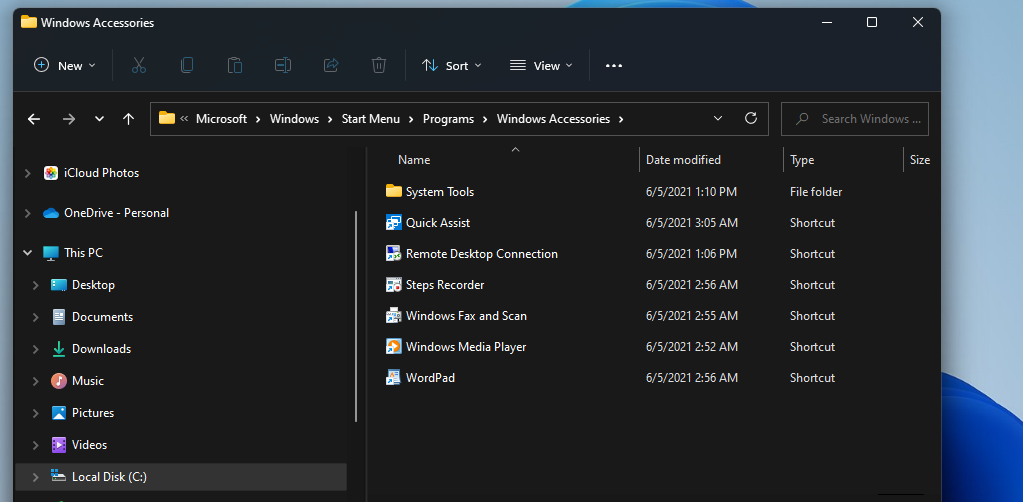
Remote Desktop Connection is included within the Windows Accessories folder. You can open the accessory from its Windows Accessories folder in File Explorer. To do that, follow the steps below.
- Press the File Explorer button (the one with the folder icon) on Windows 11’s taskbar.
- Open this folder in File Explorer:
C:\ProgramData\Microsoft\Windows\Start Menu\Programs\Accessories
- Click Remote Desktop Connection in that folder.
5. Open Remote Desktop Connection With File Explorer
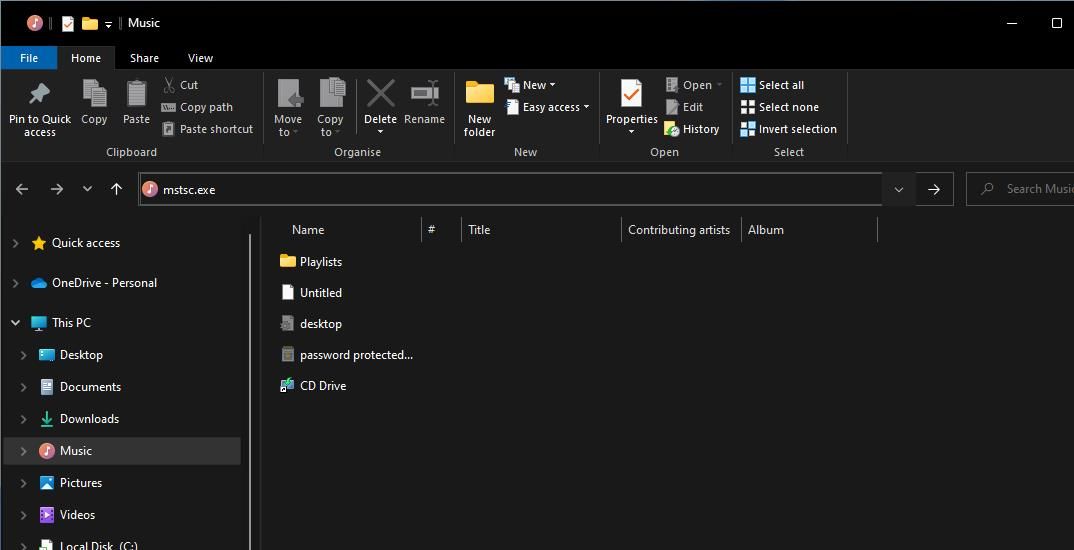
However, you don’t need to rummage through folders in File Explorer to open Remote Desktop Connection. Instead, you can quickly open Remote Desktop Connection by entering that app’s file into Explorer’s address bar like this:
- Bring up Windows 11’s Explorer folder and file manager tool.
- Click inside Explorer’s address bar and erase the current path in it.
- Input mstsc.exe inside File Explorer’s empty address bar.

- Press Enter to open Remote Desktop Connection.
6. Open Remote Desktop Connection With the Start Menu
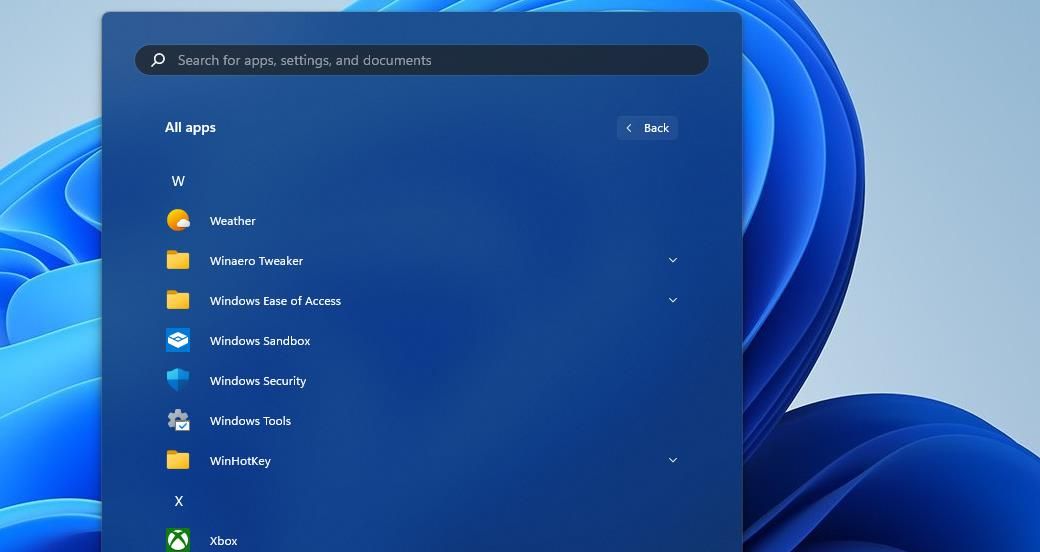
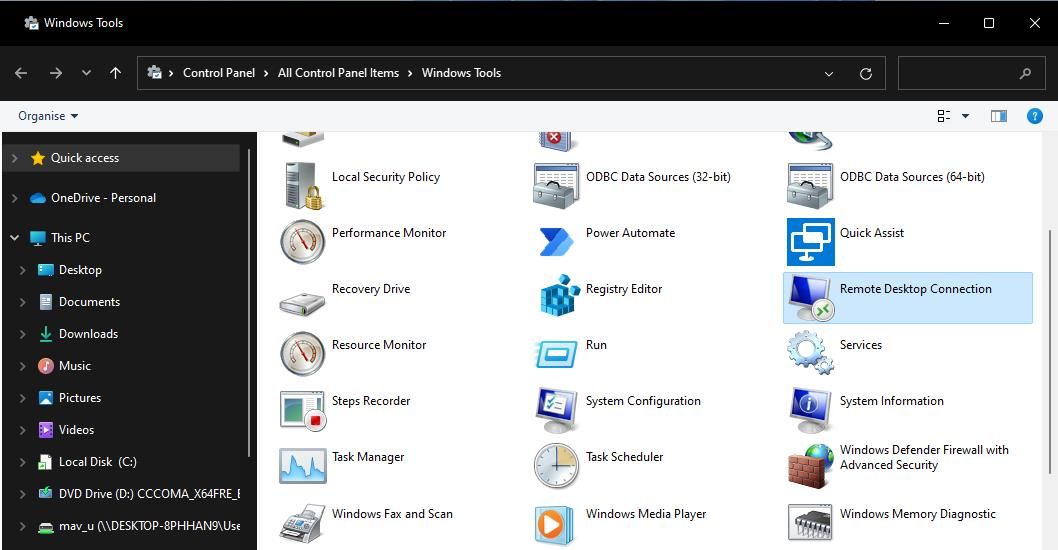
Remote Desktop Connection is also among the apps and system utilities within the Windows Tools folder. That folder is accessible on the Start menu. You can access Remote Desktop Connection by opening its Windows Tools folder with the Start menu as follows.
- Press Start or the Windows logo keyboard button.
- Select the All apps option to view all program and folder shortcuts on the Start menu.

- Scroll down the menu and double-click Windows Tools.

- Double-click Remote Desktop Connection within the Windows Tools folder.
Windows Tools is also accessible within the Control Panel. Open the Control Panel and change its view by selecting Small icons. Then you can click Windows Tools and select to open Remote Desktop Connection from there.
7. Open Remote Desktop Connection With Task Manager
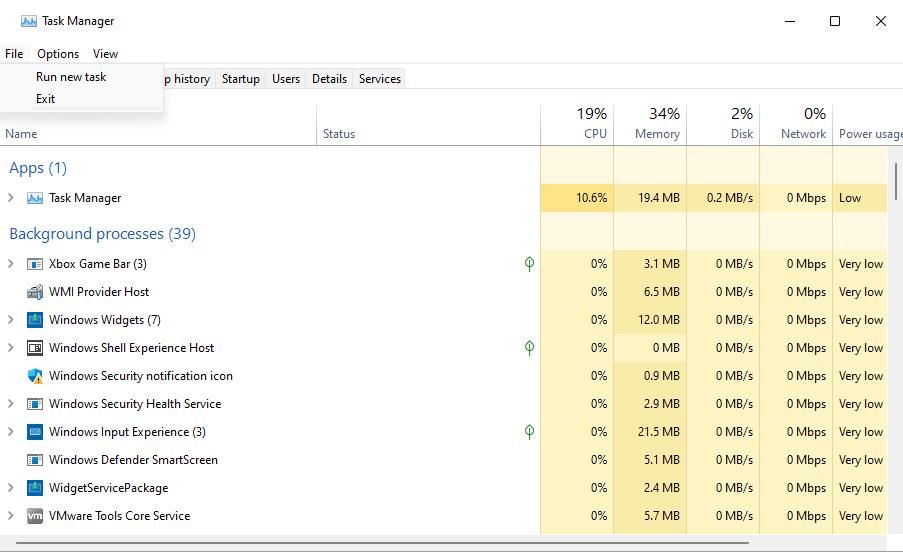
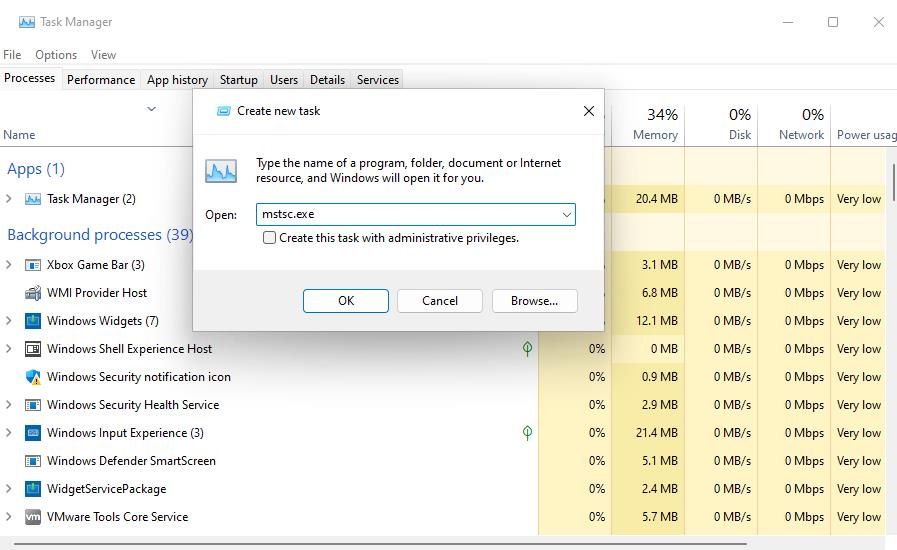
Task Manager is a utility with which you can both terminate and run processes. This is how you can open Remote Desktop Connection by running its process with Task Manager’s Create new task tool:
- Activate Task Manager by utilizing the Ctrl + Shift + Esc hotkey to access that system utility.
- Click File at the top of Task Manager to view a small window.

- Select the checkbox labeled Create this task with administrative privileges.
- Input the mstsc process command into the Open box.

- Select OK to run the Remote Desktop Connection process.
8. Open Remote Desktop Connection With a Desktop Shortcut
Desktop shortcuts provide the most direct way to open software and accessories. You can set up a shortcut for RDC so you can open it directly from your desktop. This is how you can set up a Remote Desktop Connection shortcut in Windows 11.
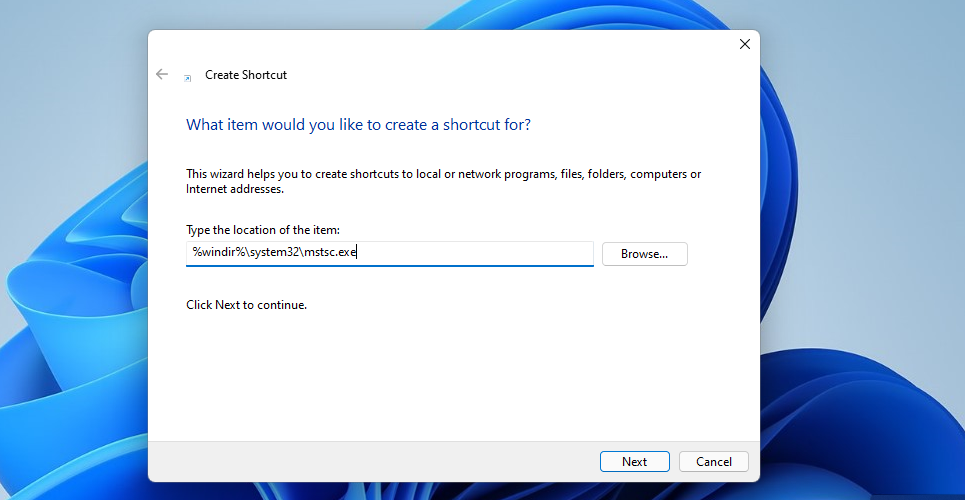
- Right-click an area of your desktop wallpaper to select New > Shortcut.
- Input %windir%\system32\mstsc.exe in the Create Shortcut window, and click Next to continue.

- Type Remote Desktop Connection in the text box.
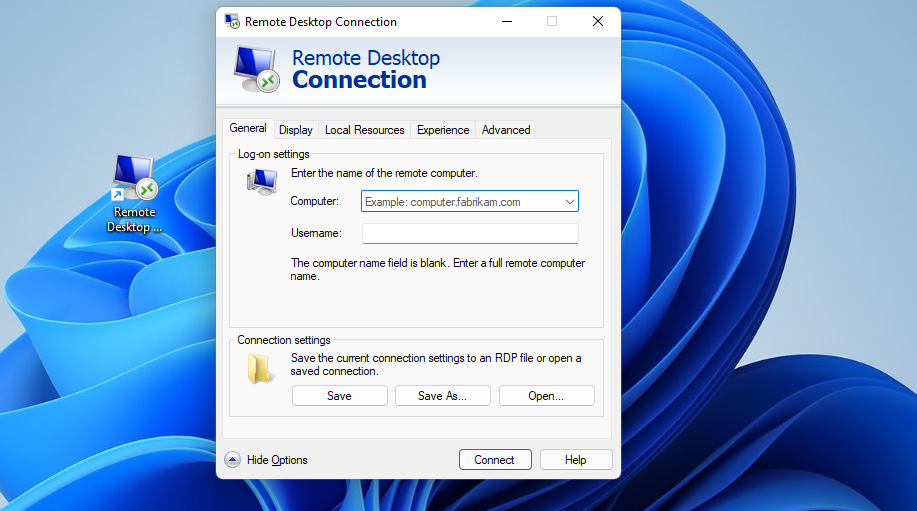
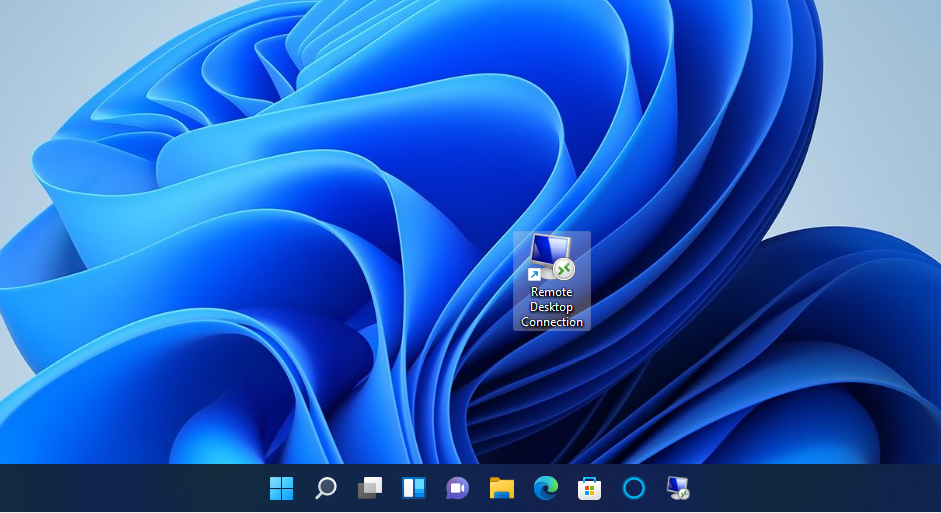
- Press the Finish button to add the shortcut to the desktop as in the screenshot directly below.

- Now you can click the new desktop shortcut to open Remote Desktop Connection.
That shortcut will simply open the RDC window. You can also set up a Remote Desktop Connection shortcut for a specific PC. To do that, enter mstsc.exe /v:PC-name in the Create Shortcut window’s item location text box. Replace PC-name in that item location with the actual name of a PC to connect with.
If you prefer, you can have a taskbar shortcut for Remote Desktop Connection instead. Right-click the Remote Desktop Connection shortcut and select Show more options > Pin to taskbar. Selecting that option will add an RDC shortcut to the taskbar as shown in the snapshot below. You can remove the desktop one by right-clicking it and selecting Delete.
9. Open Remote Desktop Connection With a Keyboard Shortcut
You can add a hotkey to an RDC desktop shortcut. By doing so, you’ll be able to open Remote Desktop Connection with a keyboard shortcut. First, set up a desktop shortcut as outlined for method five. Then you can add a hotkey to that shortcut as follows.
- Right-click the Remote Desktop Connection shortcut on the desktop and select Properties.
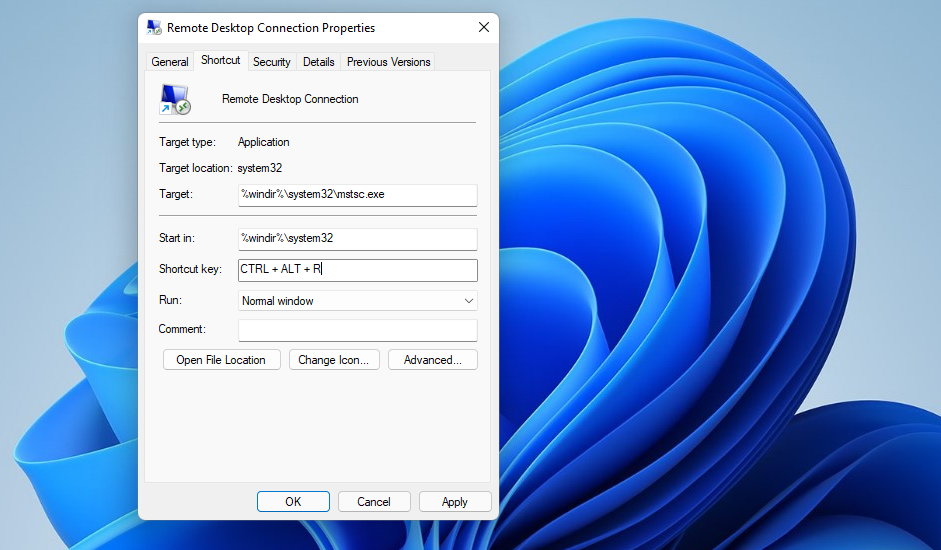
- Click inside the Shortcut key box shown in the screenshot below.

- Press the R key to set up a Ctrl + Alt + R hotkey.
- Click the Apply button to save the new keyboard shortcut.
Now you can press Ctrl + Alt + R to bring up Remote Desktop Connection whenever you need it. However, don’t delete the desktop shortcut for it. That shortcut must remain in place for its hotkey to work.
10. Open Remote Desktop Connection With the Context Menu
The context menu is the right-click menu you can open from the desktop. That menu doesn’t include Remote Desktop Connection by default. However, you can add a shortcut for opening Remote Desktop Connection to the context menu with a relatively straightforward registry tweak as follows:
- Start the Registry Editor app by pressing the Windows button + R keyboard shortcut, entering a regedit command inside the Run dialog, and clicking OK.
- Click in the registry location bar and erase the path there.
- Input this location for the shell key inside Registry Editor’s address bar and press Enter:
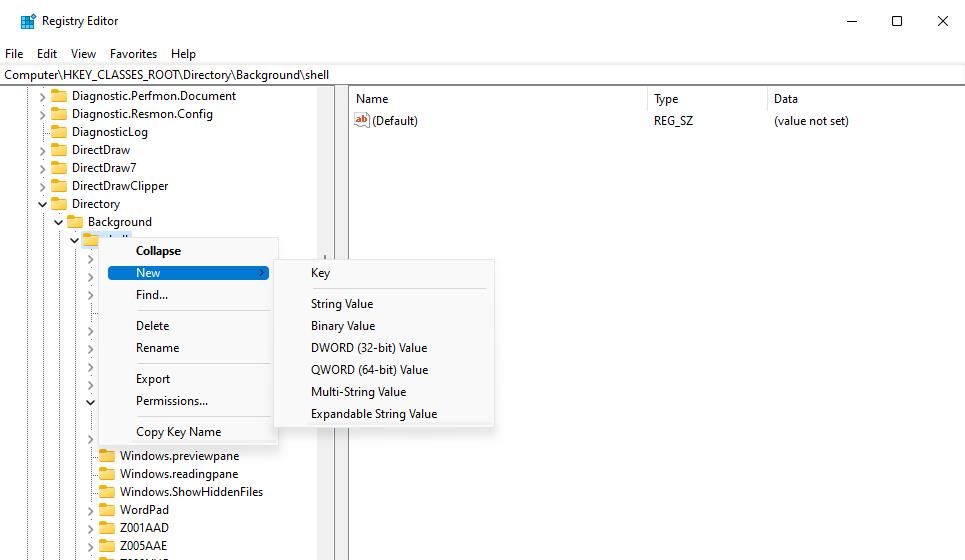
Computer\HKEY_CLASSES_ROOT\Directory\Background\shell\ - Click the shell key with your mouse’s right button and select New.
- Select Key to add a new registry entry.

- Input Remote Desktop Connection for the new key’s title.
- Right-click Remote Desktop Connection to select New > Key options.
- Next, input command inside the text box for the new subkey.
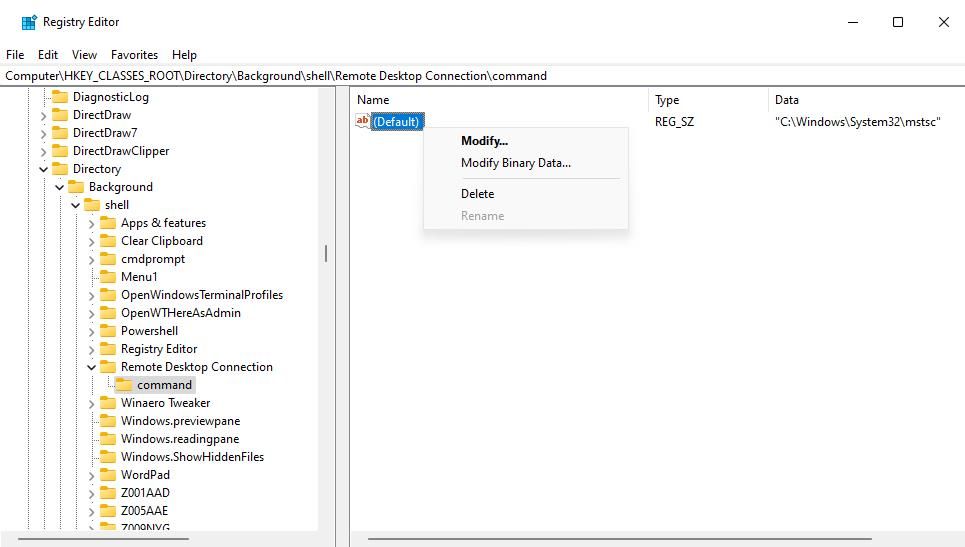
- Right-click the (Default) string inside the new command subkey and select Modify.

- Input “C:\Windows\System32\mstsc” inside the Value data box and select OK.
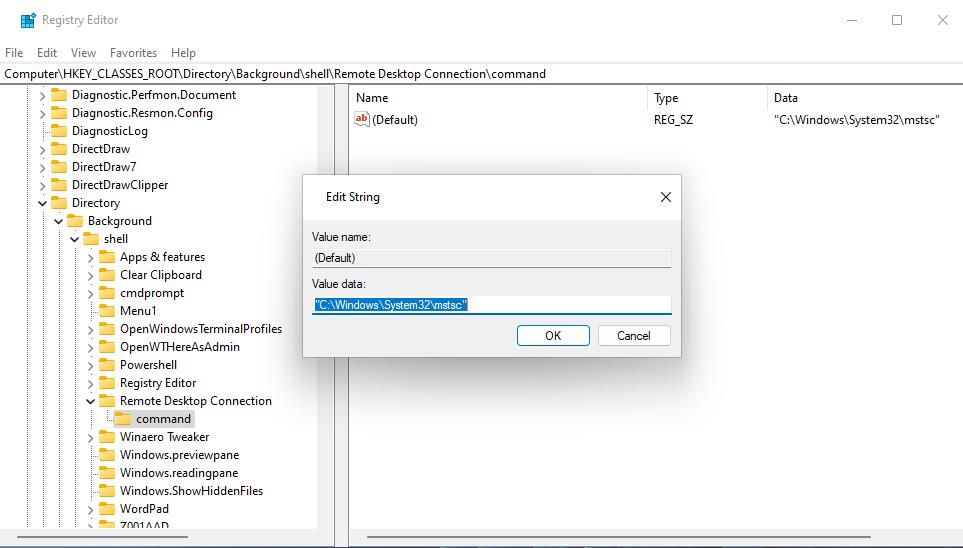
Now you can open the Remote Desktop Connection app from your desktop’s context menu. Right-click any empty area of the Windows 11 desktop to select Show more options for viewing the classic context menu. You’ll see a new Remote Desktop Connection shortcut on the classic context menu. Click that shortcut to access the Remote Desktop Connection app.
You can remove the Remote Desktop Connection context menu shortcut any time you wish. To do so, return to the shell registry location specified in step three above. Right-click the Remote Desktop Connection key you added and select Delete > Yes.
Open Remote Desktop Connection With Your Favorite Method
So, there are various ways you can open Remote Desktop Connection in Windows 11. The quickest and most direct methods are to open it from the desktop or with a hotkey, which you’ll need shortcuts for. Or you can open it via Run, the search tool, File Explorer, and Windows Terminal. Choose whatever method you prefer for opening Remote Desktop Connection.
To connect to a remote PC, you’ll need to open the Remote Desktop Connection tool. Once done, you can then enter the login credentials for the remote PC to connect to it through the Remote Desktop Connection window. As such, let’s explore how to enable the Remote Desktop Connection tool on Windows 11
Also read:
- [New] In 2024, Crafting New Dimensions A Look at Mixed Reality
- [Updated] In 2024, Auditing for Accuracy YouTube Monetization Compliance
- [Updated] Innovative IOS Tools for PS2 Game Replication
- Eliminate Dullness From Extend Volume Controls on Win
- How to Correct 0X800713f Issue with Windows Mail
- How to Remove Forgotten PIN Of Your OnePlus Nord N30 5G
- How to Reset a Vivo Y100i Phone That Is Locked | Dr.fone
- In 2024, How to Stop My Spouse from Spying on My Huawei P60 | Dr.fone
- Overcoming Windows Headset Mic Failure
- Quick Solutions: Addressing Common Issues After Windows Update
- Reviving the Deleted Input: Strategies for Windows Computers
- Stepwise Guide for Broadcasting Google Meet on YouTube
- Strategies to Recover From Windows Error Code C0000022
- The Future Shaped by AI at Microsoft's Hub
- Top 7 Future Forecasts in Cybersecurity You Can't Ignore
- Title: Convenient Windows 11 Tips: Easy RDC Entry
- Author: David
- Created at : 2025-01-01 17:26:59
- Updated at : 2025-01-06 19:19:13
- Link: https://win11.techidaily.com/convenient-windows-11-tips-easy-rdc-entry/
- License: This work is licensed under CC BY-NC-SA 4.0.
